Let the games begin! - 150gal Offset Build

  • Some of the links on this forum allow SMF, at no cost to you, to earn a small commission when you click through and make a purchase. Let me know if you have any questions about this.
SmokingMeatForums.com is reader supported and as an Amazon Associate, we may earn commissions from qualifying purchases.

MeatPopsicle

Newbie
Original poster
May 27, 2020
6
4
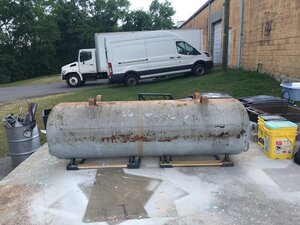
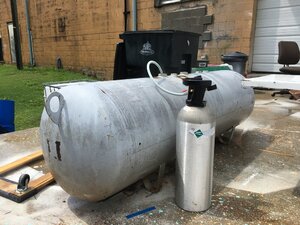
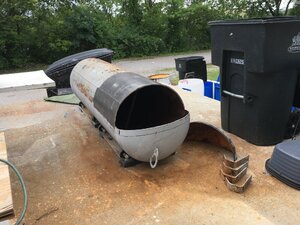
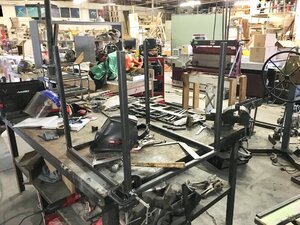
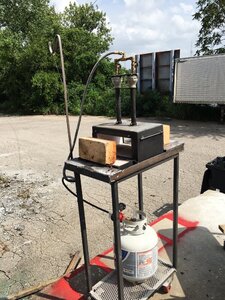
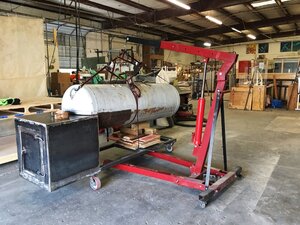
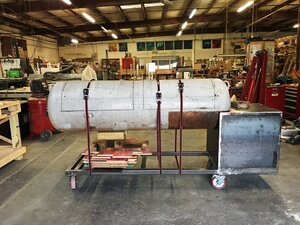
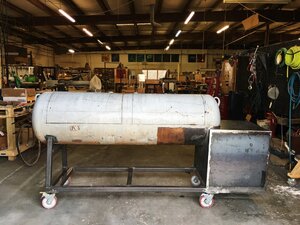
Started my first offset smoker project this week. It'll have a 150gal cook chamber (85in long - 24in diameter = 35,371cu in), a 26in X 24in X 26in semi insulated firebox (16,224cu in), and planning on having a 6in diameter/40in tall smoke stack (1,131cu in). Learning how to weld/fabricate on this project, so there's a boat-load of trial and (mostly) error. Weld distortion....
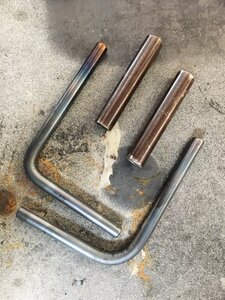
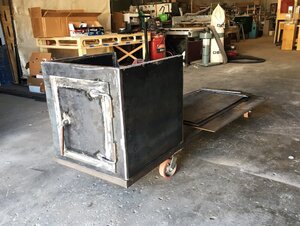
So far this week:
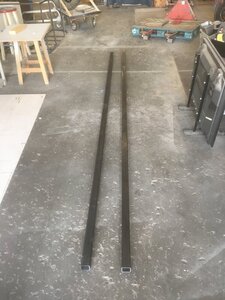
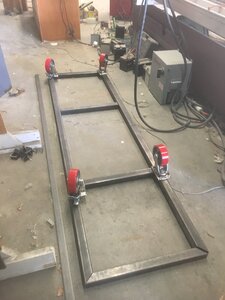
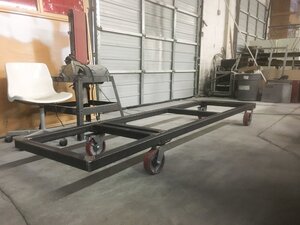
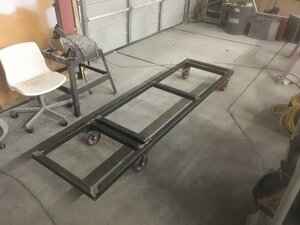
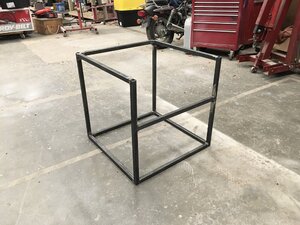
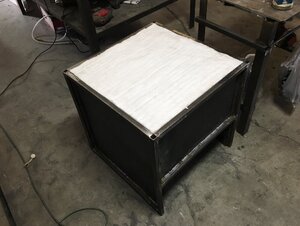
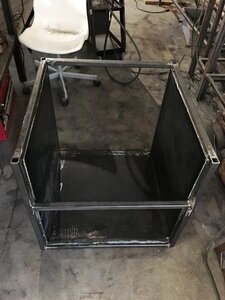
- Frame cut and welded (1/8in thick - 2in square tubing)
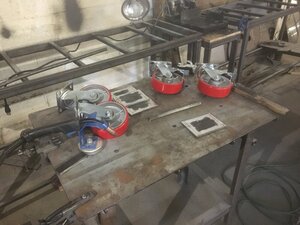
- Casters mounted to 1/4" plate
- Tank marked up for cuts

Thoughts and advice welcomed!
 

Attachments

  • IMG_0236.JPG
    IMG_0236.JPG
    130.6 KB · Views: 124
  • IMG_0237.JPG
    IMG_0237.JPG
    139.1 KB · Views: 125
  • IMG_0238.JPG
    IMG_0238.JPG
    105.1 KB · Views: 143
  • IMG_0212.JPG
    IMG_0212.JPG
    190.9 KB · Views: 160
  • IMG_0241.JPG
    IMG_0241.JPG
    120.4 KB · Views: 158
Looks like a great project, especially in this lockdown!
I wish I had the space & tools for a build like that!
Al
 
Update #1:
Finished last week getting the frame fully welded up and casters mounted/welded. The plan this week is to start building the firebox and hopefully start cutting the tank.

- I'm still going back and forth on the semi-insulated firebox. The idea would be to insulate the front face, back face, and bottom. I'd leave the top un-insulated so I could preheat wood, or even use it as a flat-top grill. Just not sure the extra cost is going to be worth it (It'd be a $100 difference and probably an extra day of welding). That being said, the added efficiency and heat stability might be nice.

- I'm slightly nervous about cutting into the tank, although I've taken nearly every step to ensure there is no LP or fumes left in the tank. I completely purged the tank, filled it with Dawn soap and water and left it soaking for 2 weeks, cycled the water in the tank 3 times, emptied the tank, have had it sitting upside down for the last month, and have hooked up a leaf blower to one of the ports and cycled air through it. When I do cut the tank, my plan is to dump a bunch of dry ice in the tank to displace any oxygen with CO2.
 

Attachments

  • IMG_0253.JPG
    IMG_0253.JPG
    119.6 KB · Views: 130
  • IMG_0254.JPG
    IMG_0254.JPG
    106.6 KB · Views: 116
  • Like
Reactions: JC in GB
Update #2:
Spent the week researching and trying not to blow myself up while cutting into the tank. I ended up going to a local welding shop and getting a 20# bottle of CO2. My tank is around 35,371cu in, which is about 20.5cu ft. A 20# bottle of CO2 has around 175cu ft (8.75cu ft per #), so there was no question of displacing all the air in the tank. I dawned my finest angle grinder and went to work. 3 hours and a fair amount of tendonitis later, voila! Going to looking into using a plasma cutter for the doors and smoke catch/chimney.

Steel plate, DOM tubing, and round bar coming Monday, so hopefully this week will bring progress on the firebox.
 

Attachments

  • IMG_0273.JPG
    IMG_0273.JPG
    186 KB · Views: 129
  • IMG_0275.JPG
    IMG_0275.JPG
    196.6 KB · Views: 119
  • Like
Reactions: JC in GB
Update #3. I've been procrastinating posting, hence the photo dump.

- I decided to build an internal frame to support the firebox. The internal skin is 1/4" plate with 1" ceramic fire-blanket in between and 1/8" plate on the outside. The internal frame is 1"x1" square tubing. When all was said and done, I think the firebox weighed in the neighborhood of 400+lbs!

- I made the hinges with a small forge, which was a learning experience to say the least.. Sacrificed the hair on my right arm and damn near lost an eyebrow lighting it the first time!

- Got the firebox mounted and welded to the frame next, then moved on getting the tank mocked up. There was about 3/4" gap between the tank and the firebox cutout, which was a learning experience. Finally got the tank mounted on the legs and got the initial cuts done on the doors.

- Next up is finishing the doors, and building the smokestack/catch. The adventure continues!
 

Attachments

  • RenderedImage.JPG
    RenderedImage.JPG
    216.2 KB · Views: 109
  • IMG_0283.JPG
    IMG_0283.JPG
    161.4 KB · Views: 109
  • D35E7809-2D55-49CF-BC3C-B8FB30DCBA92-6CE4AFDF-F72F-4A29-A9BB-0852AC4F1580.JPG
    D35E7809-2D55-49CF-BC3C-B8FB30DCBA92-6CE4AFDF-F72F-4A29-A9BB-0852AC4F1580.JPG
    115.9 KB · Views: 106
  • 0309BBC3-87C9-4A96-B8D1-50B8BE5B38D1-928EDD28-F9BA-49B5-B2EE-FEE9D063B928.JPG
    0309BBC3-87C9-4A96-B8D1-50B8BE5B38D1-928EDD28-F9BA-49B5-B2EE-FEE9D063B928.JPG
    125.4 KB · Views: 105
  • 350AAB88-5C66-477D-8A5D-92969BD4EB7D-C04A6BA8-3B85-4041-806F-41CB6B1A08F5.JPG
    350AAB88-5C66-477D-8A5D-92969BD4EB7D-C04A6BA8-3B85-4041-806F-41CB6B1A08F5.JPG
    255.4 KB · Views: 101
  • E04C6923-751E-444C-B5E3-39178B77E1E3-5DE412ED-7021-4992-AC8C-90536798AC9F.JPG
    E04C6923-751E-444C-B5E3-39178B77E1E3-5DE412ED-7021-4992-AC8C-90536798AC9F.JPG
    275.6 KB · Views: 104
  • 04250C5E-0790-46AA-9D87-F38F24DF9ECE-437943FA-262F-41CC-8E10-2025D9028E9E.JPG
    04250C5E-0790-46AA-9D87-F38F24DF9ECE-437943FA-262F-41CC-8E10-2025D9028E9E.JPG
    179.8 KB · Views: 113
  • A61D1865-6317-46F1-BD86-EB3BD1630B39-F11E518D-330C-4A35-9904-F79CA8AD3CC2.JPG
    A61D1865-6317-46F1-BD86-EB3BD1630B39-F11E518D-330C-4A35-9904-F79CA8AD3CC2.JPG
    183.9 KB · Views: 127
  • A656160A-A159-4594-B777-8B3DA3BAFE79-CD68E2EA-DFA2-429C-93B6-69C50FE39D28.JPG
    A656160A-A159-4594-B777-8B3DA3BAFE79-CD68E2EA-DFA2-429C-93B6-69C50FE39D28.JPG
    189.8 KB · Views: 123
  • 3F7DFFFA-F7AF-4EBC-91C1-44D6E527EAF8-0B2CAC2F-7213-4979-B71F-6063A9A30712.JPG
    3F7DFFFA-F7AF-4EBC-91C1-44D6E527EAF8-0B2CAC2F-7213-4979-B71F-6063A9A30712.JPG
    168.6 KB · Views: 119
SmokingMeatForums.com is reader supported and as an Amazon Associate, we may earn commissions from qualifying purchases.
Great deal on LEM Grinders!

Hot Threads

Clicky