I have had this smoker for about 4 months now and things that seem straight forward for others is just a PITA.
I have 5 changes I'm going to make over the next month, one really easy and one very difficult. I'll post them all here in turn so they stay in the same place.
The changes are:
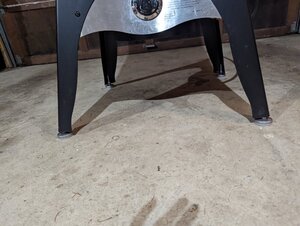
1) The smoker sits on my cement paver patio that attaches to the house at a corner. The patio tilts away from house in two directions, probably more then it should. The smoker has a water pan inside, a level device if you will and because of the slope, not much water can go in it. I put some shims under it, but the smoker is so light that opening the door can sometimes rock it off of the shims. The fix is easy enough, I bought 4 adjustable feet to attach to the legs.

I have the smoker in the garage and I cleaned it up some, don't need the pine needles getting in the way. I just figured this was easy enough, I still need a couple of washers but I got this project done this afternoon.


2) The gas burner is responsible for burning the wood and boy did it. If I would cook over 225* The smoke would just billow out of the stack, so I tried to smoke under 220*, works well for tri tip when it is reverse seared. I found the Mailbox mod, or was pointed to it by OldSmoke
and have the parts on order for my modified version. I got the last parts today and will start putting that project together tomorrow.


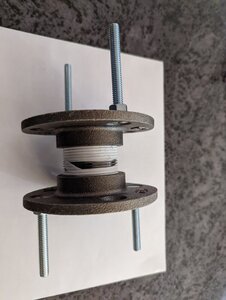
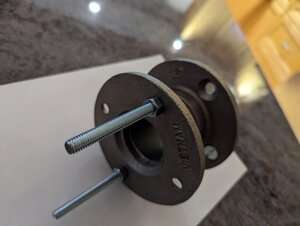
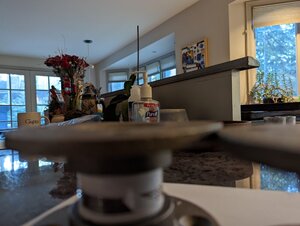
The smoke will flow between the mailbox, the stainless box, and the smoker through the close nipples that connect to the sides with the flanges. I currently have two sets, I will put them together tomorrow and begin to attach them to the mailbox and the smoker. This will probably take longer then it should, I am a computer engineer.
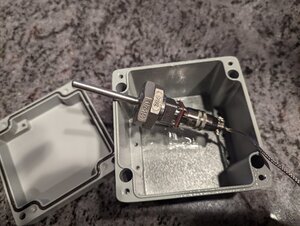
3) The thermometer connected to the door is worthless, most of the time it is steamed up so I have thoughts on riveting a piece of sheet stainless over the hole and not bother with it. So, I am also going to do a PID like addition, that's the 4th modification., I am building in a PT100 Thermo sensor. It requires an amplifier and to keep the water out of the device I am going to mount it on the back in a waterproof box.

4) will be a similar project to OldSmoke
,
 solman
adding a solenoid and needle valve to give greater control of how gas in controlled in the smoker. The parts for this mod are well known, I just haven't bought them yet.
5) Is the big project and it will have many phases. I have done a lot of work with small microcontrollers, and going to incorporate one in my smoker. It will control the solenoid in a similar way a PID does, but it won't implement a PID, I have other ideas how to solve that problem. Anyway this will be mounted on the same side of the smoker as the mailbox, using similar but smaller flanges and black pipe, and be in another stainless box mounted above the mailbox but in the other orientation. More pictures will come as I make progress.
Thanks for listening.
I have 5 changes I'm going to make over the next month, one really easy and one very difficult. I'll post them all here in turn so they stay in the same place.
The changes are:
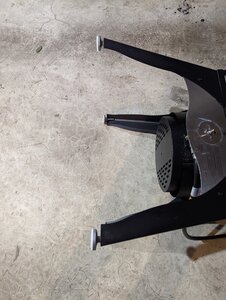
1) The smoker sits on my cement paver patio that attaches to the house at a corner. The patio tilts away from house in two directions, probably more then it should. The smoker has a water pan inside, a level device if you will and because of the slope, not much water can go in it. I put some shims under it, but the smoker is so light that opening the door can sometimes rock it off of the shims. The fix is easy enough, I bought 4 adjustable feet to attach to the legs.
I have the smoker in the garage and I cleaned it up some, don't need the pine needles getting in the way. I just figured this was easy enough, I still need a couple of washers but I got this project done this afternoon.
2) The gas burner is responsible for burning the wood and boy did it. If I would cook over 225* The smoke would just billow out of the stack, so I tried to smoke under 220*, works well for tri tip when it is reverse seared. I found the Mailbox mod, or was pointed to it by
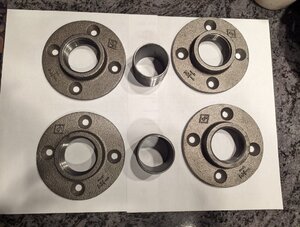
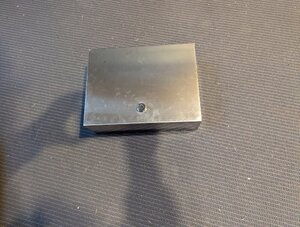
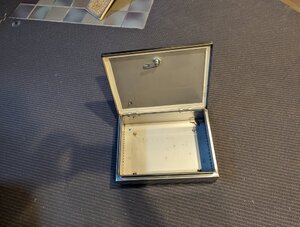
The smoke will flow between the mailbox, the stainless box, and the smoker through the close nipples that connect to the sides with the flanges. I currently have two sets, I will put them together tomorrow and begin to attach them to the mailbox and the smoker. This will probably take longer then it should, I am a computer engineer.
3) The thermometer connected to the door is worthless, most of the time it is steamed up so I have thoughts on riveting a piece of sheet stainless over the hole and not bother with it. So, I am also going to do a PID like addition, that's the 4th modification., I am building in a PT100 Thermo sensor. It requires an amplifier and to keep the water out of the device I am going to mount it on the back in a waterproof box.
4) will be a similar project to
5) Is the big project and it will have many phases. I have done a lot of work with small microcontrollers, and going to incorporate one in my smoker. It will control the solenoid in a similar way a PID does, but it won't implement a PID, I have other ideas how to solve that problem. Anyway this will be mounted on the same side of the smoker as the mailbox, using similar but smaller flanges and black pipe, and be in another stainless box mounted above the mailbox but in the other orientation. More pictures will come as I make progress.
Thanks for listening.


