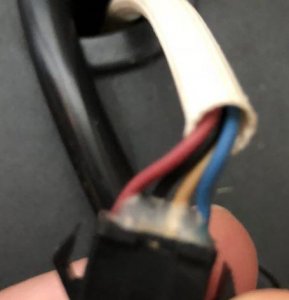
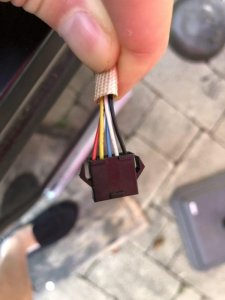
I'm a not so proud owner of two MES 30 - one is the older Gen2 and the other one is a newer Gen1. The Gen2 had served me faithfully for 6+ years until the control panel got moisture in it. It still works but throws fits once in a while (quits in the middle of the process, etc). The newer Gen1 I bought this year is suffering from a severe swinging temps disorder and just seem to be unable to hold a steady temperature. I've been exploring several options of replacing the top control panel on both smokers with a PID device that others posted over the years: either plugging an Inkbird-based PID into the control panel wires or shorting the +5V wire and smoker's relay wire with the 1K ohm resistor and use an Auber plug-n-play PID. The problem is that I'm not sure how to correctly ID the wires going to the control panel. The older Gen2 has 5 wires: red, yellow, blue, white and black. The Gen1 has 4 wires: red, black, white and blue. Any suggestions on how to figure out which is which?
-
Some of the links on this forum allow SMF, at no cost to you, to earn a small commission when you click through and make a purchase. Let me know if you have any questions about this.
MES Gen 1 and Gen @ Control Panel wiring
- Thread starter OPri
- Start date
SmokingMeatForums.com is reader supported and as an Amazon Associate, we may earn commissions from qualifying purchases.

SmokingMeatForums.com is reader supported and as an Amazon Associate, we may earn commissions from qualifying purchases.
Similar threads
SmokingMeatForums.com is reader supported and as an Amazon Associate, we may earn commissions from qualifying purchases.

SmokingMeatForums.com is a community of barbecue and outdoor cooking enthusiasts dedicated to smoking meat.
© 2004-2026 SmokingMeatForums.com