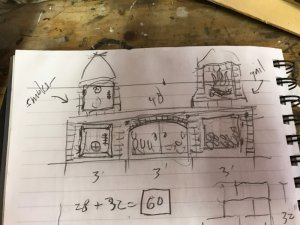
Hi there, everybody. Long-time meat smoker (on assorted cookers, most recently a cheap-but-effective Charbroil offset) and forum lurker, but now a member.
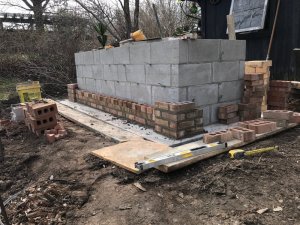
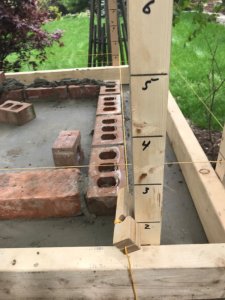
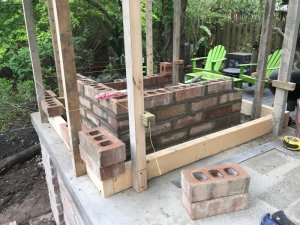
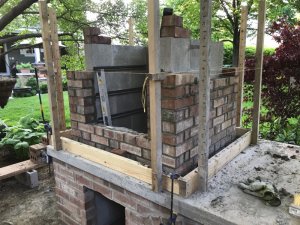
Something I've long wanted to do, and have just started, is to build a brick smoker. So with about 1,000 bricks left over from a home addition, I decided to go after it. I'm posting the first few pix here to share the project and also to get some ideas and input from others with brick pit experience. I've searched the web high and low, and there's not much out there for projects like this. So mostly I'm using experience and intuition to design and build it. Oh, it's my first brick project, too! Had one lesson from my mason. After that, it's just practice, and knowing how to read a mason's rule. The base is about done; next comes the countertop, then the smoker body on the top left and an enclosed grill on the top right, and all the metalwork (doors, racks, etc).
UPDATE: Brick pit Part II
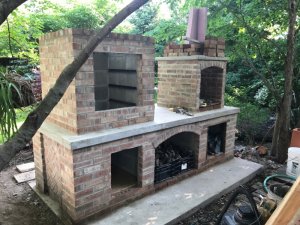
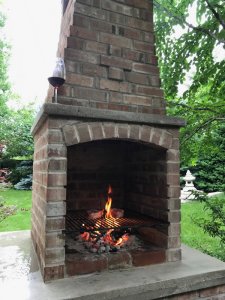
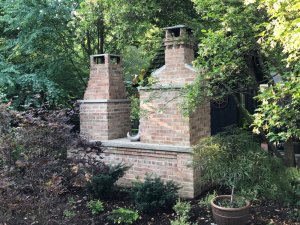
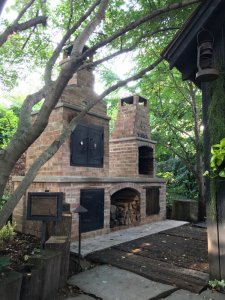
Well, it took three months, but my brick pit is complete! (Photos 18 and on).
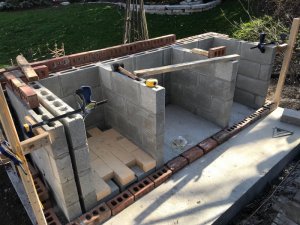
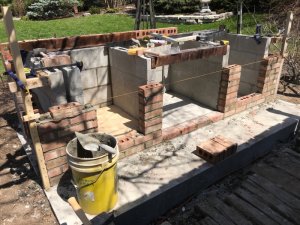
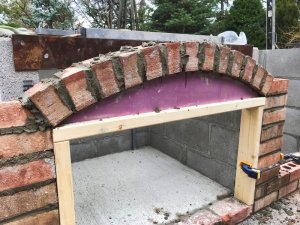
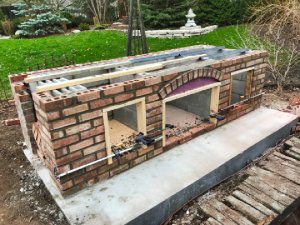
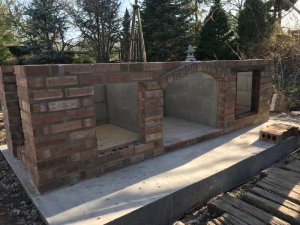
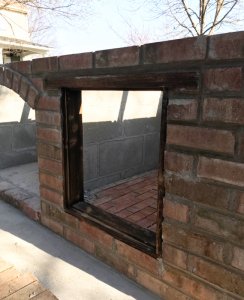
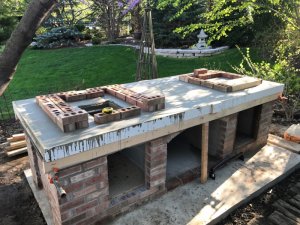
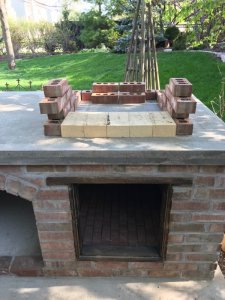
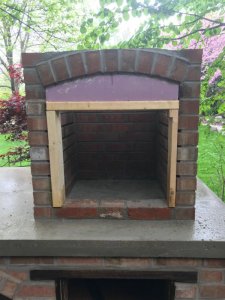
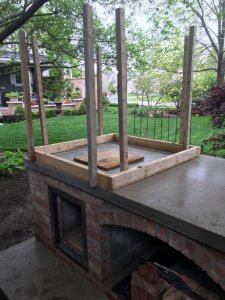
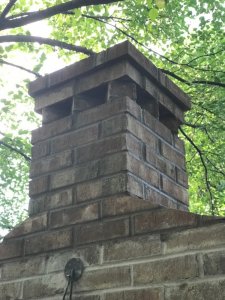
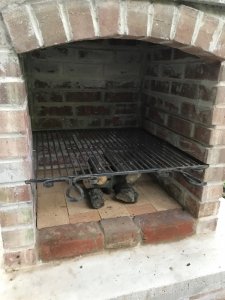
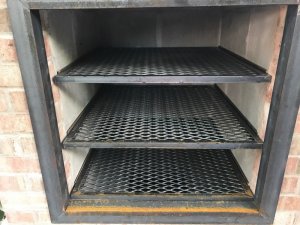
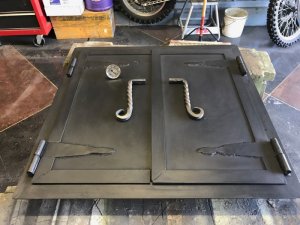
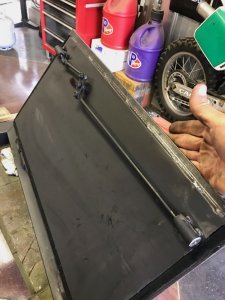
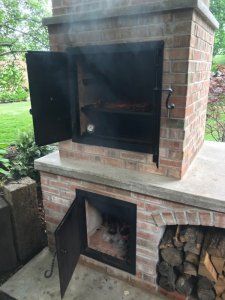
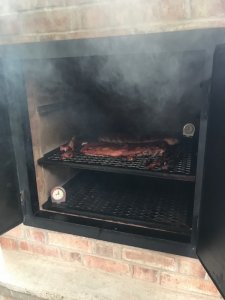
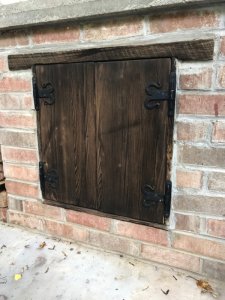
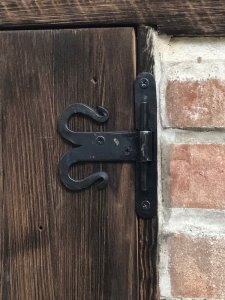
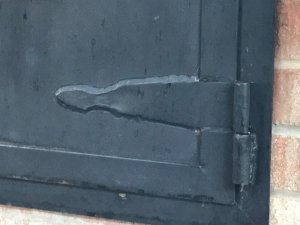
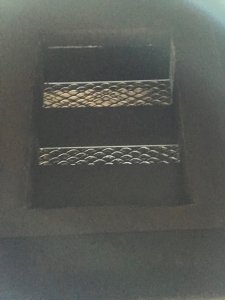
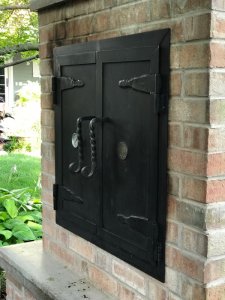
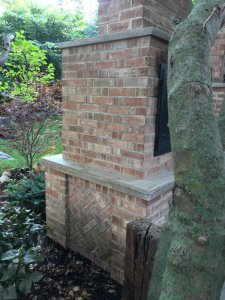
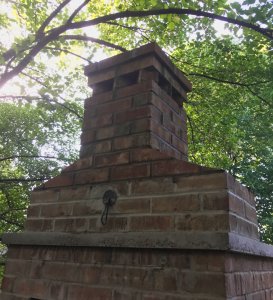
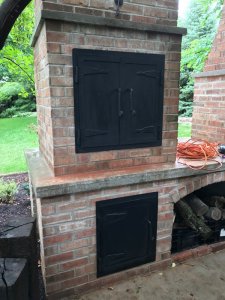
When we left off, I had finished the lower portion, and was about to pour the concrete countertop and start constructing the top, which consists of the smoke chamber on the left and the Tuscan grill on the right. Those are capped off with a concrete countertop, poured in place (1200 lbs!). Then I designed and built the chimneys (including a damper system for the smoker), fabricated the doors for the fire box and smoke box (including forging the hinges and handles), and built wooden doors (with forged hinges) for the dry storage under the Tuscan grill. Lastly, I fabricated racks for both cookers - expanded metal for the smoker and 1/4 inch rod for the grill (with forged Italianesque handles) I finished it in late July and have had one good smoking on it plus half a dozen excellent steaks on the Tuscan grill. Both sides work like a charm!
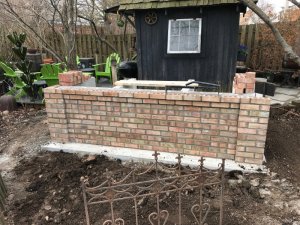
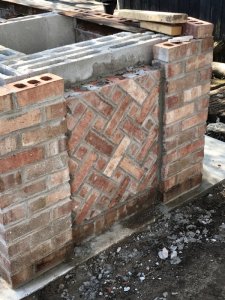
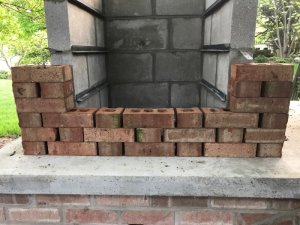
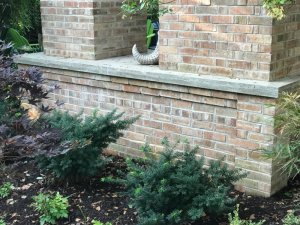
The unit features four different brick patters: standard running bond, English garden bond, Flemish bond, and basketweave decorative panels at each end. Those were made in forms, then attached with thinset and mortar piped in around the edges.
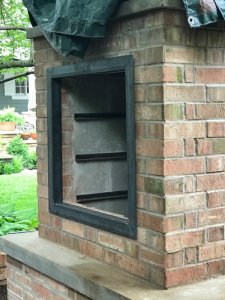
You may note that there's no vent in the firebox door. I opted to just leave the door cracked a bit when cooking rather than hack a hole in the 1/4 inch steel. If I can find someone with a CNC plasma cutter or water jet, I may still do a vent.
Something I've long wanted to do, and have just started, is to build a brick smoker. So with about 1,000 bricks left over from a home addition, I decided to go after it. I'm posting the first few pix here to share the project and also to get some ideas and input from others with brick pit experience. I've searched the web high and low, and there's not much out there for projects like this. So mostly I'm using experience and intuition to design and build it. Oh, it's my first brick project, too! Had one lesson from my mason. After that, it's just practice, and knowing how to read a mason's rule. The base is about done; next comes the countertop, then the smoker body on the top left and an enclosed grill on the top right, and all the metalwork (doors, racks, etc).
UPDATE: Brick pit Part II
Well, it took three months, but my brick pit is complete! (Photos 18 and on).
When we left off, I had finished the lower portion, and was about to pour the concrete countertop and start constructing the top, which consists of the smoke chamber on the left and the Tuscan grill on the right. Those are capped off with a concrete countertop, poured in place (1200 lbs!). Then I designed and built the chimneys (including a damper system for the smoker), fabricated the doors for the fire box and smoke box (including forging the hinges and handles), and built wooden doors (with forged hinges) for the dry storage under the Tuscan grill. Lastly, I fabricated racks for both cookers - expanded metal for the smoker and 1/4 inch rod for the grill (with forged Italianesque handles) I finished it in late July and have had one good smoking on it plus half a dozen excellent steaks on the Tuscan grill. Both sides work like a charm!
The unit features four different brick patters: standard running bond, English garden bond, Flemish bond, and basketweave decorative panels at each end. Those were made in forms, then attached with thinset and mortar piped in around the edges.
You may note that there's no vent in the firebox door. I opted to just leave the door cracked a bit when cooking rather than hack a hole in the 1/4 inch steel. If I can find someone with a CNC plasma cutter or water jet, I may still do a vent.
Attachments
-
 1. The plan.jpg509.2 KB · Views: 2,624
 -
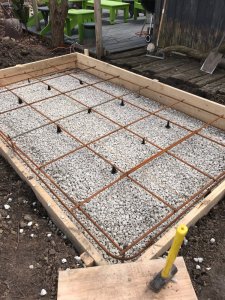 3. Pad ready to pour.jpg293.5 KB · Views: 2,595
 -
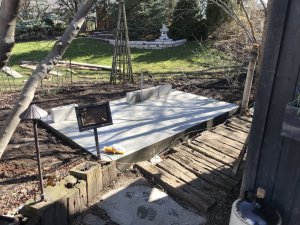 4. Pad done.JPG257.7 KB · Views: 2,506
 -
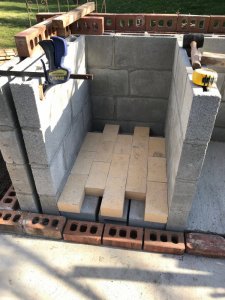 6. fire box.jpg628.2 KB · Views: 417
 -
 7 back bricks.jpg259.1 KB · Views: 423
 -
 9 back complete.jpg765.2 KB · Views: 413
 -
 10 front 1.jpg662.5 KB · Views: 2,476
 -
 12 front 3.jpg708.6 KB · Views: 423
 -
 14 arch form detail.jpg765.8 KB · Views: 430
 -
 15 front done 1.jpg819.4 KB · Views: 2,445
 -
 16 forms removed.jpg607.9 KB · Views: 413
 -
 17 storage.jpg624.3 KB · Views: 2,381
 -
 18 Basketweave form.jpg662.9 KB · Views: 2,292
 -
 20 basketweave installed.jpg644.2 KB · Views: 2,285
 -
 23 locating the cookers.jpg655.8 KB · Views: 2,264
 -
 24 string poles.jpg572.8 KB · Views: 366
 -
 25 string pole detail.jpg488.8 KB · Views: 356
 -
 26 four courses done.jpg644.3 KB · Views: 2,194
 -
 27 Tuscan grill arch form.jpg538.3 KB · Views: 2,128
 -
 28 next, the smoker box.jpg605 KB · Views: 375
 -
 29 concrete block and angle iron rack supports.jpg553.3 KB · Views: 2,194
 -
 30 bricks cover the blocks.jpg675 KB · Views: 2,190
 -
 31 chimney time.jpg656.4 KB · Views: 2,093
 -
 32 foam form guides the bricks.jpg678.7 KB · Views: 2,051
 -
 33 finished Tuscan grill.jpg686.2 KB · Views: 2,093
 -
 34 angle iron door frame.jpg588.6 KB · Views: 389
 -
 35 Smoker chimney got flagstone top and shoulders.jpg594.5 KB · Views: 381
 -
 37 custom old-world style grate.jpg482.3 KB · Views: 1,967
 -
 38 first steaks!.jpg581 KB · Views: 1,919
 -
 42 smoker grates.jpg523 KB · Views: 2,023
 -
 43 building the smokebox doors.jpg513.5 KB · Views: 1,953
 -
 44 latch mechanism.jpg518.3 KB · Views: 1,923
 -
 47 first fire.jpg512 KB · Views: 402
 -
 48 first ribs.jpg409.3 KB · Views: 2,003
 -
 50 wood doors.jpg561 KB · Views: 1,942
 -
 51 hand-forged hinges.jpg557.6 KB · Views: 360
 -
 52 more hinges.jpg471.2 KB · Views: 360
 -
 53 tuning plates between firebox and smokebox.jpg477 KB · Views: 367
 -
 54 Firebox latch detail.jpg517.1 KB · Views: 357
 -
 55 smokebox doors.jpg527.4 KB · Views: 1,891
 -
 56 brick decoration.jpg574.6 KB · Views: 354
 -
 57 two brick patterns.jpg655.9 KB · Views: 359
 -
 58 back view.jpg816 KB · Views: 350
 -
 58 back view.jpg816 KB · Views: 360
 -
 59 English Garden bond.jpg712.2 KB · Views: 381
 -
 60 finished product.jpg679 KB · Views: 1,885
 -
 61 finished product 2.jpg697.1 KB · Views: 2,565
 -
 smoker chimney.jpg1.3 MB · Views: 2,075
 -
 IMG_1226.jpg594.3 KB · Views: 1,907
Last edited:

