LOL. Yeah the beer wore off so I had to promise them free BBQ's for life. So I am already in the hole. I have learned tons about welding though and it has been a very enlightening experience. I will make sure to post the rest of my progress. Thanks for stopping by ron.
New Kid on the Block
- Thread starter bear grillz
- Start date
-
Some of the links on this forum allow SMF, at no cost to you, to earn a small commission when you click through and make a purchase. Let me know if you have any questions about this.
You are using an out of date browser. It may not display this or other websites correctly.
You should upgrade or use an alternative browser.
You should upgrade or use an alternative browser.
SmokingMeatForums.com is reader supported and as an Amazon Associate, we may earn commissions from qualifying purchases.
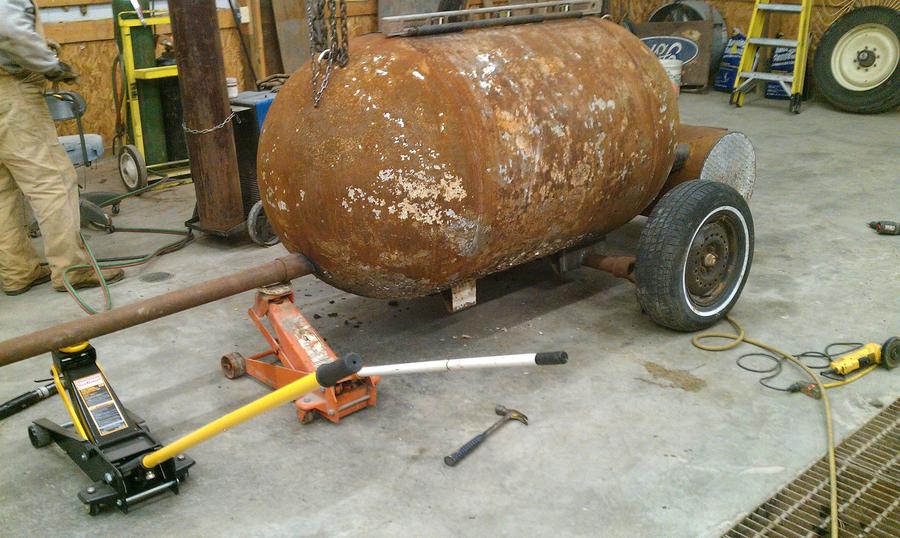
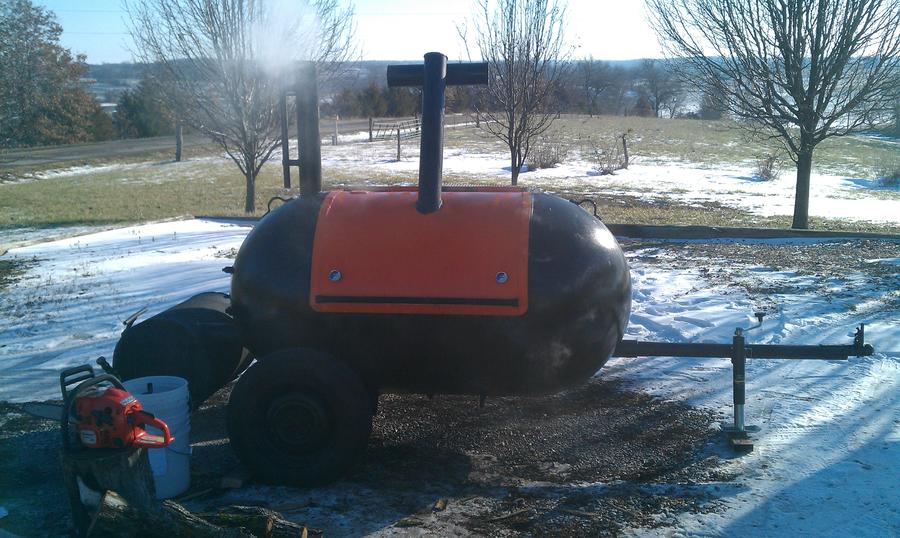
Okay I have more pictures to update but time seems to be the biggest problem with me. School has started back and coaching Fall and Winter sports is in full swing. Here goes....We were experimenting with putting the axle straight on the smoker barrel and decided that it was a good idea. The smoker actually does not bounce too bad even without shocks. The paint job is next and I just dont know how much time i will have to do that. if anyone has any suggestions on cost effective high temp paint please let me know.
Added corner braces to support the axle.
Capped the end of the counter balance pipes..
Here is a couple of views of the trailer in line with my Jeep.
Added corner braces to support the axle.
Capped the end of the counter balance pipes..
Here is a couple of views of the trailer in line with my Jeep.
Hey Jar-Jar-
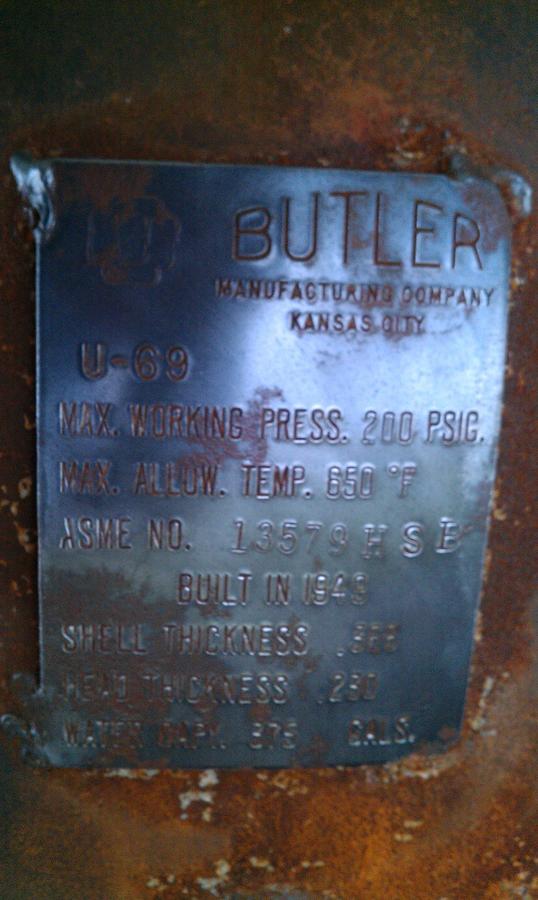
Thanks for the comments. I found this one on craigslist for $100. I dont think they even make these tanks in this style anymore. The company that originally made them was the Butler manufacturing comany out of Kansas City. Here is a picture of the tag if you want to investigate where to find an old one.
Thanks for the comments. I found this one on craigslist for $100. I dont think they even make these tanks in this style anymore. The company that originally made them was the Butler manufacturing comany out of Kansas City. Here is a picture of the tag if you want to investigate where to find an old one.
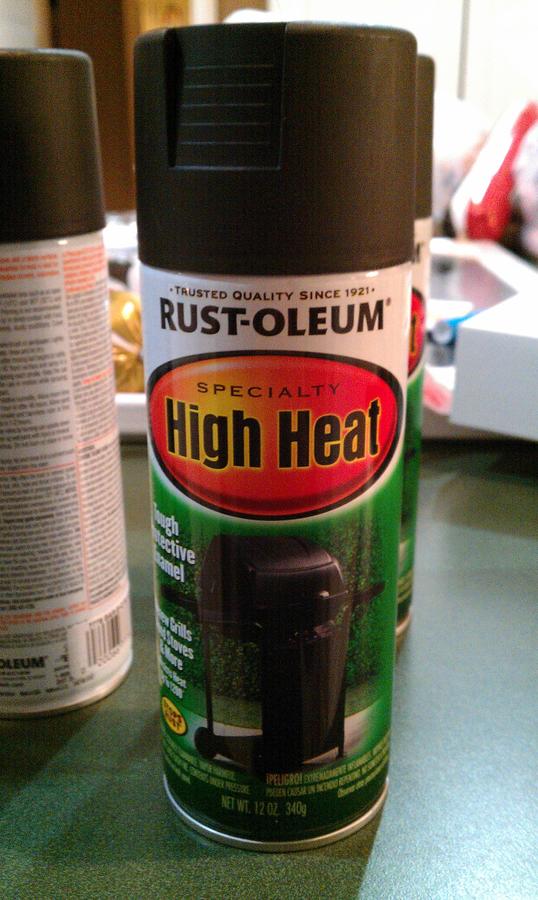
Its time to start painting I guess. I have already temp tested and I can get it to hold pretty steady around 225 with no charcoal which is right where I want it. One of my friends already cooked in it and said it works great so I will paint her up and get after it next week.I am using some expensive heavy paint on the door and not so expensive paint for the tank. The firebox will also have some relatively expensive paint on the door. I believe this VHT header paint was $9 a can and I could coat the main door twice with it. The rest of the smoker will be black I just wanted a little flare in my design. It doesnt hurt that I am a Texas Longhorn fan either!!!
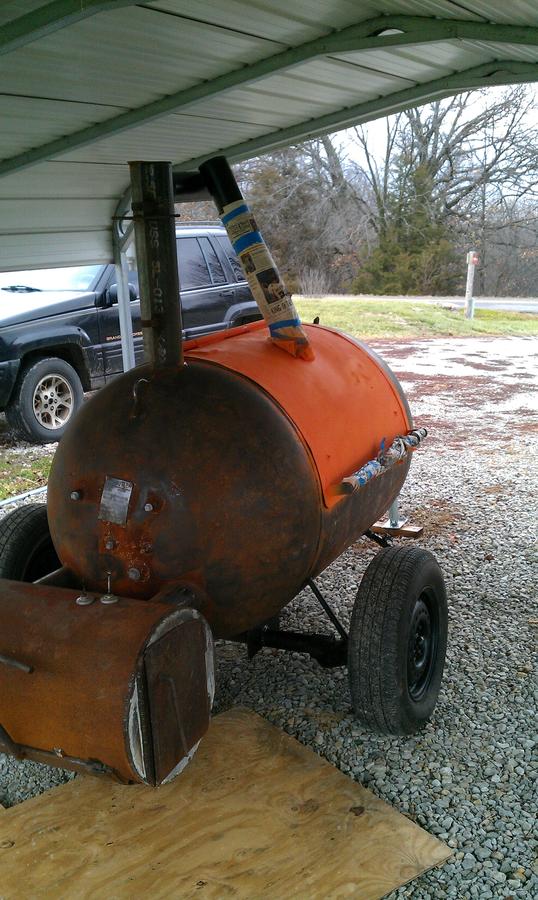
I wire brushed the heck out of it and started painting. Hopefully I can get the rest of the black on next week and have a cook out before the holidays.
I wire brushed the heck out of it and started painting. Hopefully I can get the rest of the black on next week and have a cook out before the holidays.
Here are some more angles. I painted the axle, counter weight, and the tongue black. I wish I would have wire-brushed the chamber door before painting it but i can always go back and do that. It will just cost me a little. The rest of the paint is coming this weekend during the holidays. I will try to update as soon as get done.
dragons breath
Meat Mopper
Its funny what time will allow you to do. I had a half day of school today and I am preparing to take this bad boy out for a second run. I went walmart and pick up some cheap high temp paint for the chamber and I will let you know how it works. The main chamber door has an expensive high temp paint(because I wanted a specific color) but the finished product looks nice. I will season it before I cook and it should be a pretty good deal. The temerature is pretty cold as we just got slammed by Draco this week but I am glad those 50mph winds are gone. Check it out. I will probably have to figure out something for the firebox paint but oh well at this point.
The paint from Walmart cost $3.77 a can. I will put several views of the smoker below. I ovekilled buying six cans and I nly made it through about 3 and a half on a 375 gallon tank. WOW!! I guess I can do multiple coats..
View media item 186319
View media item 186321
The cookout is coming soon!!!!
The paint from Walmart cost $3.77 a can. I will put several views of the smoker below. I ovekilled buying six cans and I nly made it through about 3 and a half on a 375 gallon tank. WOW!! I guess I can do multiple coats..
View media item 186319
View media item 186321
The cookout is coming soon!!!!
roughneck424
Newbie
dragons breath
Meat Mopper
bruno994
Master of the Pit
Great build and thanks for sharing with us. It really does help to have a lot of friends helping out with a build. I have started wiping down my firebox towards the end of cooks with some canola oil to help protect it from rust. I'm not sure that there is a paint out there that can withstand the high heat the firebox reaches.
michael ark
Master of the Pit
Yes it just came to me now since you asked. The smoker will now be referred to as the "The Longhorn".
It was a little below 12 degrees when I started to cook. It was pretty hard to get it hot but once it was hot I could keep it at 225 for almost four hours at a time. I also noticed that if I split wood instead of putting whole logs in that I could raise the temperature dramatically.
Okay everybody I have some updates on my smoker. I used it this past weekend with great success. I learned a few more things about somikng meat in the process as well. I found that getting the temperature up in the "longhorn" was difficult because I didnt split the logs and give it enough fuel. It probably didnt help that it was 12 degrees outside but oh well I still got it up to about 225 at the hottest which allowed me to go low and slow. The temperature would hold for 5-6 hours at a time if not longer. I was a big time hickory and pecan wood guy but I had very good success with oak this go around. I have never used oak but this may be a wood of choice from this moment on. The flavor was amazing and not overwhelming. I will say the combustion is amazing in this smoker and it emits a thin blue smoke that lets me know it is porportioned correctly. If I ever would like the heat any higher than 225 I could add a propane burner opposite the firebox. It wouldnt be too hard to do at all. Enjoy the pics!!
Combustion
Getting the brisket ready...
Slicing her up...so juicy!!! It had awesome smoke rings!!!
The chicken just was so juicy it would slide off the cutting board.
This is an elk roast. It is very similar to beef in texture.
The pork butt
The fork just cut through after it reached an internal temperature of 195 degrees.
The bone just slid out easily......
bruno994
Master of the Pit
jabbo
Meat Mopper
That looks very good. I have never had the fortune of eating elk but have heard so many good things about it. Maybe one day!
SmokingMeatForums.com is reader supported and as an Amazon Associate, we may earn commissions from qualifying purchases.
Similar threads
- Replies
- 3
- Views
- 683
- Replies
- 4
- Views
- 6K
- Replies
- 6
- Views
- 3K
- Replies
- 7
- Views
- 845
- Replies
- 70
- Views
- 5K
- Replies
- 5
- Views
- 1K
- Replies
- 7
- Views
- 9K
Hot Threads
-
Well. Look what Santa dropped off early!
- Started by Steve H
- Replies: 28
- Blowing Smoke Around the Smoker.
-
Featured 2025 Christmas Gift Exchange
- Started by bmudd14474
- Replies: 27
- General Discussion
-
The Best Egg Salad - Enabler Version
- Started by Chris_in_SoCal
- Replies: 23
- ABT's and all things Appetizers
-
Racoon in liquor store
- Started by normanaj
- Replies: 18
- Blowing Smoke Around the Smoker.
-
Smoking a pork but ahead of time
- Started by bubba in texas
- Replies: 16
- Pork


