New Kid on the Block

  • Some of the links on this forum allow SMF, at no cost to you, to earn a small commission when you click through and make a purchase. Let me know if you have any questions about this.
SMF is reader-supported. When you buy through links on our site, we may earn an affiliate commission.

bear grillz

Newbie
Original poster
Jun 16, 2012
25
10
Princeton, MO
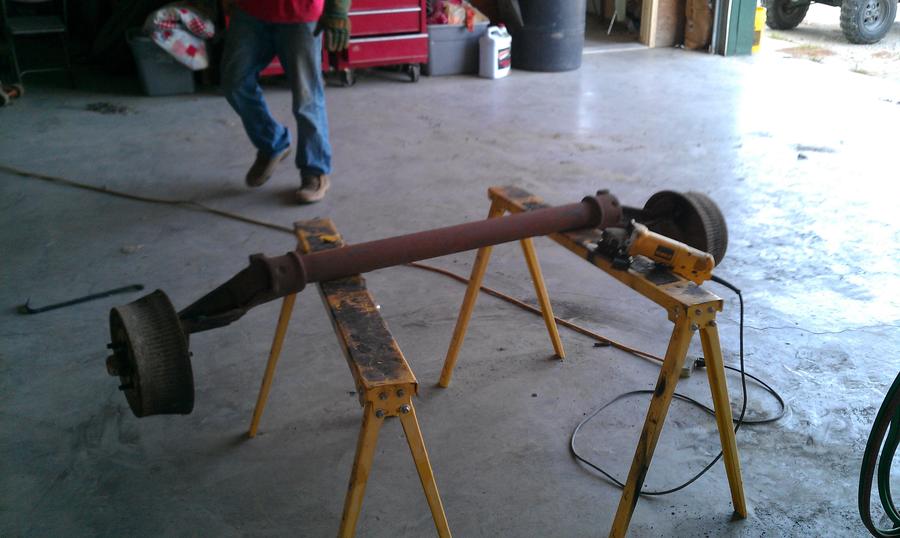
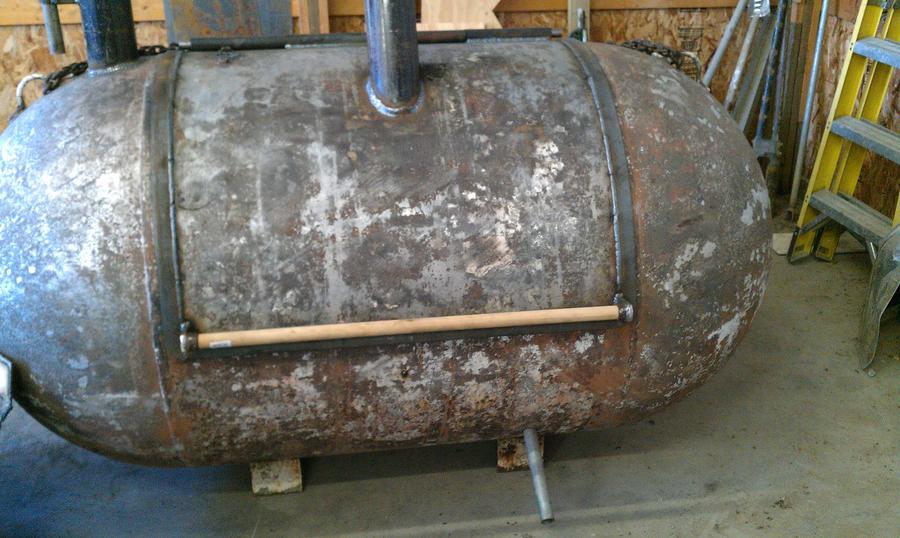
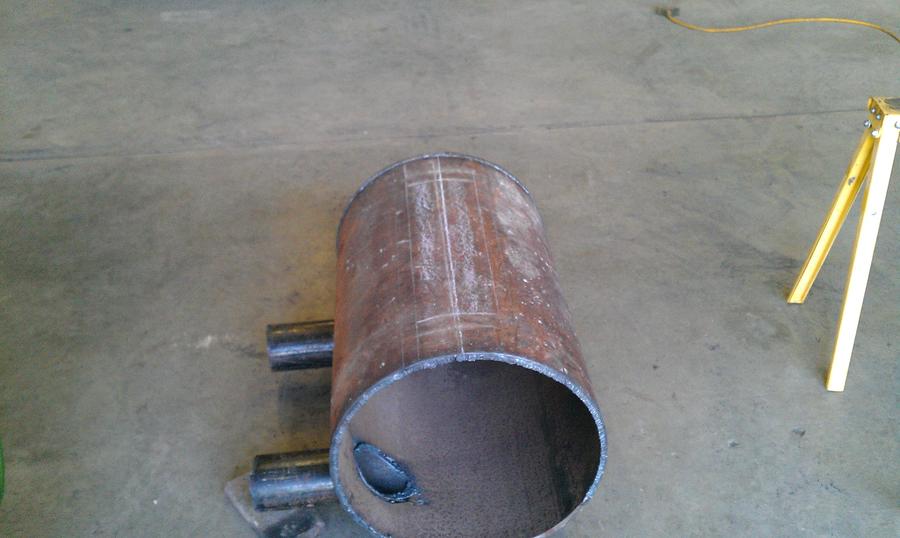
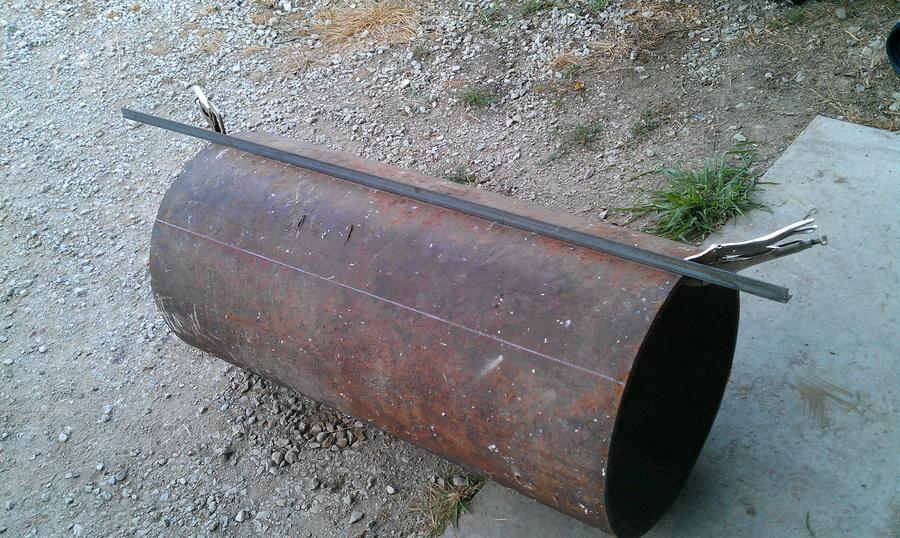
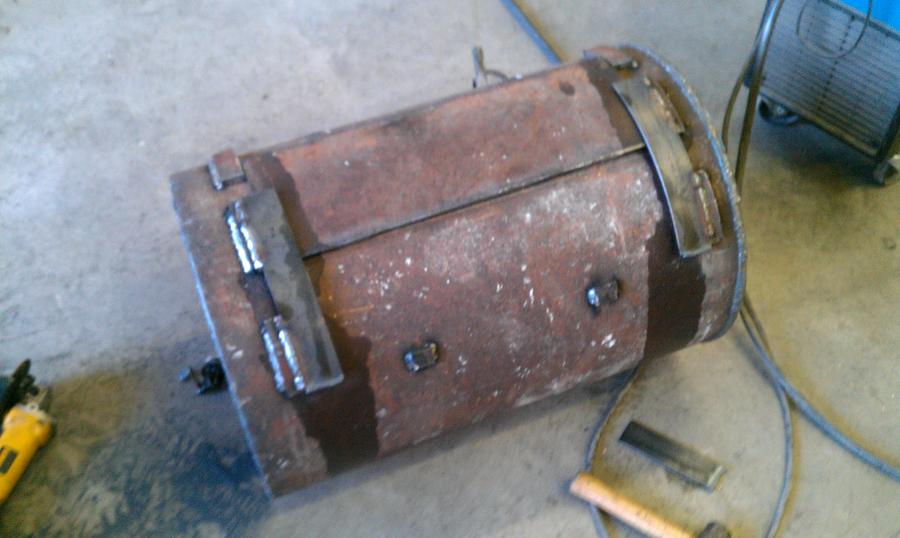
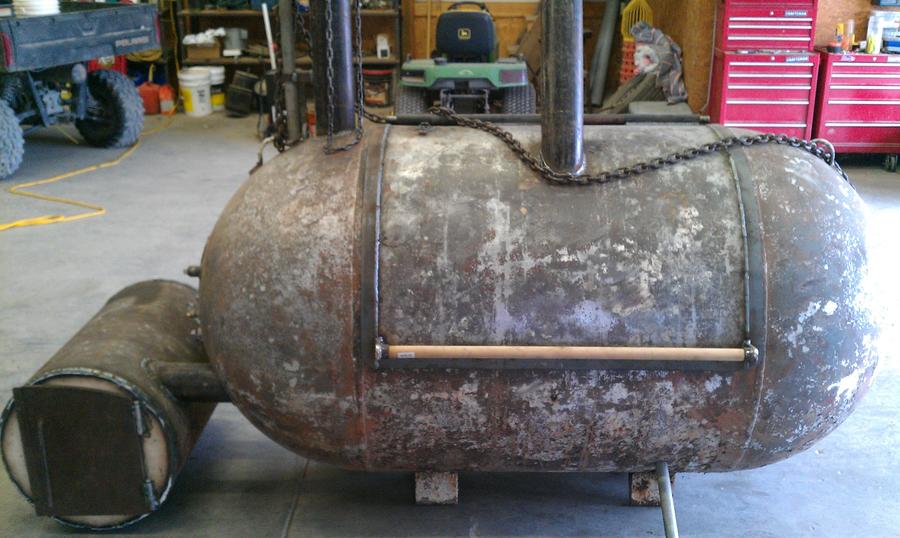
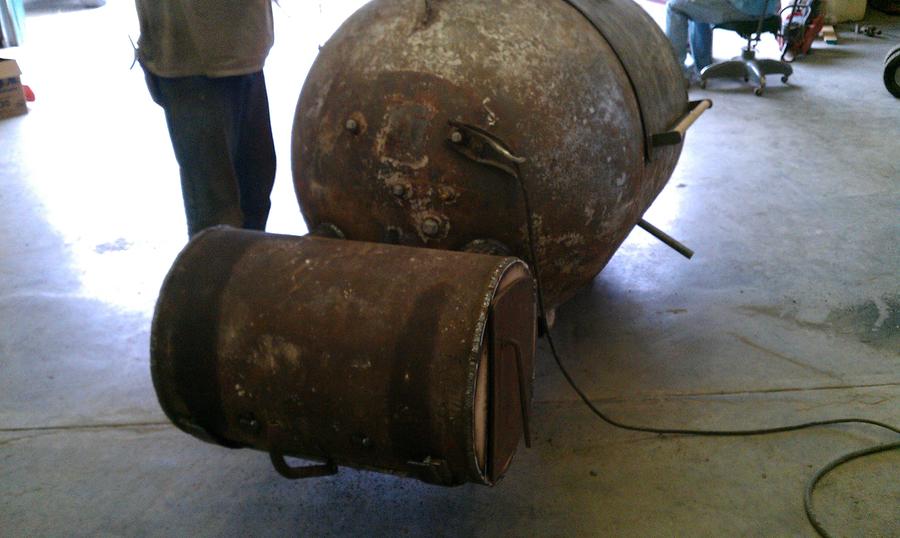
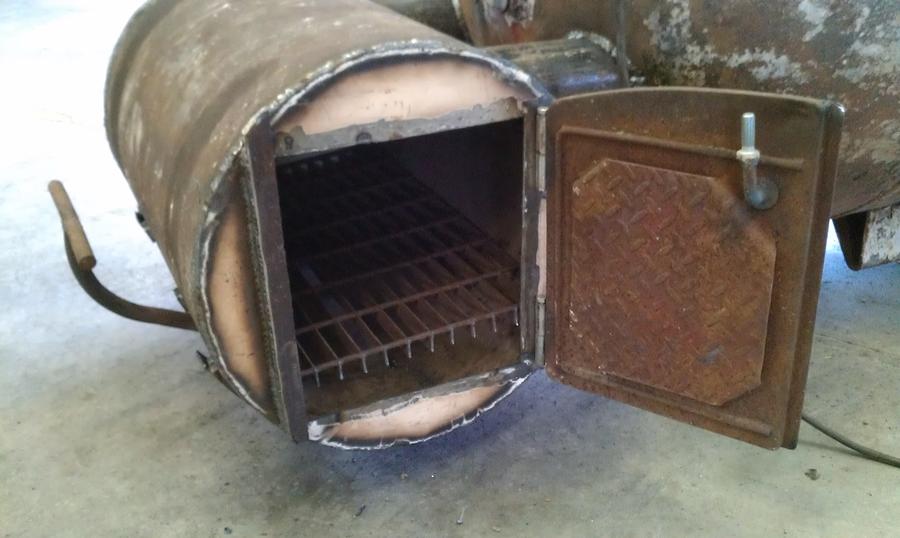
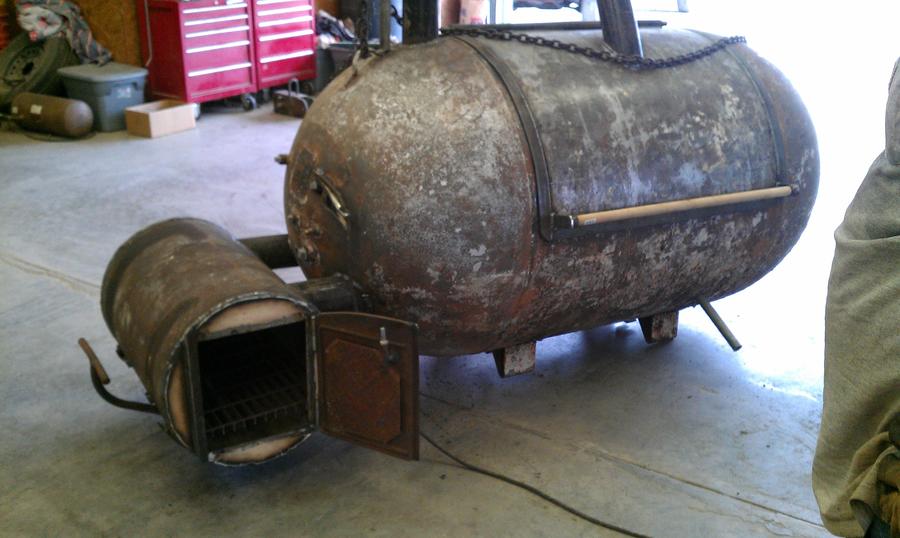
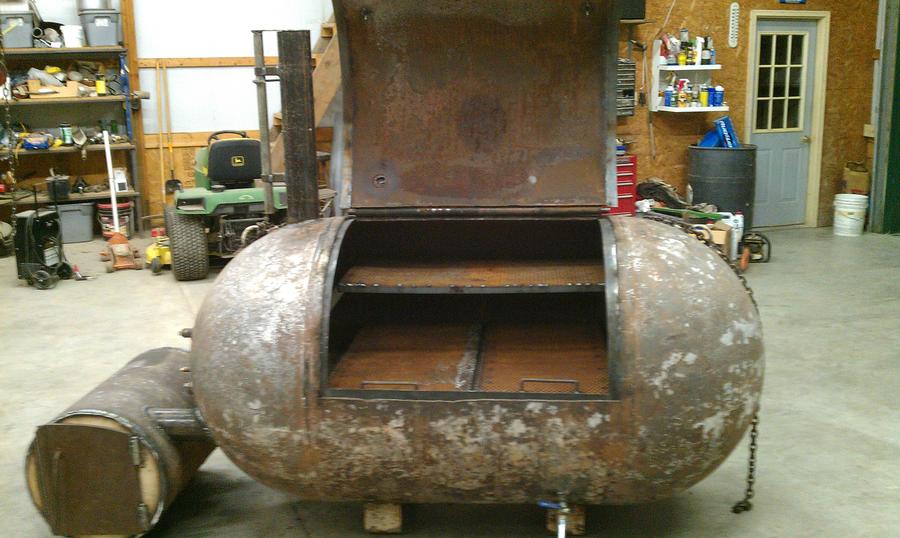
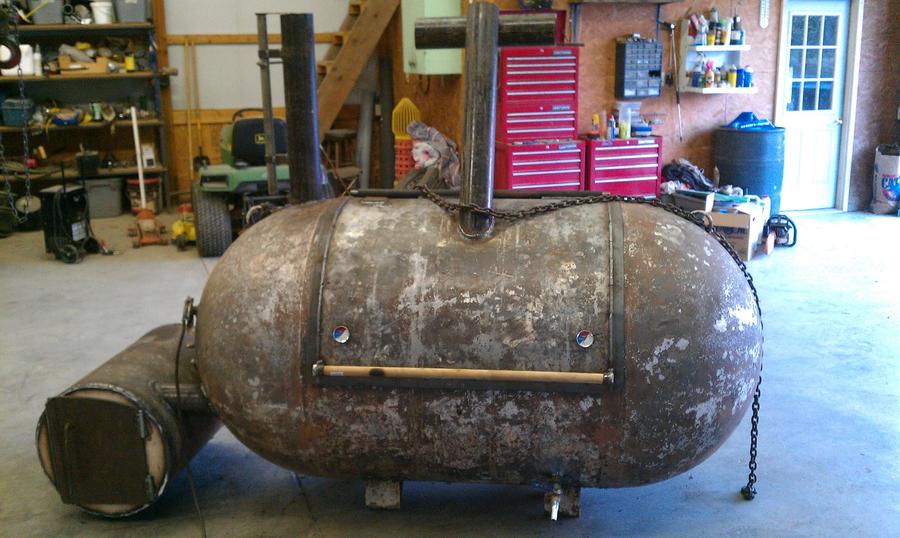
I am planning to make a reverse flow smoker out of a 375 gallon propane tank that I bought for $100 on Craigslist. I originally wanted a 250 gallon tank or smaller but my dad (who is a truck driver in Texas) told me to “GO BIG or GO HOME!” Then he told me that I couldnt do it. Needless to say, I couldn’t help but feel challenged and I would like to dedicate this build to “foolish pride”.  This project is going to be a little bit different than most tanks I have seen on this forum and I thought it would be pretty challenging to pursue. The cooking area of this tank will be huge and I feel that this large size may present some problems. But who cares because I have plenty of Bud Light. My next dilemma is if I should build or buy the trailer. Right now I can’t see the benefit of building a trailer if I can find a used one with working lights. TIME=MONEY.  I have even contemplated a double axel but I don’t want to go into over kill mode just yet. I need to put his bad boy on a scale. Now lets see if I can get some pictures to download to catch everyone up to speed.
0f5ef22b_IMAG0009.jpg
 
Last edited:
I would not recommend cutting a propane tank for fun. It is not for the feint hearted. I chose to plug my tank and fill it up with water and then begin cutting the door out. I used a plasma cutter. It is kind of freaky because the water will begin to bubble under the heat of the plasma. I figured if water could explode that today was a good day to die. I just was not convinced by techniques that people used like vacuum tubes and exhaust pipes.I have a video but I dont know if I can get it to load. I always hear of people doing it but I never see actual video which bothers me. I am holding the camera while my boy Nate Dog gets busy.

1eadd07a_IMAG0039.jpg
ad3ee5d5_IMAG0036.jpg
 
Last edited:
Okay I have the door off and I am also going to burn her out. The paint is some type of old  marine paint or something. It has a reddish tint underneath and I have heard it is toxic. The burn out seemed to eliminate all of the paint. I wish I could have put a themmeter in there. This sucker got hot!! The paint just flakes off with a finger swipe now. Also the propane smell is completely gone now. I wish I would have read the post about attaching the hinges before I took off the door. I guess I will have to deal with it now.

e2f21589_IMAG0046.jpg
d016664c_IMAG0074.jpg


d794f965_IMAG0077.jpg
 
Last edited:
I decided to go with the round firebox design instead of they typical square.I went to http://www.feldoncentral.com/bbqcalculator.html to do some research on the firebox size that I would need to heat this monster and it gave me the cubic inches I needed to make an effective firebox. I have came up with a design although a little small may work. The heavy pipe that I am using is 20" in diameter and .366 of an inch thick as is my cooking chamber. They dont make it like this anymore folks. When I burned out my firebox I cam back the next morning and the thing was still warm even with the door gone. LOL. I figured if I sealed this thing up pretty good I could create decent combustion. I can always change the design. I chose to attach the firebox using 4" heavy pipe so that I ca create dampers inside the chamber as well as the firebox. The pipes you see coming in the cooking chamber will be below the baffle plate. We used a quikie saw and a cuttign torch to cut this pipe.  Anybody have any ideas for the placement of the smoker stack? I was thinking on the top but I see tons of people put them a few inches above the firebox on the side. Is there any increase in functionality?

f8d19c69_IMAG0081.jpg
6df777be_IMAG0083NLP.jpg


46d4bd66_IMAG0084.jpg
 
I have staged my firebox next to my smoker chamber and cut holes. The baffle plate will be above where the pipes enter the chamber and I am figuring some type of additional damper system on the inside of my cooker.

beaedcce_IMAG0092.jpg


0ca5fe58_IMAG0095.jpg


9a6c9215_IMAG0097.jpg


Break Time !!!

58689b82_IMAG0098.jpg


a511ec08_IMAG0100.jpg


9ed5ea7d_IMAG0102.jpg
 
Sweeet! Got yourself a fat boy.

Your father was right   and wrong.  Go big or stay on the porch, and from the looks of your skills so far, not to mention the speed with which you are attacking this project you'll have no problems that can't be solved.

What's the diameter of that bad boy?  Slide out grates will make it a breeze to work the meat, but at your speed maybe you're already at that point of the build.

I went with a single axle trailer and it wasn't heavy enough in my estimation. Had to add another axle which bit me hard in the pocket. Mine is only a 250 gal. but old and heavy with 5/16" wall thickness. I also used some 3/8" plate for the firebox. I'm building another for my son, slowly eventually, and I found an old tandem axle camper trailer for $150 on Craigslist. Keep looking, the deals are out there.

The only potential problem I see is the 2 pipes between the firebox and smoke chamber might be a tad small for good heat transfer.

It's looking good and soon you'll be posting Que view.
 
Hello Dragons Breath.

Its a pleasure to hear from you. I followed your build to the very closely. Thanks for your advice. I was just staging the firebox and I have not tacked it on because I had the same concern. I guess I need to push it all the way against the body of the smoker and cut a very large hole between the two pipes for entry. When I burned this thing out it was still warm the next morning even with the door off so I know it can hold heat. The trick is just getting enough heat there. Im gonna take your suggestion and clean that side off and attach it flush.

The diameter of this bad boy (cooking chamber) is 41". LOL. Thats insane. I know. I may need a double axle but I guess I will know when I get there. The diameter of the heavy pipe is 20".

Thanks again, 
 
I just realized something.....STEEL IS EXPENSIVE!!! This week I made a visit ti the place where metal goes to die, (junk yard) and picked up some more materials to help me with this project.Next week is the door!

I used a grinder to smooth out the door. As a point of reference for the size of this monster. I am 6'3! LOL. 

77a8b300_IMAG0107.jpg
34ea8d66_IMAG0108.jpg


We finished staging the baffle plate using 1/8 inch thick diamond plate. I used a old piece of cardboard to help with with the cruve on the rounded sides of the tank. 

896afd91_IMAG0112.jpg


4bf06994_IMAG0113.jpg


7ce7e327_IMAG0114.jpg


4ce9cb8d_IMAG0117.jpg


We also added a drain and a drain pipe. I was not really worried about the pipes location at this point. I just wanted it to extend outside the tank before the baffle plate get welded in.

93d710c2_IMAG0122.jpg
 
Okay I went back tonight and finished the baffle plate, drain and began to work on the firebox.The main chamber door is next!! Im starting to think I should have welded my hinges on before I cut the door out. I just made more work for myself as if I dont have enough to do already.LOL.I also have some work to do on the fire box. Im trying to figure out how I want to do the damper system and ash release system. I also have my grate shelfs welded into place....Its getting there...I have only worked on it for four days total.....

e3079231_IMAG0124.jpg


4b31d669_IMAG0129.jpg


I also marked off the diamond plate steel for my firebox walls. It was welded on the floor just as shown below and a smooth outside bead was added thanks to Jeff because I jacked it up pretty good. 
f754fd7d_IMAG0127.jpg


ce4be73b_IMAG0130.jpg


34d04bdc_IMAG0131.jpg


I also measured off for what Im gonna do with the door on the other side.I got the door off of an old wood stove. It heavy duty!!!

af33958d_IMAG0133.jpg
 
Okay It went down tonight. Me and Big John the super welder did our thing. We can smell the barbeque already and we attacked the smoker stack, door insulation/ placement, and firebox door.  I have several pictures and I hope you can kind of figure out what is going on.

Smoker Stack

Marking off and cutting the smoker stack

d65508ff_IMAG0134.jpg


4f37f3a4_IMAG0135.jpg


efc43418_IMAG0137.jpg


Getting the door ready for the fire box.

043466ed_IMAG0139.jpg


Underneath view.. It seals pretty good but I will probably have to add some steel on the hinge side where you can see the slight gap...

fc9715ce_IMAG0140.jpg


I need to measure something about 1.25" (inch and a quarter) so that the hinge I have my hand on will connect.

4b9bdb8c_IMAG0143.jpg


Its time to stag the bolts on the door. I am using some bolts and some steel circular fittings that fit tightly on the bolt.

dc135255_IMAG0148.jpg


Welding on an attachment on the inside of the firebox door lid so that I can make sure it seals tight.

67dcdb8e_IMAG0149.jpg


I have the door sealed from the inside with 2" wide steel trim. I am planning on adding 1" wide trim on the outside also. This may be overkill but I already bought it so I might as well use it...

0d824a9c_IMAG0151.jpg
 
Build looks amazing, and you're giving me more ideas for mine.
 
Build looks amazing, and you're giving me more ideas for mine.
 
Man you're blazing through your build. Looks good and you can handle that door with some muscle! The double lining inside and out is a good idea and will help to seal against smoke leak. I had to get some toggle clamps to help hold the door tight and they worked great.

Keep the pics coming
 
Thanks guys.

DB Im gonna need a semi to haul this bad boy when I get done but it should be fairly unique in design. LOL
 
Last edited:
That is coming along nice - looking forward to seeing the rest of the build
 
Okay. We were back at it again today. We got the main chamber door done and tried to figure out the counter balance thing. I will walk you through what we have done. Lets start with the main chamber door. I got some 3/16' thick pipe and a solid pin to fit through all 4 pieces.

5ba9e238_IMAG0160.jpg


Weld the pipe to the tank and then to the door is opposite patterns. Two should be welded on the door and two should be welded on the tank so the hinge can function.

55de9f18_IMAG0161.jpg


Im grinding some slag out because the door is fitting funny but i know the real cause but Im hoping it will begin to fit. 

aec9fcba_IMAG0162.jpg


This is what the gap in space looks like on one side...

6d15ca6b_IMAG0171.jpg


The door bowed out when I cut it out and it is so heavy that we had to bring out the tractor. I don't think you can really see but it is raised about a quarter inch from the body of the tank.
fd773bda_IMAG0167.jpg


b632152f_IMAG0173.jpg


Problem solved....Jeff the super welder got my door and trim welded on solid but the guy has true welding "finesse".

645c8cae_IMAG0175.jpg


I never notice it but the smoker looks like it says "IT" ! LOL. Be assured that I was not trying to spell anything. The counter balance works great..

Next is the smoker stack damper. I used a piece of the left over pipe an traced it out of a piece of scrap metal out of a wood stove.

4825d277_IMAG0158.jpg


86cddaca_IMAG0159.jpg


This may be confusing but you will understand when I get this on. These will allow the damper to move..

bcffd4b9_IMAG0164.jpg


fbf8573e_IMAG0174.jpg


I need a handle on the bottom of this thing...

Got the drain plug out of the bottom so I can clean it with a power washer. It took heating up the rusty bolt to get it out but I think it will be useful to clean underneath the baffle plate when I need to..

11935103_IMAG0165.jpg


04aec9d6_IMAG0176.jpg


Thats a good stopping point. We need to get the the firebox and cooking grates ready next time and start thinking about a trailer for this monster. We are thinking about welding the smoker straight on an axle.
 
Last edited:
Okay we are back at it again. There is a some serious work getting done now and we can almost smell the barbeque. Heres what we got done today.

I went nd got an axle and cleaned her up. I plan to use it agian at a later point.


Added a wood handle to my smoker door. John really nailed it! I think the mix of wood and metal is pretty cool...


Now I am going to mark off an area underneath my smoker box for ashes to get out. It will be pretty cool and I hope you can follow what I am trying to accomplish. 

This section will be underneath the firebox..


I had to cut a peice out of the same pipe so that the curve will be the same....


Im testing the cut to see if it will work.


Here is what the hole will look like....


Top view...


We are starting the track with pieces of steel..


As you can see you will need stoppers on both sides to keep the door form going where it wants to....We added 2" angle iron to hold the track into place and had to lube it so that it would work.


Here is the asher in action....

 
I like it. Innovative and curved. I like curved surfaces. They can be more work, but they just have a more pleasing look than flat. Just leave enough clearance for the grit and ash that will accumulate down there and it should move the way you envision it.

I also like the way you did the counter weight for the door with a single centered pipe. Part of what makes your smoker unique.
 
Okay. Im back. I took a break because school started and it has just been hectic but I got the smoker completed except for the trailer and cosmetic touches such as paint. Check it out.

*Attached the firebox


We also added the firebox "asher" handle so the ashes can be released through the bottom when the begin to pile up. Also we added grate in the firebox and sealed the door.


Next John burned hole with the torch and welded the nuts in because the door was tooooooo thick for a standard themometer to fit.


I trimed the drain pipe back almost flush with the tank and welded on the vavle that I bought from Lowe's. These are pretty cheap. You will just need male adapter on one end. I decide to use two in case i ever wanted to add a hose. I just need to find one that can withstand hot grease and that will be that.


Patched a hole from one of the relief valves....


Here is the first round of grate. I used fairly thick grate that has little circles in it. I dont know what it is used for but it is pretty cool looking. I will come back and upload a closer picture.


I added another grate on top. This grate slides along the top of the smoker. It was an accident but we thought it was pretty cool. We used rebar and bent it to make handles.


On to the burnout/trailer next!!

 
SmokingMeatForums.com is reader supported and as an Amazon Associate, we may earn commissions from qualifying purchases.

Latest posts

Hot Threads

Clicky