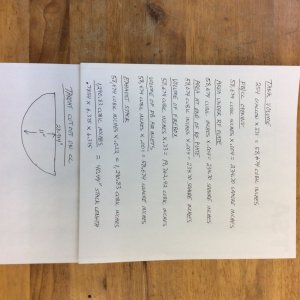
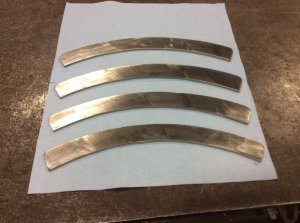
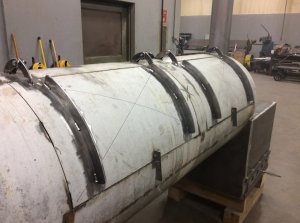
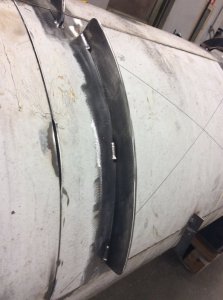
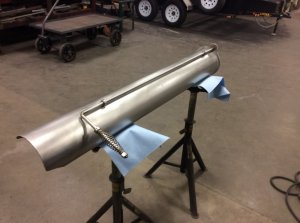
Is that 3in channel for your grease drain ..that's a great idea I was going to use angle iron but i like that idea better .do you rember what u cut your half moon measurement at ..I'm punching in the numbers on my 250 build and just wanted to see if I'm in the ball park
250 Gallon Propane Tank Build
- Thread starter Johndeere1
- Start date
-
Some of the links on this forum allow SMF, at no cost to you, to earn a small commission when you click through and make a purchase. Let me know if you have any questions about this.
You are using an out of date browser. It may not display this or other websites correctly.
You should upgrade or use an alternative browser.
You should upgrade or use an alternative browser.
SmokingMeatForums.com is reader supported and as an Amazon Associate, we may earn commissions from qualifying purchases.
Have not had a lot of time to work on it. The RF plate was pretty time consuming. Welded slow trying not to warp anything.Getting closer JD1!
Thank you. Can NEVER have a big enough shop.I am impressed with how your shop is for a build in progress.
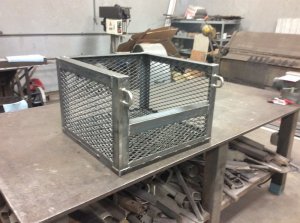
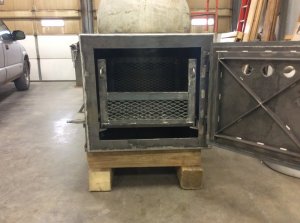
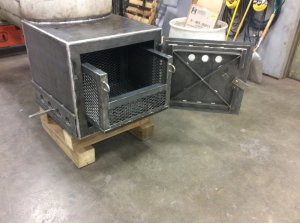
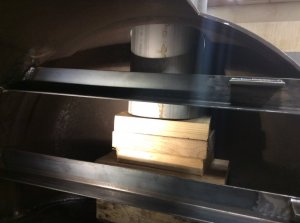
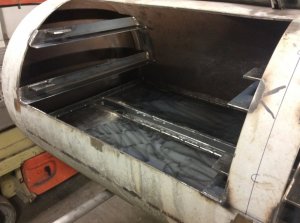
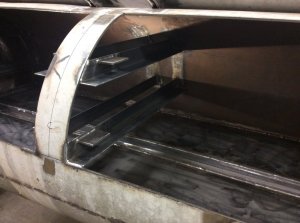
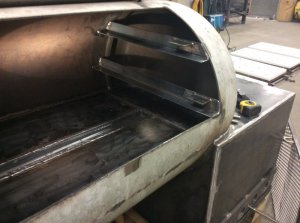
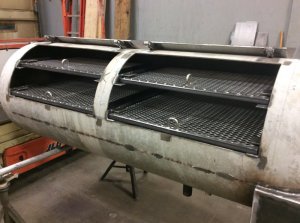
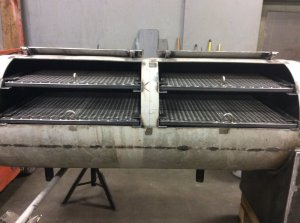
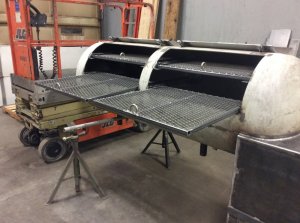
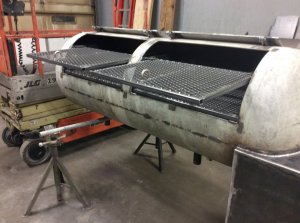
Got cooking grate rails welded in and cooking grates done. Going to start on wood basket for firebox.
Attachments
-
 E034B847-6C48-4520-B883-069FD23DBF9F.jpeg112 KB · Views: 2,003
 -
 5D0A8DB4-8BF6-4CCB-B7B1-4BCC240D9260.jpeg110.9 KB · Views: 1,791
 -
 3DE400A4-275F-4C5F-A8F3-86E22D8A9374.jpeg114.1 KB · Views: 1,779
 -
 03443726-82E6-4848-A9D7-8BA95802E861.jpeg130.3 KB · Views: 1,777
 -
 524A4039-94E4-4F57-BA2F-4B29AFC8A0A3.jpeg119 KB · Views: 1,701
 -
 6C6C4AB0-6D65-4AA9-BF4A-935E51E1AD98.jpeg136.5 KB · Views: 1,750
 -
 32233A40-5C43-4931-A9DF-311FF6A06B4C.jpeg127.4 KB · Views: 1,753
Scott Eisenbraun
Smoking Fanatic
No. My wife and I do cooks every summer for all of the volunteer fire departments in our area. Was borrowing a smoker so I decided to just build my own.Looks like you can see daylight on this build. Are you going to do some catering?
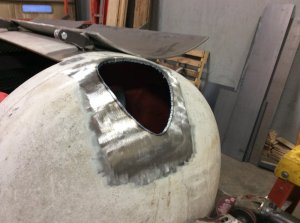
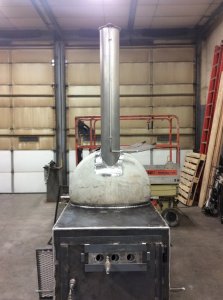
Have a little more grinding to do so the stack fits level to CC. How far into the CC does the stack need to extend? Should it be cut at an angle or left strait? I have seen many different ways on here. What works best? Maybe some of the experts could help me with this.
Attachments
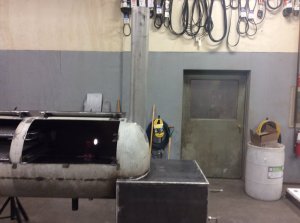
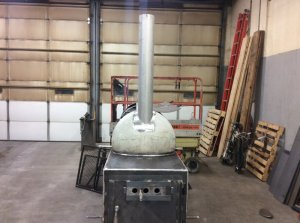
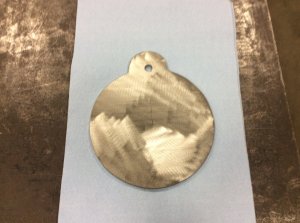
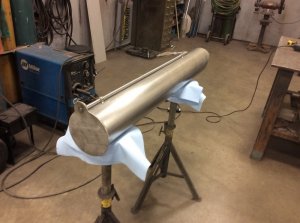
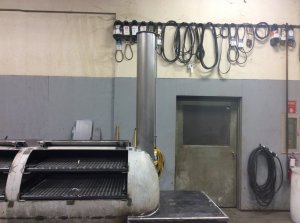
Today worked on getting the stack damper made and put on pipe. Got the stack tack welded to CC. Ran out of 1/8” tig rod. Have more Monday so I can finish welding on stack. I guess next will be adding metal door seals and ports for thermometers.
Attachments
-
 224BF67C-7F6D-49EE-B115-21A762E5652D.jpeg126.3 KB · Views: 1,512
 -
 27276270-06A9-4B14-968C-4693C8030469.jpeg110.3 KB · Views: 1,496
 -
 5E000D8E-D882-4162-BA65-6439A860ADD8.jpeg94.3 KB · Views: 1,486
 -
 4A566151-D3D5-44E1-9D94-40B8A29AF303.jpeg120.8 KB · Views: 1,478
 -
 806D45B9-DF4D-4DE3-84DD-363F6C3D96EF.jpeg108.8 KB · Views: 1,432
InThePittBBQ
Smoke Blower
Thank you. This is my 1st smoker build. Kinda figuring it out as I go. Have looked at a lot of pics on this site to get ideas. Hope this thing works ok.That is some impressive fabrication work, well done!
kmmamm
Meat Mopper
- Apr 30, 2016
- 238
- 87
Nice progress! We have been away for awhile and I missed you question about how stack location. My first couple builds (done in the dark days of black iron and fire.....long before answers magically appear on the internet) were straight forward stack to cc designs. While they were very ascetic looking, both had drafting issues which took numerous reworks to resolve. Once I started building plenums, draft issues related to exhaust were eliminated. But even then, it took quite a bit of exhaust rework to finally get the cc temps evened out across the racks. Long story to simply say that I have found the sweet spot for the bottom of the plenum seems to be about 1-2 inches above (and centered on) the bottom rack.
InThePittBBQ
Smoke Blower
I was just looking over the pics again, I really like the spacing between the top and bottom racks on this build. Plenty of room for larger tall cuts on the bottom and chicken, country style, ribs etc. fit easily on top.
I can't wait to see this finished, if it cooks as good as it looks this is going to be a tough act to follow!
I can't wait to see this finished, if it cooks as good as it looks this is going to be a tough act to follow!
I didn’t build a plenum. The stack is centered and extends down in the CC to 3 inches above bottom cooking grate. Hope this works ok. Looked at a lot of designs and pictures and went this route.Nice progress! We have been away for awhile and I missed you question about how stack location. My first couple builds (done in the dark days of black iron and fire.....long before answers magically appear on the internet) were straight forward stack to cc designs. While they were very ascetic looking, both had drafting issues which took numerous reworks to resolve. Once I started building plenums, draft issues related to exhaust were eliminated. But even then, it took quite a bit of exhaust rework to finally get the cc temps evened out across the racks. Long story to simply say that I have found the sweet spot for the bottom of the plenum seems to be about 1-2 inches above (and centered on) the bottom rack.
I measured and measured trying to get the spacing of the racks for the best usage. Hope it works because building one of these is time consuming. My 1st build. I’m sure if I ever do another one it will go faster.I was just looking over the pics again, I really like the spacing between the top and bottom racks on this build. Plenty of room for larger tall cuts on the bottom and chicken, country style, ribs etc. fit easily on top.
I can't wait to see this finished, if it cooks as good as it looks this is going to be a tough act to follow!
Worked today to get the CC doors sprung back into shape with a chain and portapower. Took some time but finally got them. They had sprung out a bit when I cut them. Cut out and welded Stiff backs onto the doors to help hold the correct shape. Ready to start on the CC door strips to cover the cut gap. Also need to figure out what type handles to put on the doors.
Attachments
SmokingMeatForums.com is reader supported and as an Amazon Associate, we may earn commissions from qualifying purchases.
Similar threads
- Replies
- 6
- Views
- 3K
- Replies
- 2
- Views
- 9K
- Replies
- 3
- Views
- 1K
- Replies
- 10
- Views
- 2K
- Replies
- 110
- Views
- 9K
Hot Threads
-
Featured Christmas Eve Lasagna , salad and sourdough
- Started by chopsaw
- Replies: 26
- General Discussion
-
Is my bacon bad? Please help
- Started by hooked on smoke
- Replies: 25
- Bacon
-
Featured Merry Christmas
- Started by pineywoods
- Replies: 22
- Blowing Smoke Around the Smoker.
-
Cowboy Queso dip on the Egg 🔥
- Started by TimboBBQ!
- Replies: 20
- General Discussion


