all5n
Newbie
- Sep 25, 2015
- 27
- 15
Hey everyone!
Fairly new to the forum, but have been lurking for a while. As promised in my roll call post, i wanted to share my build experience on this smoker.
I started out 10 or so years ago with a Bar-B-Chef from bbqsgalore. That recently gave up the ghost. My neighbor and I decided to build our own stump clones. His was first, and we over-shot a little. It will easily smoke about 28 briskets.
For mine, we scaled it down to something sane. This one will only hold about 8 briskets.
I learned to weld during this process (and got too good with the angle grinder), and took over the garage for a month or so (the wife was not pleased). But the end result she is more than happy with.
I have a visio diagram with the design/schematic and all the cuts, if anyone is interested. Drop me a PM.
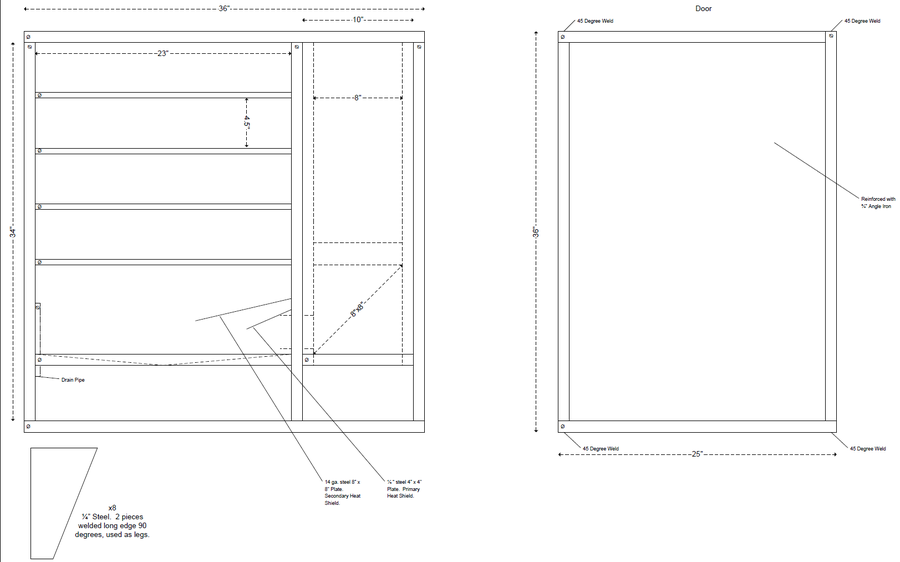
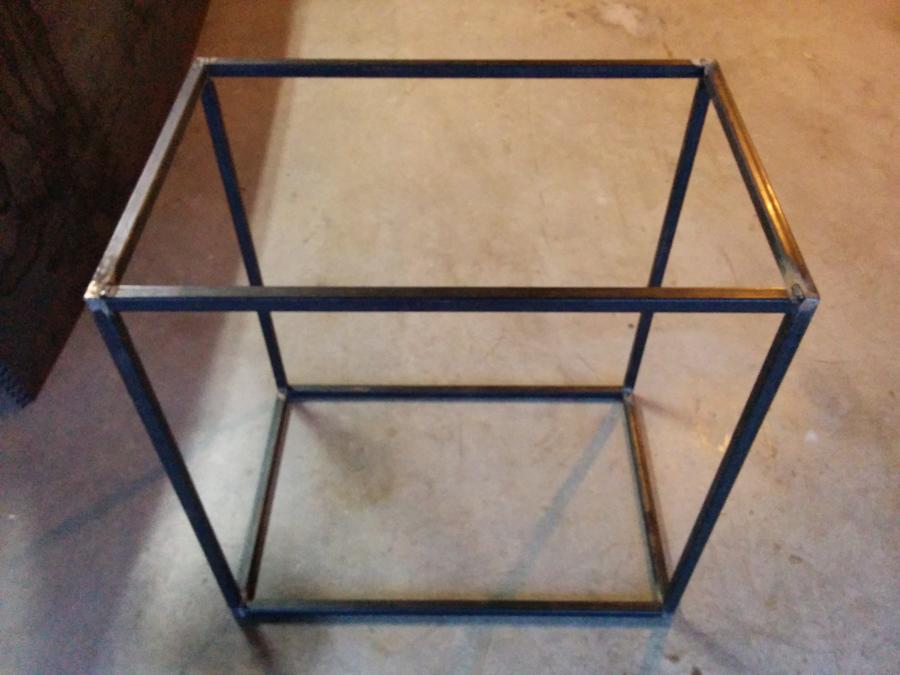
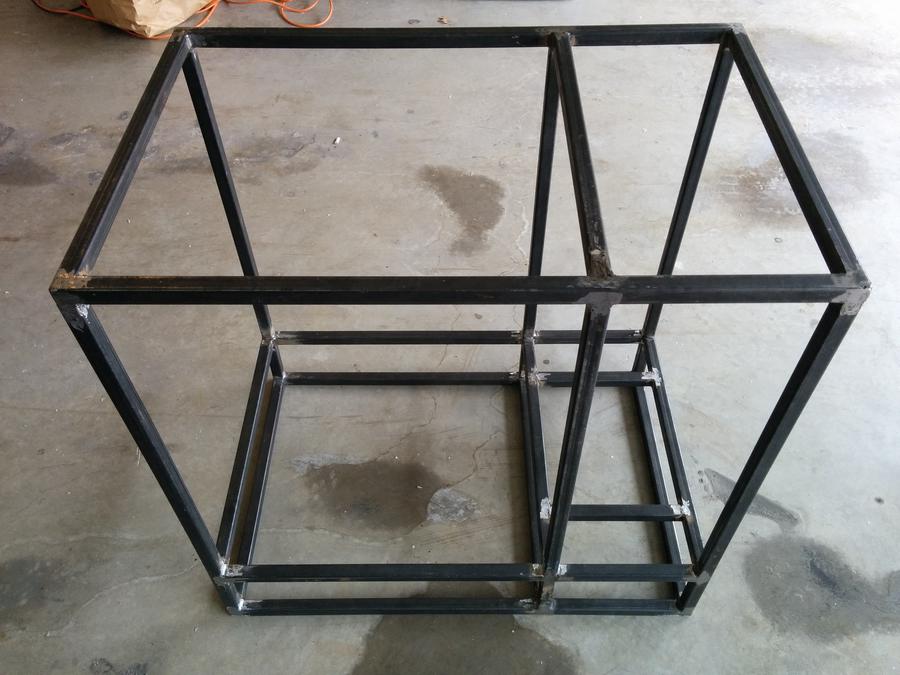
The basic frame. 36h x 36w x 24d (inches). 4x 90 degree clamps make lining up the welds square easier. This is 1" square tubing.
Cross beams welded in. The project seemed to go fast until this point.
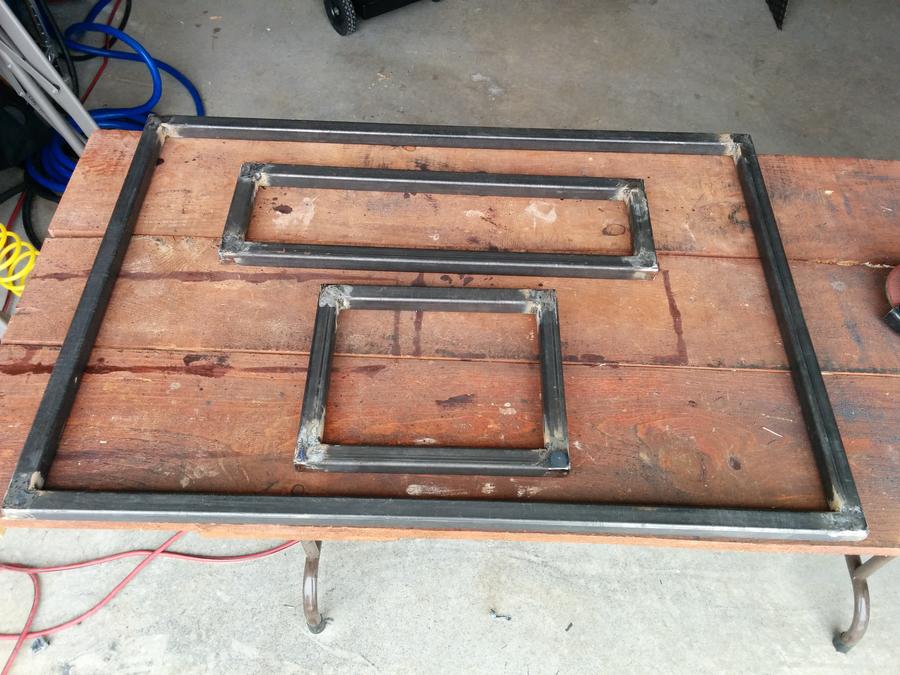
Door frames. Smoke Chamber, charcoal chute, and firebox doors.
Mineral wool for insulation. This is the smoke chamber door before i welded the sheet metal to close it up. Used 14 gauge sheet metal and a handy plasma cutter to cut the pieces.
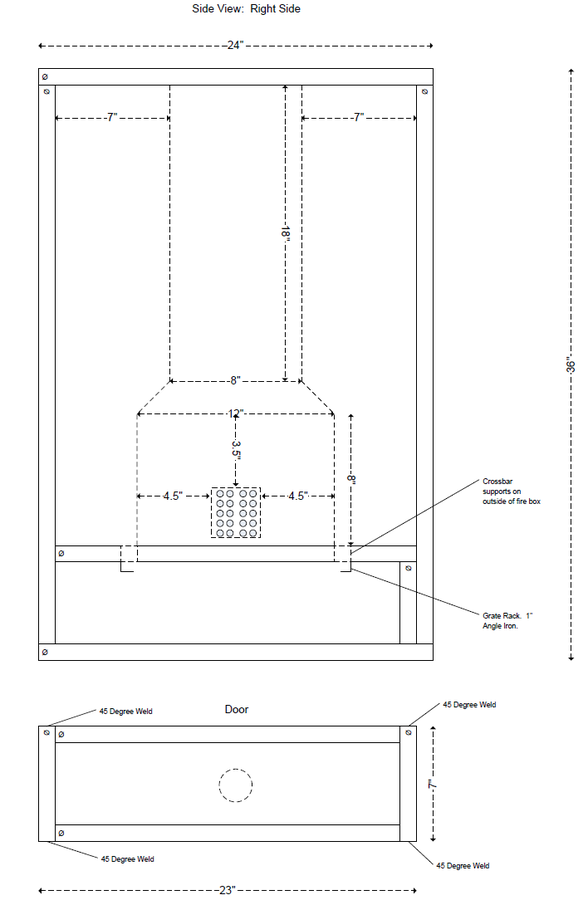
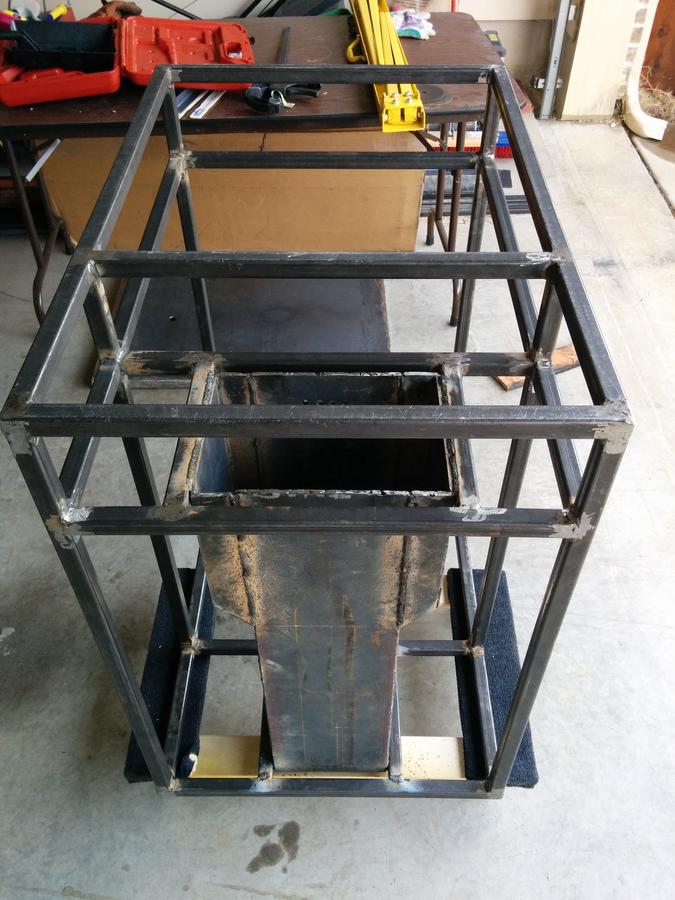
Fire box and chute is made from 1/4" steel plate. The welder got a workout putting it together. The firebox is 8x12 at the bottom. The chute is 8x8.
Smoker is upside down in this picture.
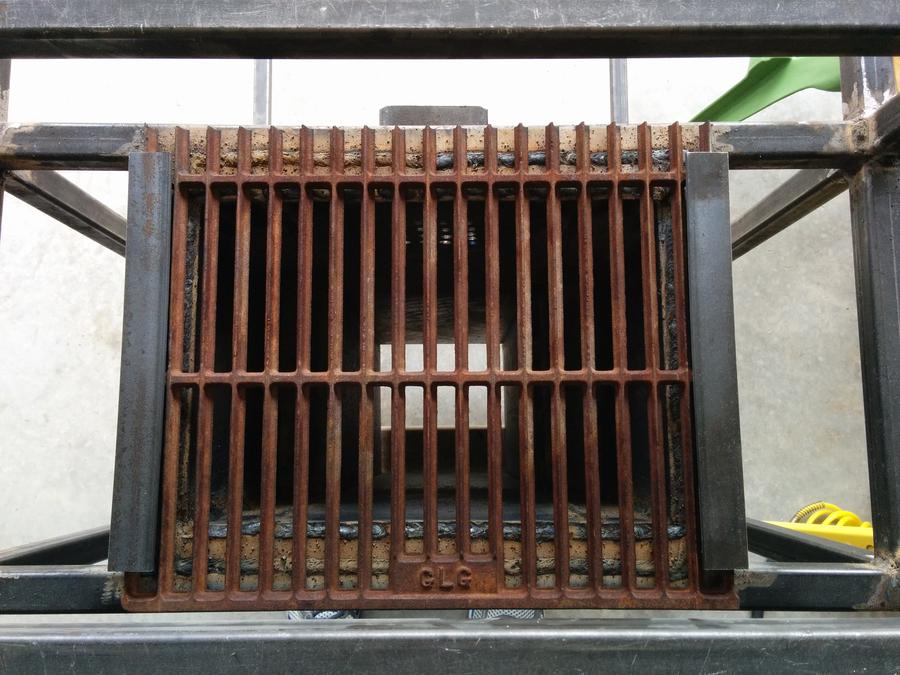
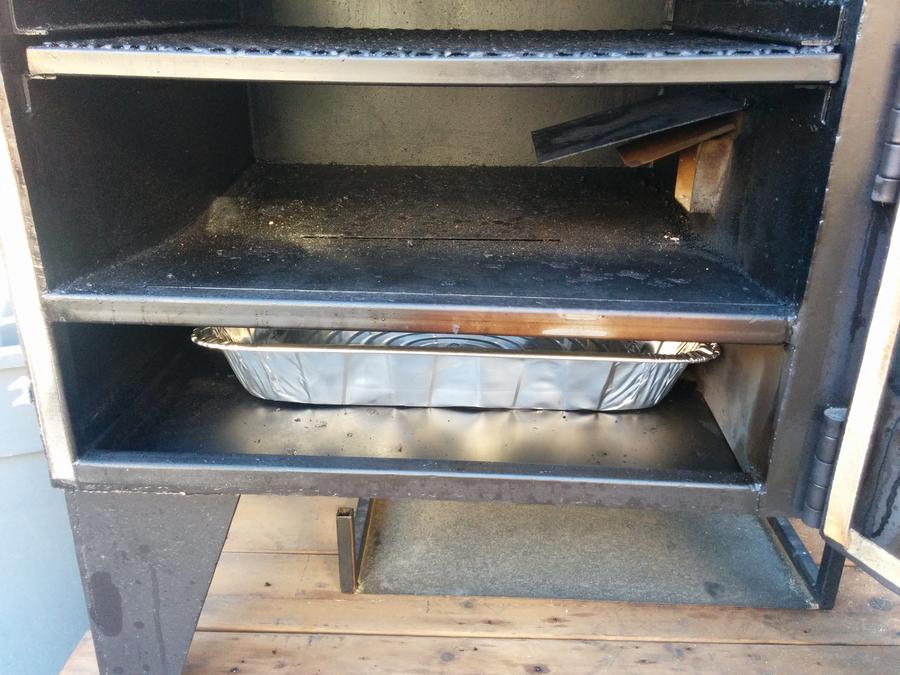
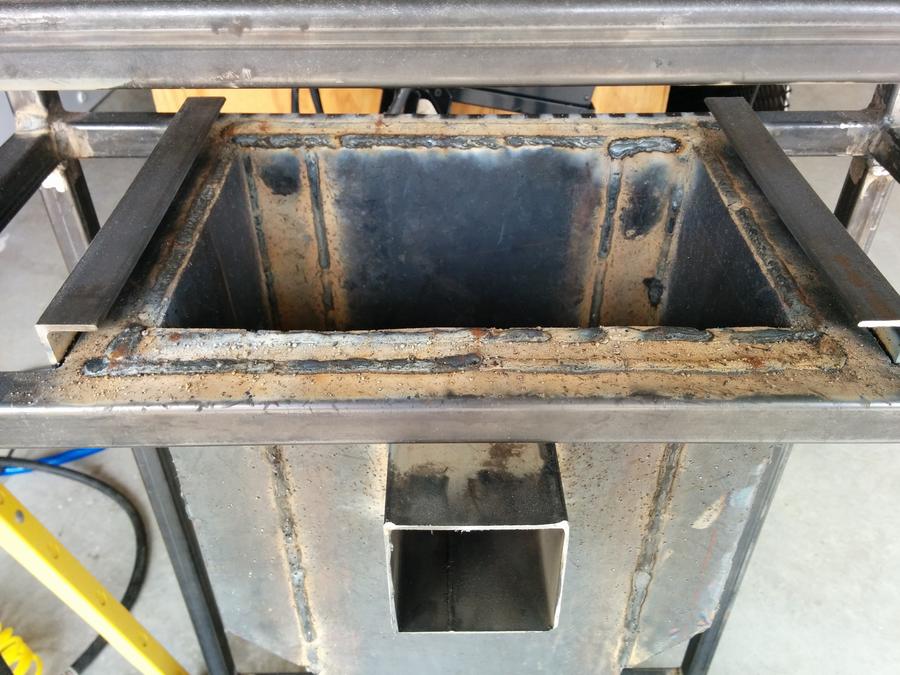
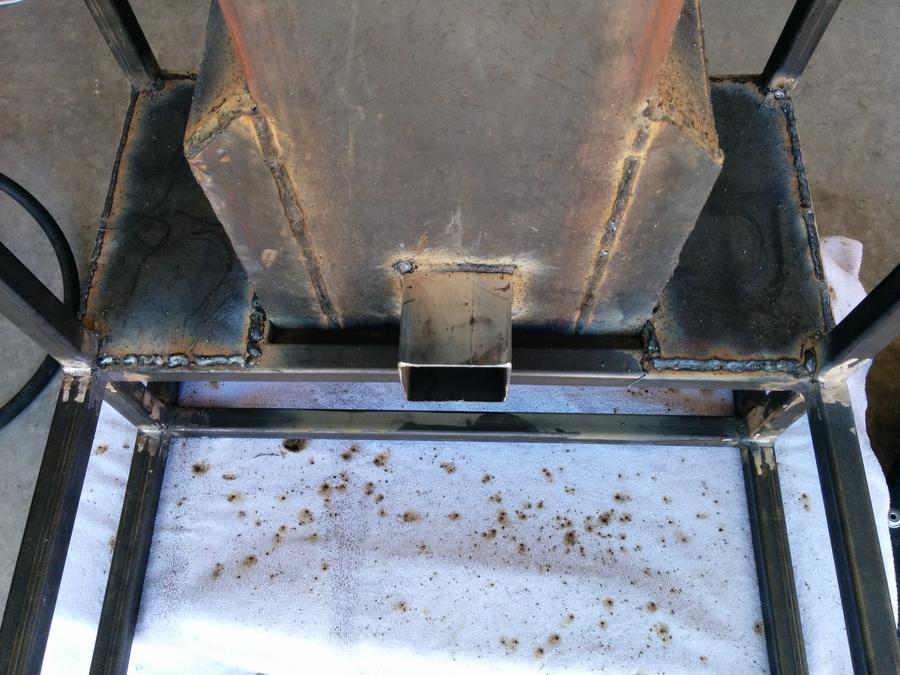
Smoke vent from firebox to smoke chamber. You can also see the angle iron used as a slide for the grate at the bottom of the fire box. Makes for easier cleaning/replacement. Used one of the grates from my old bar-b-chef to make the firebox grate.
Smoker is upside down in this picture.
Starting to seal off the chute area.
Smoker is right side up in this picture.
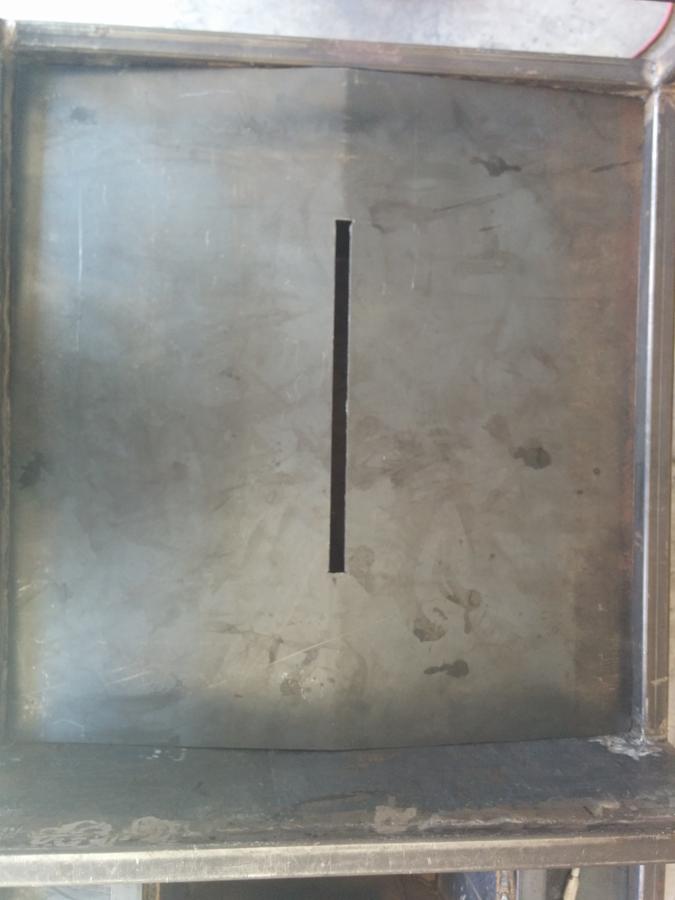
Angled drip catch at the bottom of the smoke chamber. Used a makeshift metal break to give it a slight angle.
Smoker is upside down in this picture.
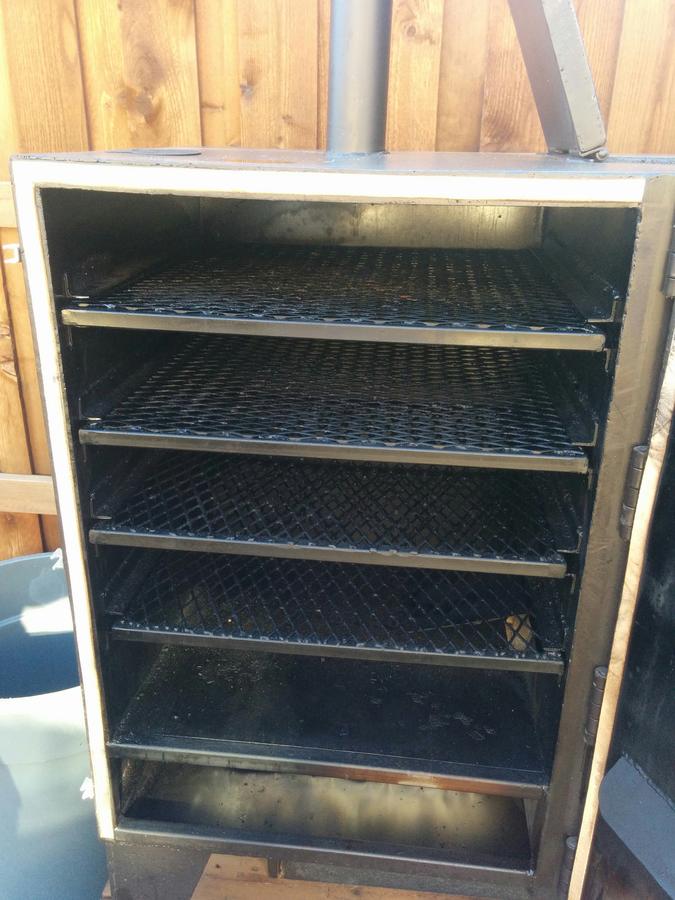
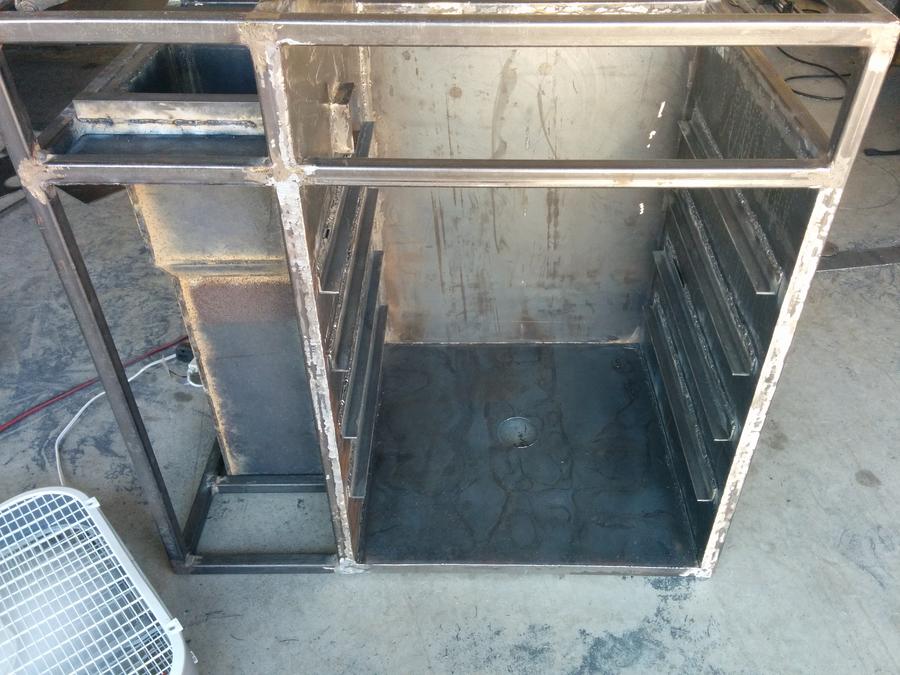
Inside skin done with rack slides welded in.
Smoker is upside down in this picture.
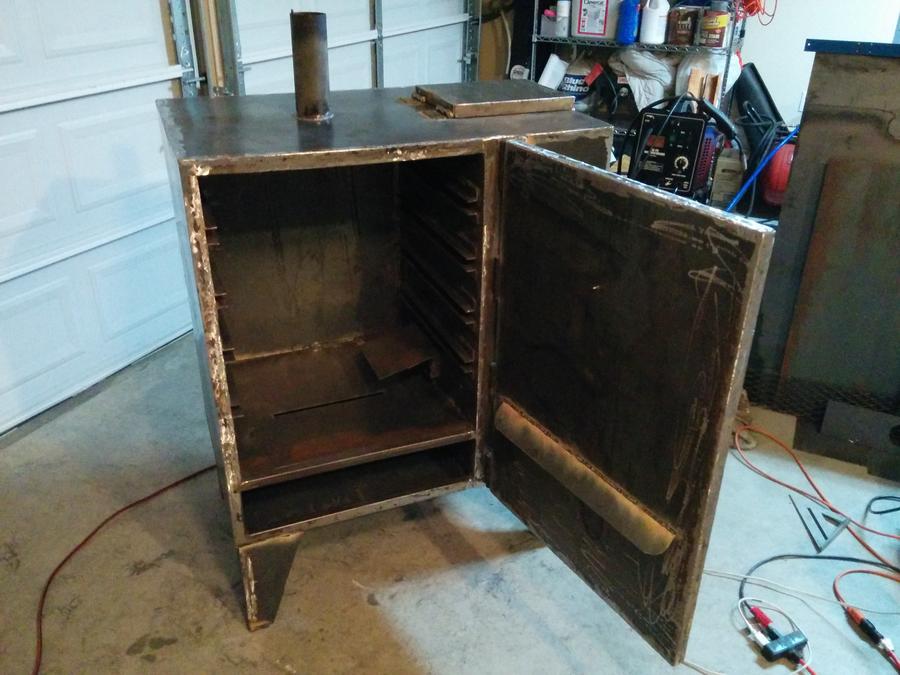
Outside Skins complete with doors welded on. No latches yet in this picture. You can also see the dual heat shields on top of the firebox chamber port. Used the chimney from my old bar-b-chef.
Possibly the hardest part to this process was loading the beast up and taking it to have it sandblasted/painted. Took 3 people to muscle this thing around.
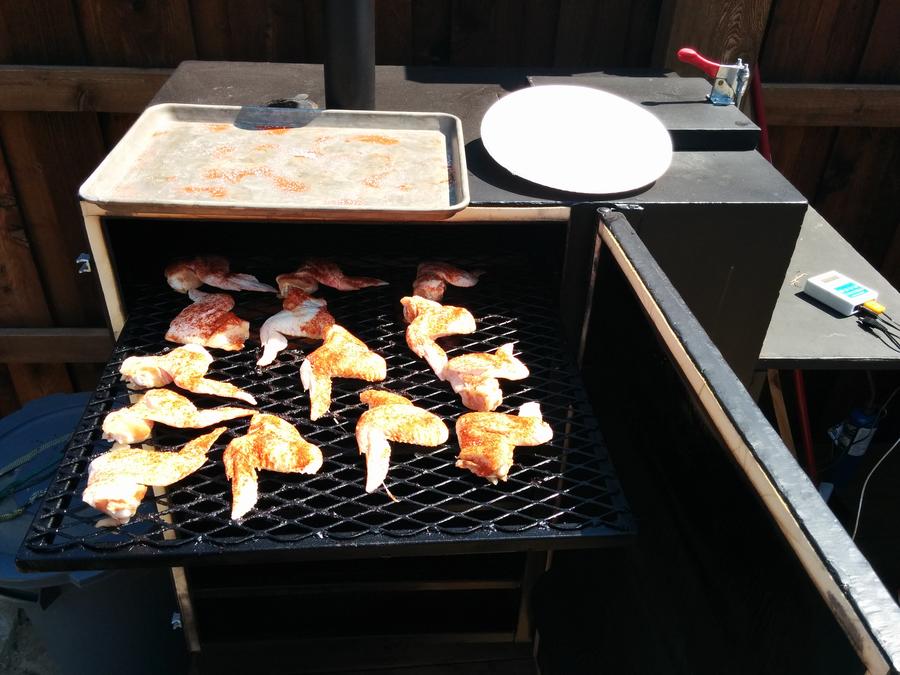
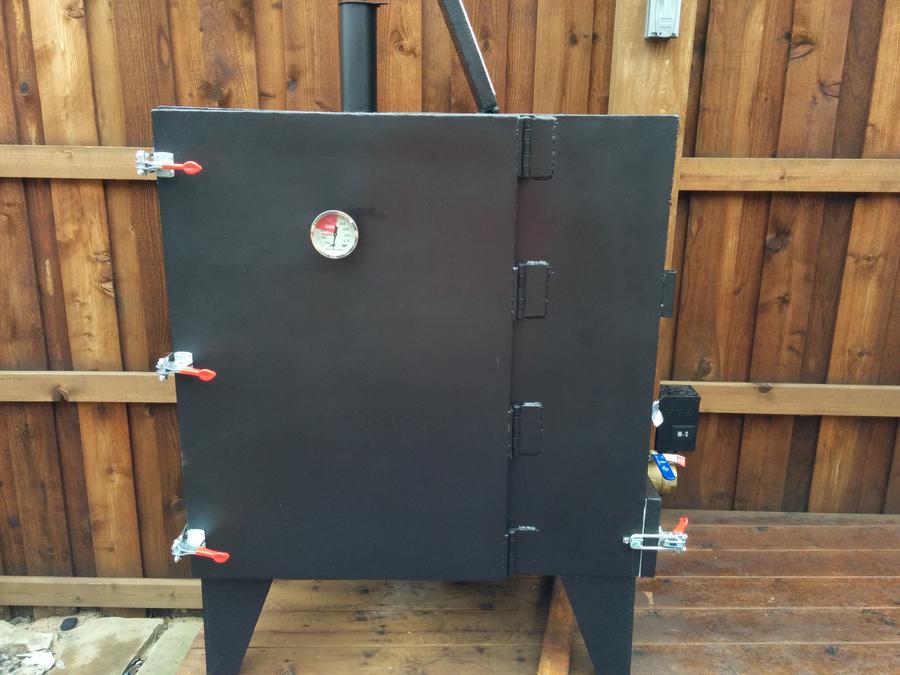
Here is the finished product.
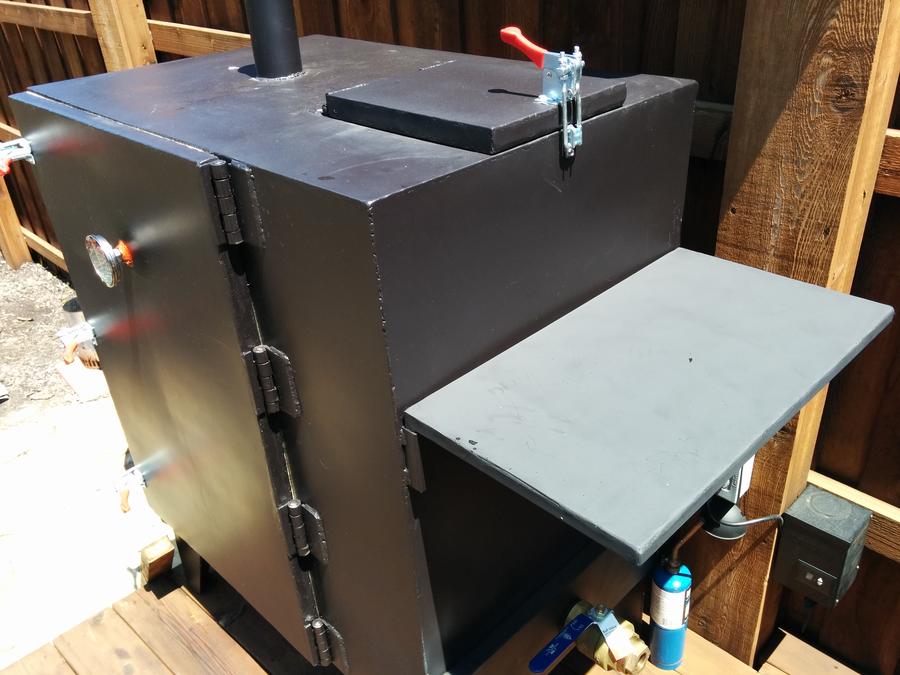
I finally got around to making a side table, and the paint i used didnt quite match :/
Thanks for looking guys. Let me know if you have any questions.
-allan
Fairly new to the forum, but have been lurking for a while. As promised in my roll call post, i wanted to share my build experience on this smoker.
I started out 10 or so years ago with a Bar-B-Chef from bbqsgalore. That recently gave up the ghost. My neighbor and I decided to build our own stump clones. His was first, and we over-shot a little. It will easily smoke about 28 briskets.
For mine, we scaled it down to something sane. This one will only hold about 8 briskets.
I learned to weld during this process (and got too good with the angle grinder), and took over the garage for a month or so (the wife was not pleased). But the end result she is more than happy with.
I have a visio diagram with the design/schematic and all the cuts, if anyone is interested. Drop me a PM.
The basic frame. 36h x 36w x 24d (inches). 4x 90 degree clamps make lining up the welds square easier. This is 1" square tubing.
Cross beams welded in. The project seemed to go fast until this point.
Door frames. Smoke Chamber, charcoal chute, and firebox doors.
Mineral wool for insulation. This is the smoke chamber door before i welded the sheet metal to close it up. Used 14 gauge sheet metal and a handy plasma cutter to cut the pieces.

Fire box and chute is made from 1/4" steel plate. The welder got a workout putting it together. The firebox is 8x12 at the bottom. The chute is 8x8.
Smoker is upside down in this picture.
Smoke vent from firebox to smoke chamber. You can also see the angle iron used as a slide for the grate at the bottom of the fire box. Makes for easier cleaning/replacement. Used one of the grates from my old bar-b-chef to make the firebox grate.
Smoker is upside down in this picture.
Starting to seal off the chute area.
Smoker is right side up in this picture.
Angled drip catch at the bottom of the smoke chamber. Used a makeshift metal break to give it a slight angle.
Smoker is upside down in this picture.
Inside skin done with rack slides welded in.
Smoker is upside down in this picture.
Outside Skins complete with doors welded on. No latches yet in this picture. You can also see the dual heat shields on top of the firebox chamber port. Used the chimney from my old bar-b-chef.
Possibly the hardest part to this process was loading the beast up and taking it to have it sandblasted/painted. Took 3 people to muscle this thing around.
Here is the finished product.
I finally got around to making a side table, and the paint i used didnt quite match :/
Thanks for looking guys. Let me know if you have any questions.
-allan
Last edited: