Who roasts their own coffee on their BBQ or Grill?

  • Some of the links on this forum allow SMF, at no cost to you, to earn a small commission when you click through and make a purchase. Let me know if you have any questions about this.
SMF is reader-supported. When you buy through links on our site, we may earn an affiliate commission.
This may be my last post on this thread. It is pic heavy and shows the whole prep, roasting, cooling, and resting process for those interested.

Before Christmas I picked up a 5 lb bag of Mexican green beans I ordered from Amazon for less than $6/lb. This is NOT the store-bought Mexican Organic I showed above for the off-gassing comparison. I was going to use home roasted Mexican to make gifts of Mexican Kahlua, but didn't really care for the taste on some samples I roasted, so I used a store-bought, pre-roasted Mexican Organic bean I knew would work for the gifts.

The Mexican bean I roast makes great espresso though, acceptable cold brew, and really good Mexican Irish Coffee (espresso, brown sugar, Irish whiskey, and whipped cream), although the other ingredients might make a slight influence on my taste buds.

Below is this morning's roast of 10 oz of Mexican green beans.

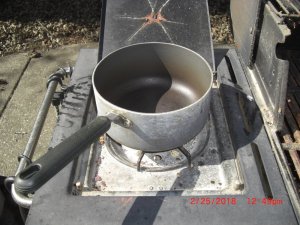
My original roasting set-up. Just a pan on the 12,000 BTU burner.
001 - Old Set up.JPG

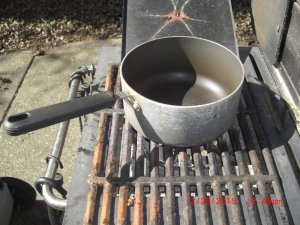
My second roasting set-up. I used one of the gas grill grates from my unused gas grill to try and more evenly spread out the heat. It worked, but too well, extending my roast times. Plus, I had to hold onto the pan handle the entire time.
002 - Next Set Up.JPG

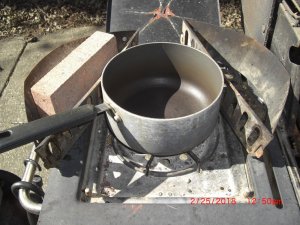
I've settled on the roast set up below. I can just stir, take pics, whatever. My charcoal baskets and a brick make for a nice anchor. I don't have to hold onto the pan at all.
003 - Current Set Up.JPG

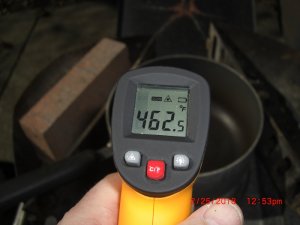
Pan pre-heated on high heat to 450F+. Ready to load the beans.
006 - Ready To Load Beans.JPG

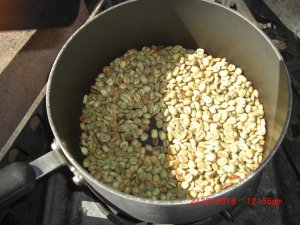
Green Mexican beans loaded.
007 - Green Beans in Pan.JPG

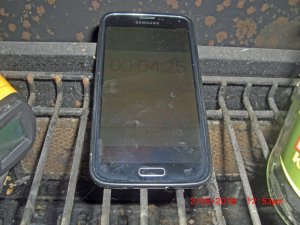
Start timer.
008 - Start Timer.JPG

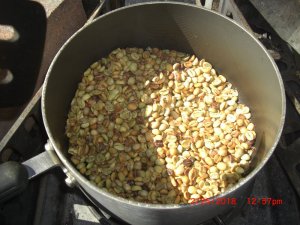
Stir continuously. Here are the beans at 1 minute. Any brown you see at this point is chaff on the bean:
009 - One Minute.JPG

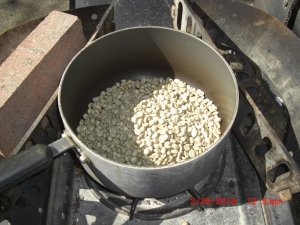
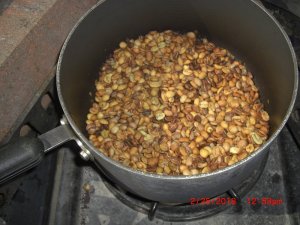
Keep stirring. I use kind of an "S" pattern as I stir. At 2 minutes, some beans are starting to scorch. I turn the heat down to "medium" when I see it happening.
010 - Two Minutes.JPG

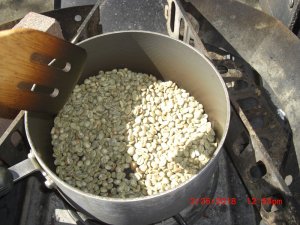
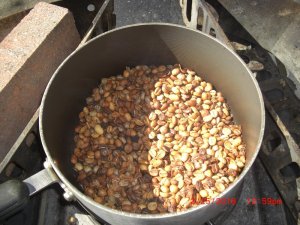
Keep stirring. At 3 minutes the scorching wasn't slowing down, so I turned the heat to low. Notice how the beans are already changing color from light green to greenish-yellow.
011 - Three Minutes.JPG

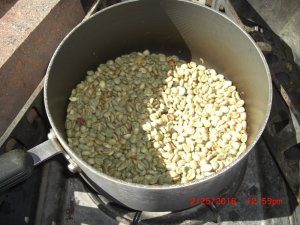
Keep stirring. At 4 minutes the color change is quite noticeable.
012 - Four Minutes.JPG

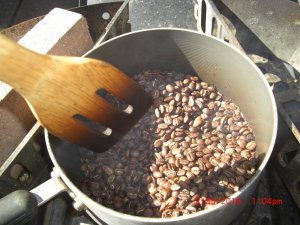
Keep stirring. At 5 minutes, the beans are well on their way to being roasted. You'll be getting some smoke, and chaff starts to flake off the beans.
013 - Five Minutes.JPG

Okay, SWMBO is sending me on an errand. I'll be back in a little while to finish the thread in another post.
 
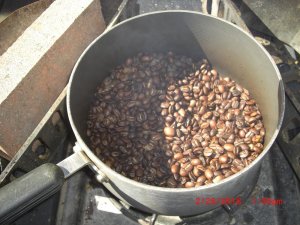
Keep stirring: At 6 minutes, give or take a minute, you'll start hearing the "pop" of "first crack." Depending on the moisture content of the beans, you may even see a bean or two jump across the pan when it cracks.
014 - Six Minutes.JPG

Keep stirring: At 7 minutes, you start to really notice chaff as first crack continues. At this point I step out of the smoke, take a deep breath, and blow into the pan. Chaff goes EVERYWHERE! But it's kind of fun.
015 - Seven Minutes.JPG

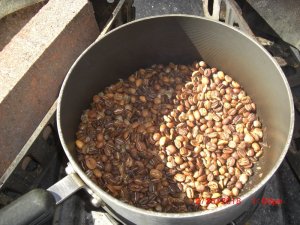
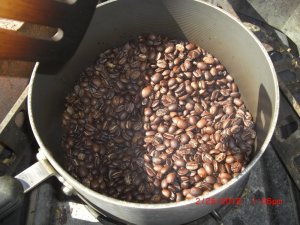
Keep stirring: At 8 minutes, there's usually all kinds of popping. Beans from different countries will roast differently. Some roast faster, like the African beans. This Mexican roasts a slower.
016 - Eight Minutes.JPG

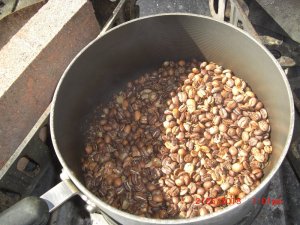
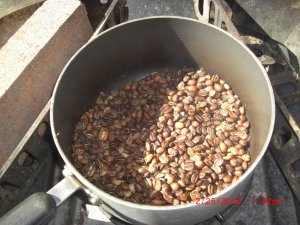
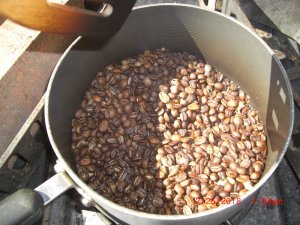
Keep stirring until the desired roast temp is reached: 9, 10, 11, and 12 minutes are shown below. Then the smoke at 12 minutes, which is pretty much what it looks like from about 6 minutes until you're finished.

9 minutes:
017 - Nine Minutes.JPG

10 minutes:
018 - Ten Minutes.JPG

11 minutes:
020 - Eleven Minutes.JPG

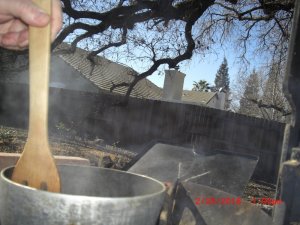
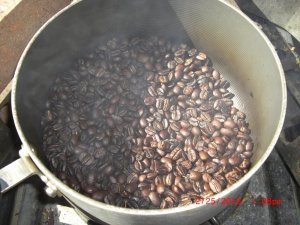
12 minutes, and 12 minute smoke: Usually at this point you are into the "second crack." It sounds like Rice Krispies.
021 - Twelve Minutes.JPG
022 - Twelve Minute Smoke.JPG

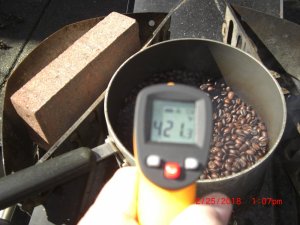
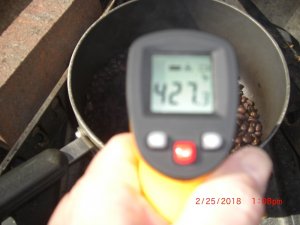
13 minutes and Temp check. I'm into my 20-something roasts, so I'm getting to the point I can visually tell when I am at my desired level. I knew this wasn't ready, but I wanted to show how fast things progress toward the end.
023 - Thirteen Minutes.JPG
024 - Temp Check 13 Minutes.JPG

14 minutes, and temp check indicating I had reached my target of 425-430F bean temp.
025 - Fourteen Minutes.JPG
026 - Temp check just before 15 minutes.JPG

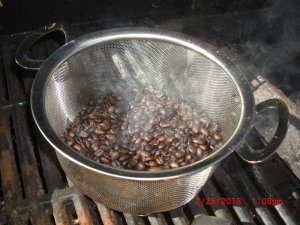
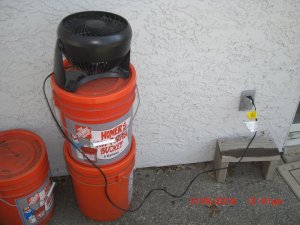
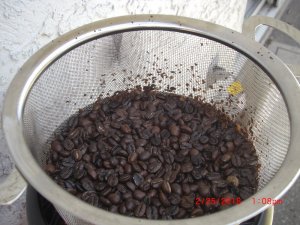
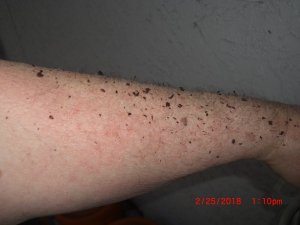
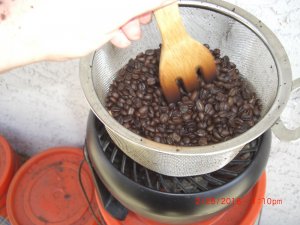
Time to dump the beans into a colander and then put them over a $15 Wally World fan to stir, de-chaff, and cool. Chaff goes EVERYWHERE from the fan, so stand downwind. They only take about 2-3 minutes to reach ambient temp.
027 - Dump Hot Beans.JPG
027a - Fan for Cooling Hot Beans.JPG
028 - Cooling Beans on Fan.JPG
031 - Chaff everywhere.JPG

Now the beans are cool. Time to brush off the chaff, take inside, and prep them to rest.
032 - Beans are cool.JPG

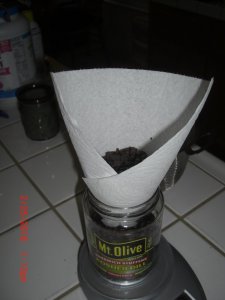
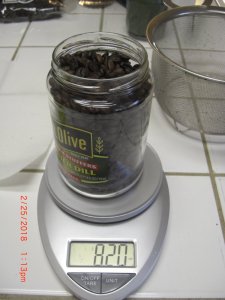
A rolled-up half-sheet paper towel makes a quick and easy funnel. I zero out my scale then dump the beans into a clean jar. Remove the funnel and check the weight of the beans. 10 oz green became 8.2 oz roasted. Right on my target of 8.2 to 8.25 oz.
034 - Funnel and Jar Full.JPG
036 - 82 Percent Final Product.JPG

I don't have a pic, but I put a piece of masking tape on the top. Write the type of bean, roast date, and final weight in percentage. For this roast the label reads, "Mexican. 2/25/18. 82%." I loosely put the lid on the jar and let it sit for 24 hours. It off-gasses during that time. Then I seal the jar and wait until 96 hours have passed, grind 40 grams, and make a 16 oz mug of coffee.

CYA!

Ray
 
Since posting the above pics I have experimented with my roasting process by putting the beans in the pot when the pot temp is 380-400F, then roasting more quickly (10-11 minutes) to a final temp of 425F. I've done four roasts since 2/25, and tasted three (one is still resting).

The beans are maintaining more weight (83.5% to 85% of green weight) and definitely tasting different than the previous 12-15 minute process I was using. They are more complex tasting, meaning they are maintaining more of the character of the bean. I'm seeing MUCH less (or no) oil on the glass of my jars used to hold the roasted beans. In one of my earlier posts I said I wasn't crazy about the Kenya beans. Scratch that. With this change in process, they taste fantastic! I've put them back on the reorder table.

Interesting. I need change my setup so I have more control over roasting but I only have my crappy little electric burner lol. I was really eyeballing the Kaldi Mini Coffee Roaster and getting a propane burner for it. I just can't justify the cost though since I don't even drink the coffee I'm roasting hahaha.
It is still fun to roast it and everyone loves what I'm making with my little gimpy setup :)
 
My wife and I have learned that if you see something you want at Costco, especially if they normally don't carry it, buy it then or it may not be available later. Turns out buying coffee from Sweet Maria's is kind of the same thing. Two days ago I made a list of coffees I want to buy. Today, when I was ready to order some more green coffee, two of the ones on the top of my list were not available: a Costa Rica Helsar and an Ethiopian Yirga Cheffe. I guess with them, if you snooze you lose. Lesson learned!
 
My wife and I have learned that if you see something you want at Costco, especially if they normally don't carry it, buy it then or it may not be available later. Turns out buying coffee from Sweet Maria's is kind of the same thing. Two days ago I made a list of coffees I want to buy. Today, when I was ready to order some more green coffee, two of the ones on the top of my list were not available: a Costa Rica Helsar and an Ethiopian Yirga Cheffe. I guess with them, if you snooze you lose. Lesson learned!

Yeah I hear ya and it sucks :(
I tried finding Mexican Vanilla beans to try and make some vanilla like in your other thread and man there seem to be none to be had in the world lol
 
Yeah I hear ya and it sucks :(
I tried finding Mexican Vanilla beans to try and make some vanilla like in your other thread and man there seem to be none to be had in the world lol

And I hear you! Poor harvest in 2016, a vanilla blight in certain parts of the world, farmers cutting back on their harvest due to a glut, plus higher demand have driven up the prices of vanilla beans.

If I see the price of green coffee beans increasing, I'll buy 50 lbs, enough to last me two years.
 
Ray... This coffee roasting has become a thing for us now. I'm embarrassed to say how much I have spent at Sweet Marias in the last couple of months. Lets just say I am really enjoying their Sample packs to try all different kinds. What surprised me the most is their house "blends", which are at the top of my list so far.

Oh... and I am now able to roast 1lb of green beans at a wack now too!
 
I hear you, Erik. I've been under the weather for the last few days, but dragged myself off the couch today to roast some Rwandan coffee. I was getting low on roasted beans and needed to roast another batch so they could rest properly.

I'll definitely have to try Sweet Maria's house blends. It would be interesting to know if they are just blending up the remnants of beans, or using their superior skills and taste buds to find just the right blend.

I've tried some Sumatra from them. Not one of my favorites.

I've added a small hair dryer to my roasting process. I'll use it to blow away the chaff while roasting, turning it on three or four times during the roast. Works GREAT!
 
I've added a small hair dryer to my roasting process. I'll use it to blow away the chaff while roasting, turning it on three or four times during the roast. Works GREAT!

Ditto! I use a heat gun, but a hair dryer would work also. I started out with a smaller pot/pan and would blow out the chaff while I roasted. Now I use a bigger pot (and more beans) and blow out all the chaff AFTER it is roasted out in the yard with the heat gun. Way less mess.

The sample packs generally have the last bit of odd quantities of their beans. Some are blends, some are not. They also have "tail ends" you can order specifically that are NOT blends. The one particular blend that stood out for me was called something like Espresso Blend Workshop #2. But it's not listed on their stocked merchant pages now so I presume that was the last of it. Judging by the name of it, I'm guessing there is some in-house "workshop" engineering going into the blends vs just some random floor sweepings. The workshop #43 is next on my try list to try. Sounds delicious and perfect.
 
Hey guys any input on the use of one of these coffee roasting devices? They go over an open flame burner.

I was thinking of grabbing one so I could get more consistent. I would replace the analog thermometer with a digital electric one, it's just held in place by an arm and can be swapped easily. The 1st pic doesn't show it but the thermometer goes in the hole in the end to measure temp. It does not sit where it is located in the pic, they just moved it out of the way.

Kaldi Mini (electric but they make hand crank ones too) below:
s-l500.jpg


Kaldi Home Roaster - electric motor but they make hand crank ones too, also goes over a flame burner but has more bells and whistles, below:
41pJAFMIAqL._SX355_.jpg
 
I have been looking at those. Very interesting and shiny for sure. But even for that price I think I will keep doing what I am doing. If I get around to it, I want to try making a roasting drum out of the rib rack in my Showtime rotisserie. I'm even thinking I can make something similar to the Cajun Bandit rotisserie with my mini WSM upper over my propane burner with a cordless drill or old window regulator motor. Same concept as the Kaldi.
 
I have been looking at those. Very interesting and shiny for sure. But even for that price I think I will keep doing what I am doing. If I get around to it, I want to try making a roasting drum out of the rib rack in my Showtime rotisserie. I'm even thinking I can make something similar to the Cajun Bandit rotisserie with my mini WSM upper over my propane burner with a cordless drill or old window regulator motor. Same concept as the Kaldi.

Have you checked out RK Drums for potential parts and such?
https://www.rkdrums.com/

They seemed to be put together quite a bit better then some of the youtube homemade stuff :)
 
One more huge piece of the puzzle came together for me recently. I learned A long time ago how to store beans and grind them right before brewing, but I have always used a blade mill type of grinder. I found out how important it is to get the grind right for the type of brewing method as well as measuring by weight- not volume. Mrs. BEV's fully automatic has its own conical burr grinder and measuring system built in, so I am the only one that uses the blade mill now for my French Press coffee. Getting the grind right with a blade mill is not optimal. Either I get black sludge in the bottom of my cup from too fine of grinds or the grinds are too large and there are larger bits of beans that don't extract well. In-between and there is some of both! So I just splurged on an OXO conical bur grinder with integrated scale. I had a coupon saved plus it was a sale so I got a pretty deep discount.

Let me tell you something... What an improvement! With the combination of good beans, home roasting, precise measuring, brewing methods/temperatures, and now precision grinding- each has made a noticeable improvement in my coffee game!

Hahahaha, I'll never be able to keep up :P

That sounds awesome! I love all the info you are providing. Right now I just grind with the Magic Bullet grinder blade.
Next item on the fringe is maybe one of those Kaldi home roasters. After that maybe I would graduate to precise measures and grinding as I totally see the value of precision and accuracy, hence me going full blown HeaterMeter controller on my MES :)
 
I received a Cuisinart Burr Coffee grinder maybe twenty years ago as a birthday gift. I still use it every day. I clean it regularly, but it just keeps going and going and going. Most French Press guides say to use 1.6 to 2 grams of coffee per ounce of water. I use a bit more ground coffee than most folks like in my Clever Dripper or French Press (20 grams/8 ounces water, or 2.5 g/ounce of water), but each morning is like a kiss from the coffee gods.

I just finished pan roasting 13 ounces of Sweet Maria's Burundi green coffee. It is resting as I type. I can still smell the smoke on me as I sit here typing. That smoke is so friggin' sweet and addicting. It's too late in the day for one of my 16 oz morning mugs, but I just might have to fire up my little 3 cup Moka pot for 6 oz of espresso made with Rwandan coffee, then mixed with sweetened condensed milk, to power through the afternoon.
 
You make a good point Ray. I am seeing conflicting use of the word "cup" in how many ounces that means. There are 8 oz to a Cup. But in the coffee world I'm finding out that could be 6, 5 or 4. But who drinks only 4 or even 6 oz cup of coffee? And there is a difference by dry weight vs volume (scoops, TBS, etc) of the grinds.

My French press holds 32 Oz. But I only drink that much on the weekends, so I would make a 24oz on workdays for my travel mug with 3-1/2 to 4 scoops to 24 oz of water. But now I am going by weight and a with consistent coarse grind this changes. With the scale I can measure out in Grams, or by "Cups". Still dialing it all in but so far WAY better flavors!
 
The learning process continues.

When you buy roasted beans in the store, they'll say things like "Kenyan Coffee, Ethiopian Coffee, Mexican French Roast, etc." I made the typical consumer mistake of assuming all coffees from Kenya, Ethiopia, Mexico, whatever, are the same. I've now come to realize that is the same mistake as saying all Scotch whiskies are the same, or all red wines, or all beers. Every coffee farm, cooperative mill, and region in a single country can produce noticeably different green coffee beans due to soil, climate, elevation, milling processes, and storage. Then the roasting process can make a huge difference. I've found that I get different flavors when I pan roast 8 oz of green beans compared to 10 oz, or 12, or 13.

When I come across a green bean I don't care for when roasted, I'll make coffee with the roasted beans, then set the green beans aside for future use. Once I finish roasting other beans I like, I start experimenting with the stuff I don't like.

First lesson: don't roast two different beans in the same pot, say a Sumatran and a Mexican. Roast them separately, then mix. There can be visually apparent differences in the size of roasted beans, which mean they'll roast at different rates. Beans grown at higher elevations are noticeably smaller than beans grown at lower elevations. I've had much better results roasting them separately, then mixing them, than roasting them together.

Second lesson: try to be as consistent as possible with your roasting profile. I remember reading somewhere that learning to roast coffee is a long process. When I first started pan roasting on my gasser, I thought, "Huh, this is pretty easy. I'll get this nailed in no time." And I did, to a point. Then you develop your palate, noticing little flavors you completely missed previously.

I love pan roasting, but now I'm interested in making a drum and using my rotisserie to roast coffee. I still have no interest in buying a coffee roaster, but that may change with time as the learning process continues.
 
And more lessons.

I started experimenting with the grind level and extraction times (how long it steeps) of the green coffees I didn't care for. Grinding the roasted beans to a coarser grind and shortening the extraction time by almost 50% definitely improved the flavor in my Clever Dripper and French Press. Still not crazy about them, but a noticeable improvement.
 
SmokingMeatForums.com is reader supported and as an Amazon Associate, we may earn commissions from qualifying purchases.

Hot Threads

Clicky