My first build

  • Some of the links on this forum allow SMF, at no cost to you, to earn a small commission when you click through and make a purchase. Let me know if you have any questions about this.
SMF is reader-supported. When you buy through links on our site, we may earn an affiliate commission.

aki-

Newbie
Original poster
Dec 14, 2012
16
10
Hi all,

I've been reading forums for some time now and admiring what you guys do, so I decided to build one myself.   I've never used a hot smoker per-say but I have experience with deer jerky and sausage that I've been making in the oven.  I live in Iowa so winter temps can get pretty low and I plan to keep the smoker outside.  In that regard I need a smoker that will hold good temp in coldest weather.

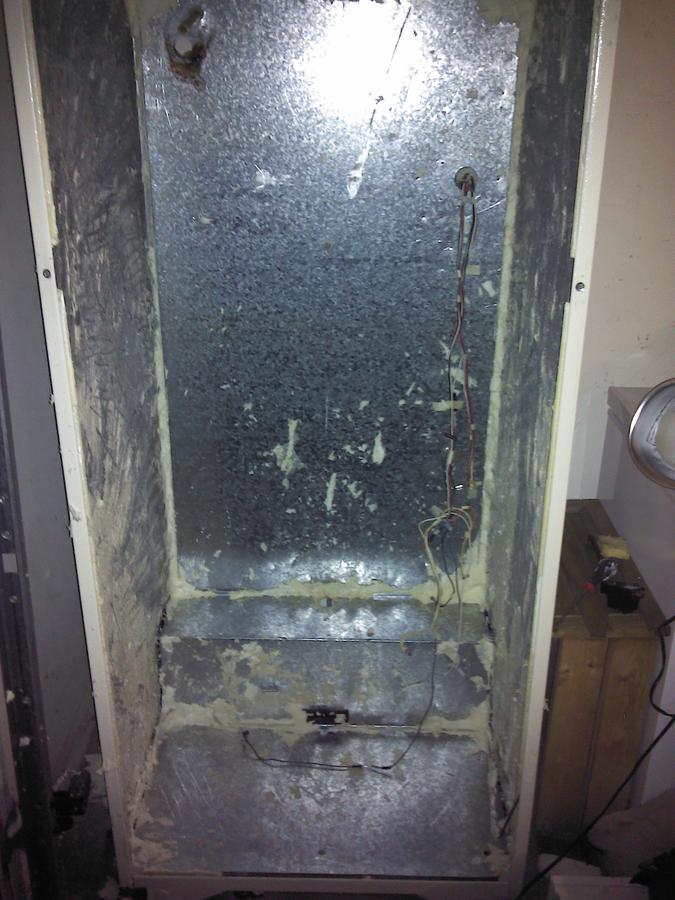
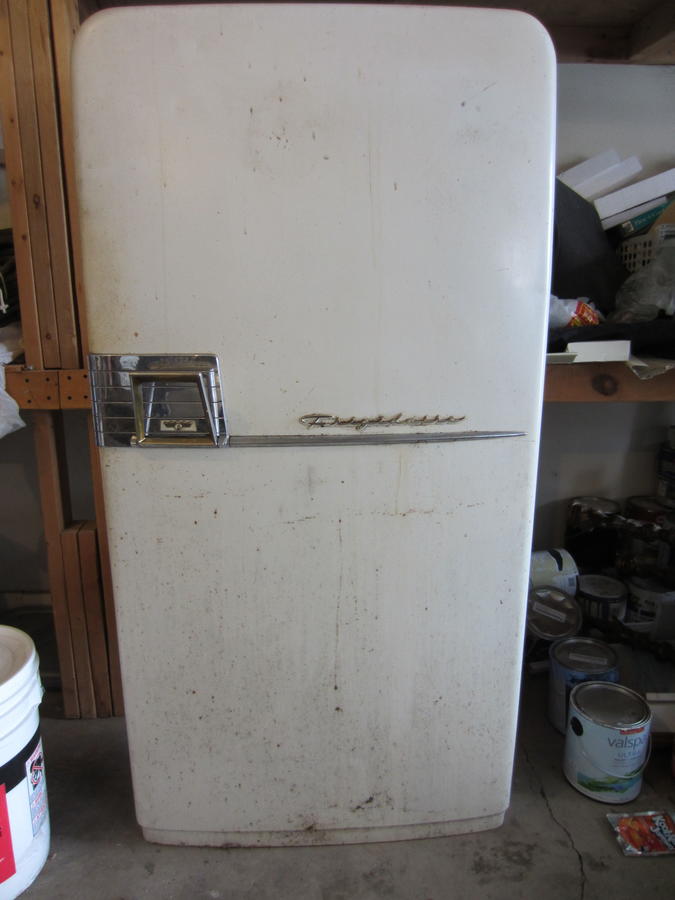
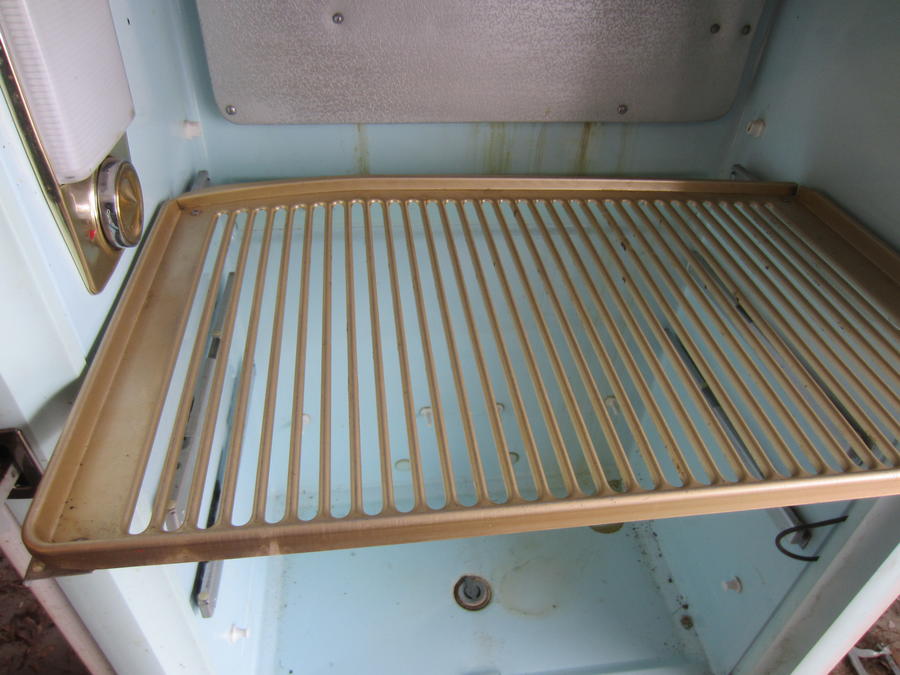
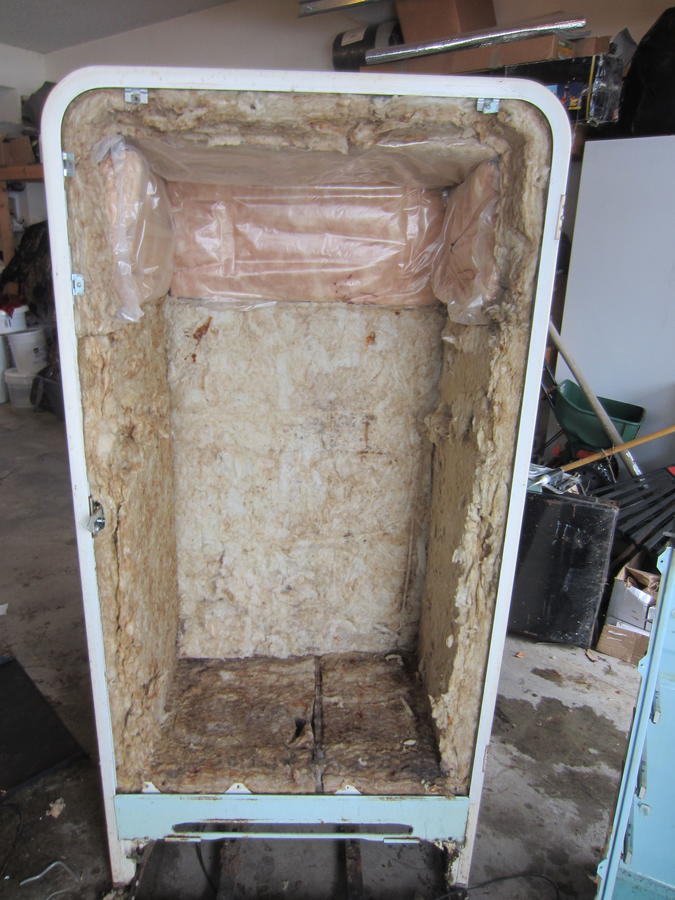
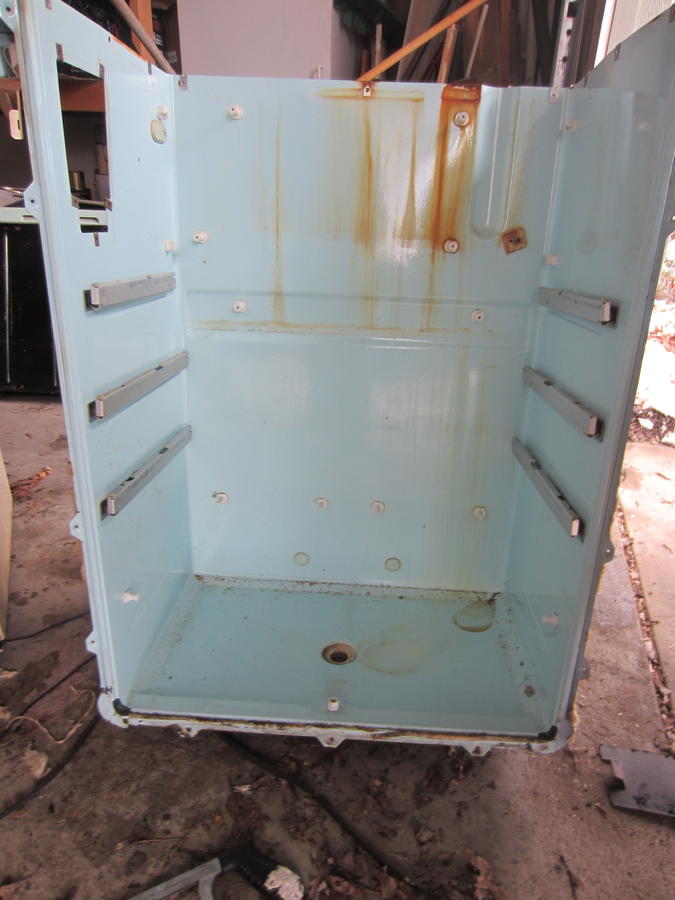
I was not able to find suitable old fridge but "luckily" my garage fridge just died. It's 90's fridge so the inside walls are plastic and the insulation is expanding foam. I've already removed the most of the foam and my plan is to add couple of inches of insulation and create inner shell with aluminum sheeting 0.035 thick.

Couple of questions:  based on the picture do I need to do better job of removing the foam keeping in mind that over it is going insulation and layer of aluminum sheeting?

Is aluminum suitable/safe to use for inner wall of the smoker, and is 0.035 thickness good enough?

Any suggestions are welcome and thank you in advance.

 
Hi Aki-,

I can help you with at least one question. What little foam remained my fridge after scraping, I burned off with a propane torch. My idea was to be better safe than sorry. And the stuff can only burn once, right? It did produce some acrid smoke, so make sure you do it in a well ventilated area and use safety precautions.
 
Yeah that was what I was going to do the next.   So I did it and it worked ok, i still had to scrape some of the thin stuff that adhered to the walls.  I also used my magic oscillating tool which did great job.
 
I am happy today
yahoo.gif
, I was able to find and old fridge for a very reasonable price, 2 of my deer summer sausages
sausage.gif
sausage.gif
.  So my original idea is a scrap and new build is already under way.  I've already gutted the fridge and removed everything that's not going to be used.  I torch tested the existing insulation inside and it looks like it's staying.  I am planing on flipping the insides upside-down so the drain hole that's on the bottom can be reused for the exhaust.  I'll have to do some fabrication for the what's now bottom, where the freezer box was and the front sides  since those were plastic. 

Nice thing about this fridge are the 3 shelf slides that seams to be made out of aluminum, so I am keeping those unless someone knows any reason not to?

Also question on the shelves, those also look like they are aluminum but coated, they are perfect for the grates just don't know if they are safe.  See pic bellow, Anyone has any suggestions or experience with those?

I've already ordered the PID and SSR (Digital PID Temperature Controller+6Ft 25A Relay+K type thermocouple)

and the heating element (1575 Watt Farberware Open Hearth Electric Broiler-450)

Any comments/suggestions more then welcome.  This is my first build so I can use help.


Well I am pretty much done and happy with it.  I am not going to into lots of details, I don't think my build is anything special, it was quick and dirty and I was making stuff up as I went.  I didn't think that the fridge I got was worth all the extra work and details so I didn't bother with it.

I pretty much got a sheet of 16ga steel for $45 at local shop  and filled all the voids with it.  Lots of screws, nuts and bolts and boat-load of drill bits and cut-off wheels.

Issues that I ran into is big gap between door and fridge that I had trouble finding solution for.  I did get 2 of 5/8" x 10' fireplace gasket rope  for $10 each but that thing is hollow and compresses down easy leaving me with over 1/4" gap.  I looked around for different solutions such as radiator hoses, kevlar rope, but all of those things were too expensive for my taste.  After going to the home improvement store for the 10th time I ran into some aluminum rails/trim that is used for the screen doors ($4 for 6 foot piece).  It was perfect thickness, 1/4" and about 1/2 width.  So I got that screwed onto the frame and then attached gasket rope using hi-temp silicone.

Another thing I did kind of different is I added  a computer CPU heat sink to the SSR and sticking out of the box.

So here are the few questions:

1. The shelves that came with the fridge, they looked like they are made out of aluminum but coated so they look gold.  Are these safe to use?

2. On my first test i was able to get up to 275F in an about hour, is this ok?

3. As you can see the temp between my PID and food prove is about 50F different, do I just need to autotune the PID?

 
Where did you get your element from? I'm looking for a replacement for mine and this looks like it might just work.
 
Greeting fellow Iowan,

got the heating element from the ebay, it's Farberware Open Hearth Electric Broiler-450 Model, payed $21 with shipping.
 
On the PID question I would plug the PID into a hot plate and see if you can keep a water bath @200F.  Put a sheet of wood over the top so you can suspend the temp probes into the water with out touching the pot.   (You also have your regular thermometer probe in the same pot.)

Once things stabilize make your observations.  Both readouts should be the same.  Now up the temp to 212F  Water should be boiling.

The reason you do this at two stages is the PID learns by measuring how much it overshoots and you cant raise the temp of the water beyond 212F so if you keep it at 200F this will allow for some overshoot so the PID can learn.

The reason to then bring it up to 212F is then you have a solid reference point (the boiling water) to judge if the thermometers are calibrated correctly.  If you observe any discrepancy then you can calibrate (if possible) or know that the probe is off by 5 degrees at 212F so you can get good results when cooking.

If your grates are aluminum the gold color is no problem.  If the metal is steel and it is plated with gold then you might have cadmium plating which is not good.

Does a magnet stick to the metal?  If not then you have aluminum so no worries.  Those fancy Cephalon pots are anodized aluminum.

If the magnet sticks then you might want to strip the plating off.  I think you can do this with acid, but you might want to defer this question to someone that is up on the process.  I know that either an acid or a lye bath will take the zinc off of steel but I am not sure about cadmium.  I think if the plating is tin you are OK.  There is probably some simple test to identify the plating. 
 
On the PID question I would plug the PID into a hot plate and see if you can keep a water bath @200F.  Put a sheet of wood over the top so you can suspend the temp probes into the water with out touching the pot.   (You also have your regular thermometer probe in the same pot.)
Roger, thanks for the reply. Just to be sure, you're saying to plug the PID into the heat element and dunk it into the water, not the PID but the heat element :O?
 
NO!!  Do not immerse your heater in water.

Get a regular hot plate and a pot if water.  Plug the hot plate into the PID.  Now perform your tests.   The PID does not know what is plugged into it all it does is to turn on and off what ever you plug into it.  What you are doing is to test the thermocouples and the readouts to confirm their accuracy.
 
  What you are doing is to test the thermocouples and the readouts to confirm their accuracy.
This should be :What you are doing is testing the thermocouples and the readouts to confirm their accuracy.
 
I'll give it a try tonight, just so you know I was willing the submerge the heater element into the water for you!
biggrin.gif


I'm glad you asked.  The do make immersion elements but the regular ones will fail if you get them wet and you might be in for a nasty shock.
 
NO!!  Do not immerse your heater in water.

Get a regular hot plate and a pot if water.  Plug the hot plate into the PID.  Now perform your tests.   The PID does not know what is plugged into it all it does is to turn on and off what ever you plug into it.  What you are doing is to test the thermocouples and the readouts to confirm their accuracy.
I did as you suggested, however I only had couple of  hot plates from an old stove which I assume are 220V.  Heating up water was very slow and it hanged around 200F. All through out the heating process my PID and the digital food probe were 1-2 degrees from each other.  When temps got up to 205F on the probe PID was showing 200F.  So this brings more confusion to me.  The only thing I can think of is the position of the thermacouple in the fridge, I am attaching a pic so you can see if it's ok.


Also magnet tested the shelves and it was not sticking, so I guess I am ok on that.
 
OK sounds like something is hokey here.

It sounds to me like you had an electric stove element that you jury rigged.  If you plug it in straight into the wall, can you bring the pot of water to a full rolling boil?

When you had the PID controlling the water and had it set on 200F, what were the observations you made?

Did you have both the probes in the same pot of water?   I ask this because you posted a picture of the inside of the fridge.
 
The picture is from before I removed the probes from the fridge.   I was wondering if in my original build the PID probe was positioned correctly.

I had PID probe and food probe sticking out of the piece of wood that was sitting on top of the small pot filled with water.  I made sure both probe were submerged the same and not touching the pot walls.  During the whole heat up process temps of the PID and food probe were pretty much the same, 1 or 2 degrees difference. 

Yes I used heat element from a stove, I wondered the same thing so I did jury rigged it directly into the outlet and I was getting same result. it was slow heating up and it never turned red.   I am quite sure it's 220V.

I guess I can try it again using the heat element that's in the smoker right now.
 
Ok so I ran the test again using the heat element from the smoker so here are the results

Digital food probe - PID temperatures
158/147
160/155
165/160
170/163
175/169
180/173
187/178
195/189
198/193
203/192
208/200
209/201.5

Water started boiling at 202F on the food probe and it never got past the 209F

 
SmokingMeatForums.com is reader supported and as an Amazon Associate, we may earn commissions from qualifying purchases.

Latest posts

Hot Threads

Clicky