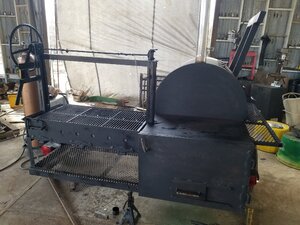
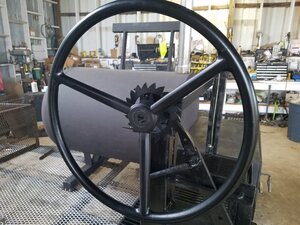
First time build - 250 gallon reverse flow

  • Some of the links on this forum allow SMF, at no cost to you, to earn a small commission when you click through and make a purchase. Let me know if you have any questions about this.
SMF is reader-supported. When you buy through links on our site, we may earn an affiliate commission.

Grilldaddys

Newbie
Original poster
Apr 2, 2020
13
9
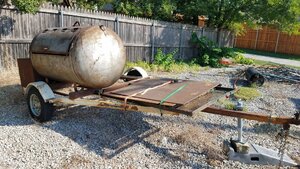
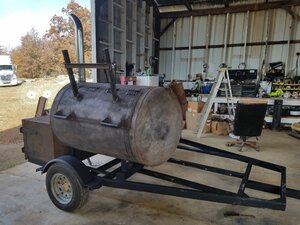
I'll post a series of posts to show my progress all the way through. To give the background, I've always found at least one negative issue with every smoker/grill i have ever used - ever! I love smoking and grilling enough, I wanted to build one to get exactly what i wanted. At first, i was just going to take some upright gas smokers i had used in the past and convert them to stick burners... but as i priced the cost of metal, i was unpleasantly shocked! And then came the $300 craigslist ad- it gave me a starting place. What is shown below is my STARTING line that I began with.

1.jpg
 
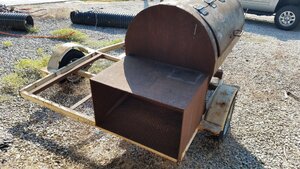
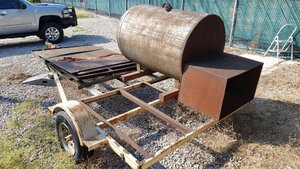
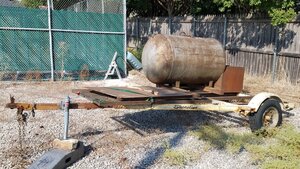
So I paid $300 for what was essential an old jet ski trailer and tank. The tires were dry rotted from sitting in the pasture so long, no tongue jack so we had to use a tractor front end loader to lift it onto the ball of my truck, the metal he said was enough to finish- wasn't... but for the most part, i had a starting point i could work with.

2.jpg 3.jpg 4.jpg 5.jpg

Limped it to a Discount Tire and bought new tires for it and stopped at Harbor Freight on the way home to get a tongue jack so i could take it off the truck.
 
Last edited:
My father pretty much epitomizes the definition of a modern Renaissance man- it's a large part of the reason I was willing to jump into this endeavor. THANKS DAD! I also have a cousin- shout out to Mike T.- who is an insanely talented welder. While they both live 4 hours away, I pulled the trailer to my dad's shop and work began. First things we did included grinding down some of the really nasty welds and rewelding- especially around the seams of the tank. The previous owner had taken a 500 gallon tank and cut it in half- giving half to a friend and keeping half for himself. He did a pretty good job with the plasma cutter to make straight lines on the door- but he did a lousy job welding.

Anyway, first thing modification i made was to put the reverse flow plates in. We welded angle iron 6" below the opening of the door and cut the 1/4" steel that came with the trailer to fit. It runs the full length of the smoker but stops at the tank seam where the end curve starts. Turns out that the rounded end of the tank made for AMAZING air circulation.

We used some expanded metal and installed the shelf as a sliding shelf- this allows easy access to meats that go to the back of the grill that would be otherwise difficult to reach. We also ordered a 4" cast iron stove damper and installed it inside the chrome smoke stack before cutting a hole and welding the smoke stack on. Finally, we painted the trailer with black primer- I had to do something cosmetic so it wasn't so overwhelmingly ugly when my wife saw it- she was already uncertain when she saw the original purchase.

6.jpg
 
Last edited:
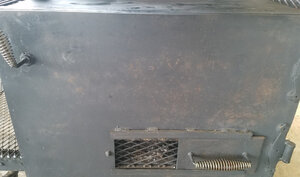
On second trip to my dads, we added a door to the firebox. The previous builder didn't cut the firebox square, but we were able to use angle iron around the edges to make it square and also give an edge to the door of the firebox. The original design had a 'single' handle that looked like it was made of bent re-bar. I wasted no time cutting that off and welded 2 new "cool" handles that allow for easy lifting of the lid... Even with the handles, the lid was heavy, so we added a counter balance weight to hold the lid open. I didn't want the lid to go too far back making it difficult to close, but it had to stay open so I could work the smoker out too.

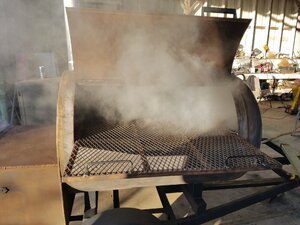
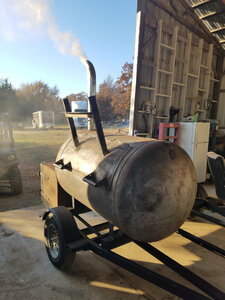
It was time to start a test fire to see how well it drafted and distributed heat. I didn't want to go too far in building until we knew the fundamentals were right.

Everything worked well EXCEPT the door- the metal warped when we were cutting it to fit the dimensions of the firebox.
7.jpg 9.jpg 8.jpg
 
As mentioned, the firebox door warped when we cut it the first time, so we bought new metal and remade the door. We also added a sliding draft door to control airflow to the firebox- it's oh so perfect. I can adjust it a 1/4 in" and see the internal temp of the smoker change 5 degrees.... Since the smoke test went well, we finished the counter-balance on the lid. While on this trip, we also added an expanded metal shelf around the front side of the smoker with hanging hooks and installed expanded metal on the floor of the trailer. We applied heat resistant paint to the firebox and smoker so it is starting to look like the real deal. Finally, I upgraded the rusted tire rims for new chrome rims and started putting on the trailer lights.
10.jpg 11.jpg
 
Last edited:
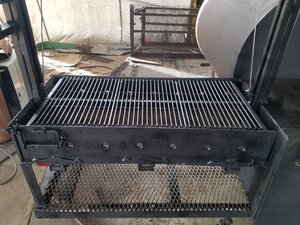
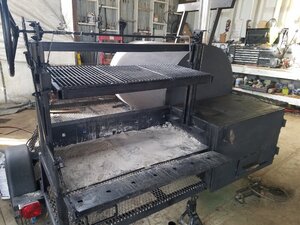
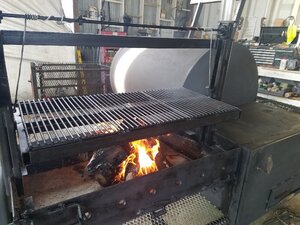
So the smoker was working nearly flawlessly now, but you don't often see smoked hamburgers- and it's even more uncommon to see smoked steak. There are simply some things that must be grilled. I knew I wanted the grill to be large. One of my previous (retired) grills let me cook 32 burgers at a time and it was great! I wanted the ability back to cook a LOT of burgers at once. I also knew that controlling temp on a charcoal grill can be harder than a gas grill- but this rig is going to be "a naturale"... No gas here! After hours and hours of research, the best design I could find was a Santa Maria style/Argentine style grill with some tiny modifications/enhancements. This style of grills has a wheel that turns and lifts the grill surface away from the heat source if needed. We planned for a drop front to allow easy access to coals too. This lets me easily move coals from the firebox to the grill, or from the grill to the firebox. I ordered the cog parts from Amazon, bought a tractor steering wheel on eBay. Finally, we used bulldozer blades for the sides of the grill. Not only are they insanely heavy so they'll be there long after the trailer rusts away, but they have holes in the side that allows for ample air flow to my charcoal pit for grilling. Plans made, next step was building it. When we got done, I realized I love that grill more than the smoker!

12.jpg 13.jpg 14.jpg 15.jpg 16.jpg
 
VERY VERY Nice! Love the design and setup. Can’t wait to see some amazing cooks come off that rig. Thanks for sharing.

Johnny Ray
 
Man, you really got it going on, that is just a fantastic piece of work, Like! Post up some cooks on the baby, offset and Santa Maria should just about do it all. RAY
 
SmokingMeatForums.com is reader supported and as an Amazon Associate, we may earn commissions from qualifying purchases.

Latest posts

Hot Threads

Clicky