First Smoke Stressful - Second Smoke a Breeze!

  • Some of the links on this forum allow SMF, at no cost to you, to earn a small commission when you click through and make a purchase. Let me know if you have any questions about this.
SMF is reader-supported. When you buy through links on our site, we may earn an affiliate commission.

noggin

Fire Starter
Original poster
Dec 27, 2013
68
16
Texas
I did my first smoke on Jan 1st (two 3 lb butts and 2 chickens).  By the end of the day I just wanted it to be over.  Turned out very well, but it just stressed me the heck out.  I did my second smoke yesterday, 7 lb butt and two chickens and it was a breeze.  My only regret is not starting the butt the minute I woke up.  Instead, I waited about two hours.  Overall, it turned out very well and I'm very happy and one 7 lb butt was much better taste-wise than two 3 lb butts.

My wife was sick when I did my first smoke, and she wasn't impressed at all with the outcome.  By the time she was better, we (or more accurately, I) had eaten it all.  Last night, when we sat down to eat our chicken dinner she was really impressed with it.  She was amazed with how good it was and couldn't stop eating it.  No more buying grocery store rotisserie chickens for us! 

Here's my log from this most recent smoke:
[h1]January 11, 2014[/h1]
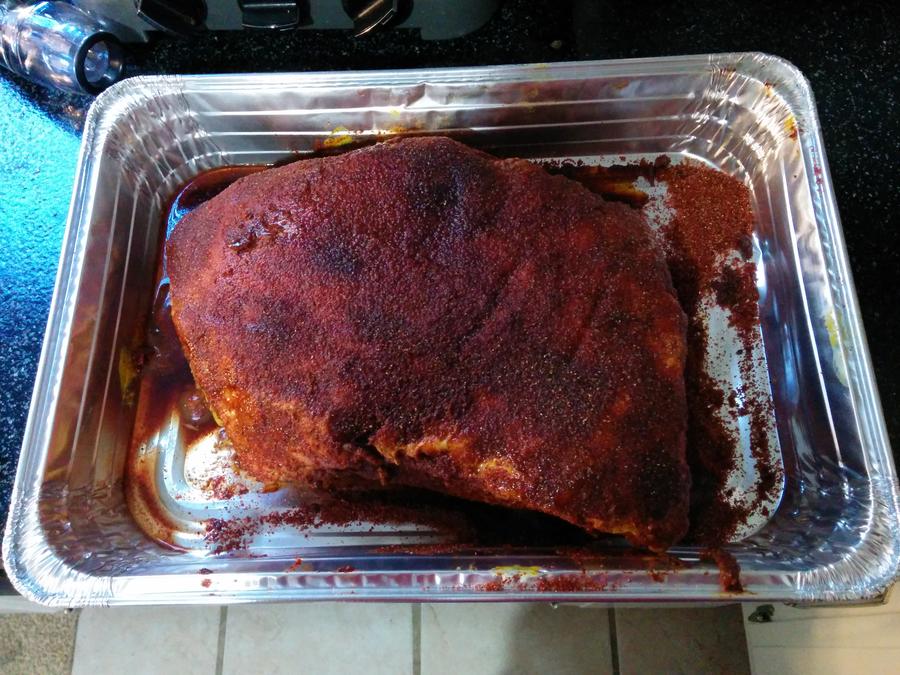
7 lb butt, and two spatchcock chickens.  Butts rubbed with Jeff’s Rib Rub and chickens placed in Wine Brine night before.

8:00 AM    Smoker preheated.  Cherry wood chips put in water.

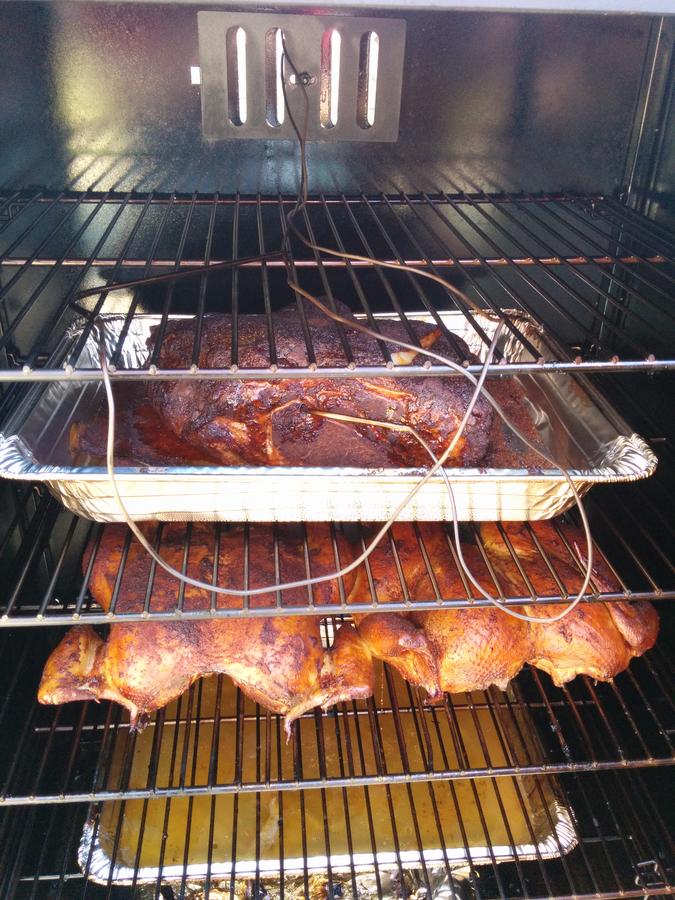
8:30 AM    Butt and wood chips placed in the smoker.

11:20 AM    Chickens rubbed and placed in smoker, used rest of cherry wood chips.

12:00 PM    Added apple wood chips.

1:30 PM    Foil placed over top of tray, apple juice poured into tray.  Apple juice sprayed on chicken.

4:00 PM    Chickens removed at 180°F

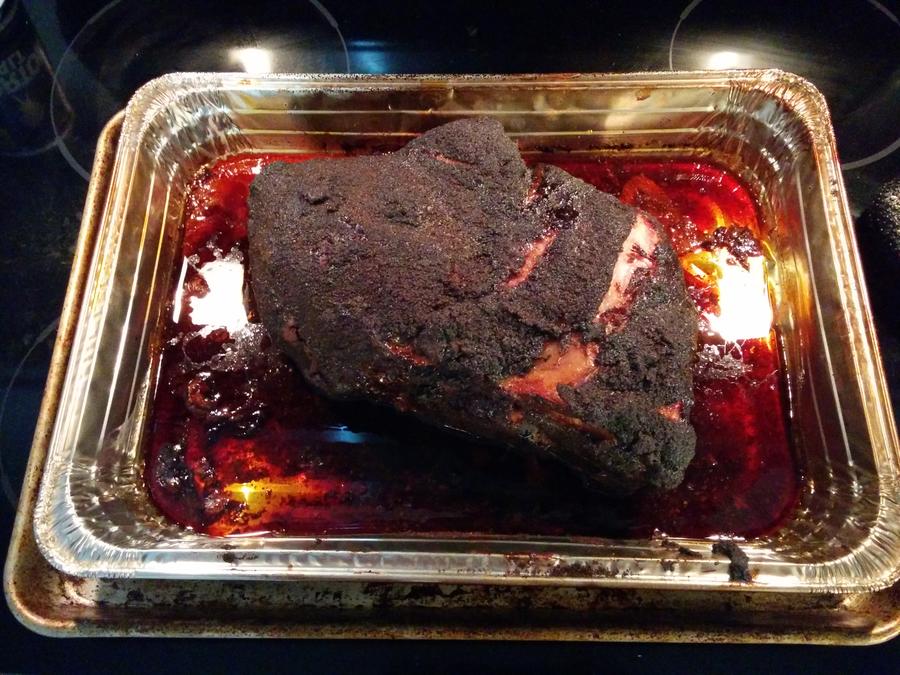
10:00 PM    Butt removed at 190°F, just a bit on the low side.  Placed in cooler overnight.  Juices put into glass and put into fridge.

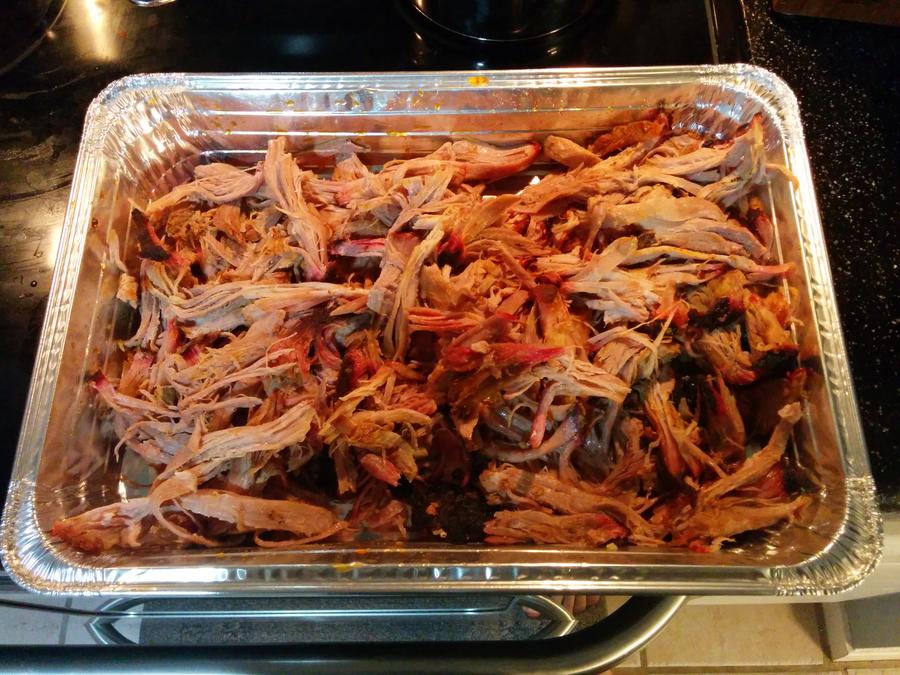
7:00 AM    Butt pulled.  Fat removed from juices.  Glass with congealed juices placed in pot of water.  Pot placed on stove on low heat.  Butt put in oven to keep it warm at 170°F.  

8:00 AM    Butt dried out just a little bit, but still very tasty.  Juices poured over butt.

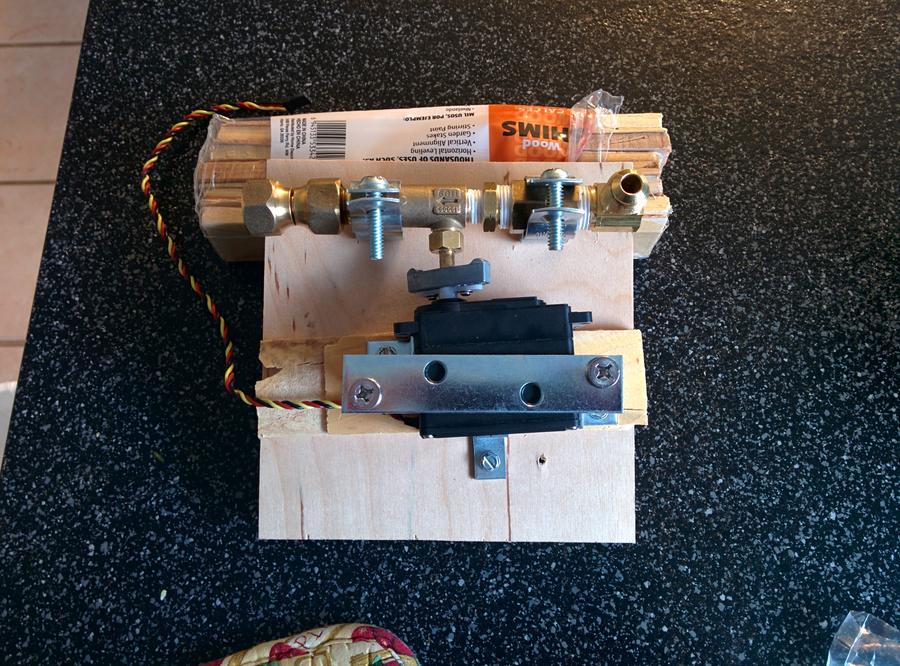
I bought a needle valve too, to help more finely control the temperature of the system.  There seems to be some large black box connected to it which has made it cumbersome to use at the moment. Guess I'll have to figure out some way to take advantage of that 
icon_twisted.gif
 

https://www.dropbox.com/s/kvansm5q9qqh2cv/2014-01-10 14.12.38.mp4


  • Like
Reactions: JLeonard
In one of your photos I see the probe sitting right in the metal cooking grate. That's not a good way to do that. You'll get a false temperature reading. The metal absorbs more heat. You can run the probe through a potato or a small bloke of wood to hold it off the metal.
 
 
Hey Noggin, that black box is a radio control servo, are you planning on adjusting the flow by remote control ?
Hopefully, it'll be more than that when I'm done.  This project is drawing inspiration from the HeaterMeter  for charcoal BBQ's and smokers.  However, my goal is to remove the need for the Arduino MCU, add additional temperature channels, and also cut the temperature back to ensure that any meat at desired temperature doesn't exceed the desired final temperature, and assist in getting temperatures out of the danger zone. 

Example:

You place a chicken and a butt in the smoker.

In the web interface, you identify one of the channels as chicken and the other as a pork butt.

(Optional) Cabinet temperature is ramped up to 270°F until both the chicken and the pork are out of the danger zone

Temperature set to 240°F for the chicken.

Once chicken hits 170°F, cabinet temperature is reduced to 170°F

Chicken is removed and cabinet temperature ramps up to 225°F

Cabinet temperature is set to 200°F when butt reaches 200°F

I also hope to allow emails/sms to be send a status every hour or so, and also when meats are done.  We'll see how far I actually get in this project.  I have a habit of not finishing what I start.

I'm also hoping that I'll be able to make it easily configurable for electric smokers.

http://noggin01.github.io/SmokinPi/


Last edited:
In one of your photos I see the probe sitting right in the metal cooking grate. That's not a good way to do that. You'll get a false temperature reading. The metal absorbs more heat. You can run the probe through a potato or a small bloke of wood to hold it off the metal.
Thanks, I'll look into that, but it doesn't make much sense at first thought.  The metal can't get hotter than its surroundings. I can understand that it makes the temperatures wrong for a while after the door is opened/closed though.  I may drill a hole in a block of wood and hang it from the top of the cabinet.  I like the idea of not having to waste a rack for just a temperature probe.
 
Last edited:
 
Thanks, I'll look into that, but it doesn't make much sense at first thought.  The metal can't get hotter than its surroundings. I can understand that it makes the temperatures wrong for a while after the door is opened/closed though.  I may drill a hole in a block of wood and hang it from the top of the cabinet.  I like the idea of not having to waste a rack for just a temperature probe.
Actually the metal can get hotter and retain heat longer than the air surrounding it. The only portion of the probe that you need to be worried about is the tip as that is where the reading comes from. You also want to place the probe close to the meat but not too close. If the meat is cold and the probe is too close you can get false readings. Also if the probe is placed below the meat and drippings are dripping on it you can get false readings.
 
Still doesn't seem logical to me.  Infrared might cause some additional heating, but I don't think that much infrared radiation can make it to the top of the cabinet when it is full of meat.  I'm not saying you're wrong, I'm just saying I can't fathom it.

That being said, I am considering what you suggested and may do something along the lines of drilling a series of holes along the back side of the unit.  If a small sleeve is inserted into the hole, the temperature probe can be inserted through the sleeve at varying heights in the cabinet.  The sleeve would provide support to hold the probe at the desired angle.

I'm thinking something like this:

 
Hopefully, it'll be more than that when I'm done. This project is drawing inspiration from the HeaterMeter for charcoal BBQ's and smokers. However, my goal is to remove the need for the Arduino MCU, add additional temperature channels, and also cut the temperature back to ensure that any meat at desired temperature doesn't exceed the desired final temperature, and assist in getting temperatures out of the danger zone.

I was following this project a while ago but ended up not getting a smoker. My wife just bought me a dual fuel smoker so I started looking at it again. Now that you got yourself a pellet smoker, is this project done?
 
Surprised anyone noticed this thing. It never got to a point where it would be very useful for someone else unless you're very comfortable poking around on a command line and know how to use a soldering iron. But, it did work very well. It could hold my propane (eventually converted to natural gas) smoker to +/- 2°F. Shortly after opening the door to check on it, the servo would open wide until the temperature recovered and then it would cut back. I loved it. I eventually added a thermocouple to sit above the flame so it could quickly detect the fire going out and had it sending me text messages (that I slept through 90% of the time!) I ended up with 3D printed linkages to hold the needle valve and the servo together.

It was around that time that we had our first child so I ran out of time to tinker with it. The plastic parts eventually degraded and broke after several years as they were in direct sunlight for a portion of every day. I printed new ones a couple of times, but then we moved to a new house and could never get my printer working well again after unpacking it. Then we had another kid which made it more difficult to find time to tinker with it.

Being a Raspberry Pi, it suffered from a couple of SD card failures at terrible times. Like right when I wanted to smoke something so I'd have to rebuild the OS when I was in a rush. We had a surprise rain while I was doing an overnight smoke. The RPi survived the shower in the short term, but corroded quickly afterwards. So I bought a new RPi, reinstalled the software. Soldered together a new analog board. Bought new probes that required a new temperature curve.

We went on a vacation at some point. I "accidentally" left it out in the rain again so I "had" to buy a new smoker. I'm very glad I made it, it was a fun experience and I learned a lot in doing it. If I were to automate it again, I would do a couple things differently...

First, I'd recognize that I had NO NEED for 11 blasted analog channels. Sure, having a temperature probe in all 6 turkey legs is cool and all, but it is also unnecessary. This means that I could use a BeagleBone instead of an RPi. The BB has built in analog channels, so I wouldn't need an external board. That cuts down on a HUGE amount of work.

Second... the needle valve I used was fantastic for manual control. It allowed me to go out and bump the gas up or down a tiny amount. But with an automatic controller, it caused problems. The needle valve needed to go about 3 or 4 turns to fully open or fully close. The multi-turn servo I used had no feedback on it, so I didn't know where it was. This meant I had to calibrate it any time it disconnected from the servo so that I wouldn't accidentally close the valve and shut off the gas. Instead of a needle valve and multi-turn servo, I'd probably go with a pilot light and a gas solenoid valve. The solenoid valve would be fully open or fully closed, but I don't think that temperature regulation would be a problem.

That's probably far more than what you were looking for.
 
SmokingMeatForums.com is reader supported and as an Amazon Associate, we may earn commissions from qualifying purchases.

Latest posts

Hot Threads

Clicky