The circular saw works quite well, actually. It only took two blades to cut the two pieces. It works best to plunge down versus trying to push it like cutting wood. The blade seems to want to wander when you do that. It was quicker than I thought it'd be.
Navigation
Install the app
How to install the app on iOS
Follow along with the video below to see how to install our site as a web app on your home screen.
Note: This feature may not be available in some browsers.
More options
Style variation
-
Some of the links on this forum allow SMF, at no cost to you, to earn a small commission when you click through and make a purchase. Let me know if you have any questions about this.
You are using an out of date browser. It may not display this or other websites correctly.
You should upgrade or use an alternative browser.
You should upgrade or use an alternative browser.
First RF Build. Excited!
- Thread starter buda q
- Start date
SmokingMeatForums.com is reader supported and as an Amazon Associate, we may earn commissions from qualifying purchases.
bob1961
Smoking Fanatic
yeah I was thinking of the plunge method as I know I can keep a long line straight....
bob1961
Smoking Fanatic
I used a 4 1/2" grinder with a very thin 6" cutting wheel to cut the door in mine. It works good if you don't apply much pressure. To much pressure wears out the blades very fast. I think I used 4 or 5 at about $3 each. Not to expensive.
This is dangerous because you have to remove the guard to fit the blade on the grinder.
yeah I know I have used them many times without the guard on in the way....
Today, I brought the pieces of pipe to a commercial sandblaster to remove the exterior paint/epoxy. I am also going to have them hit the inside while they do it to remove some slight rust. Better than a wire brush, I think. Total cost of $100. I think that is a fair price and only 15 miles from home. Will post pics when I pick them up.
Just waiting for a few more items to arrive and then the build really begins.
Keith
Just waiting for a few more items to arrive and then the build really begins.
Keith
UPDATE
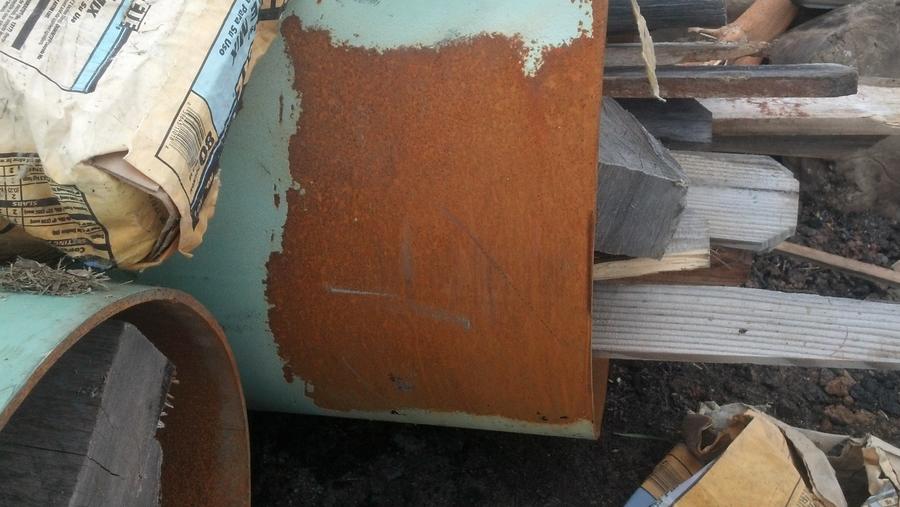
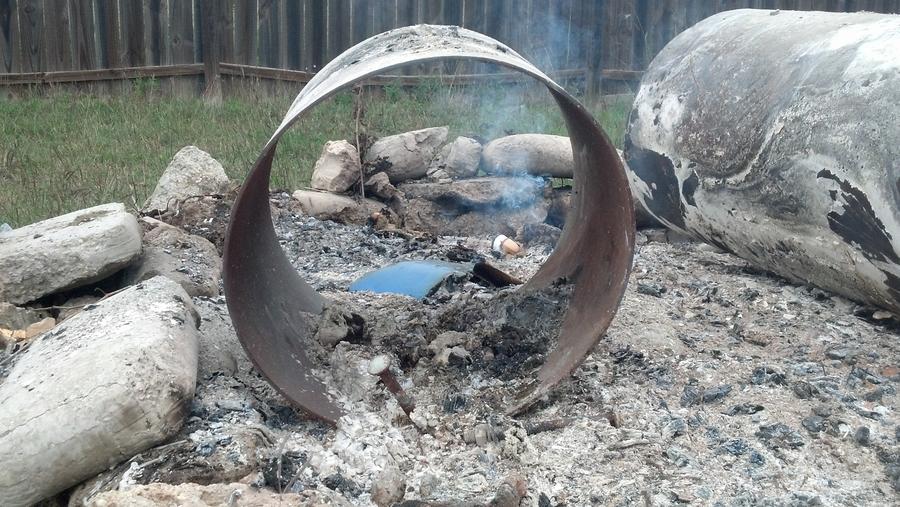
Well........What a process so far. The sandblasting company called and said that it was taking a lot longer than they thought to get the paint/epoxy off. My quote for $100 was not going to complete the job. This is what they got done in an hour.
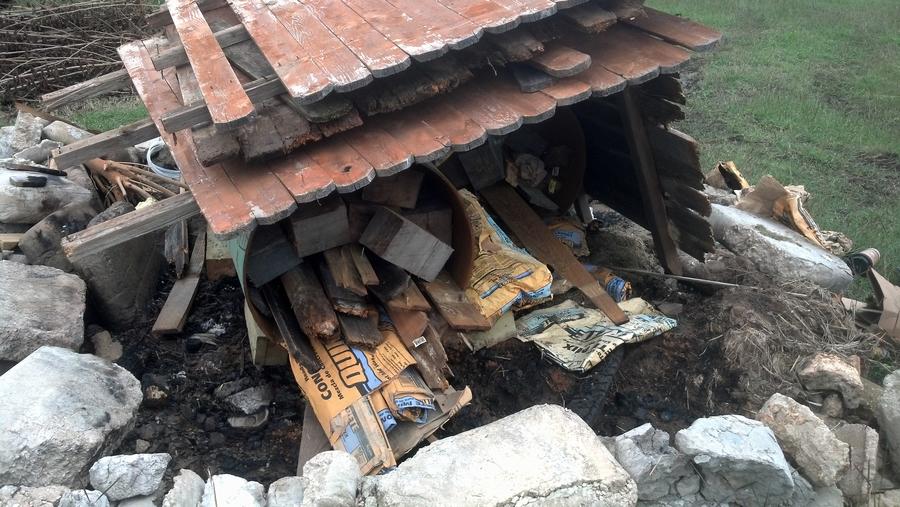
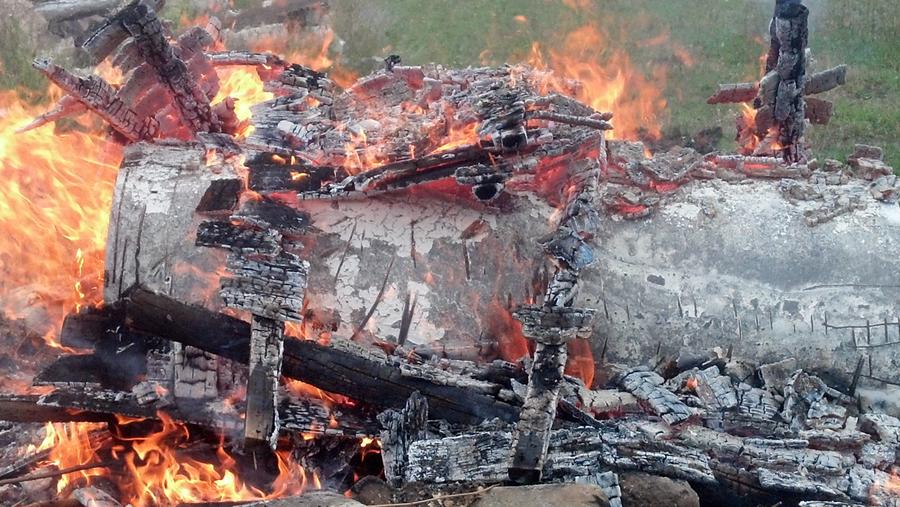
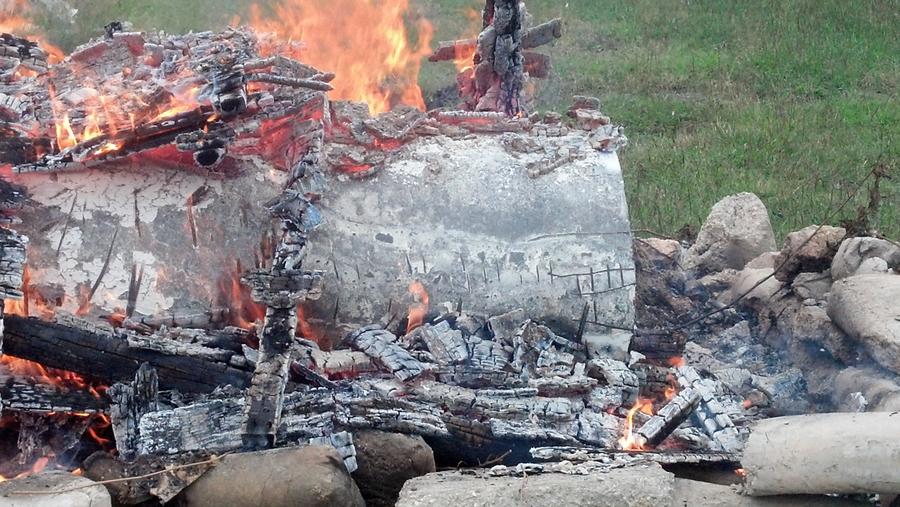
So, I am trying to do the economical thing. I paid $100 for the pipe and was going to pay $100 to blast it. Now it may take $3-400 to blast it. New pipe is only $275, so why would I do that. I can sell the pipe online and start with new. Or...I spoke with a guy today who used the same pipe and he burned it off in a fire pit. As a last resort, this is what I will try.
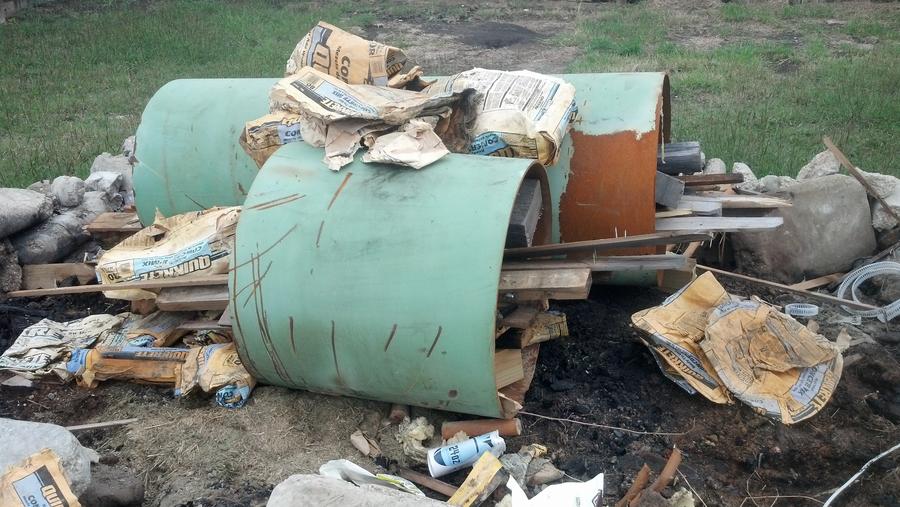
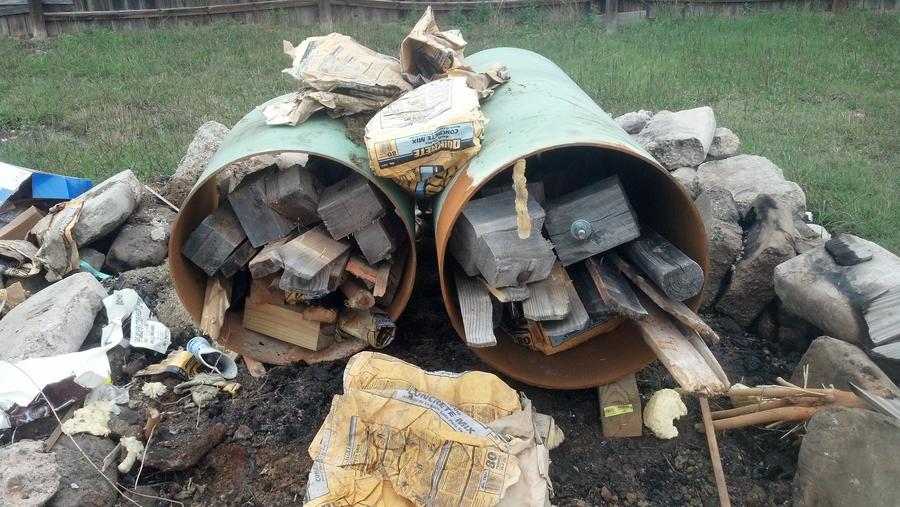
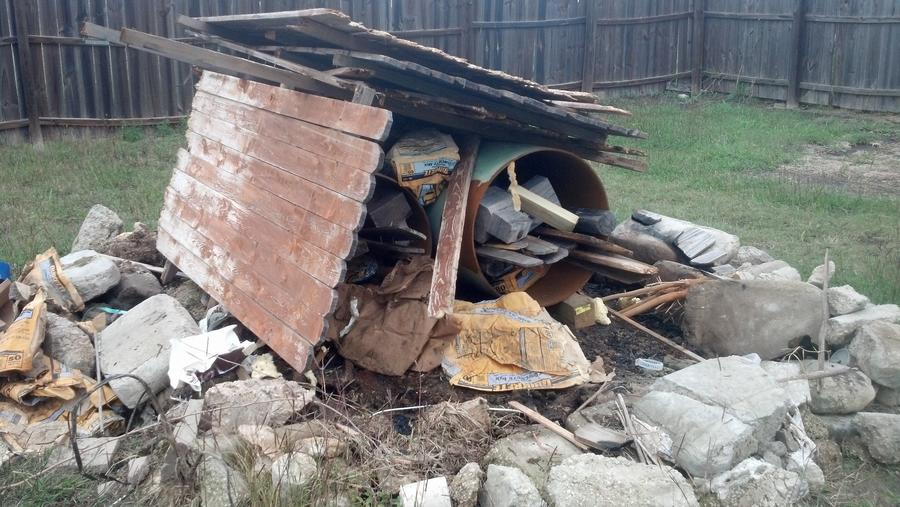
Load it up...
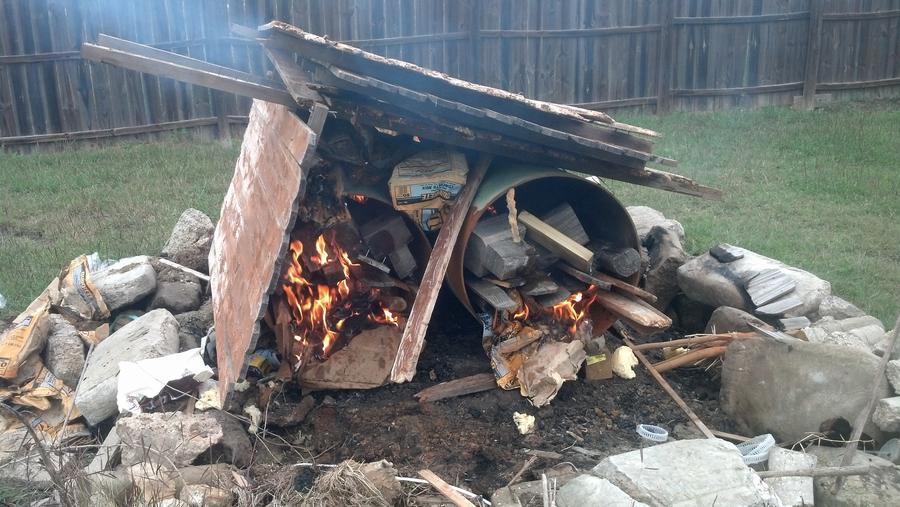
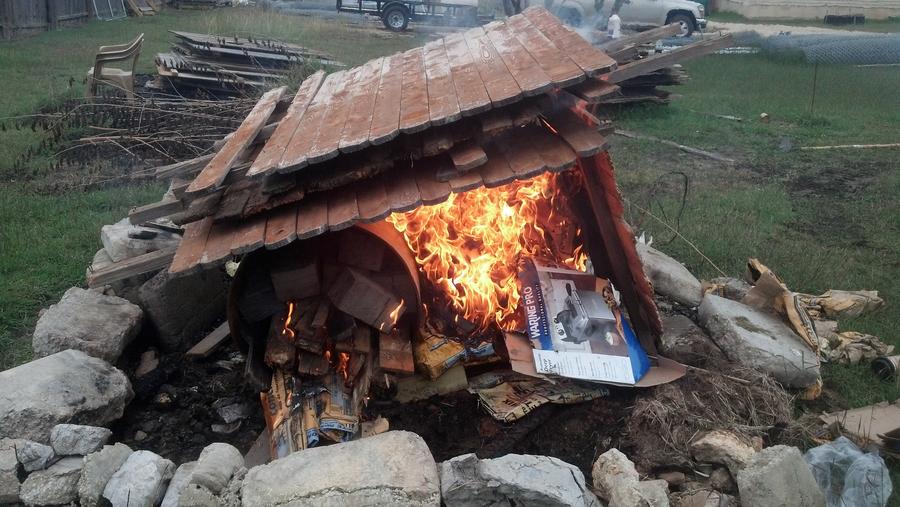
Light it up and hope for the best!
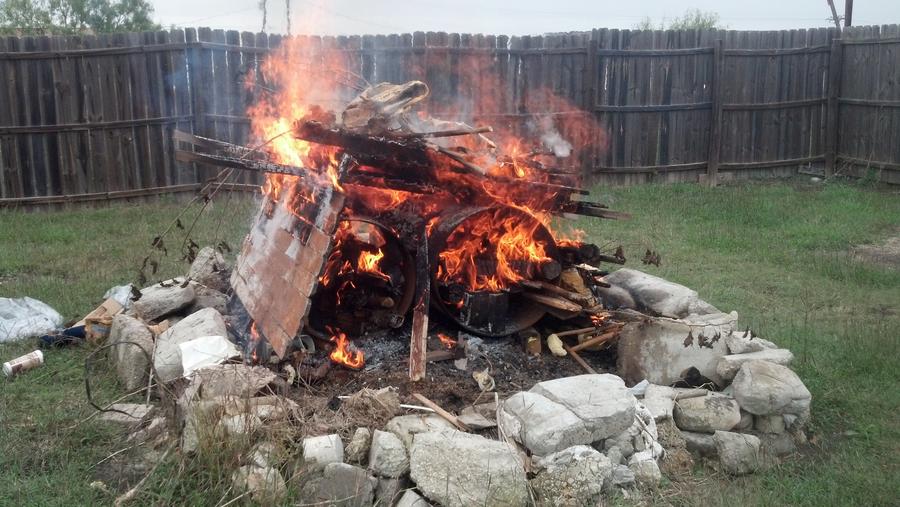
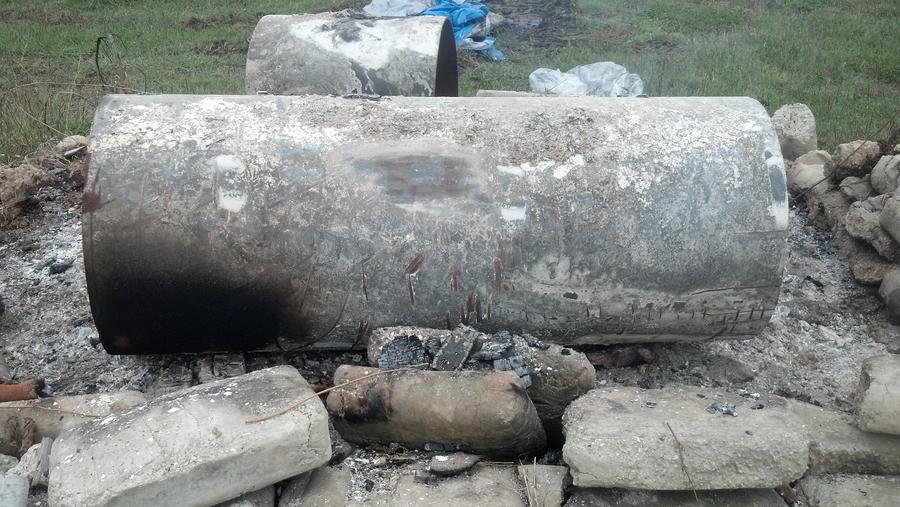
And it worked!!!
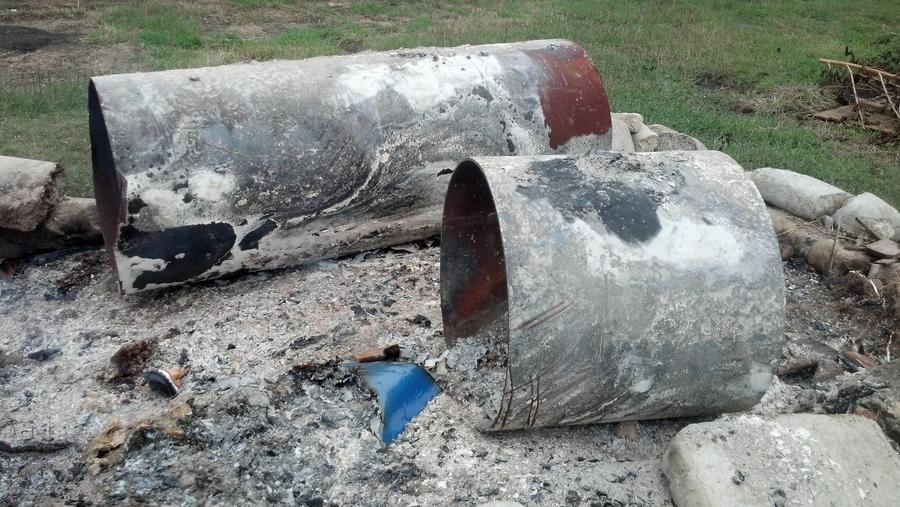
My only concern is that the fb pipe looks like it may be warped a little. Maybe it's an illusion. Anyways, it will work. I will mark the end caps to that warp if any and cut them.
Now I'm ready to pick up the rest of the steel. I have the spring handles and thermometers. Almost ready to make it happen.
Well........What a process so far. The sandblasting company called and said that it was taking a lot longer than they thought to get the paint/epoxy off. My quote for $100 was not going to complete the job. This is what they got done in an hour.
So, I am trying to do the economical thing. I paid $100 for the pipe and was going to pay $100 to blast it. Now it may take $3-400 to blast it. New pipe is only $275, so why would I do that. I can sell the pipe online and start with new. Or...I spoke with a guy today who used the same pipe and he burned it off in a fire pit. As a last resort, this is what I will try.
Load it up...
Light it up and hope for the best!
And it worked!!!
My only concern is that the fb pipe looks like it may be warped a little. Maybe it's an illusion. Anyways, it will work. I will mark the end caps to that warp if any and cut them.
Now I'm ready to pick up the rest of the steel. I have the spring handles and thermometers. Almost ready to make it happen.
alaska
Meat Mopper
I built a fire like that once when the chickens decided -30 degrees was to cold to push out eggs. I ate the chickens and burnt the coop. My neighbor came over thinking we were having a BBQ.
I have to agree, I think the pipe is out of round.
I have to agree, I think the pipe is out of round.
smokin' joe smoker
Newbie
Found a commercial sandblaster. Even he was griping about how long it took. Good to know pipelines are well protected, though.[/quote]Doodle: thank you for the info on blasting off the paint/epoxy!! It is quite thick and I was wondering how to remove it. I have torches and also a propane torch that I use to start fires with, but it seems like that would take a long time. And grinding??? heck no! I will get it blasted. What kind of place did you take yours, a paint shop, metal shop?
I have two pipes of the exact same material - a 4' and a 4.5' length. They are natural gas pipes and the epoxy is for wetland installation of the pipe. There is a sandblasting place right down the road from me, but worried they'll charge an arm and a leg. It has to be done though.
smokin' joe smoker
Newbie
Did you try a chemical remover - like a paint removing gel or something?
Today, I brought the pieces of pipe to a commercial sandblaster to remove the exterior paint/epoxy. I am also going to have them hit the inside while they do it to remove some slight rust. Better than a wire brush, I think. Total cost of $100. I think that is a fair price and only 15 miles from home. Will post pics when I pick them up.
Just waiting for a few more items to arrive and then the build really begins.
Keith
Joe, I would suggest that you throw the pipe in a fire pit and light it up. The epoxy comes right off.
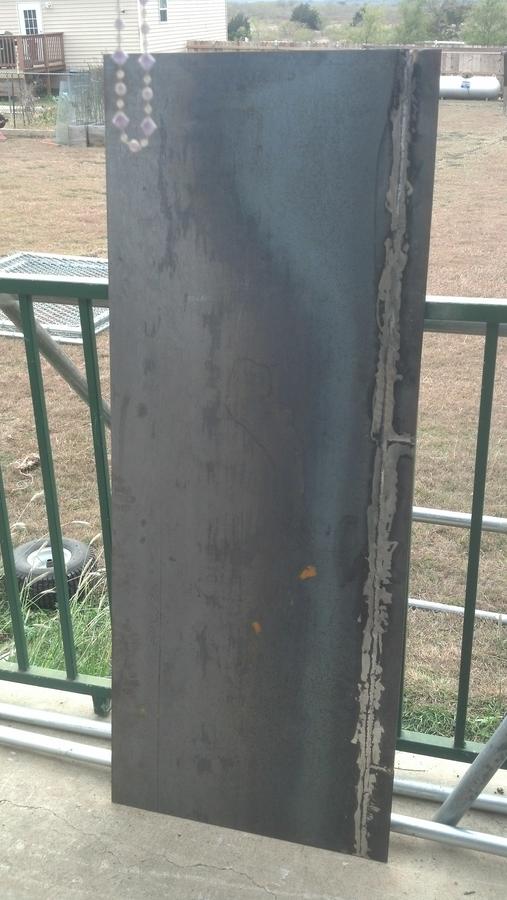
I have decided against using the warped piece of pipe for the firebox and instead have bought some 1/4" plate and will make a square one. The dimensions will be 24" long, 24" deep, and 22" high. I am going to double plate the top, with a 1" gap between them, as Ribwizzard suggests. I was going to make it 24" high, but made a mistake on my rf plate and left it 2" too skinny. So, I cut 2" from 3 of the 24" plates and welded them to the rf plate, which is also 1/4".
I have ordered a plazma cutter and it should be here in a couple of days to start cutting the doors, caps, etc.
It has been very cold and windy here in Texas for several days, and not very good weather for pit building.
I hope to continue building and taking pictures in a few days when the weather returns to normal.
The weather got a little bit better today. We got up into the mid 60's, which is normal for this time of year. Not complaining at all.
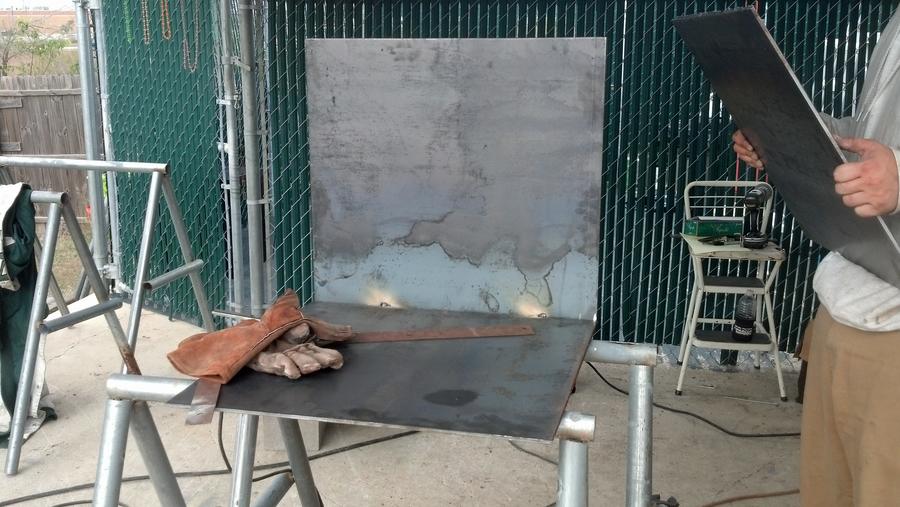
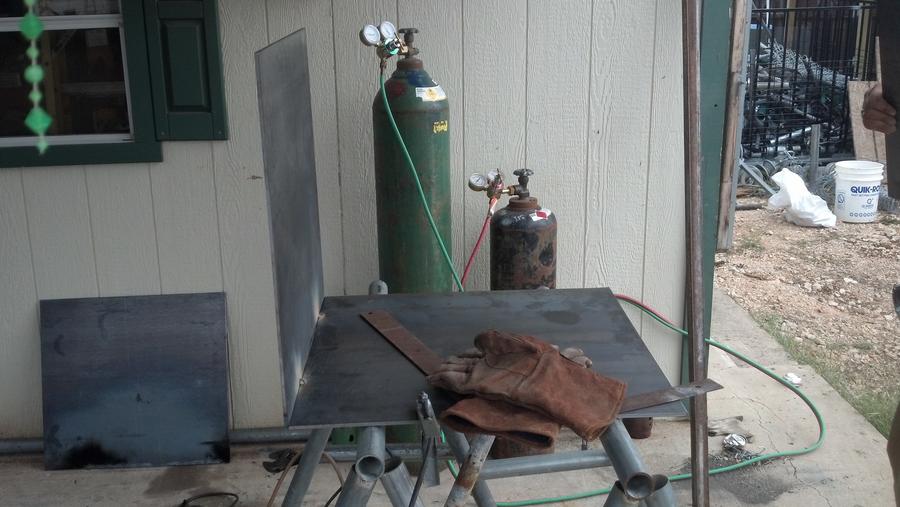
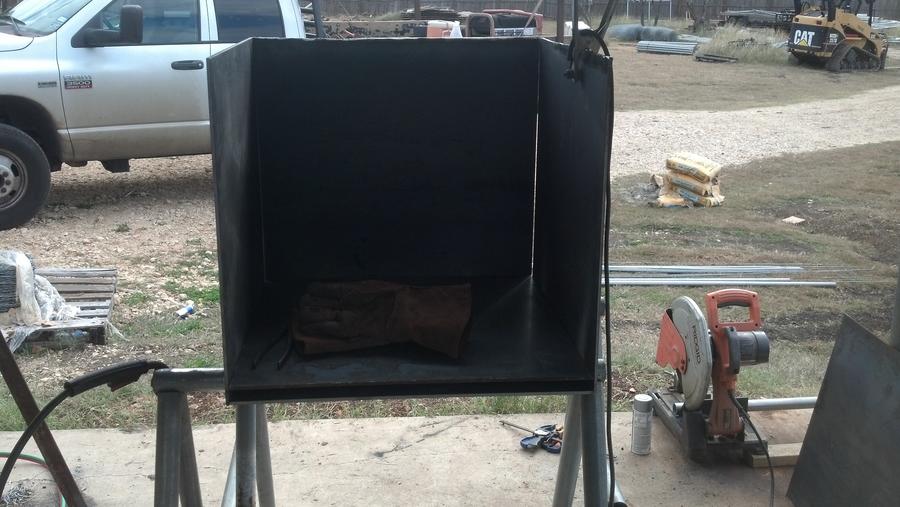
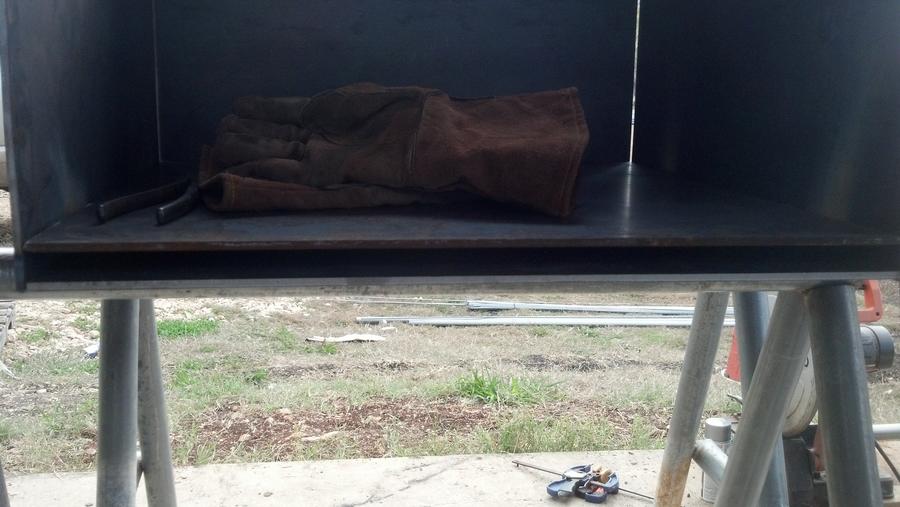
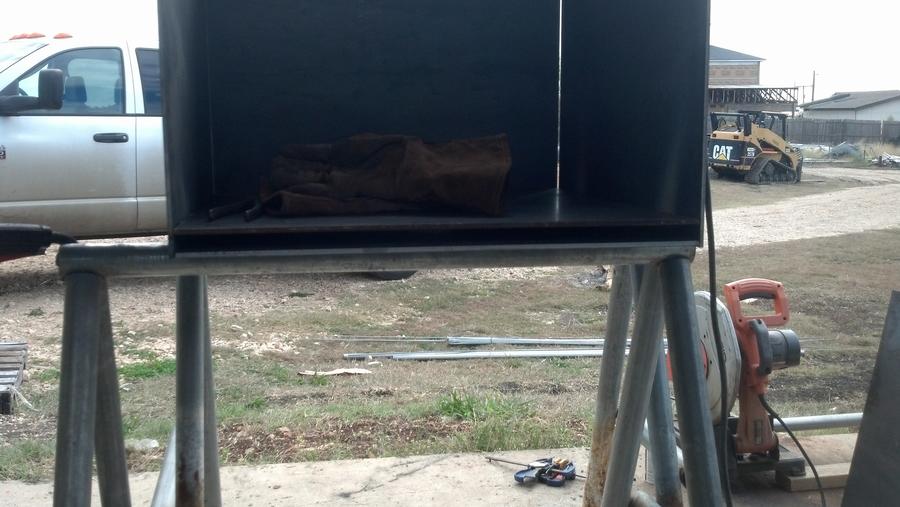
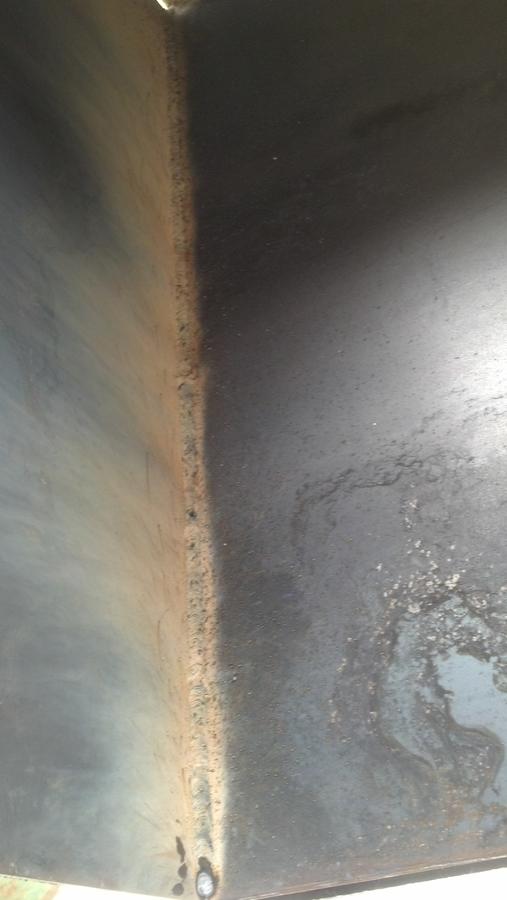
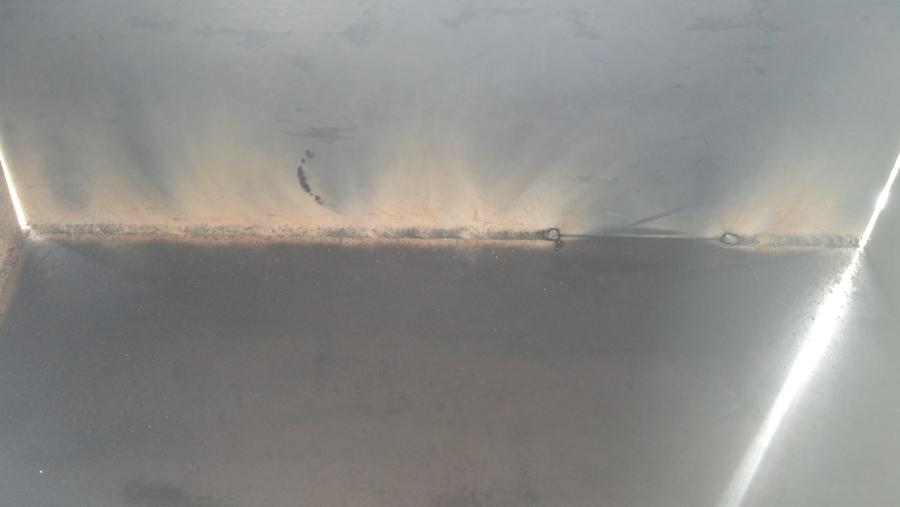
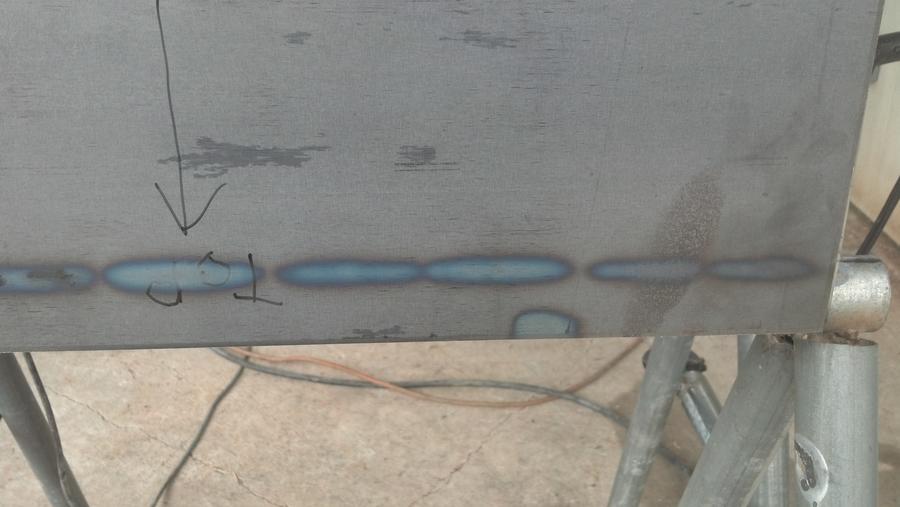
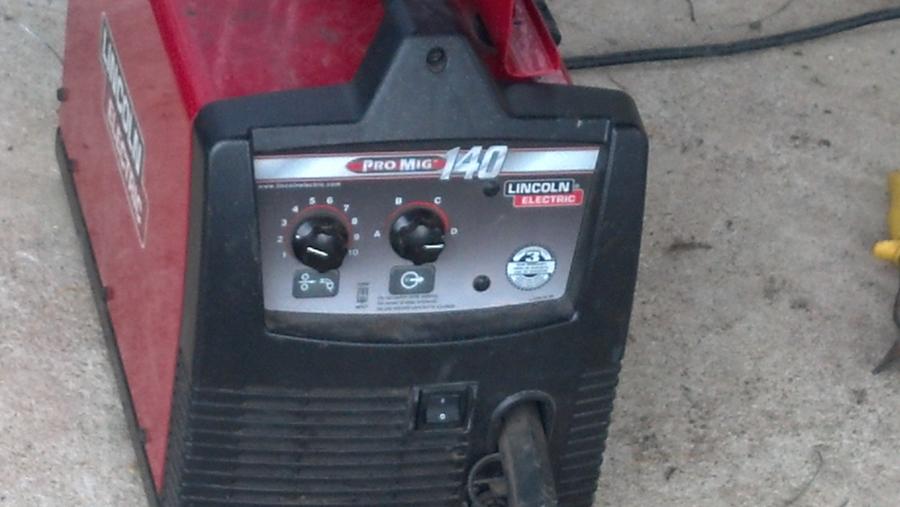
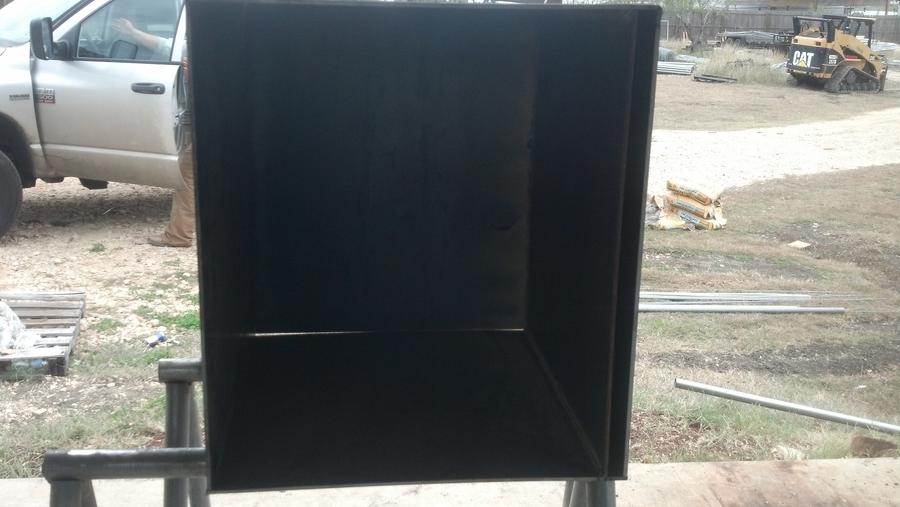
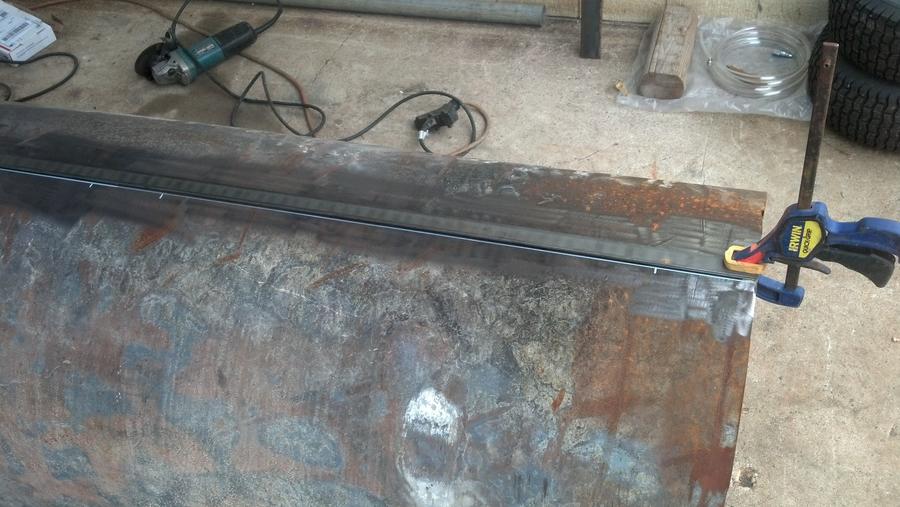
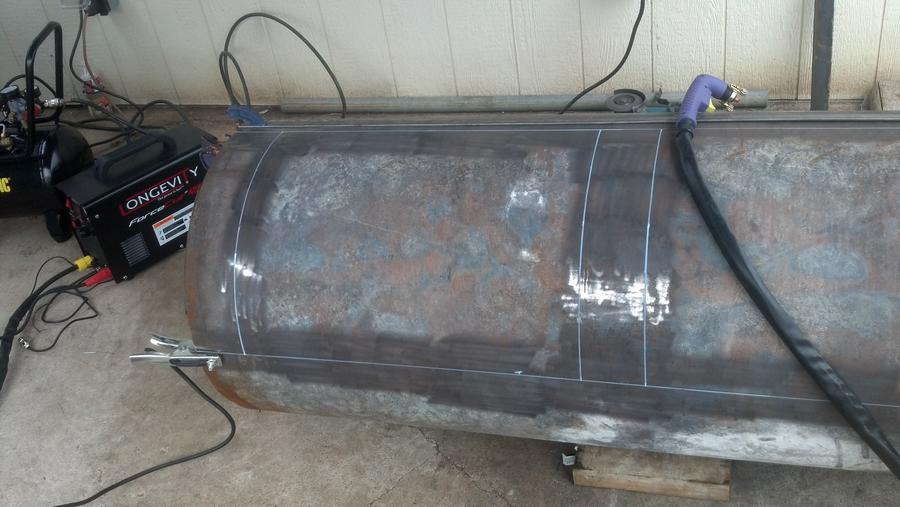
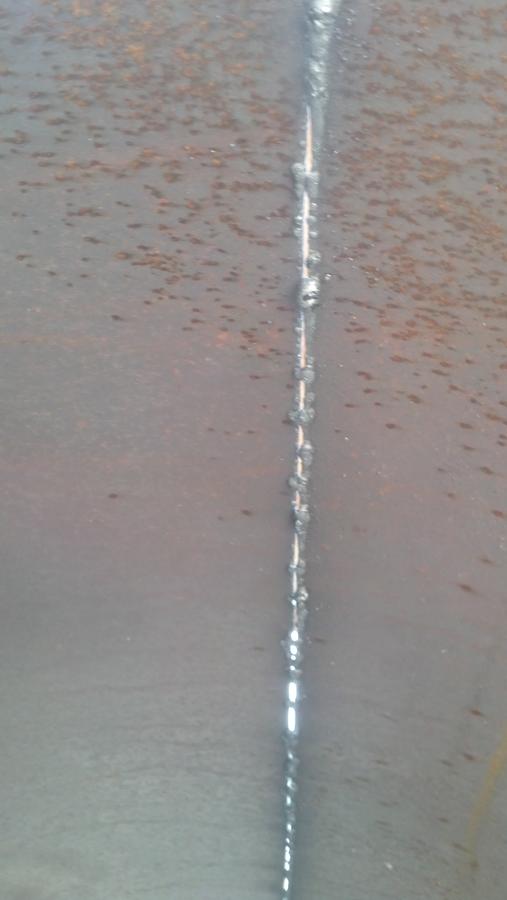
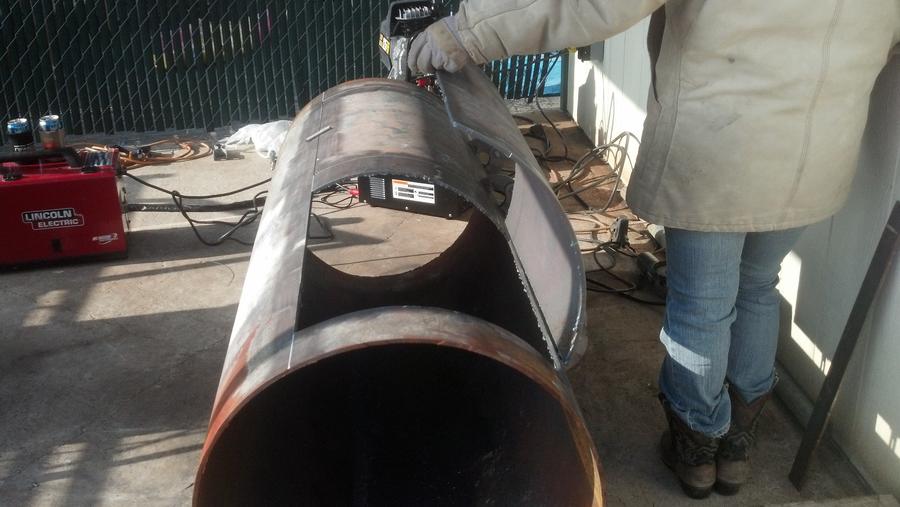
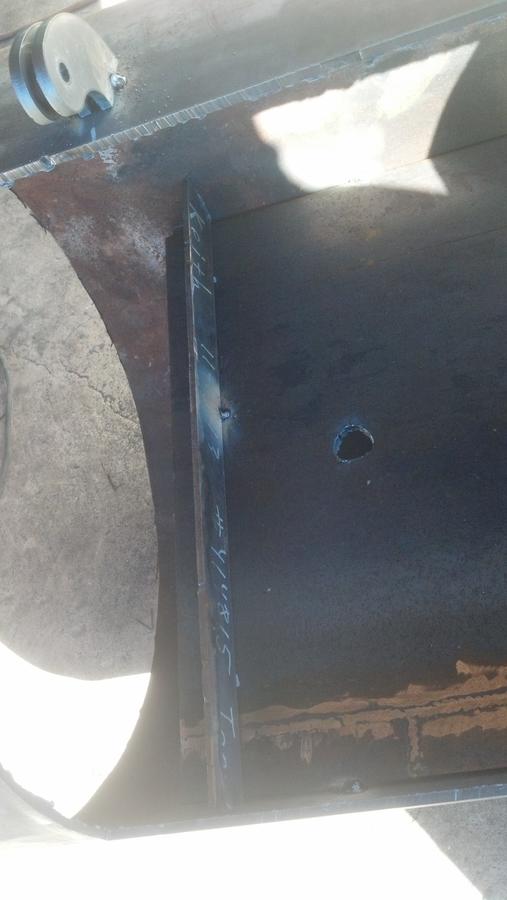
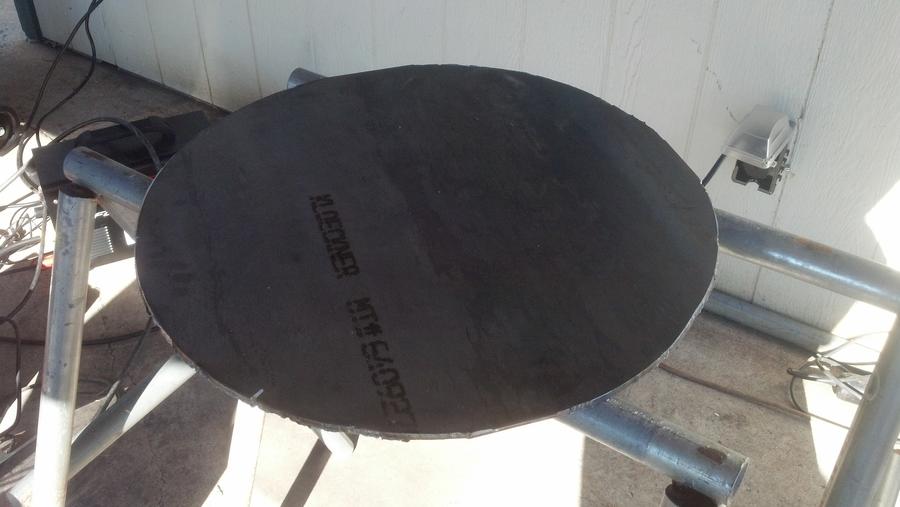
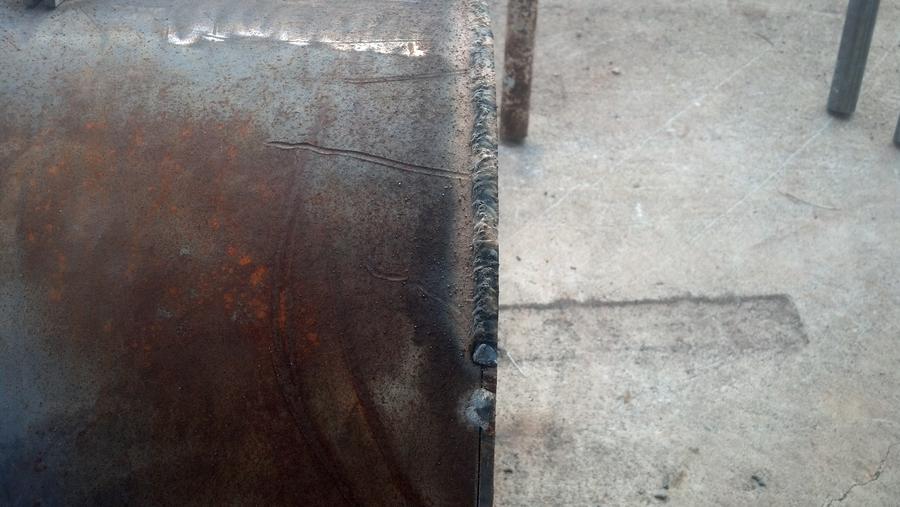
I started on the firebox today. Still waiting on the plasma cutter. It should arrive on Tuesday. You can see in the pictures that I used the double plate on the top of the firebox with a 1" gap between the plates. I am using a 140 red welder that runs on 110. Sure would be nice to be using a 220 welder! It sure takes a while on the long welds. It is burning good though, with good penetration as you can see in the pictures.
I also have a picture of the "repaired" rf plate. I am just waiting for the plasma so that I can cut the doors and get rockin' and rollin on this thing. I have a goal to be smoking meat on Christmas day.
UPDATE with Pics
It is still way below average temps in Texas as it has been for over 3 weeks. The new plasma cutter came in last week but it has been too cold and wet to use it.
It was in the 50's yesterday with high winds but I braved it and got some work done on the pit. It's amazing how fast things go with the right tools.
The plasma cutter.
This thing cuts 1/4" and 5/16" steel like a skill saw on a 2x4. I now have some oxy-torches for sale!

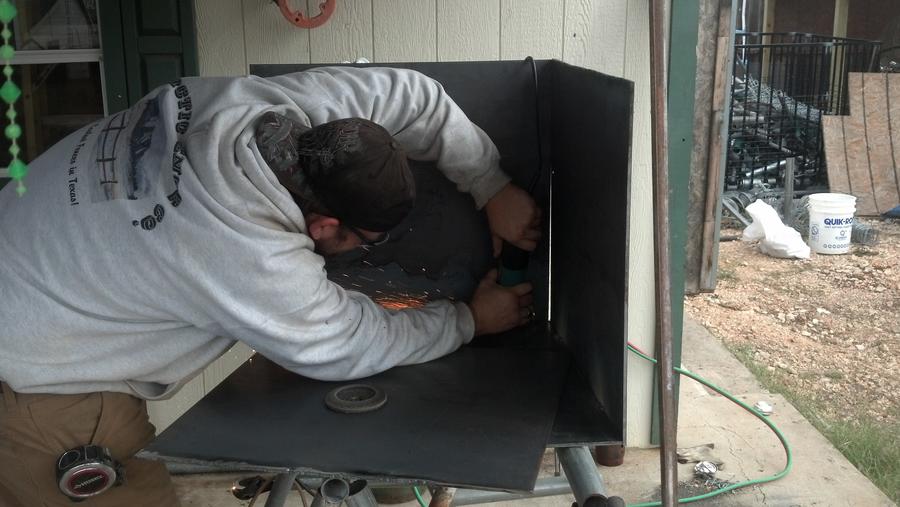
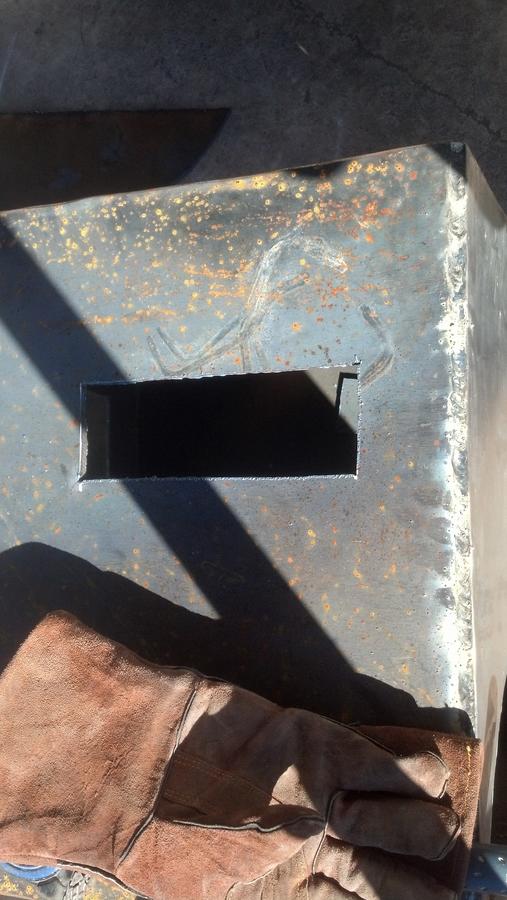
My first cut with the plasma was the door for the firebox. It is cut out and the frame tacked onto the firebox.
The firebox didn't end up as square as I'd hoped, but I can fill it with weld and grind it down. I still have a few more seams to weld on the firebox; takes forever with a 110 volt welder.
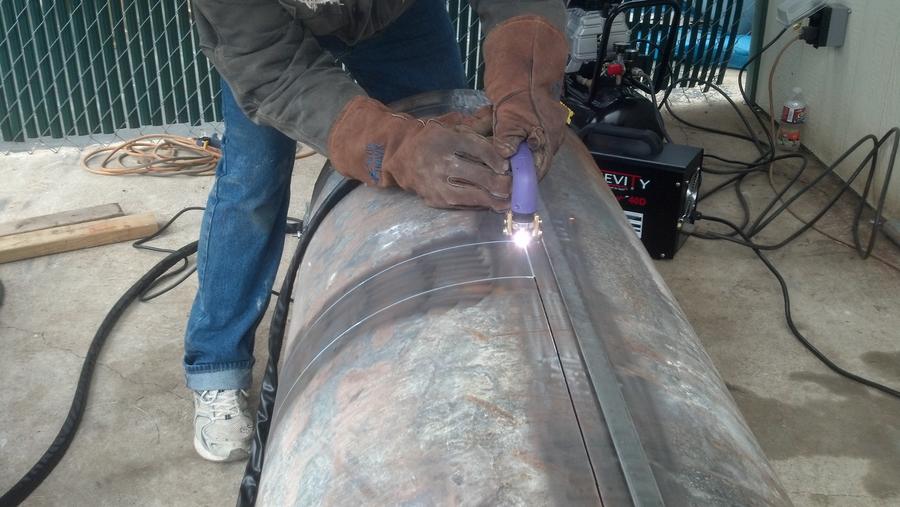
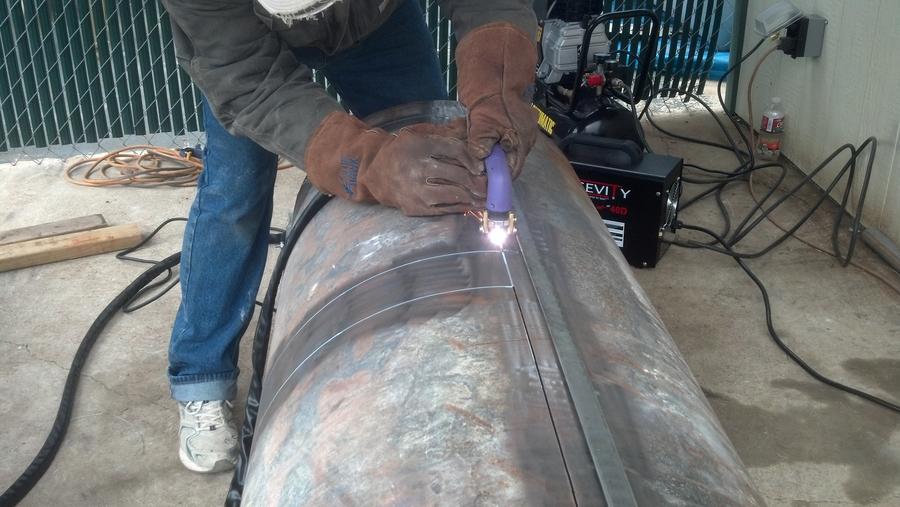
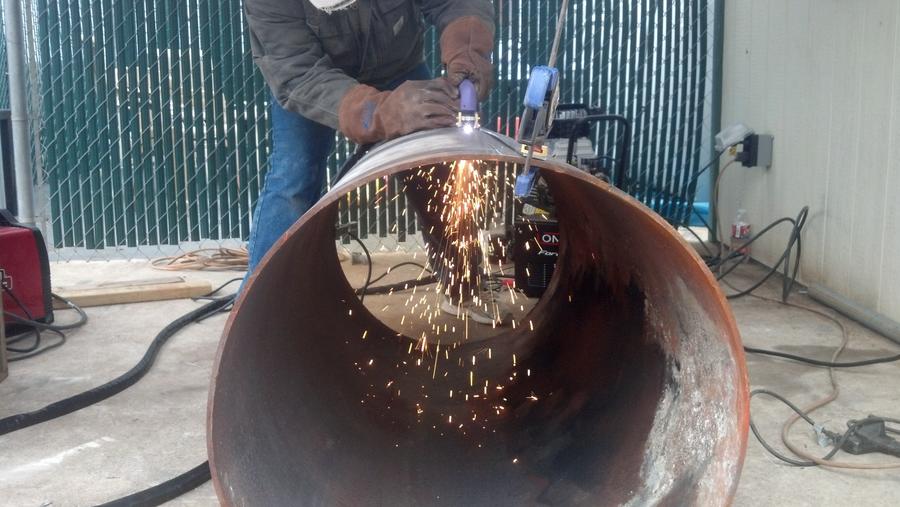
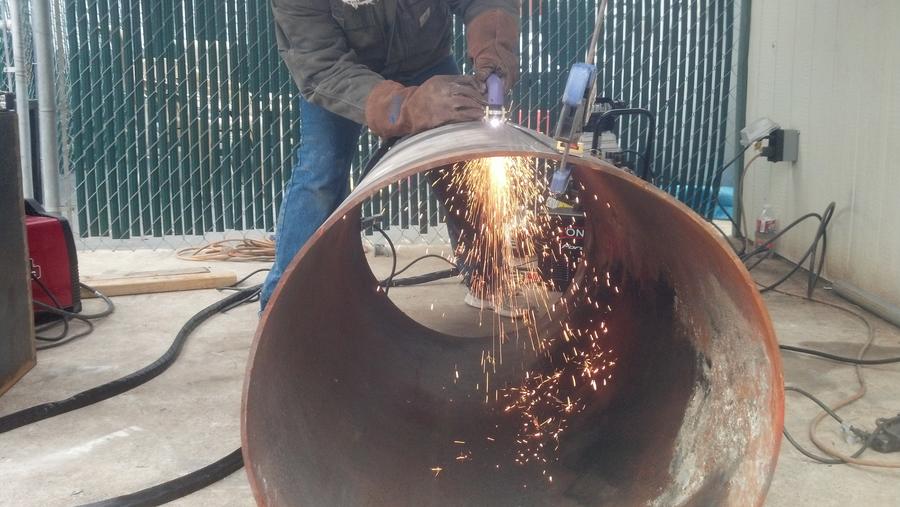
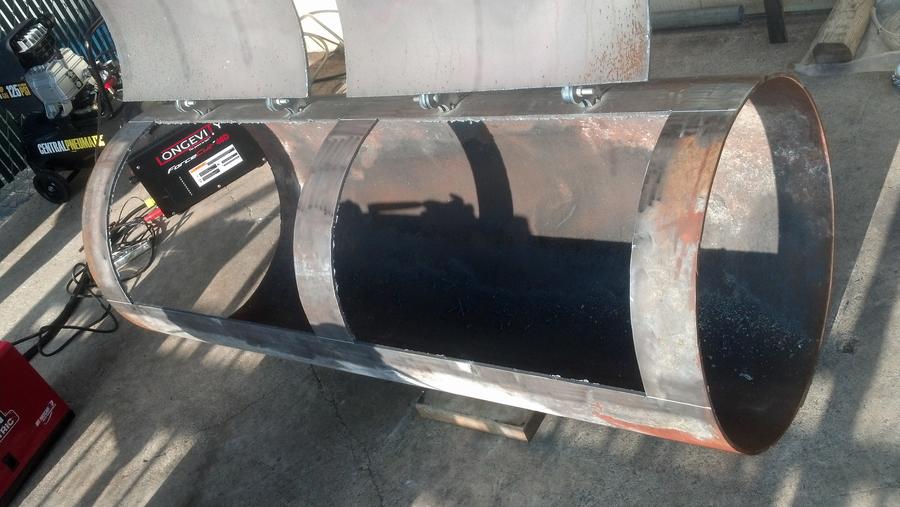
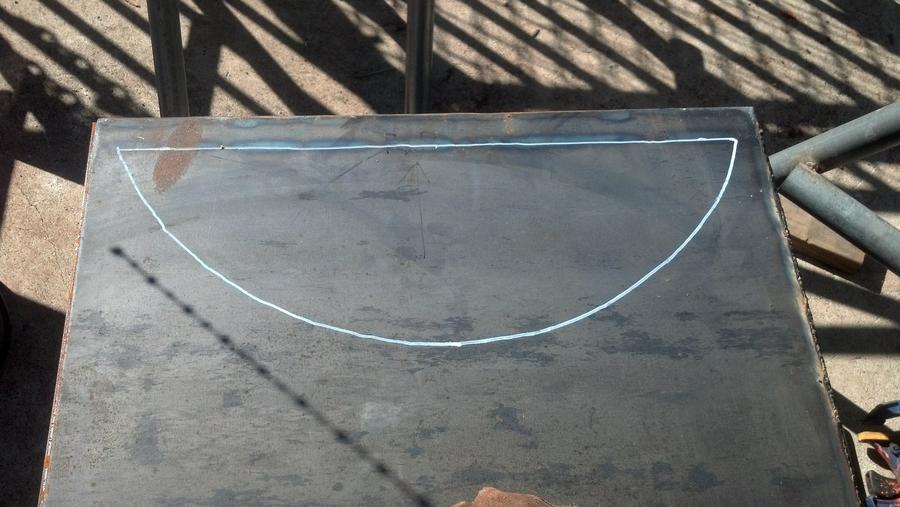
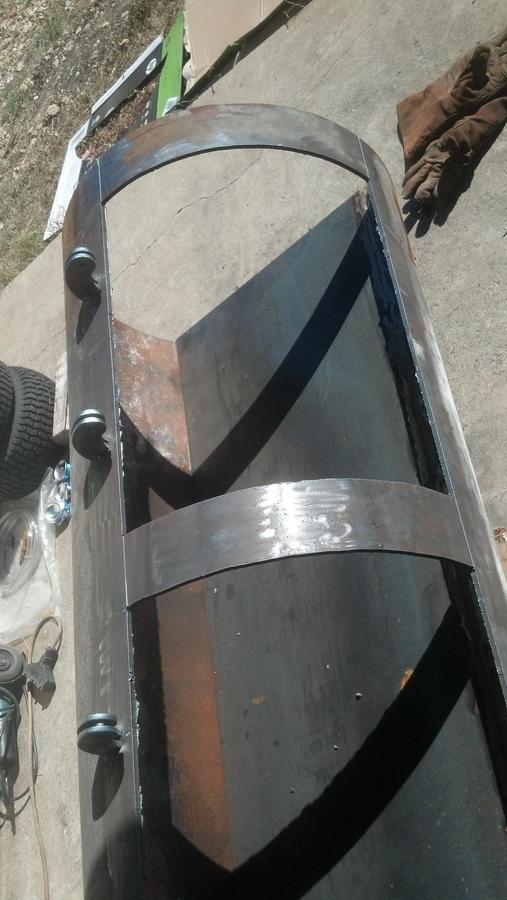
Next, we got the doors marked out on the cooking chamber and ready to cut.
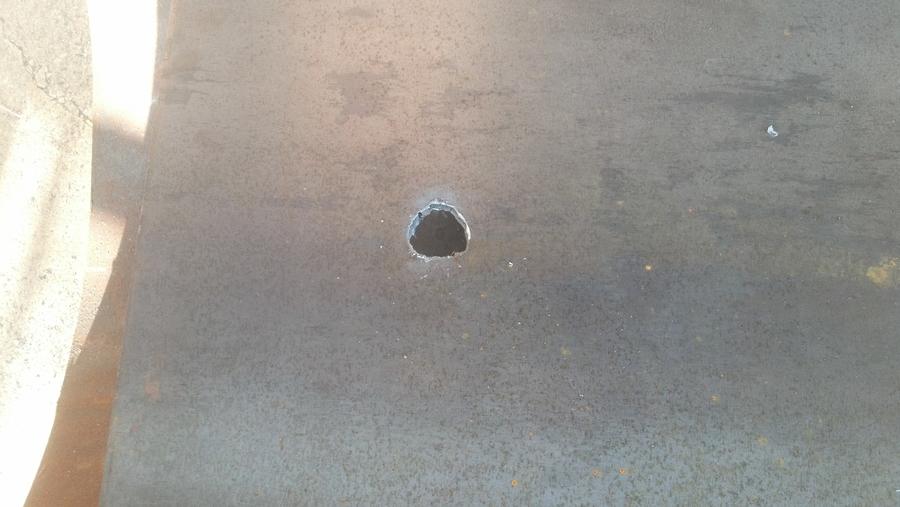
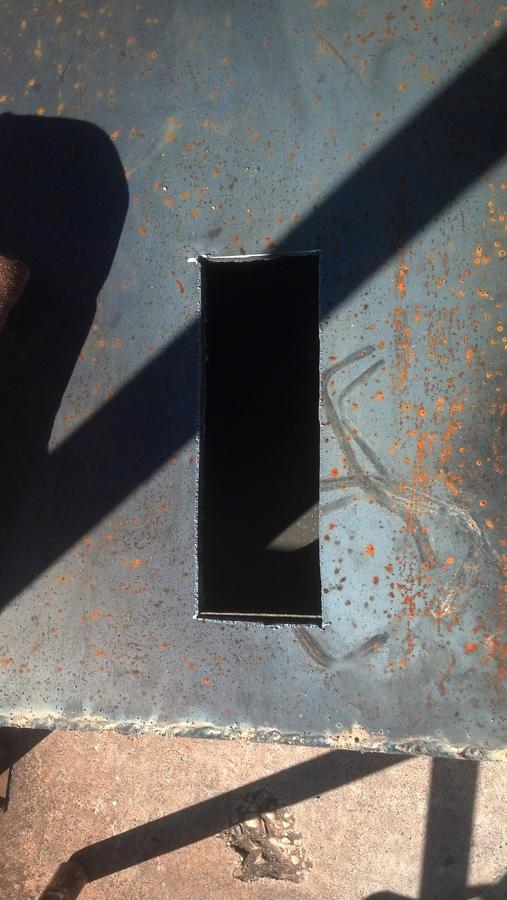
The plasma cutter punches holes right through the 5/16" steel to start the cut. Here's a pic of the first cut and also looking up from the bottom of the cut. Not a lot of slag to deal with.
Got the top lines cut, now to tack on some hinges.
I was able to use some 1/8" strap for a guide on the top and bottom door cuts to get a good straight cut. I didn't know what to do on the vertical cuts, so I free-styled it. They actually came out really good. I tacked on a scrap piece to keep the doors from falling in when the final cuts were made.
I was really nervous from watching so many builds on this site that the doors were going to spring and I would have a bunch of trouble. The doors didn't warp at all. I don't know if that is because of the use of a plasma cutter versus torches, or because this was a rolled pipe versus a tank. Anyone have an idea? Anyways, I was glad.
The doors all cut out
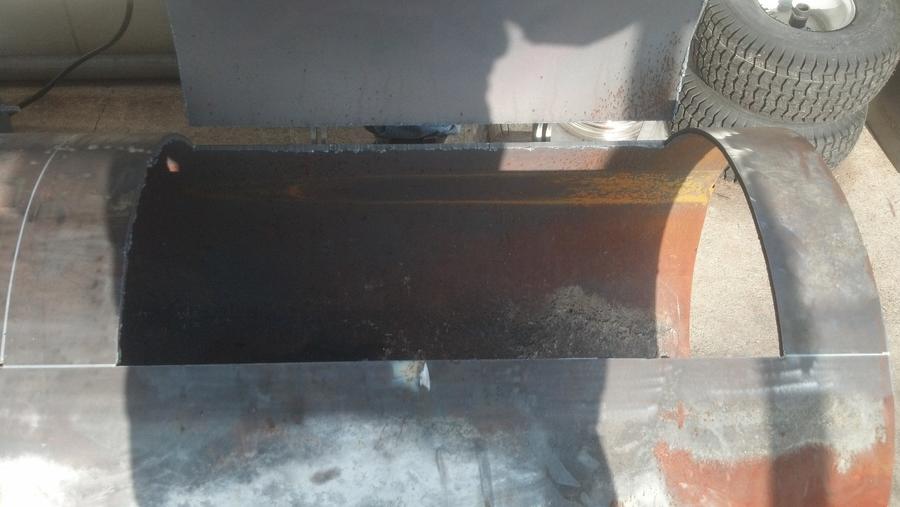
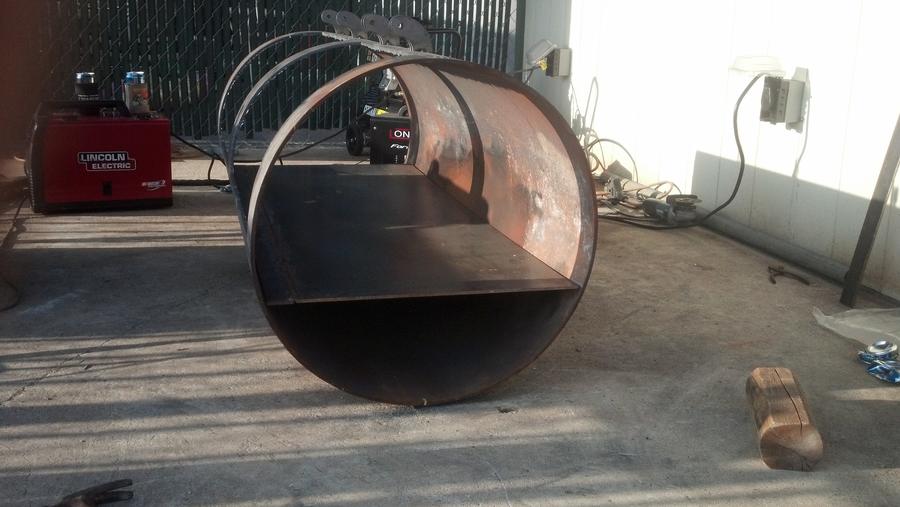
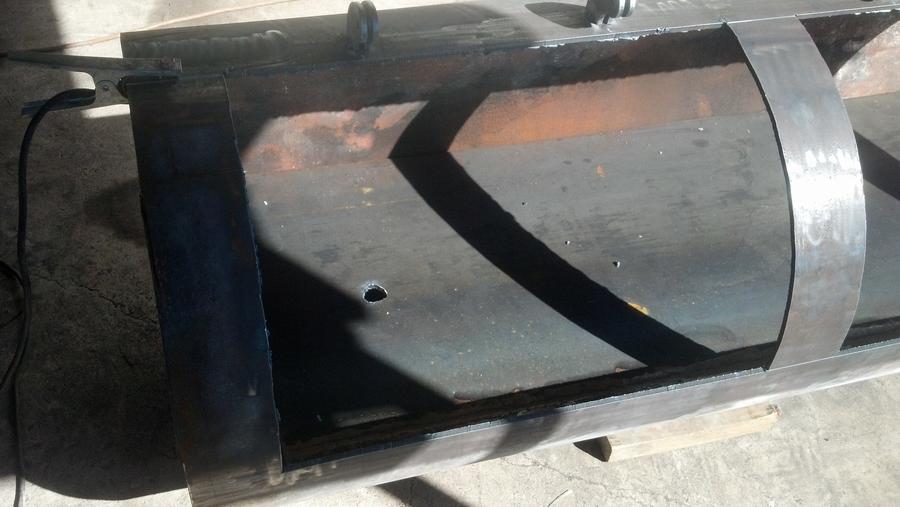
We laid the reverse flow plate in and got it level and marked it. It fits very well. With it marked, we moved it towards the end of the pipe so that I could lay a piece of flat stock on it for the grease dam and mark the pipe contour on it. With a little grinding, it was a perfect fit. I then marked out the hole for the drain in the rf plate and blasted it out with the plasma. Not a perfect hole but the pipe fits and I can fill it with weld.
The weather is supposed to be better today so will get some more work done and post the results.
I'm quite pleased after yesterday's work; for so long all I had was a piece of pipe laying on the ground in the back yard, wondering if I'd ever be able to burn some meat. Now, it's finally starting to look like a bbq pit.
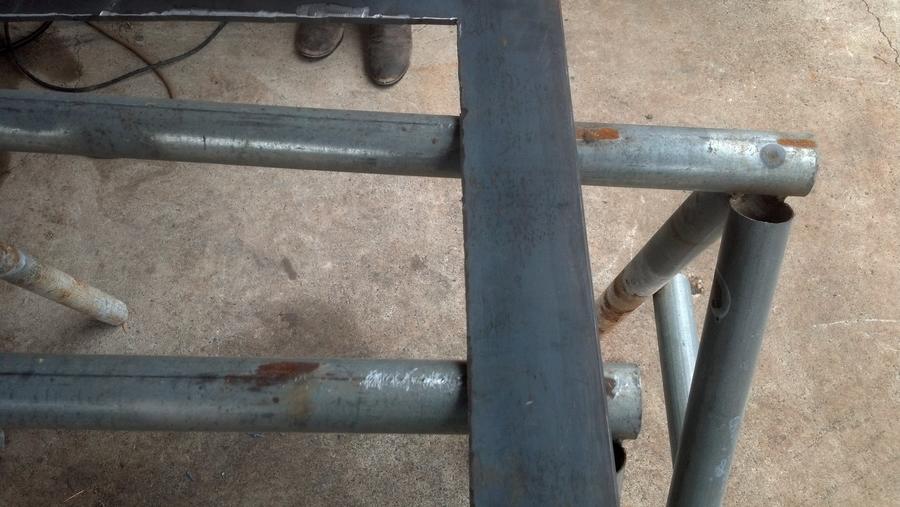
I'm working on a design for the stand/legs. I've seen some good ideas on the site.
I have some angled u-bolts that I plan to use for the door stops. My plan is to have the smoker on a slab in the back yard but then I can use my skid-steer and some straps through the u-bolts to pick it up and put it on a trailer to make it mobile when I have the urge. I really didn't want to trailer mount it.
More pics to come.
Keith
It is still way below average temps in Texas as it has been for over 3 weeks. The new plasma cutter came in last week but it has been too cold and wet to use it.
It was in the 50's yesterday with high winds but I braved it and got some work done on the pit. It's amazing how fast things go with the right tools.
The plasma cutter.

This thing cuts 1/4" and 5/16" steel like a skill saw on a 2x4. I now have some oxy-torches for sale!
My first cut with the plasma was the door for the firebox. It is cut out and the frame tacked onto the firebox.


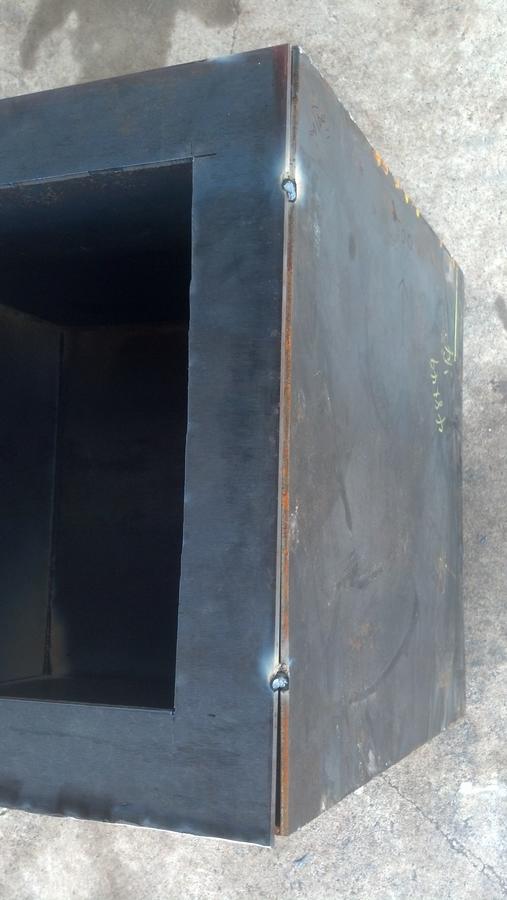
The firebox didn't end up as square as I'd hoped, but I can fill it with weld and grind it down. I still have a few more seams to weld on the firebox; takes forever with a 110 volt welder.
Next, we got the doors marked out on the cooking chamber and ready to cut.


The plasma cutter punches holes right through the 5/16" steel to start the cut. Here's a pic of the first cut and also looking up from the bottom of the cut. Not a lot of slag to deal with.

Got the top lines cut, now to tack on some hinges.
I was able to use some 1/8" strap for a guide on the top and bottom door cuts to get a good straight cut. I didn't know what to do on the vertical cuts, so I free-styled it. They actually came out really good. I tacked on a scrap piece to keep the doors from falling in when the final cuts were made.
I was really nervous from watching so many builds on this site that the doors were going to spring and I would have a bunch of trouble. The doors didn't warp at all. I don't know if that is because of the use of a plasma cutter versus torches, or because this was a rolled pipe versus a tank. Anyone have an idea? Anyways, I was glad.
The doors all cut out
We laid the reverse flow plate in and got it level and marked it. It fits very well. With it marked, we moved it towards the end of the pipe so that I could lay a piece of flat stock on it for the grease dam and mark the pipe contour on it. With a little grinding, it was a perfect fit. I then marked out the hole for the drain in the rf plate and blasted it out with the plasma. Not a perfect hole but the pipe fits and I can fill it with weld.
The weather is supposed to be better today so will get some more work done and post the results.
I'm quite pleased after yesterday's work; for so long all I had was a piece of pipe laying on the ground in the back yard, wondering if I'd ever be able to burn some meat. Now, it's finally starting to look like a bbq pit.
I'm working on a design for the stand/legs. I've seen some good ideas on the site.
I have some angled u-bolts that I plan to use for the door stops. My plan is to have the smoker on a slab in the back yard but then I can use my skid-steer and some straps through the u-bolts to pick it up and put it on a trailer to make it mobile when I have the urge. I really didn't want to trailer mount it.
More pics to come.
Keith
Hope everyone had a nice Christmas. A few more pics. The darn weather is still not cooperating but it is supposed to be nice this weekend, so maybe I can get a little more work done.
The firebox opening is marked to be cut. The vents are cut into the firebox. I will also be putting a pie vent on the fb door, up a little higher.
A couple shots of the grease dam tacked into place. I did not put it right onto the very end of the rf plate. I let about an inch. I am thinking that if I ever have a problem with air flow and need to make the opening bigger at that end, I can cut off that inch without having to grind off the dam.
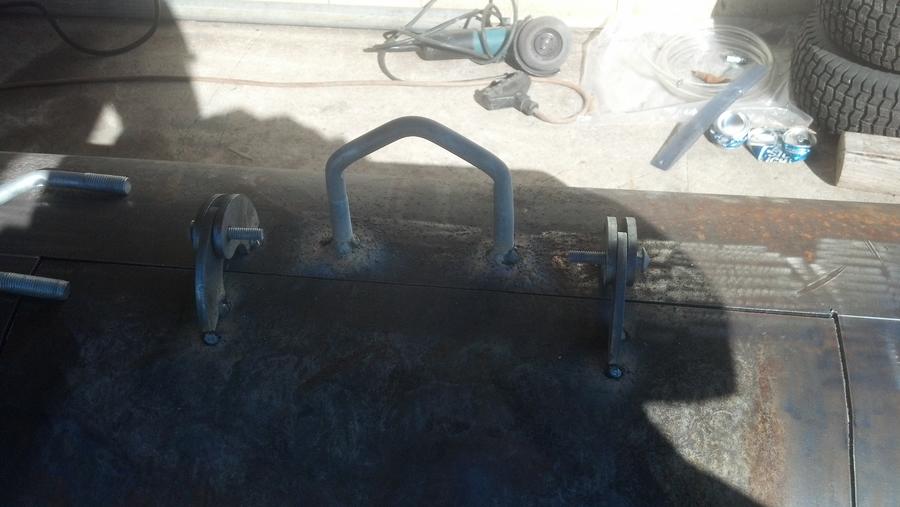
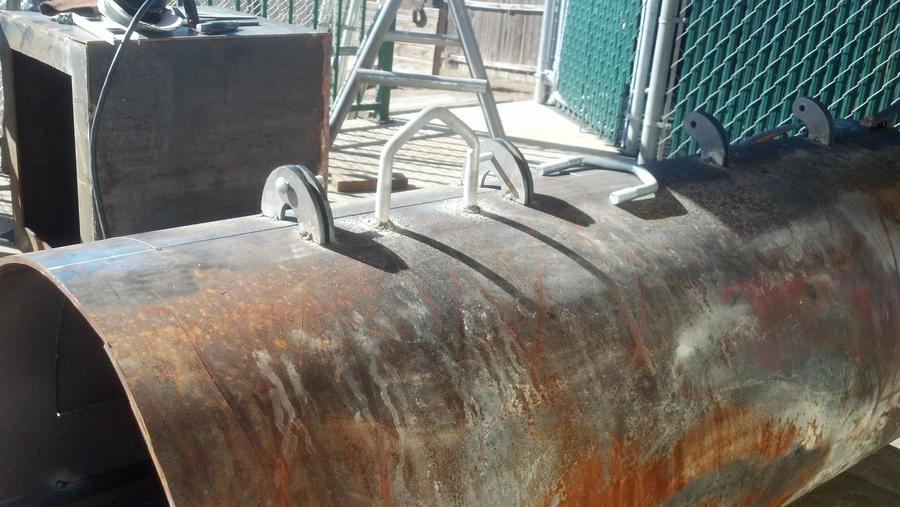
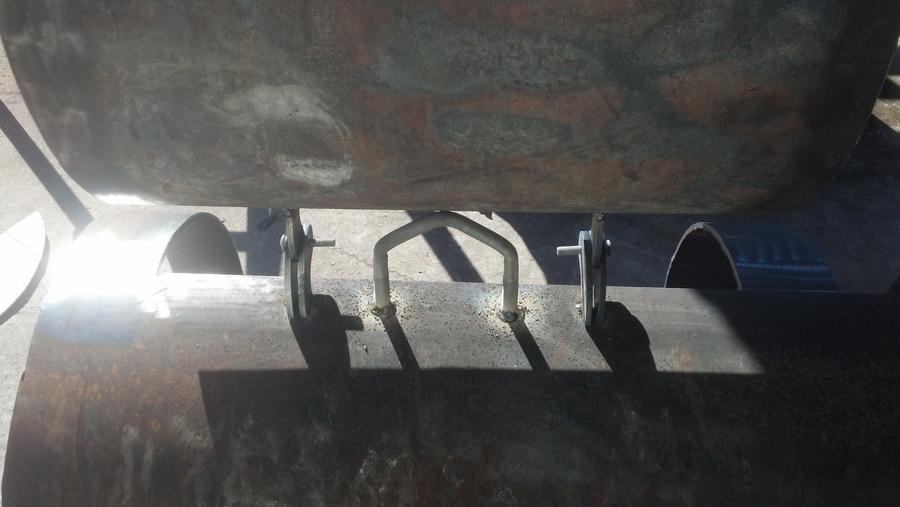
These are the u-bolts that are being used for door stops, as well as picking hooks to move the pit with a machine to trailer it.
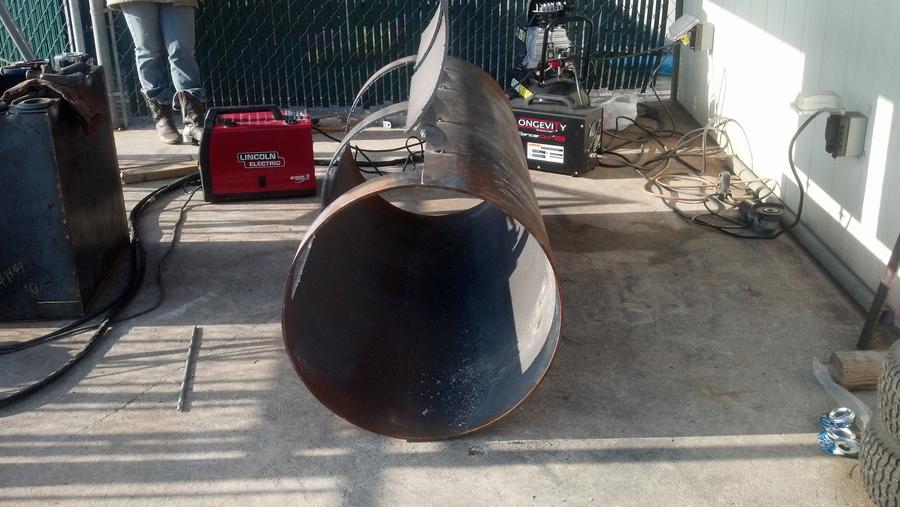
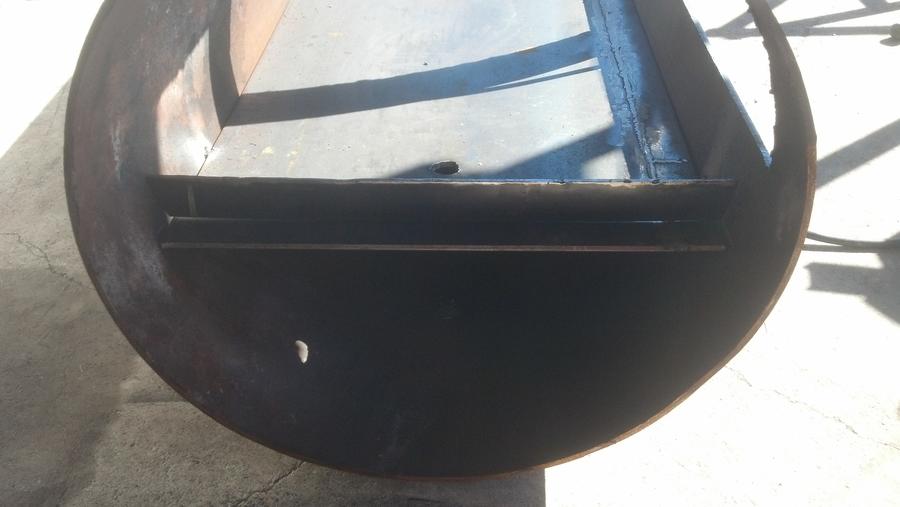
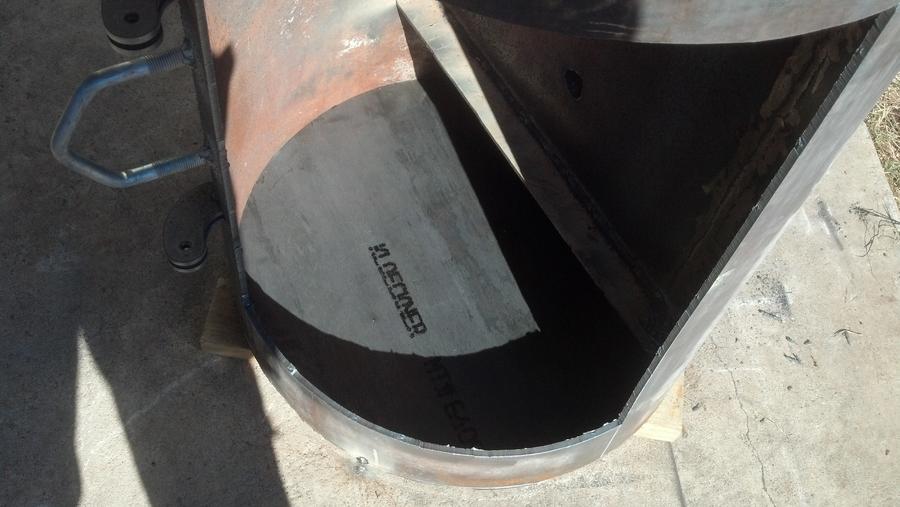
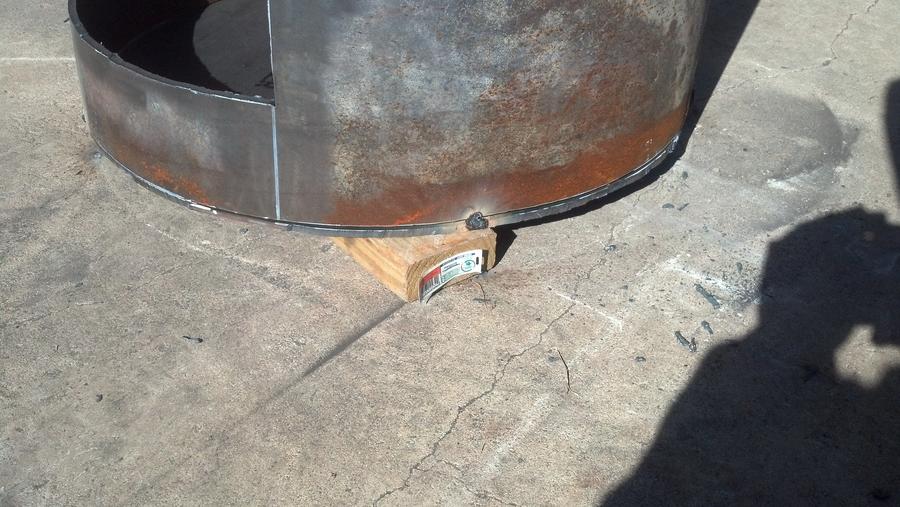
I cut out the end cap with the plasma and got it tacked into place. I really give thanks to all the pro's on this site for helping me to not make a mistake on this, as I've seen. Ribwizzard had suggested in his posts to stand the pipe up on the plate. I am glad that I did this to mark it out; lo and behold, all pipe is not exactly round! I marked the circle out and then marked the plate and the pipe so that I could put them back together exactly after cutting it. I will have a few gaps to fill, but I'm getting used to that!
I will be using a piece of 4" square stock for my exhaust. Is it true that only the part that extends above the cc is used in the calculation of square inches? I plan on extending into the cc to a few inches above the cooking grate and having it cut at 45 degrees. I really like the look of the plenum that Dave always suggests, as it keeps the pipe at center. I guess it just takes a little more fab work.
Will try to post more this weekend.
The firebox opening is marked to be cut. The vents are cut into the firebox. I will also be putting a pie vent on the fb door, up a little higher.
A couple shots of the grease dam tacked into place. I did not put it right onto the very end of the rf plate. I let about an inch. I am thinking that if I ever have a problem with air flow and need to make the opening bigger at that end, I can cut off that inch without having to grind off the dam.
These are the u-bolts that are being used for door stops, as well as picking hooks to move the pit with a machine to trailer it.
I cut out the end cap with the plasma and got it tacked into place. I really give thanks to all the pro's on this site for helping me to not make a mistake on this, as I've seen. Ribwizzard had suggested in his posts to stand the pipe up on the plate. I am glad that I did this to mark it out; lo and behold, all pipe is not exactly round! I marked the circle out and then marked the plate and the pipe so that I could put them back together exactly after cutting it. I will have a few gaps to fill, but I'm getting used to that!
I will be using a piece of 4" square stock for my exhaust. Is it true that only the part that extends above the cc is used in the calculation of square inches? I plan on extending into the cc to a few inches above the cooking grate and having it cut at 45 degrees. I really like the look of the plenum that Dave always suggests, as it keeps the pipe at center. I guess it just takes a little more fab work.
Will try to post more this weekend.
ribwizzard
Master of the Pit
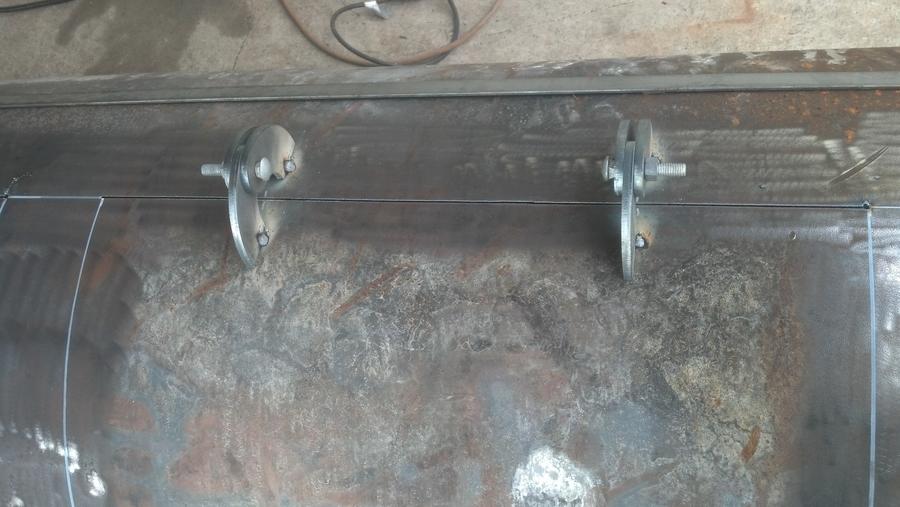
Nice job on the hinges, did you make those?
I bought them out of a place in Houston. I will try to post the site on your thread about where to buy parts. I will make them myself next time using that design.
Well....the site was teoufitters.com but it appears that the domain expired, so I don't know what is up with them. Trinity Expedition Outfitters. Guess I'll just trace out a hinge and cut some on the plasma.
ribwizzard
Master of the Pit
They are cool! Think I will copy the design in 3/8".
These are 1/4". I will measure the diameter for you and post today.
I like the way that they lift the door up and away.
Did a lot of welding today. The rf plate is totally welded in, the firebox is all welded, and continued welding the full end cap of the cook chamber. It just takes SO long with a 110v welder. I envy those of you welding with a bigger rig.
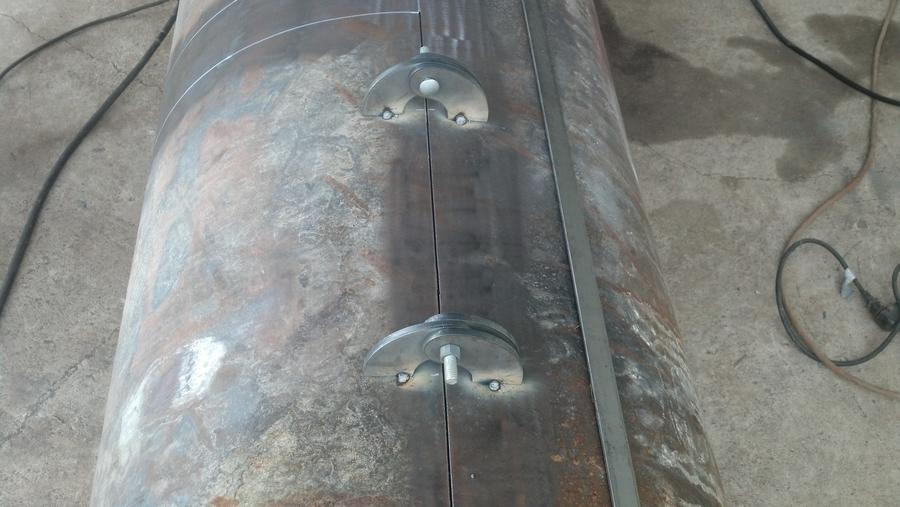
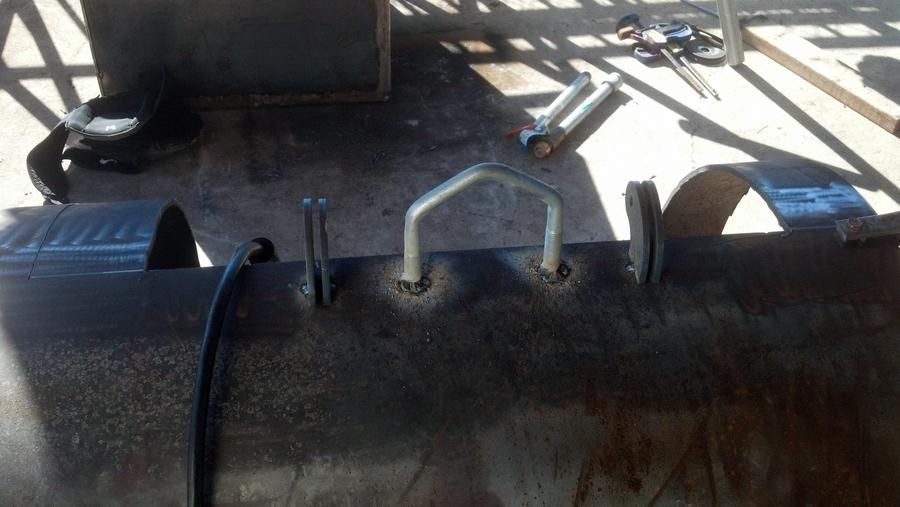
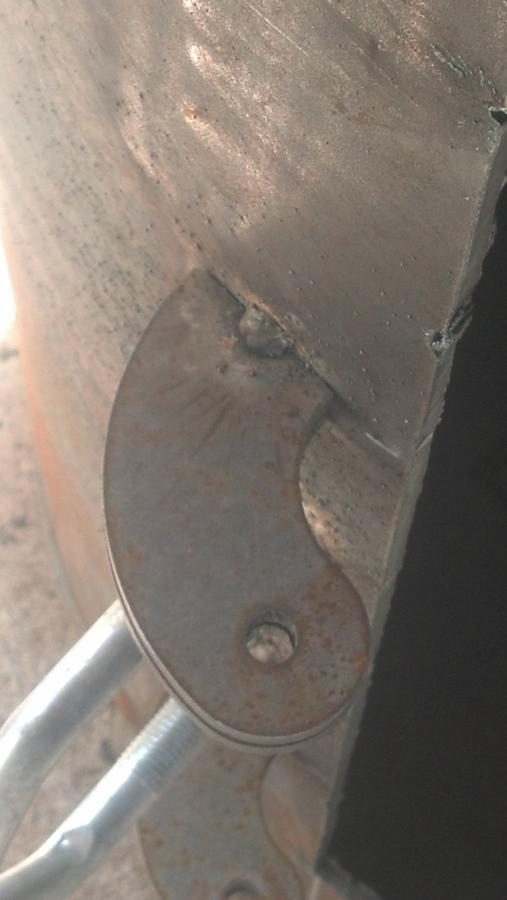
Hey Ribwizzard, I took some measurements on the hinge and attached a clean closer picture of it If each piece were part of a circle, they appear to be 1/4 of a 6" circle. They are 1 1/2" wide. Hope that helps.
Tomorrow will be starting the trim on the doors. I have some 1" x 1/8" strap to use. I will be attaching it from the back as Ribwizzard does. I will use the plasma cutter to cut notches. I think that will be quicker than a grinder.
Question; should I overlap the corners long and cut them with a cutting wheel in place or should I try to cut them at 45 degrees and then weld them to the door? I'm thinking that the overlap is better but any help would be greatly appreciated.
Keith

SmokingMeatForums.com is reader supported and as an Amazon Associate, we may earn commissions from qualifying purchases.
Similar threads
- Replies
- 2
- Views
- 127
- Replies
- 23
- Views
- 2K
- Featured
- Replies
- 13
- Views
- 793
SmokingMeatForums.com is reader supported and as an Amazon Associate, we may earn commissions from qualifying purchases.

SmokingMeatForums.com is a community of barbecue and outdoor cooking enthusiasts dedicated to smoking meat.
© 2004-2026 SmokingMeatForums.com