Dried Beef (cured & smoked)
I got a Hot Tip about Eye Rounds being on sale for $1.99. That's the first time I saw it that cheap since more than 4 years ago!!!
The first time I used Eye Rounds for Dried Beef, I injected cure because they were over 3" thick:
Link:
http://www.smokingmeatforums.com/t/93718/smoked-dried-beef-with-lots-of-qview
This time I decided to slice them all in half instead of injecting (See Below):
Day #1 (Prep & Cure):
Trim all the exterior fat off the Eye Rounds.
Since the Eye Rounds were well over 3" thick, I decided to slice them in half to make the pieces each under 2" thick.
This way I won't have to inject the over 3" thick pieces, and it will be easier for the cure to get to the center.
Rinse well, dry, and weigh each piece.
Weigh the proper amounts of TQ for each piece (1/2 ounce per pound of whole meat).
Rub the TQ and one or two tsp of Brown Sugar per pound on each piece of meat to be cured.
Put each piece in a Ziplock, and put any cure that falls off before it gets into the bag, in the bag with the piece it belongs with.
This way the proper "weighed" amount of cure stays with each piece.
Squeeze excess air out of bags, and zip them up.
Tip: Fold Ziplock bags back at the opening, like a pants cuff, until you're ready to close. You young guys can ask your parents what a pants cuff is.
This way you don't get any cure or sugar in the zipper, which will ruin the seal of the zipper.
Put bags in Fridge for proper amount of time.
The thickest piece I had to cure was less than 2" thick, so I made the number of days to be 9 days, however due to frequent snow storms, these pieces stayed in cure for 11 days.
Note: I Never cure for less than 8 days.
Also flip the bags over every day that it is in cure, for best cure penetration.
Day #12 (Getting Ready to Smoke)
Drain juices from bags, remove meat, and soak in cold water (20 minutes) to remove surface salt.
Cut thickest piece in half to check if cure got to center. (Should be pink in center)
Take a couple small slices from an end of a small piece, and fry it to test flavor.
Fry test was perfect, so I rinsed, dried, and put the pieces on two smoker racks.
Note: You don't have to perform a Fry-Test to check for salt, but you don't have to look both ways before crossing the street either.
I put the thinner pieces on one rack, and the thicker pieces on another.
I also sprinkled CBP, Garlic Powder, and Onion Powder on the pieces.
Then into my Meat Fridge to begin forming the pellicle.
Due to bad weather---Couple feet of snow----Meat stayed in fridge a couple extra days.
Day #16 (Smoking Day!!):
7:00AM-------------Pre-heat MES to 160*.
7:30-----------------Put meat in smoker (Thicker on 2nd position---Thinner on top position). The second position in my smoker is a bit hotter than the top.
8:00-----------------Put in well lit AMNS, filled with Hickory Dust. Cut heat back to 140*
10:00----------------Meat at 102* IT.
12:00----------------Meat at 120* IT. Bump heat up to 160*.
2:00-----------------Meat at 135* IT.
4:00-----------------Meat at 143* IT. Bump heat up to 180*.
6:00-----------------Meat at 148* IT.
7:00-----------------Meat at 152* IT. Bump heat up to 190*.
8:00-----------------Meat at 158* IT. Check with Thermapen---Pieces ranged from 153* IT to 164* IT.
8:15------------------Remove All pieces, place in large bowl, and put in Fridge (uncovered) for a couple days.
Day #19 (Slicing & Packaging):
Slice all ends & side edges at 3/16" thick, and give to my Son. He says it's the best Beef Jerky there is.
Slice all the rest paper thin, vacuum pack & freeze.
Results: This stuff is Awesome. I left it a little moist because my favorite thing to do with it is cold sandwiches. All I do is coat 2 slices of fresh white or Italian bread with Miracle Whip (Mayo if you prefer more bland). Then put a couple layers of thin sliced Dried Beef on one side. Then a slice or two of American Cheese, and close it up. I used to eat two Sammies a day like that for months!!!
If you like it drier, just cut the heat back to 160*, and keep it in as long as you want. The longer you keep it in, the drier it will get.
That's All Folks,
Bear
Four Nice Eye Rounds, about 3 pounds each:

Pieces & proper amounts of TQ weighed & ready to rub:

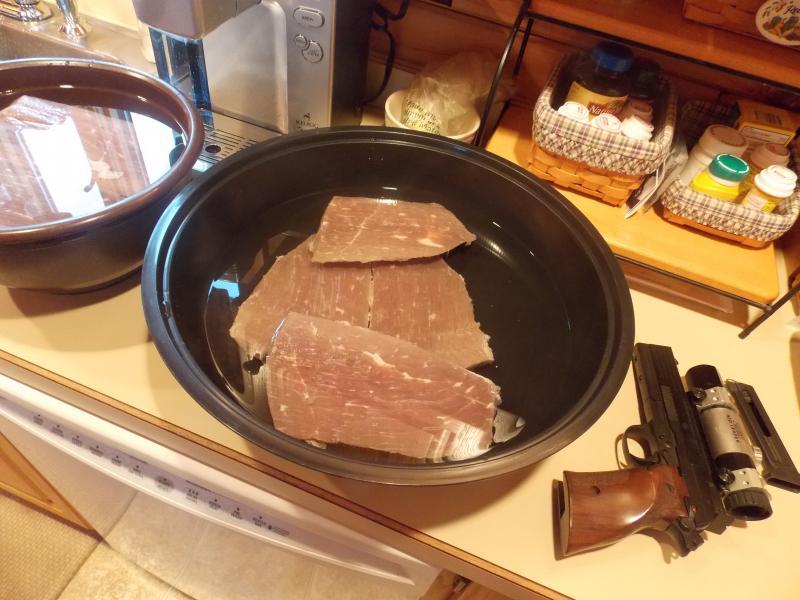
20 minute soak to eliminate surface salt:

Checking Cure to Center.
That Bright Red/Pink in the center shows that the cure got all the way to the center:

Test Fry a few slices:

Time to taste---MMMMmmmmmm:

Ready for seasoning & into fridge to start pellicle:

Lighting my AMNS:

Into the Smoker:

Fresh out of Smoker:

Ready to slice:

All sliced up. Two big bowls of thin sliced Dried Beef, and two bowls of Ends:

Close-up of big bowl of goodness!!

All vacuum packed, plus a couple zip locks for immediate consumption:

I got a Hot Tip about Eye Rounds being on sale for $1.99. That's the first time I saw it that cheap since more than 4 years ago!!!
The first time I used Eye Rounds for Dried Beef, I injected cure because they were over 3" thick:
Link:
http://www.smokingmeatforums.com/t/93718/smoked-dried-beef-with-lots-of-qview
This time I decided to slice them all in half instead of injecting (See Below):
Day #1 (Prep & Cure):
Trim all the exterior fat off the Eye Rounds.
Since the Eye Rounds were well over 3" thick, I decided to slice them in half to make the pieces each under 2" thick.
This way I won't have to inject the over 3" thick pieces, and it will be easier for the cure to get to the center.
Rinse well, dry, and weigh each piece.
Weigh the proper amounts of TQ for each piece (1/2 ounce per pound of whole meat).
Rub the TQ and one or two tsp of Brown Sugar per pound on each piece of meat to be cured.
Put each piece in a Ziplock, and put any cure that falls off before it gets into the bag, in the bag with the piece it belongs with.
This way the proper "weighed" amount of cure stays with each piece.
Squeeze excess air out of bags, and zip them up.
Tip: Fold Ziplock bags back at the opening, like a pants cuff, until you're ready to close. You young guys can ask your parents what a pants cuff is.
This way you don't get any cure or sugar in the zipper, which will ruin the seal of the zipper.
Put bags in Fridge for proper amount of time.
The thickest piece I had to cure was less than 2" thick, so I made the number of days to be 9 days, however due to frequent snow storms, these pieces stayed in cure for 11 days.
Note: I Never cure for less than 8 days.
Also flip the bags over every day that it is in cure, for best cure penetration.
Day #12 (Getting Ready to Smoke)
Drain juices from bags, remove meat, and soak in cold water (20 minutes) to remove surface salt.
Cut thickest piece in half to check if cure got to center. (Should be pink in center)
Take a couple small slices from an end of a small piece, and fry it to test flavor.
Fry test was perfect, so I rinsed, dried, and put the pieces on two smoker racks.
Note: You don't have to perform a Fry-Test to check for salt, but you don't have to look both ways before crossing the street either.
I put the thinner pieces on one rack, and the thicker pieces on another.
I also sprinkled CBP, Garlic Powder, and Onion Powder on the pieces.
Then into my Meat Fridge to begin forming the pellicle.
Due to bad weather---Couple feet of snow----Meat stayed in fridge a couple extra days.
Day #16 (Smoking Day!!):
7:00AM-------------Pre-heat MES to 160*.
7:30-----------------Put meat in smoker (Thicker on 2nd position---Thinner on top position). The second position in my smoker is a bit hotter than the top.
8:00-----------------Put in well lit AMNS, filled with Hickory Dust. Cut heat back to 140*
10:00----------------Meat at 102* IT.
12:00----------------Meat at 120* IT. Bump heat up to 160*.
2:00-----------------Meat at 135* IT.
4:00-----------------Meat at 143* IT. Bump heat up to 180*.
6:00-----------------Meat at 148* IT.
7:00-----------------Meat at 152* IT. Bump heat up to 190*.
8:00-----------------Meat at 158* IT. Check with Thermapen---Pieces ranged from 153* IT to 164* IT.
8:15------------------Remove All pieces, place in large bowl, and put in Fridge (uncovered) for a couple days.
Day #19 (Slicing & Packaging):
Slice all ends & side edges at 3/16" thick, and give to my Son. He says it's the best Beef Jerky there is.
Slice all the rest paper thin, vacuum pack & freeze.
Results: This stuff is Awesome. I left it a little moist because my favorite thing to do with it is cold sandwiches. All I do is coat 2 slices of fresh white or Italian bread with Miracle Whip (Mayo if you prefer more bland). Then put a couple layers of thin sliced Dried Beef on one side. Then a slice or two of American Cheese, and close it up. I used to eat two Sammies a day like that for months!!!
If you like it drier, just cut the heat back to 160*, and keep it in as long as you want. The longer you keep it in, the drier it will get.
That's All Folks,
Bear
Four Nice Eye Rounds, about 3 pounds each:
Pieces & proper amounts of TQ weighed & ready to rub:
20 minute soak to eliminate surface salt:
Checking Cure to Center.
That Bright Red/Pink in the center shows that the cure got all the way to the center:
Test Fry a few slices:
Time to taste---MMMMmmmmmm:
Ready for seasoning & into fridge to start pellicle:
Lighting my AMNS:
Into the Smoker:
Fresh out of Smoker:
Ready to slice:
All sliced up. Two big bowls of thin sliced Dried Beef, and two bowls of Ends:
Close-up of big bowl of goodness!!
All vacuum packed, plus a couple zip locks for immediate consumption:
Last edited: