Barn tear down...Shed build pics.

  • Some of the links on this forum allow SMF, at no cost to you, to earn a small commission when you click through and make a purchase. Let me know if you have any questions about this.
SMF is reader-supported. When you buy through links on our site, we may earn an affiliate commission.
Got the last wall up, Top plate in place, then set the first truss on the framing and have it speed clamped to a couple temporary braces. Loss of that nail gun really slowed me down.

No pic. to late in the day.

Tomorrow, install all the trusses. Add all roof bracing. Install perlings. Then prep for roof install. Hope to atleast get that done, and rip the 14' galvalum sheets in half down to 7'. Maybe get the first sheet of tin in place. That is the hardest sheet to install. That way early friday morning I can install the galvalum and screw it down, and maybe get the ridge cap on before the rain hits. It is coming through late in the day so fingers crossed...
 
The top framing diagonals are 20' 1/8" so almost square. Little gaps and mis width lumber caused the error, but that is to be expected. I honestly did not think it would be that close.

I think I have enough 2x6's left for the diagonal bracing on the walls....
 
If you have plans of hanging the inside now , or in the future you need to think about adding ladder blocks or some type of nailer on the ( looks like ) long wall before you start the tin . You can add it later , but might be easier before . Also before any in wall wiring that turns the corners .
 
  • Like
Reactions: indaswamp
If you have plans of hanging the inside now , or in the future you need to think about adding ladder blocks or some type of nailer on the ( looks like ) long wall before you start the tin . You can add it later , but might be easier before . Also before any in wall wiring that turns the corners .
Thanks for thinking ahead for me chop. No plans to enclose the inside. But I will do the wiring before installing the side tin.
 
Progress. Definitely felt like I got something accomplished today. Got the trusses installed and the long middle anti twist brace down the middle. Other than some bracing, the framing is pretty much complete. Will do that tomorrow then install perlings, rip the 14' galvalum sheets in half down to 7' and install the roof.

Trusses going up!
IMG_20230323_144114.jpg

Trusses installed...
IMG_20230323_170900.jpg


middle brace...
IMG_20230323_181850.jpg

IMG_20230323_190324.jpg


And the baby doves flew the nest today. They were hanging out near the saw table all day. As it got late, one flew up on the board I was about to cut going up to roost from off the ground. It walked all the way down the board to me as I imitated a baby dove call. The camera is less than 2' from it...
IMG_20230323_183237.jpg

IMG_20230323_191206.jpg


Momma eventually came and got the chicks and took them up into the oak tree in the front yard for the night. Was a nice break every now and then just to sit in a chair, catch my breath and watch the baby doves.


Before long....I will have a work shop! I am ready!!
 
Last edited:
Oh- and I did remember to nail the top header plate on top of the studs so no nail in between when drilling holes to pull wire. Learned that lesson 20 years ago......
 
I was over ambitious on my estimation on how long it would take to get the perlings on the roof. Being both the ground man and the guy in the air, that slowed me way down. Tried to think ahead as much as possible and plan my work, was still slow. I knocked off early today. Body telling me I need a break anyhow. Was very windy...gusts to 40mph from the south out ahead of that front rolling through. Not a good day to be handling galvalum panels on trusses with perlings! Especially alone! So.... the major storms look like they will stay north of here. Will get back at it in the morning. Now that I've done one side, the other side should go faster. Hope to have the galvalum on tomorrow evening. Then we will have 3 days of rain.....
 
Got up an hour early and put a brisket in the smokehouse today.
IMG_20230324_225714.jpg

After that was lined out and it got daylight, I put the perlings on the other side of the trusses. After lunch I got one side of the tin installed. One man show and that is as fast as I could go.
No work on the work shop for the next few days...rainy pattern setting in as a warm front backs up and stalls out over us.

Brisket was done in 12 1/2 hours so pulled it,
IMG_20230325_194319.jpg

IMG_20230325_205001.jpg


vac sealed, and in the sous vide @140*F to hold until tomorrow for supper with the guys at the firehouse.

IMG_20230325_205839.jpg
I lined out the smokehouse @ 250-265*F with live oak chunks and let it eat....refueled about every 4 hours. When the wind shifted, I could smell it all afternoon up on top the shed.

So...a break. Will be bottling wine with my Uncle tomorrow, then supper with the guys. I got aches and pains all over my body....not use to this kind of work. My hands are sore and my right hand goes numb every now and then...especially at night. I need to go see my massage therapist. Got knots in my upper arms and upper back. Anyways...no updates for a few days at least. To roof the other side, I'm gonna splice on a walkway scaffold to the wall studs @8ft. I have (3) 16ft. 2X6's for runner boards. Will make the job much easier...especially with alignment and getting the tin in place.
 
Last edited:
  • Like
Reactions: pineywoods
Thinking I'm going to use this base drip trim flashing along the bottom edge of the tin on the outside wall to eliminate mice/rats/roaches.

base-drip1x.png

That should do it. I'm going to price it at Metal Mart....
 
  • Like
Reactions: bill1
Finally got the roof galvalum panels on both sides. The catwalk helped out a lot with alignment and installing the first two rows of screws. Also build a slide with stop to stage the galvalum panels on so I could grab them while on the roof...
IMG_20230329_193010.jpg

IMG_20230330_145953.jpg

IMG_20230330_150015.jpg

IMG_20230330_150041.jpg


The diagonal measurements at the top of the header plate in the corners is only out 1/8" so fairly plumb and square...

And I did put in angle bracing under the rafters on the truss. Almost forgot.....
IMG_20230329_124203.jpg
 
Next is hurricane clips, strap bracing, electrical boxes, pulling wire, installing wall perlings. After that, prepping the old tin for the walls, then hanging.
 
Few pics. of my progress...

Got the brace banding installed. Used big ratchet straps to put tension on them and pull the walls as plumb as possible...
IMG_20230331_182112.jpg

IMG_20230331_170350.jpg


Little dove still hanging around...flew up to roost on the banding as I was setting up and getting ready to tighten.
IMG_20230331_184507.jpg


Hurricane straps installed.... bottom and top...every 4 feet.
IMG_20230402_132208.jpg

IMG_20230402_132204.jpg

Brace bands on the wall with the 6' double door. I added blocking to transfer the force to the door studs and tie all the studs together for strength. Thought about it that night and added another band from the door studs at the blocking down to the bottom corner on each side to transfer the force to the bottom corners. plumbed the rough opening best I could...only out 1/8" on the diagonals.
IMG_20230402_131641.jpg

All the bands are pre-loaded and tight. The work shop walls are stout now! Very rigid. Will get even tighter when I install the wall tin panels which will happen this week. Got the gable end top pieces cut and will install those tomorrow. Progress should pick up speed now that I am working mostly from the ground. Got 2 maybe 3 days of good weather, then a rainy pattern so will get as far as I can until then....
 
Last edited:
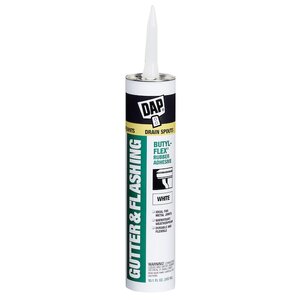
I've settled on using this adhesive...but in grey.
03357378.jpg

https://www.lowes.com/pd/DAP-Gutter-Flashing-Low-VOC-White/50100572

A local lumber yard has it for $6.48/tube. It is paintable after a 7 day cure.

Also decided to cut 3 1/2" long X 26" wide strips of tin to cover where the holes in the tin are located...instead of 5 individual patches. Easier and stronger. Figuring the perling spacing, I can space them to match where the holes are on the old tin. The patch strips (installing on the outside of the building wall tin) will strengthen the attachment to the wall. No sharp edges on the inside. Fortunate it all worked out that way....I'm happy, I can see the light at the end of the tunnel!
 
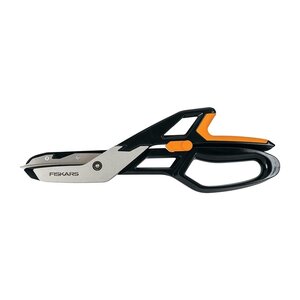
Bought me a set of heavy duty metal shears....this thing is bad to the bone! Cuts tin like butta!
Lifetime warranty and the blades are replaceable....even cut through the tie-down engineering metal banding! Almost 1/16" thick!
resource_fiskarsamericas_710400-1003.jpg
 
  • Like
Reactions: civilsmoker
Nice always good when you can find a tool that can make the job easier
 
  • Like
Reactions: indaswamp
Inda, can I ask the details, and where you got, the steel banding straps? Stuff like that just seems to have soared in price.
But really looking good. Some very impressive use of tools and brainpower. I'm really enjoying the photo journey you're taking us on here.
 
SmokingMeatForums.com is reader supported and as an Amazon Associate, we may earn commissions from qualifying purchases.

Hot Threads

Clicky