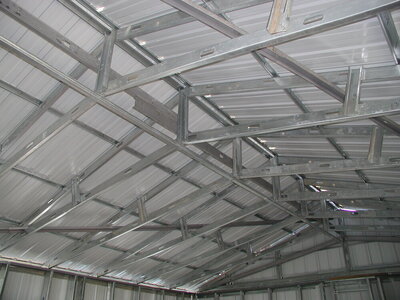
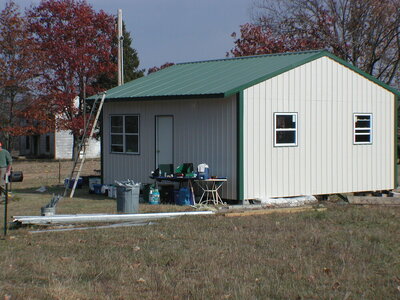
Barn tear down...Shed build pics.

  • Some of the links on this forum allow SMF, at no cost to you, to earn a small commission when you click through and make a purchase. Let me know if you have any questions about this.
SMF is reader-supported. When you buy through links on our site, we may earn an affiliate commission.
More pics. of the truss jig...there might be an easier way to do this, but this is the way I came up with to do it...

I am using the 12' span of the deck for the jig. The bottom ot the truss is a 2x4 and the rafters of the truss are 2x6's. The pitch is 4 on 12 so I needed to raise the peak 2'. The birds beak cut needs to be 5 1/2" because I am using 2x6's for studs. The rafters will stop at the wall so there will be no overhang for an eve (the roof tin will have 3-4" of overhang). The width of the cut out is 1 5/8" so I found a scrap that was 1 5/8" wide to use for tracing the cut lines. I also added 1 5/8" to my mark on the floor at the peak to keep the angle true when I made the marks.
scribing the line..
IMG_20230315_153438.jpg

line cut...
IMG_20230315_153442.jpg


the gap, 1 5/8"..pull it to the stop and the peak will hit the 2" mark.
IMG_20230315_153507.jpg

When I pull that to meet the jig stop, the top of the truss peak will hit my 2' mark; keeping it true....

The peak lines....2' and 2' 1 5/8"...
IMG_20230315_161101.jpg


Then peak cuts and first brace pattern...
IMG_20230315_161929.jpg
 
Last edited:
Watch that thumb. If it gets too painful you may want to lance in from the top or side to relieve the pressure.
 
  • Like
Reactions: indaswamp
I know we talked about using the deck as a truss jig . Are you face nailing the bottom chord ? All the members of a wood truss should stack . That's where the strength comes from . If you have 3/4 plywood scrapes , cut some 4" rips and sister them on the center support . Rest on the bottom cord and overlap the plum cut at the ridge .
I sistered on the face of the metal because the screws are spec'd for that . No pull out
and 5/16 hex heads hold the shear weight .
1678971245387.jpeg


Do they make a closure for the wall where it meets the roof with no overhang ?
I know there is a gasket for the ridge line cap . Not sure about where the walls meet the roof with no overhang . Water tight at least .
1678971137611.jpeg
Most of the metal panels are based on 3'0" coverage . They measure 38 5/8's " but 1 5/8's overlap and a 3/8's flange leaves you with 36" coverage . Just something to keep in mind when you do your layout for the starter panel .
 
  • Like
Reactions: indaswamp
Going to use the minimal overhang necessary. 3-4".....

I know we talked about using the deck as a truss jig . Are you face nailing the bottom chord ? All the members of a wood truss should stack . That's where the strength comes from . If you have 3/4 plywood scrapes , cut some 4" rips and sister them on the center support . Rest on the bottom cord and overlap the plum cut at the ridge .
Good advice. Thanks.
 
So, I slept in a little this morning. When Metal Mart opened @9am, I went over to see about the roof tin. The price came in $200 cheaper than the 2 other places I checked, so I put an order in. Roof galvalum, screws, inside and outside foam molding, ridge cap....all for $350. So glad I checked...but the store is on a road I don't travel down much. They called just after lunch and it was ready. I started cutting truss pieces until then. Got all the pieces for the trusses cut and made 5 trusses this afternoon. No pics. today. I picked up everything, put the trusses on the deck, restacked the wood, then covered the deck with a 25X50' tarp. Then unloaded the galvalum from my truck and covered another stack of wood set aside for wall rafters. It wasn't until after I finished covering the wood that I thought about taking a picture.

Might not get anything done tomorrow. Will wait until the rain clears out.
 
Last edited:
Get an extra box of screw anchors. Also a 1/2 dozen tubes of butyl calking. I would add a dab of butyl for each screw put down as the rubber gasket never fully sealed the penetration.
 
Get an extra box of screw anchors. Also a 1/2 dozen tubes of butyl calking. I would add a dab of butyl for each screw put down as the rubber gasket never fully sealed the penetration.
What kind of screw anchors are you referring to?

Butyl caulk...now there's some tough stuff!

What product would you recommend to seal the holes in the old corrugated tin we took down? This will be used on the outside walls, so not as critical as if it were going back as roofing. Will be painted after it is up and sealed.
 
Last edited:
I assume you use gasketed screws to anchor the roof tin to the purlins and trusses. A little wipe of butyl on the gasket assures a weather tite seal
Butyl to seal old holes in the wall tin, too. Some will say acrylic, silicone/acrylic, silicone, but my better results are straight butyl.
 
  • Like
Reactions: indaswamp
I assume you use gasketed screws to anchor the roof tin to the purlins and trusses. A little wipe of butyl on the gasket assures a weather tite seal
Butyl to seal old holes in the wall tin, too. Some will say acrylic, silicone/acrylic, silicone, but my better results are straight butyl.
Noted. I have used butyl caulk before...It ought to work great to seal the holes. Thanks for the advice!
 
Watch that thumb. If it gets too painful you may want to lance in from the top or side to relieve the pressure.
Had to lance the nail tonight with a hot needle Bill...much better now. Will definitely lose the nail at some point. It'll feel much better in about a week....still real tender right now.
 
  • Sad
Reactions: bill1
I'm a silicone . Butyl is good stuff in the right application . If you go that way get some Guardsman dry cleaning fluid . Always had that on hand when caulking building joints .
You're wanting to paint the outside so I don't think the butyl is paintable .
 
I'm a silicone . Butyl is good stuff in the right application . If you go that way get some Guardsman dry cleaning fluid . Always had that on hand when caulking building joints .
You're wanting to paint the outside so I don't think the butyl is paintable .
Good call on the solvent. Forgot to mention.

Yes, butyl is not paintable. Maybe poly is a better choice? Problem is it so blasted expensive.
 
Would take a little doing, but another option is to cut 2"x2" or 3" x 3" patches from 1 good sheet and glue those on from the inside. I will have about a 1' drop after trimming for the wall on each sheet. Could use that for patches. Could use butyl for gluing those into place. Prime the outside where the butyl shows on each hole, then paint.
 
No progress on the building Friday as it rained most of the day. Not much today either as the rain lingered until around noon. I did realize that I will have to loosen the tie down band bolts to let off on the pressure because when I tightened the band to get the metal tight around the bolt, I pulled the corners down 1/8" -1/4". So will need to re-shim the corners before I frame the walls and install the doors. Not a lot of work to do, but I need to do it now or it might affect my door installs.
I did go to my Uncle's wood shop and figure out the door frame. Will build that tomorrow afternoon. I'll pick up where I left off Thursday and finish the trusses and then do the layout for the wall studs, start cutting studs to length. Walls should be going up very soon.

Oh- here is a pic. of the 5 trusses I finished Thursday...
IMG_20230318_144542.jpg


Glued and screwed...
IMG_20230318_144552.jpg

I happened upon a mostly full 5# box of 1 1/4" wood deck screws left over from another project. Perfect for screwing the 1/2" plywood to the 2x's on the truss. 35-40 screws per truss...should be solid. I added the 2x6 piece on the ends to have some good wood to attach the top wall perling to. Will also help stabilize the rafter. But I plan to tie them all together with a board down the middle after install. Probably also boards run @ 45 under the rafters to the peak for strong side support.
 
Last edited:
Roof pitch is roughly 4.5 on 12... Somehow I got off doing my figuring on my jig when making the pattern. They are all the same, and fit together so I'm gonna go with it. No biggy for a personal shed, and I'm not a professional carpenter...LOL! Little more roof pitch won't hurt. Will actually be stronger.
 
You are making good progress! I’ve had a thumb like that many times!!! When I was roofing I wrapped my fingers and thumb in athletic tape and it saved many a finger nail.
 
  • Like
Reactions: indaswamp
Great prep work.
We used to call them hitting the "wrong nail" strike. Been there, done that.
The diagonal ribs under the trusses don't need to be more than a 1x2 firring strips.
A 1x3 along the bottom chords is needed for the stability and the place to running Romex wiring.
I prefer pipe and wire in a shed to prevent rodent chew.
Butyl isn't paintable. I don't like silicone as it is sunlight degraded more than other caulking unless painted.
 
  • Like
Reactions: chopsaw
I am thinking I probably won't need any diagonal ribs under the trusses... The 2X6 rafters are only 6' 4" long....
Remember , a truss is built for vertical load . Not horizontal , and not for wind shear .
I would put a stay lath through the center . Top of the bottom chord ( as suggested above ) and a rack brace from the top of the gable ends down to a solid horizontal transfer point . From both directions .

Nice job on those truss Keith .
 
SmokingMeatForums.com is reader supported and as an Amazon Associate, we may earn commissions from qualifying purchases.

Latest posts

Hot Threads

Clicky