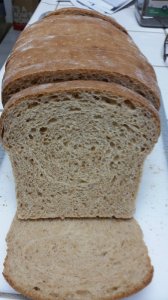
White flour has started giving me joint problems (inflammation), so we've switched to whole wheat bread. That said, I'm tired of paying $3 a loaf on sale, up to $6 a loaf regular price. I like commercial whole wheat bread because it is moist and pliable. I never cared for homemade whole wheat bread because it was always kind of dry and crumbly. Plus, I really don't like taking all day to make a loaf of bread. There had to be a better way.
I tried a couple YouTube recipes and didn't care for the results. Then I tried a YouTube "Jenny Can Cook" recipe for whole wheat bread that promised a loaf in 90 minutes, not including cooling. I gave it a try and knew with the first loaf I'd found something I could work with to get exactly what I needed. 5 loaves later, I hit on the recipe and technique below. I get a moist, tender crumb that holds together beautifully for sandwiches and toast. It has all the properties of commercial bread, and better flavor without all the unpronounceable ingredients. It will last 7 days bagged on the countertop, a little longer in the refrigerator.
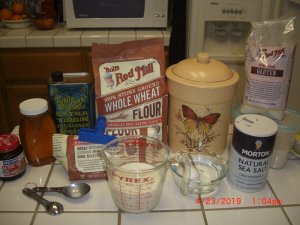
All the ingredients posing for a picture. I don't gather everything ahead of time, but that can prevent you forgetting something. Instead, I broke the bread down into steps and get stuff as needed, immediately putting it away. I REALLY hate a cluttered kitchen when cooking/baking.

Step One: Set up your proofing oven.
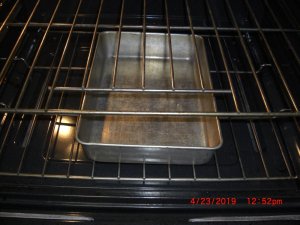
Place one shelf in the middle of the oven. Then put a baking or roasting pan on the bottom of your oven and add 3-4 cups of boiling water. Close the oven and turn on the light. A proofing oven should be 75% humidity and 75-95F temp. I Mav tested my process and the temp is right where it should be. I have no way to test the humidity, but there is condensation on the inside of the window, so good enough.

Step Two: Mix dry ingredients.
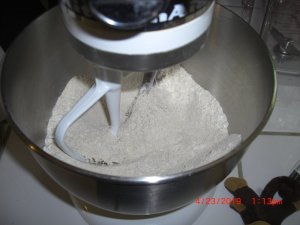
Collect your dry ingredients in a mixer bowl. This recipe is for a stand mixer, but it can be done by hand.
2 cups whole wheat flour. I use Bob's Red Mill, which works out to 304 grams for two cups. If you weigh your main ingredient, you'll get more consistent results. Other whole wheat flours may have a different weight. Check the label.
1/2 cup all purpose flour (I don't weigh this one).
5 tsp vital wheat gluten (helps with proofing {rise}, moisture retention, and crumb flexibility).
2 1/4 tsp active dry yeast. Read the label for dry "mixer instruction" temps. It make a HUGE difference in the rising time when done correctly.
1 tsp salt.
Add the paddle attachment, NOT THE DOUGH HOOK, and mix ingredients on the lowest setting. I just let it run while I prep the wet ingredients.

Step Three: the wet ingredients
One large egg at room temp is needed. I never remember to pull an egg from the fridge, so I put hot tap water in a small bowl, then put the egg, still in the shell, in the water. It warms up quickly without cooking.
In a measuring cup add:
1 cup plus 2 round Tablespoons whole milk. The additional gluten requires the extra milk.
2 Tablespoons honey (or any sugar of your choice)
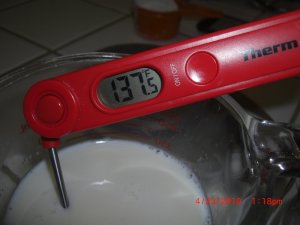
Warm the milk/honey to 130F in the microwave and stir to mix. I have a probe so I don't know how long it takes, but not long. I actually heat it to a little higher temp, 135F knowing it will cool a little when poured. The picture below still needs to cool a little so I don't kill the yeast.
Empty the water and crack the egg into the bowl. Add 2 Tablespoons oil of any type to the egg.

Step Four: Mixing all the ingredients with the paddle attachment, NOT THE DOUGH HOOK.
With the mixer still on low, slowly pour the milk/honey mixture into the bowl. Then add the egg/oil mixture. It will look like a batter, not bread dough (sorry for the focus).

Turn the mixer to high and time for 2 minutes. This will save you a LOT of kneading time.
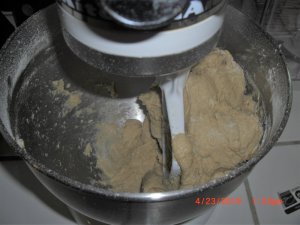
At the end of two minutes, turn the mixer to low and slowly add about 1/4 cup of all purpose flour, just until the dough starts to pull away from the sides. Stop adding flour and turn off the mixer.

Step Five. Knead the dough.
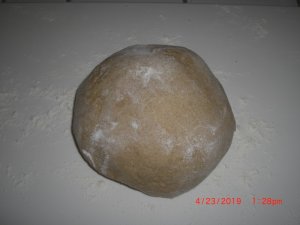
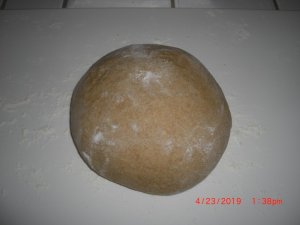
Flour your hands and scrap the REALLY wet dough out onto an AP floured work surface. Add a little more flour to the dough ball and knead 50 times (about 3 minutes). If not using a mixer in earlier steps, knead 150 times. Lightly flour hands and work surface if dough starts sticking.
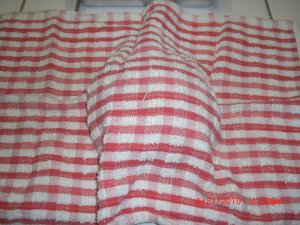
Tuck the seams under the dough ball, cover with a towel, and let rest 10 minutes.


Step Six. Prep for rise.
Get another 3-4 cups of water boiling to add to the proofing pan in the bottom of the oven.
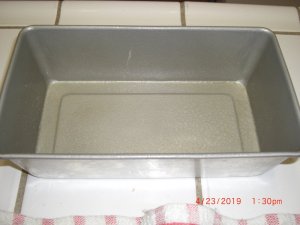
Prep a 9"x5" loaf pan with oil.

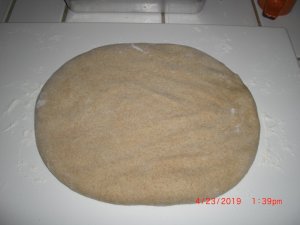
After a ten minute rest, ensure your work surface is lightly floured, flour your hands, and press the dough ball into a rectangle. Roll the rectangle back toward you and pinch the seams closed on the bottom and ends. Place in the greased loaf pan.


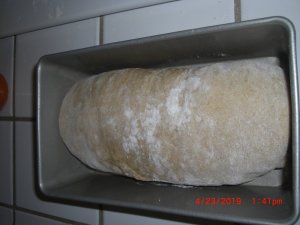
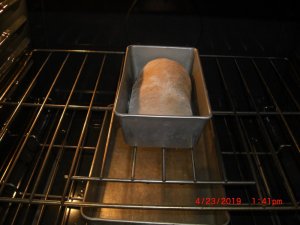
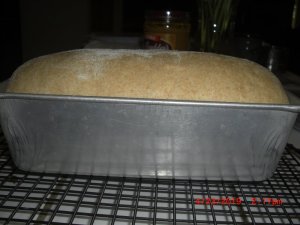
Recharge the proofing pan with 3-4 more cups of boiling water, then place the loaf pan in the oven to rise. Close oven door, light on. If everything was done correctly above, the rise will happen in 30-35 minutes. The top of the loaf should be about 1" above the top of the pan. If not done correctly, don't worry, it will get there, but may take an hour or more (experience talking as I tried proofing in the milk, or milk only at 115-120F, definitely not hot enough).


Step Seven: baking and cooling.
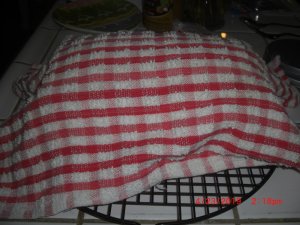
Pull the loaf out of the oven, set aside, and cover with a clean cloth. Remove the proofing pan and water. Close the oven and pre-heat to 375F.
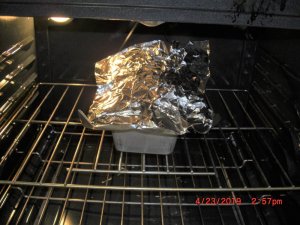
At 375F, put the loaf in the oven to bake for 30 minutes. After 15 minutes, tent with aluminum foil (dull side toward bread) to prevent the crust from over browning. Just crinkle the foil with your hands and loosely shape it. (I took the below pic at the end of the bake if you're watching the time stamp)

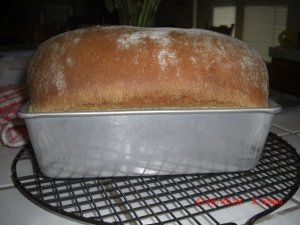
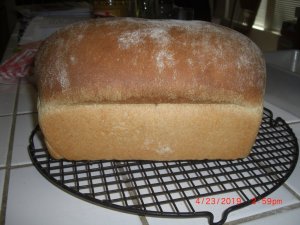
After 30 minutes, turn off the oven, remove the tent, and empty the loaf onto a cooling rack. The loaf will have risen quite a bit more during the bake, but still retains a nice crumb.
Let the loaf cool completely, about 3 hours, then slice with an electric knife. A sharp bread knife will work, but you get more tearing of the crumb. Still works though.


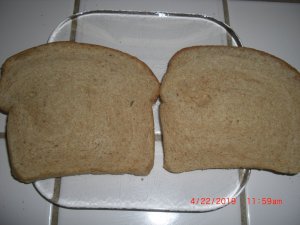
The last two slices of LAST week's baked loaf. Notice the nice crumb. Still made a sandwich without crumbling a week after baking. Soooo good!

Easy peasy! My wife and I go through a loaf a week. Mondays are now my bread baking days. Takes less than two hours start to finish, not including cooling.
Happy Baking!
Ray
I tried a couple YouTube recipes and didn't care for the results. Then I tried a YouTube "Jenny Can Cook" recipe for whole wheat bread that promised a loaf in 90 minutes, not including cooling. I gave it a try and knew with the first loaf I'd found something I could work with to get exactly what I needed. 5 loaves later, I hit on the recipe and technique below. I get a moist, tender crumb that holds together beautifully for sandwiches and toast. It has all the properties of commercial bread, and better flavor without all the unpronounceable ingredients. It will last 7 days bagged on the countertop, a little longer in the refrigerator.
All the ingredients posing for a picture. I don't gather everything ahead of time, but that can prevent you forgetting something. Instead, I broke the bread down into steps and get stuff as needed, immediately putting it away. I REALLY hate a cluttered kitchen when cooking/baking.
Step One: Set up your proofing oven.
Place one shelf in the middle of the oven. Then put a baking or roasting pan on the bottom of your oven and add 3-4 cups of boiling water. Close the oven and turn on the light. A proofing oven should be 75% humidity and 75-95F temp. I Mav tested my process and the temp is right where it should be. I have no way to test the humidity, but there is condensation on the inside of the window, so good enough.
Step Two: Mix dry ingredients.
Collect your dry ingredients in a mixer bowl. This recipe is for a stand mixer, but it can be done by hand.
2 cups whole wheat flour. I use Bob's Red Mill, which works out to 304 grams for two cups. If you weigh your main ingredient, you'll get more consistent results. Other whole wheat flours may have a different weight. Check the label.
1/2 cup all purpose flour (I don't weigh this one).
5 tsp vital wheat gluten (helps with proofing {rise}, moisture retention, and crumb flexibility).
2 1/4 tsp active dry yeast. Read the label for dry "mixer instruction" temps. It make a HUGE difference in the rising time when done correctly.
1 tsp salt.
Add the paddle attachment, NOT THE DOUGH HOOK, and mix ingredients on the lowest setting. I just let it run while I prep the wet ingredients.
Step Three: the wet ingredients
One large egg at room temp is needed. I never remember to pull an egg from the fridge, so I put hot tap water in a small bowl, then put the egg, still in the shell, in the water. It warms up quickly without cooking.
In a measuring cup add:
1 cup plus 2 round Tablespoons whole milk. The additional gluten requires the extra milk.
2 Tablespoons honey (or any sugar of your choice)
Warm the milk/honey to 130F in the microwave and stir to mix. I have a probe so I don't know how long it takes, but not long. I actually heat it to a little higher temp, 135F knowing it will cool a little when poured. The picture below still needs to cool a little so I don't kill the yeast.
Empty the water and crack the egg into the bowl. Add 2 Tablespoons oil of any type to the egg.
Step Four: Mixing all the ingredients with the paddle attachment, NOT THE DOUGH HOOK.
With the mixer still on low, slowly pour the milk/honey mixture into the bowl. Then add the egg/oil mixture. It will look like a batter, not bread dough (sorry for the focus).
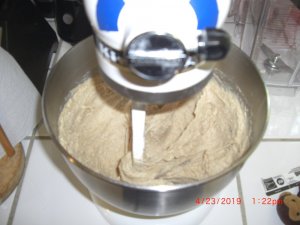
Turn the mixer to high and time for 2 minutes. This will save you a LOT of kneading time.
At the end of two minutes, turn the mixer to low and slowly add about 1/4 cup of all purpose flour, just until the dough starts to pull away from the sides. Stop adding flour and turn off the mixer.
Step Five. Knead the dough.
Flour your hands and scrap the REALLY wet dough out onto an AP floured work surface. Add a little more flour to the dough ball and knead 50 times (about 3 minutes). If not using a mixer in earlier steps, knead 150 times. Lightly flour hands and work surface if dough starts sticking.
Tuck the seams under the dough ball, cover with a towel, and let rest 10 minutes.
Step Six. Prep for rise.
Get another 3-4 cups of water boiling to add to the proofing pan in the bottom of the oven.
Prep a 9"x5" loaf pan with oil.
After a ten minute rest, ensure your work surface is lightly floured, flour your hands, and press the dough ball into a rectangle. Roll the rectangle back toward you and pinch the seams closed on the bottom and ends. Place in the greased loaf pan.
Recharge the proofing pan with 3-4 more cups of boiling water, then place the loaf pan in the oven to rise. Close oven door, light on. If everything was done correctly above, the rise will happen in 30-35 minutes. The top of the loaf should be about 1" above the top of the pan. If not done correctly, don't worry, it will get there, but may take an hour or more (experience talking as I tried proofing in the milk, or milk only at 115-120F, definitely not hot enough).
Step Seven: baking and cooling.
Pull the loaf out of the oven, set aside, and cover with a clean cloth. Remove the proofing pan and water. Close the oven and pre-heat to 375F.
At 375F, put the loaf in the oven to bake for 30 minutes. After 15 minutes, tent with aluminum foil (dull side toward bread) to prevent the crust from over browning. Just crinkle the foil with your hands and loosely shape it. (I took the below pic at the end of the bake if you're watching the time stamp)
After 30 minutes, turn off the oven, remove the tent, and empty the loaf onto a cooling rack. The loaf will have risen quite a bit more during the bake, but still retains a nice crumb.
Let the loaf cool completely, about 3 hours, then slice with an electric knife. A sharp bread knife will work, but you get more tearing of the crumb. Still works though.
The last two slices of LAST week's baked loaf. Notice the nice crumb. Still made a sandwich without crumbling a week after baking. Soooo good!
Easy peasy! My wife and I go through a loaf a week. Mondays are now my bread baking days. Takes less than two hours start to finish, not including cooling.
Happy Baking!
Ray
Last edited:


