I haven't been on the forum much because I have been concentrating on my Aquaponics and Hydroponics this year, I realized when working on my page that SMF has a garden section so I am dropping by to show you what I have been up to.
The reason I posted this in "small spaces" is because that is the reason I got into this type of gardening (limited space) I am also working on some other projects like vertical gardening, NFT Systems and a bunch of other things.
If I can impress Mrs. SQWIB with this years crops, she may let me get a greenhouse!!! Well she put me on a diet and I replaced bread with Romaine SO SHE BETTER LET ME GET A GREENHOUSE!!!
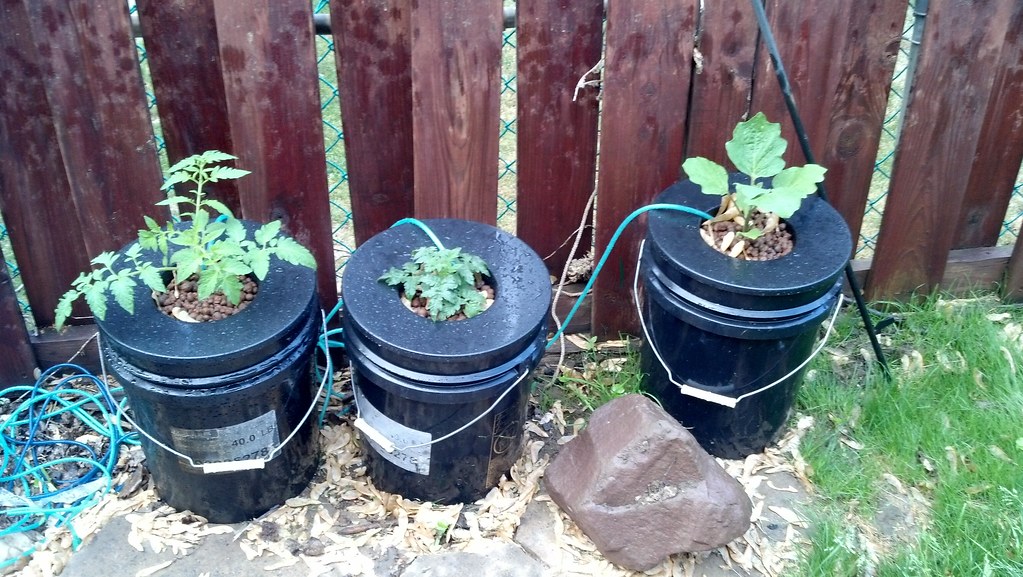
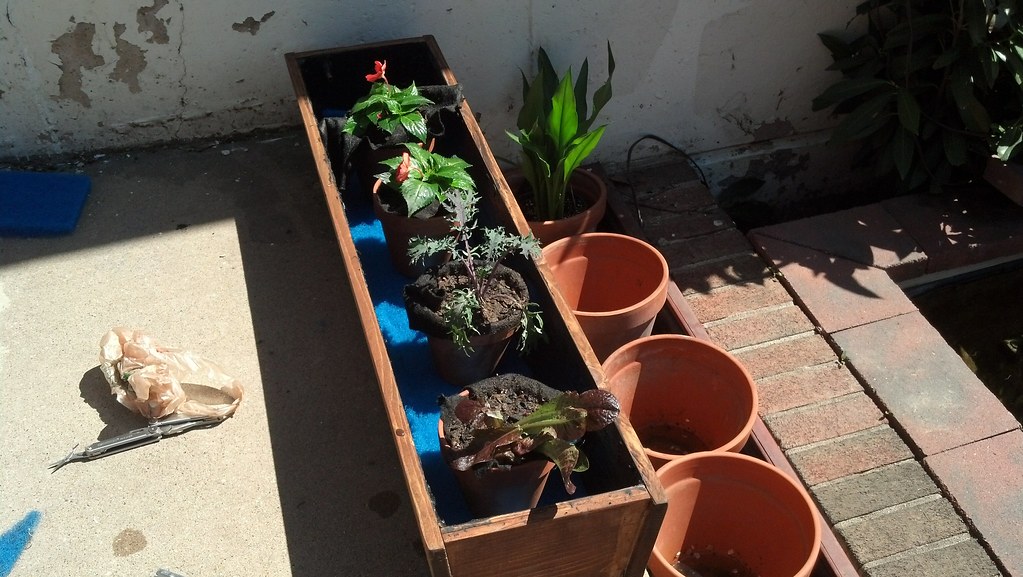
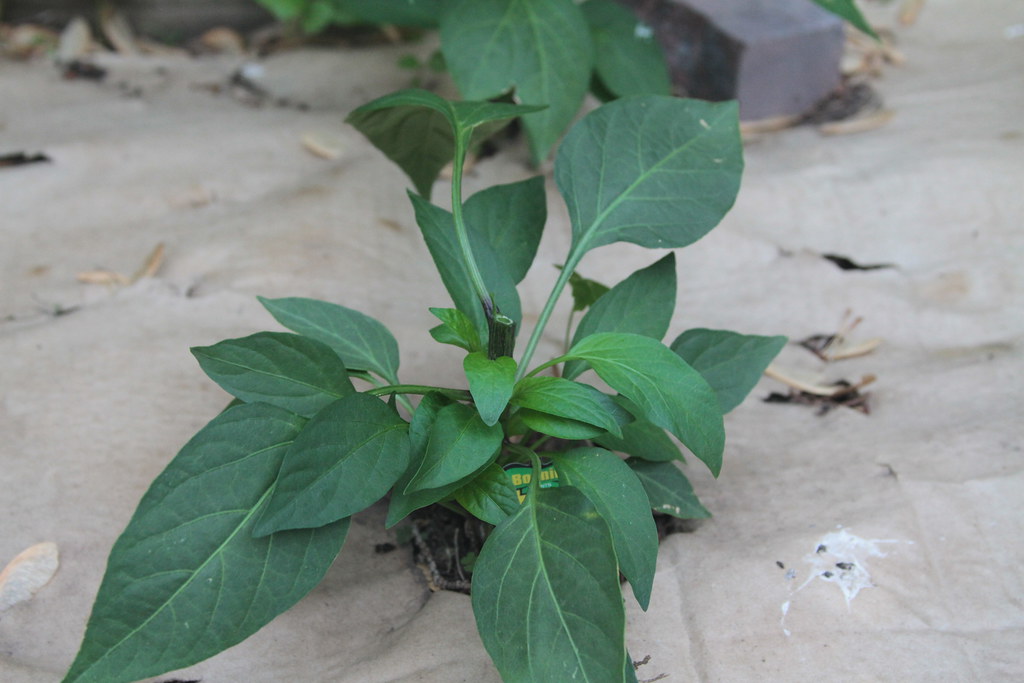
Deep Water Culture Tomatoes / Peppers / Eggplants
I decided I wanted to expand on my tomatoes and other veggies and with a limited planting area, I chose the DWC method of hydroponics, This is a trial run and if all works well, I will double the size and plumb in a Recirculating Deep Water Culture w/nutrient reservoir and control bucket.
Most likely using the underflow design.
For my Fertilizer (Nutes) I used Bobbies formula, I also added about 1/4 ounce of vinegar to drop the ph to around 6- 6.5
N P K
Nute Mix per 5 gallons for tomatoes (20-18-38)
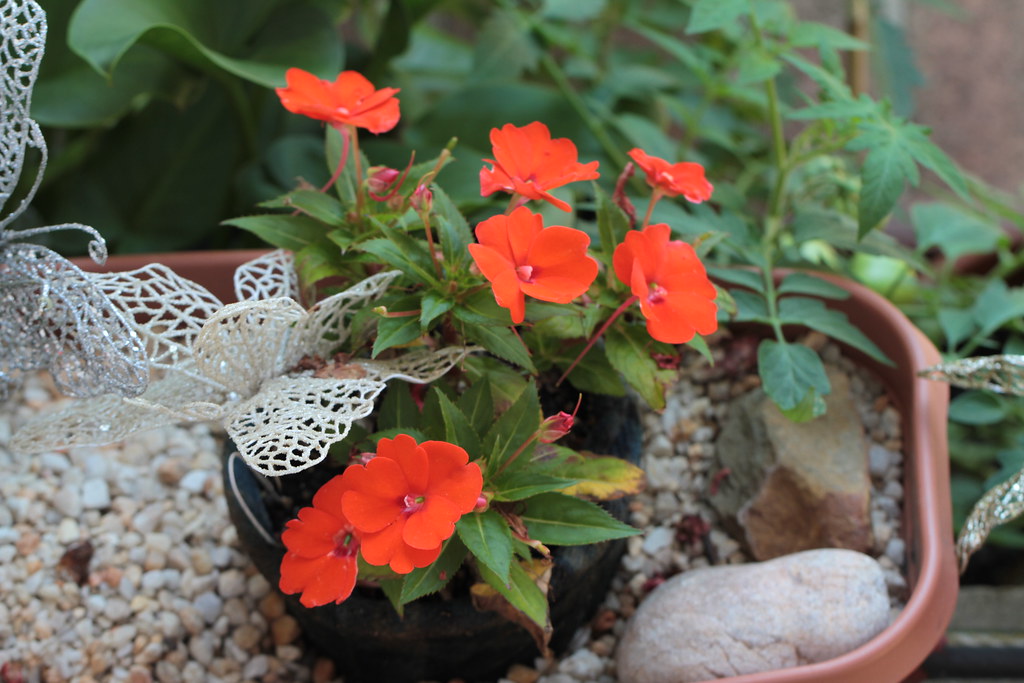
Early Girl Tomato, Patio tomato, Black Beauty Eggplant,
May 18th 2015
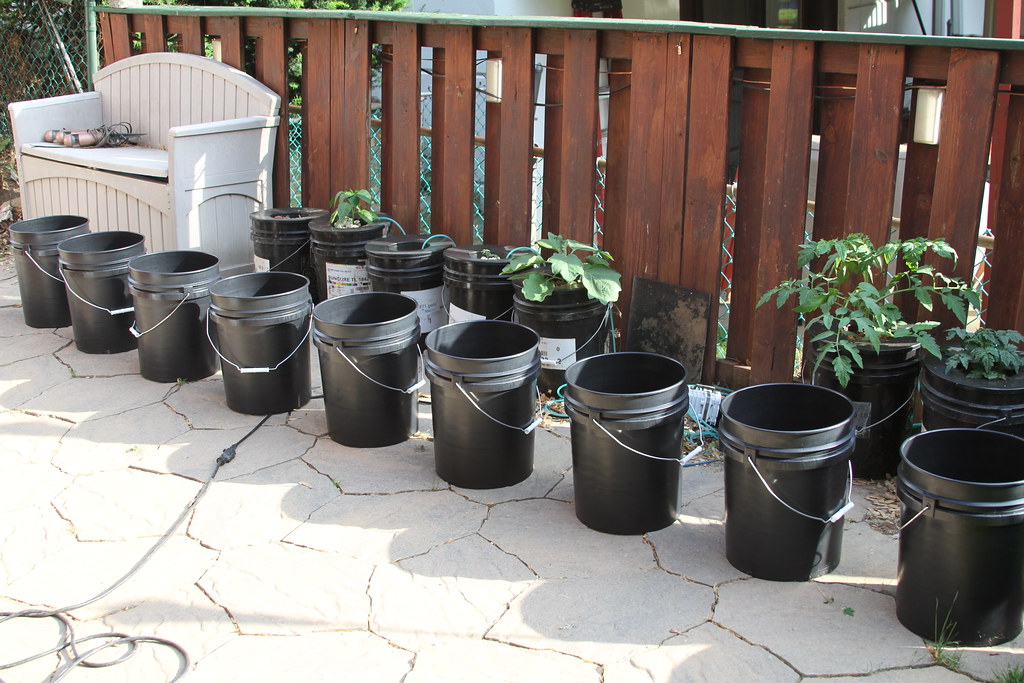
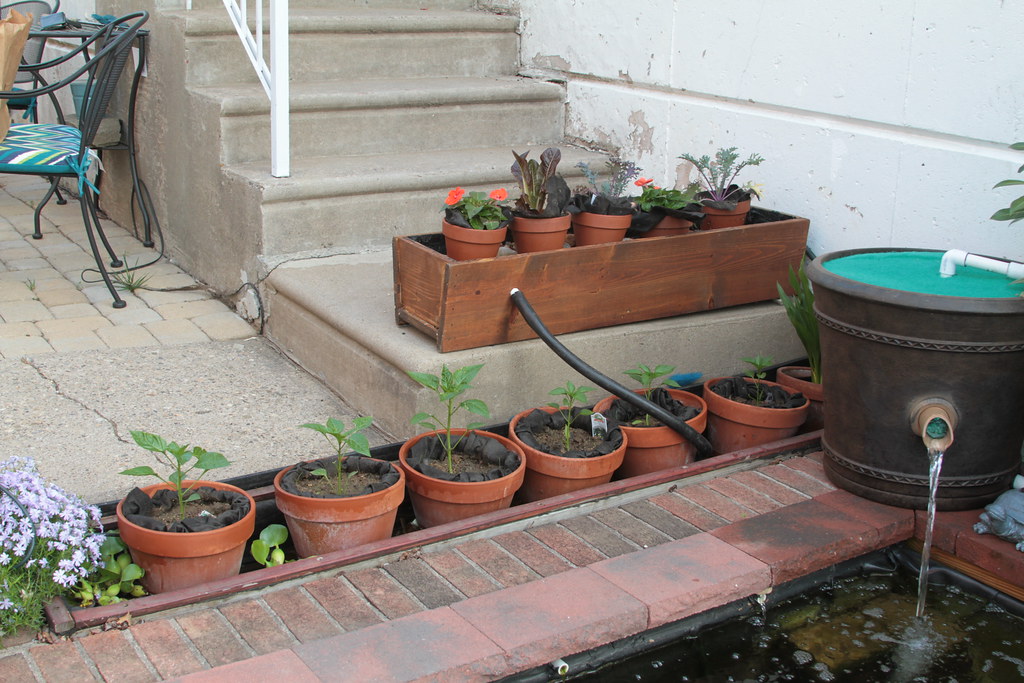
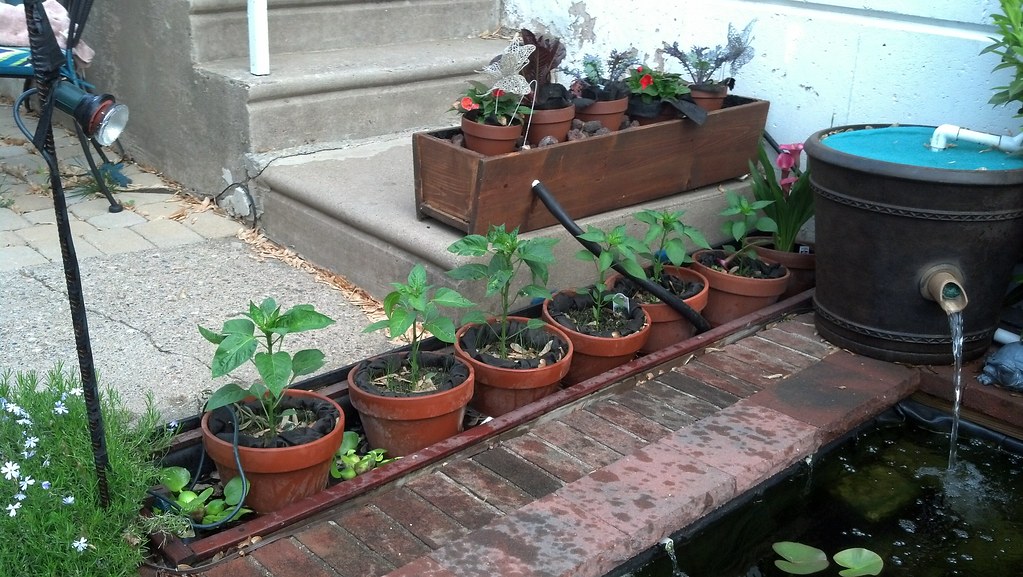
It's been about 3 weeks and so far everything is looking real good, so I decided to go a step further and build an "Undercurrent Recirculating Deep Water Culture Hydroponic System". URDWCHS for short, lol...
I will try out 10 buckets this year and may add two more next year if this system works.
Danner Model 7 pump (Amazons picture is wrong)
you will need a piece of 1" hosing and two pipe clamps with this pump, if it's a threaded inlet purchase the
1/2 in. x 1/2 in. PVC Sch. 40 MPT x FPT Riser. The rubber hose actually worked out well, it adds a bit of flexibility juggling the components around.

Then the return line is plumbed in
then the 2nd part of the union is glued on to a 10' piece of 1/2" PVC Pipe, this goes to a 12" 1" black rubber hose and is clamped to the pipe and pump with hose clamps.
The control tank is drilled at the highest point to allow the 1/2" PVC pipe to slide in and then ther e is another smaller hole drilled at the same level for an air line.
from the pump on the outlet goes the 1/2" female adapter
The threads on the pump needed a ton of teflon tape


The only problem with a system like this is there is 0 tolerance for mistakes, a small leak and you're done, the air pump fails and you're done, you run your system dry and you're done the pump fails... well you might be OK if that happens.
All the air hoses are cut to the same length, I purchased twenty foot air hose sections and cut them in half, the pump is placed above the air stones to act as an airlock (anti siphon) in the event of a pump failure or power outage.
I measured the system by pouring in 5 gallon buckets, its roughly 60 gallons when operating. Once hooked into the Nute reservoir the system will be 115 gallons circulating about 6x per hour.
I ran the system for half an hour with the garden hose overflowing the buckets for a cleaning.

Did some math, then added the nutes.
The new system in place and only need a few minor tweaks.
New air stones will be added today as well as a float for a 55 gallon gravity fed nute reservoir . I will also need to raise the feed line off of the concrete to reduce heating up the nutes and run the electric cord under ground.
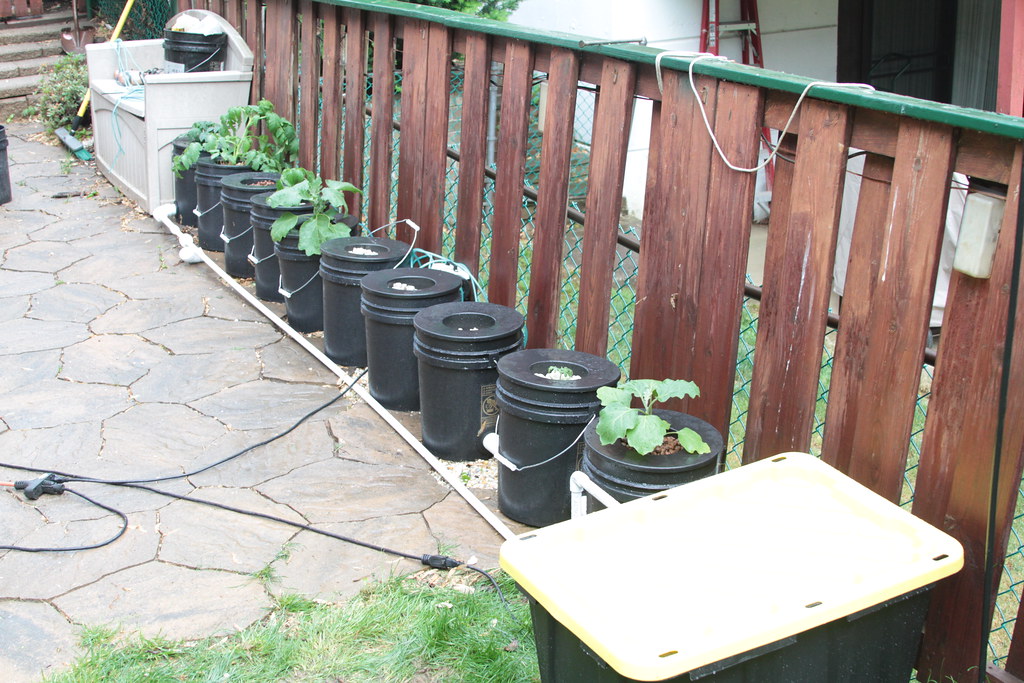
I was worried it would look obnoxiously huge, the only part that looks a little BOLD is the control tank.
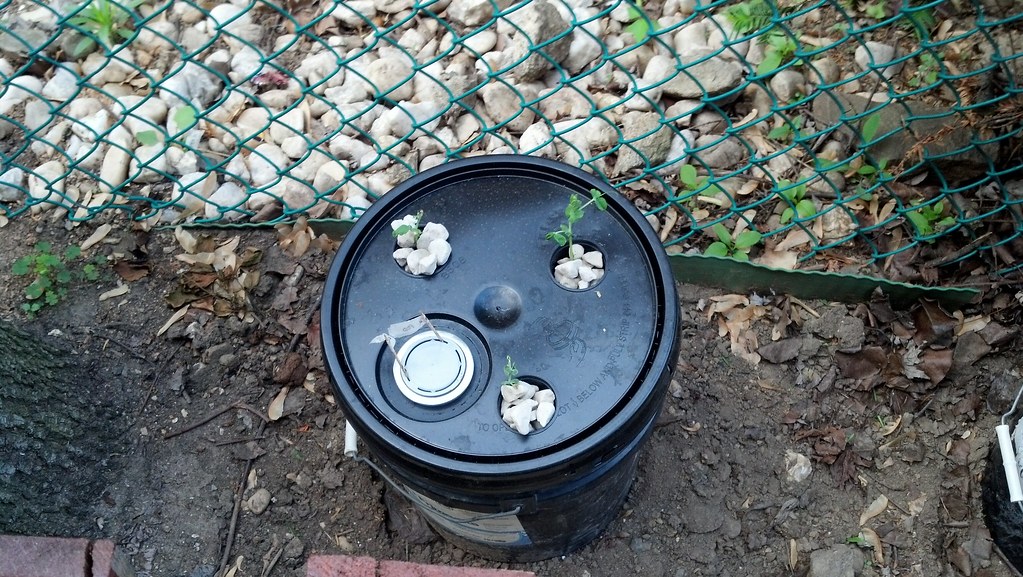
(1) Patio Tomato Plant, (2)Early Girl Tomato Plant, (3)open, (4)Poblano Pepper or Bell pepper?,(5)Black Beauty Eggplant, (6)open, (7)open, (8)open, (9)Cloned Fantastico tomato plant, (10)Black Beauty Eggplant.
I wanted a mix of plants to see which ones did well in the DWC system using my current nute formula, I'm a bit worried combining eggplant with tomatoes as they like different nutes.

N P K
Nute Mix per 5 gallons for Sugar Snap Peas (20-18-38)
Behold FREE Pallets.

Cutout for the turtles bottom right


May 16th, 2015 (L)


N P K
Nute Mix per 5 gallons for Grow Bed (20-18-38)
May 18th, 2015
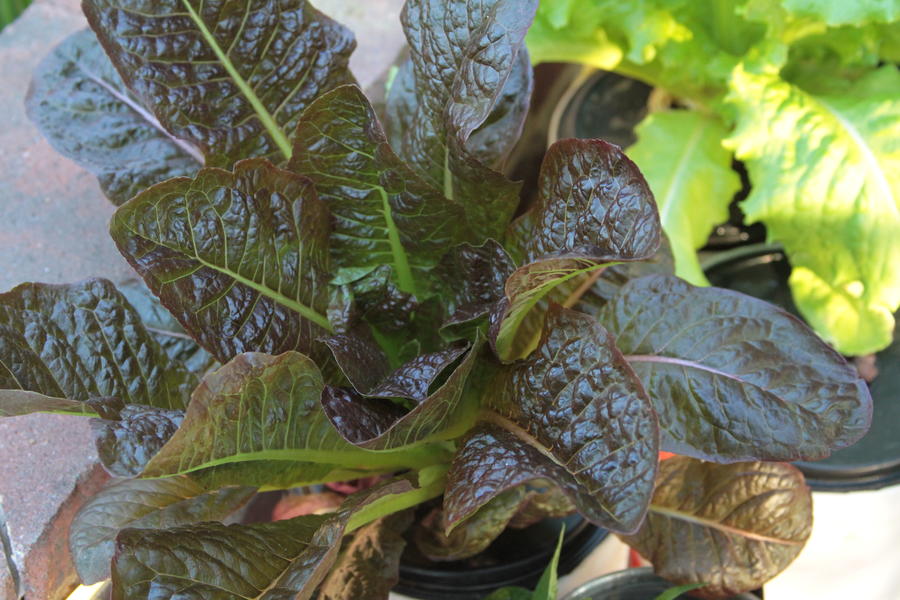
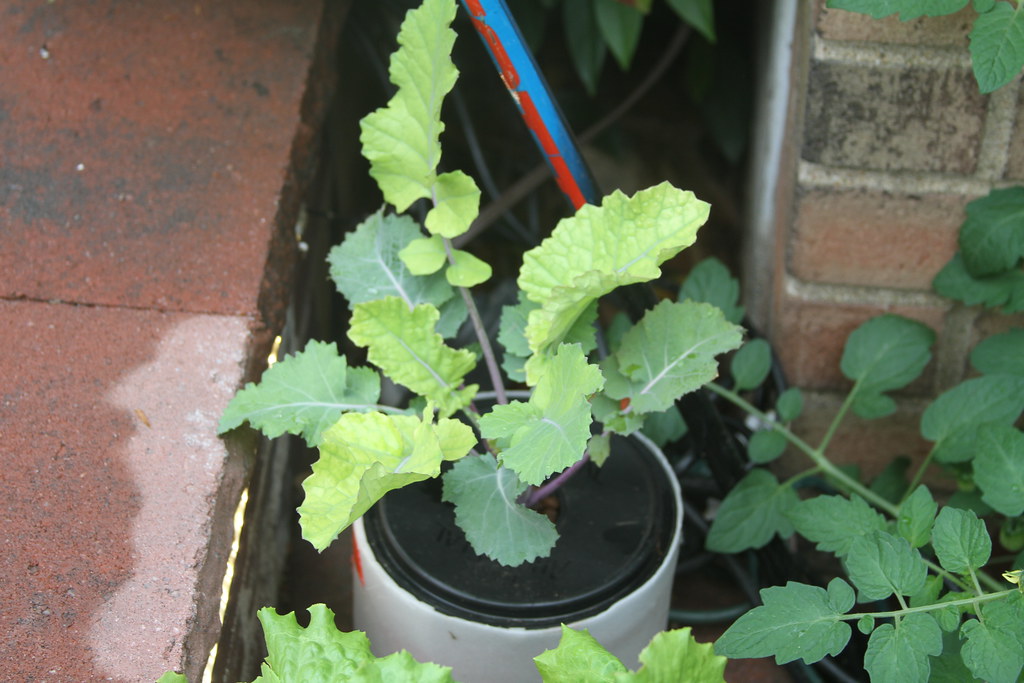
Red Russian Kale, Romaine and ??? The iceberg and spinach is from seed and not looking good.
L-R Sugar Snap Peas, Habaneros and Poblanos?

For my Fertilizer (Nutes) I used Bobbies formula, I also added about 1/4 ounce of vinegar to drop the ph to around 6- 6.5
N P K
Nute Mix per 5 gallons for Kratky Lettuce (20-18-38)

These were purchased the beginning of May and planted the week before mothers day.
I figure 5- 6 weeks should be OK, However I'm not sure if the nutes will last that long in hotter weather, I'm gonna try 1-1/5 gallon buckets next year.
Yesterday when I got home the lettuce was bone dry, I added a bit of pond water because I wasn't up to mixing any nutes, the next day I added some nutes from my DWC system as that was being upgraded. These guys are really drinking a lot the last few days and I have been careful just adding a few inches of water at a time.
I will definitely be upgrading this to 1.5 gallon containers and 3" net pots.

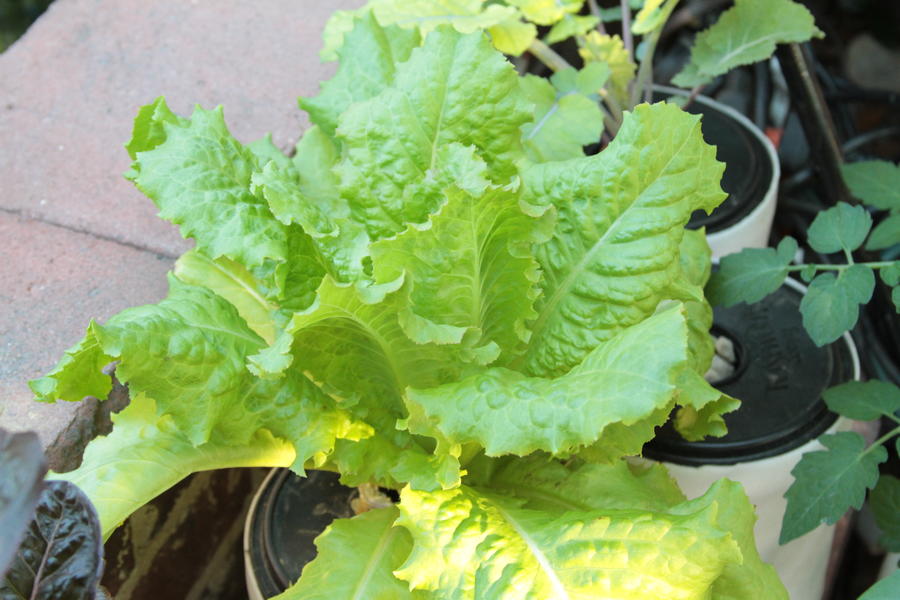
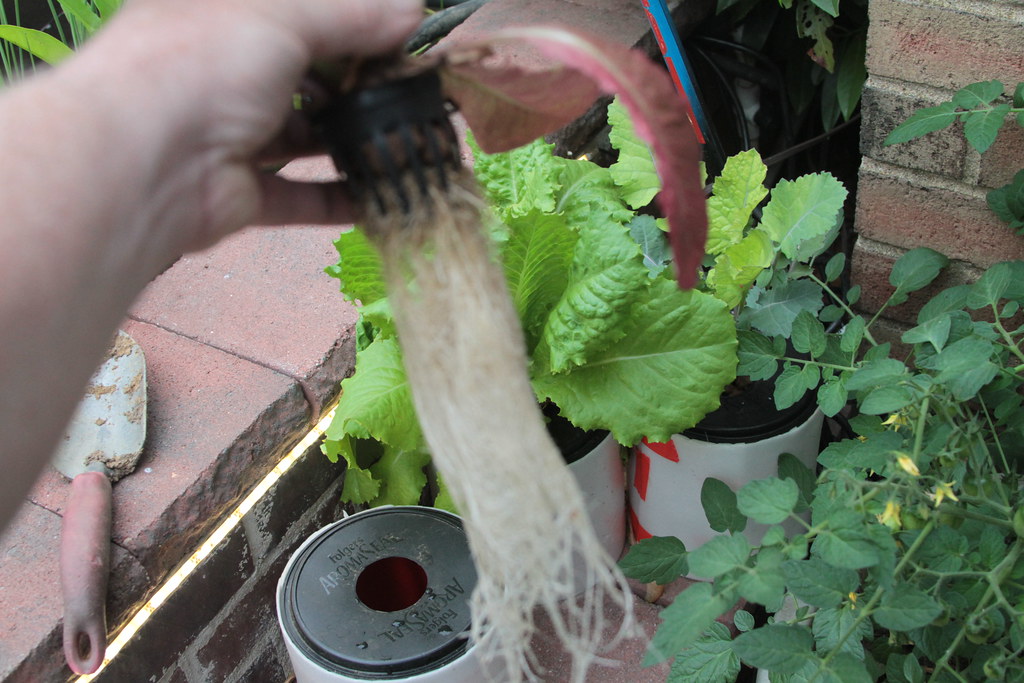
Roots are getting a tad dirty, time to harvest these soon.

This head was almost completely flat yesterday.
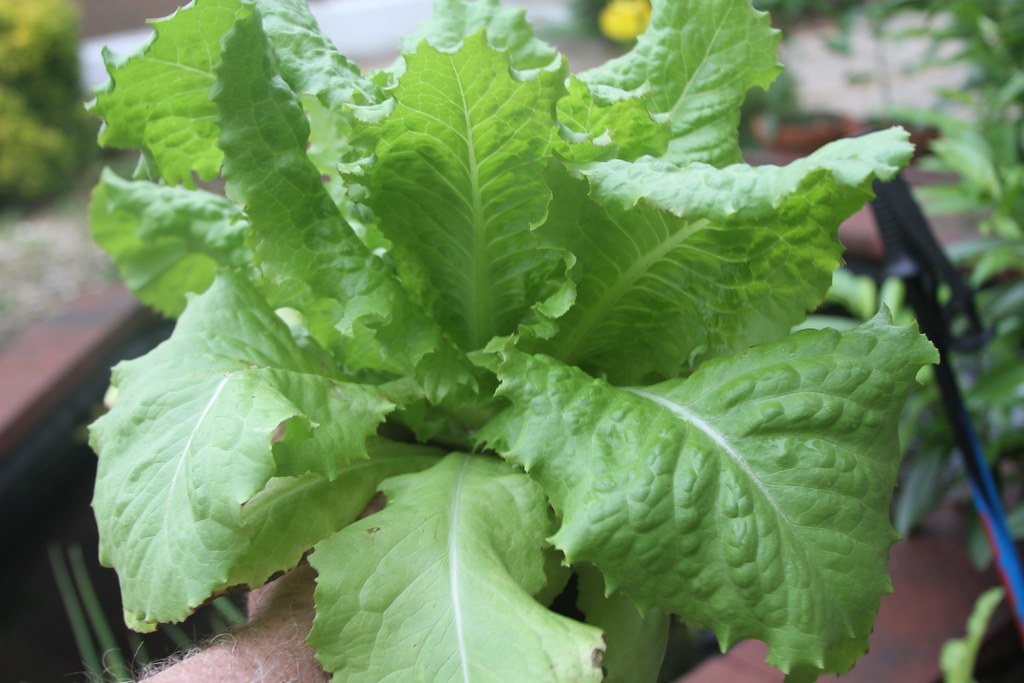
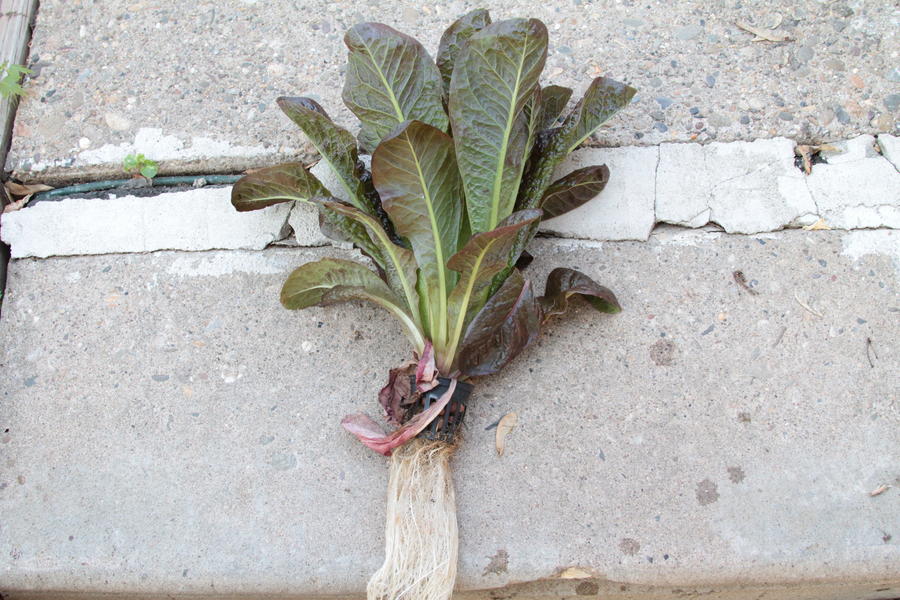
The Red Romaine is really looking good.
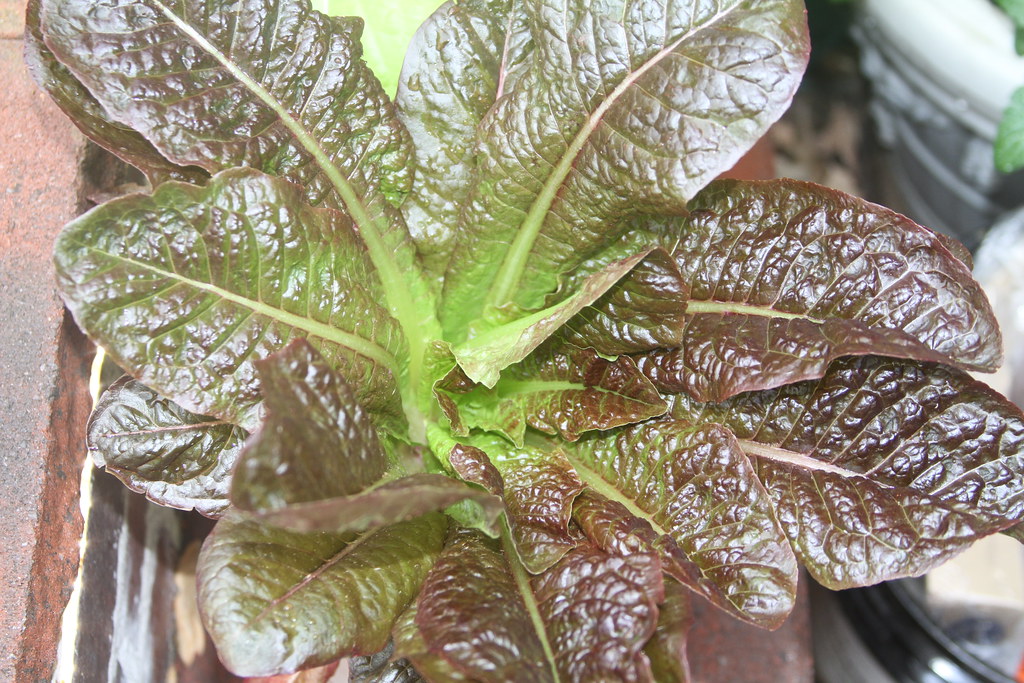
The Russian Red Kale is hanging in there but I think the Kale in the Pond Planter is doing better.
The colors of the leaves are much brighter in the Aquaponic planter than the Kratky Lettuce but also much less mature.
These Lettuce plant were purchased grown already, I tried planting seeds with no success,
I would call this a total success but needs tweaking.
I have been so impressed with how the lettuce done in these kratky containers, with the exception of the containers being too small resulting in the nutes lasting less than three weeks I decided to remedy that problem I ordered 2 gallon buckets, this will more than triple the volume of nutes.
Another problem was the lettuce was top heavy and kept falling over and the net pot pulling out, I will glue the net pots in or at the least try to have a tighter fit.
Today I put out two new containers with nute solution, I'm trying to germinate 4 Black Seeded Simpson right in the planter with grow stones... keep your finger crossed.
Here's my newer setup, I am working on if the Black Seeded Simpson germinate.
Basically my veggie filter is an up-feed filter from the pond, the water travels a pipe outside the main pond and under the veggie filter, the water flows up through a few hundred pot scrubbers and 3-4" thick polyester filter media, up along the clay pots about 2" high. The clay pots rest on the filter media, the pots are lined with a pond underlayment to assist in wicking, the pots are filled with a clay soil and potting soil, then the water exits the veggie filter through three feeder tubes back into the pond, the dwell time in the veggie filter is several minutes.
I usually grow peppers in these planters with a little fertilizer.
2012 veggie filter.

2013 veggie filter. (Photo July 8th)
Tomatoes grew but only had a few fruits and the Chinese egg plant developed one small fruit. The Canna Lily kicked ass.
2014 Veggie Filter (Photo June 28th)
The peppers did well but could be better, I may up the Nutes this year

2015 Veggie Filter (May 8th)
L-R Three Bell peppers, three Poblano peppers, Calla Lily in the very back and some Water Hyacinths. The phlox to the extreme left is in the ground.
May 8th, 2015
May 11th, 2015

May 18th, 2015
This is the old flower planter that we plant impatiens in. I tried a few cayenne peppers in there with no success, this year I may try spinach or something along side the impatiens. The New planter bottom is layered with some filter media then covered in pea gravel, the terracotta pots are lined with pond underlayment to promote wicking and the pots sit inside the pea gravel, the water flows from the top fills up the planter to the outflow submerging an inch or so of the terracotta pots, then empties in the veggie filter. Dwell time is a few minutes. There is a bottom drain that will be left open in the winter for proper drainage.
2014 Planter

For the new build I used some scrap 3/4 I had laying around, cut on the table saw, air nailed and glued with PL-500 and caulked the joints, the inside was coated with some Henry 201 ashphalt Roof Coating I had laying around then sprayed with Performix 11203 Plasti Dip Black Multi-Purpose Rubber Coating Aerosol - 11 oz.
I do not recommend using the Henry 201 and if you do, you will need to coat it as it may leach harmful by products into the pond.
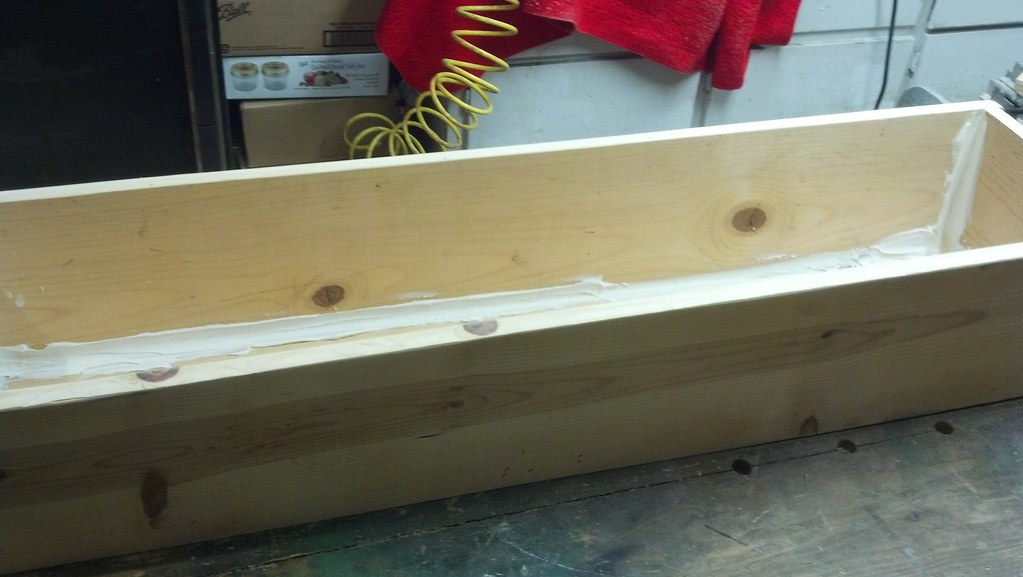
The outside was stained with some TWP Redtone that I had left over and will probably re-stain every other year. The inside was coated with Henry 201...again do not use this.
Rubber feet were placed on the bottom so the wood does not rot where it is in contact with the concrete.


OK let me just say that this thing is getting expensive and becoming a nightmare, after I sprayed with the plasti-dip and set up... it leaked, I let it dry 24 hours, sealed with two tubes of Dow Coring 732 silicone dried 24 hours and it leaked..., I ordered 3 more tubes of Dow Coring 732 and will give it one more shot.
In hindsight I should have cut 5 rubber panels from pond liner and sealed them to the sides and bottom then seamed the corners ...oh well, live and learn.
Do not build this how I did it!!!
Finally, the dam thing is done!!
L-R Red Russian Kale, Impatiens, Red Russian Kale, Romaine, Impatiens. I'll have to have Laura tidy up the planter pots a bit.

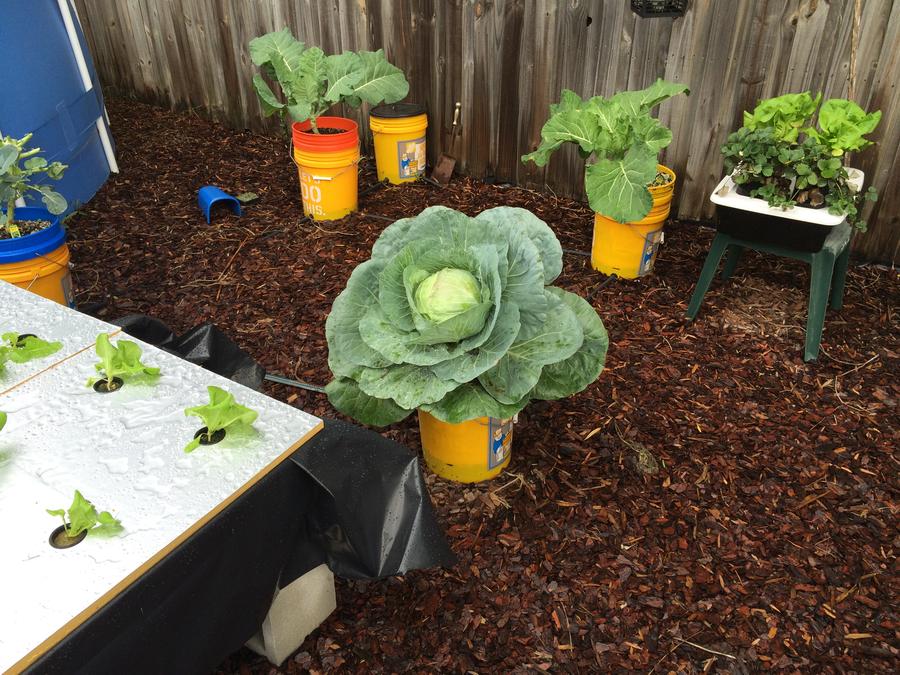
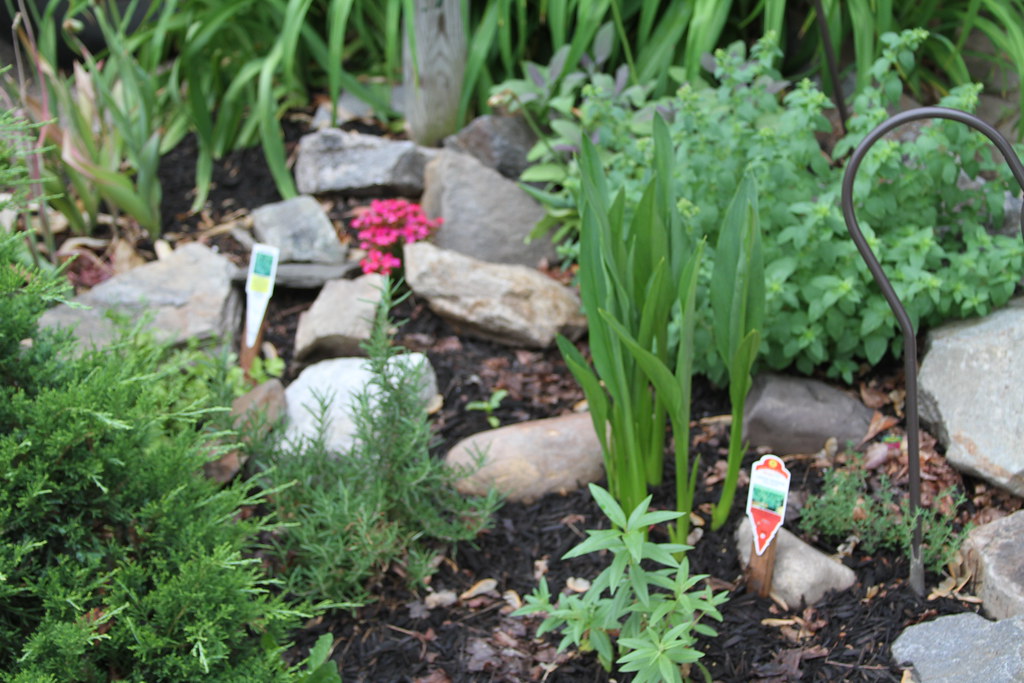
This is the Dirt Farmer section!
Herbs
I did away with my herb garden on the deck when I resealed the deck, it was nice to have access to fresh herbs from the kitchen but it was too much work trying to keep the soil moist, my last ditch effort was I removed the pots and placed in a pond liner and filled the liner with soil.

Herbs were moved to the back yard pond perimeter and the front of the yard and all wintered over but the rosemary.
For My herbs I have Chives, Sage, Thyme, Italian Oregano by the back pond. The front of the house I have Purple Sage, Oregano, Chocolate mint, that wintered over and added Thyme and Herb Lemon Verbena this spring, I placed the Basil next to the Pond Bench. I also tossed in another Arp Rosemary and Dwarf Sage plant in the garden closest to the house. Once the Rosemary and Basil get larger and I can get a couple suckers, I'll clone those. I had to remove the chocolate mint from the front lower herb garden and transplanted on the upper garden for a ground cover it was strangling my sage and on its way to the oregano.
I also took two cuttings one from the Sage and one from the Oregano that is in the back pond and transplanted them on the hill in the front yard, for some reason these two plants are much more aromatic than my other plants
Front of the house photo chocolate mint center of photo.

Sage and Rosemary

Sage, Oregano transplanted from the back pond herbs and Chocolate Mint removed from the front yard. I know the chocolate mint will grow out of control but I'm hoping it will make a good ground cover.

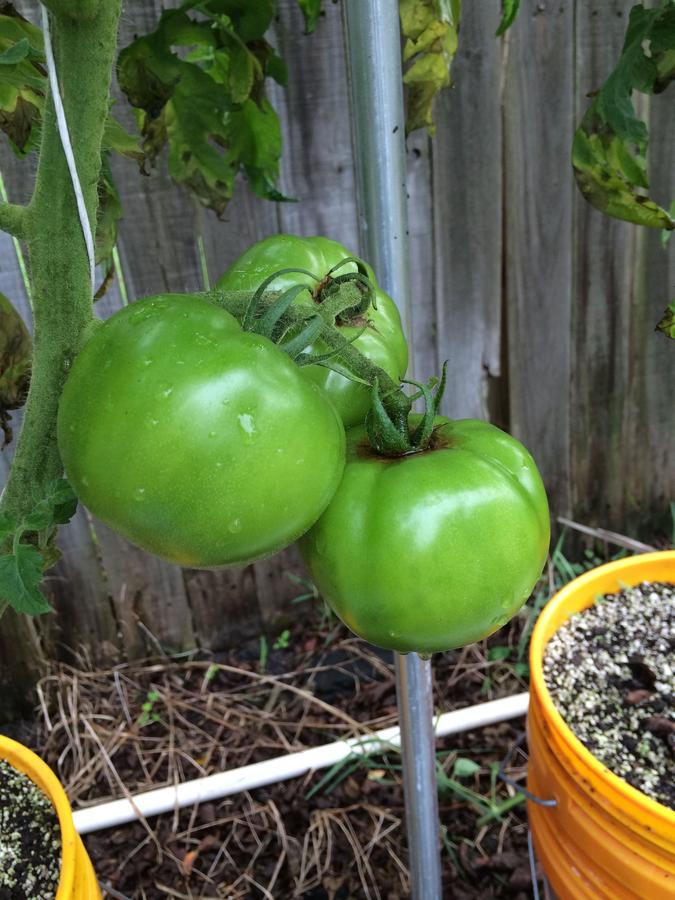
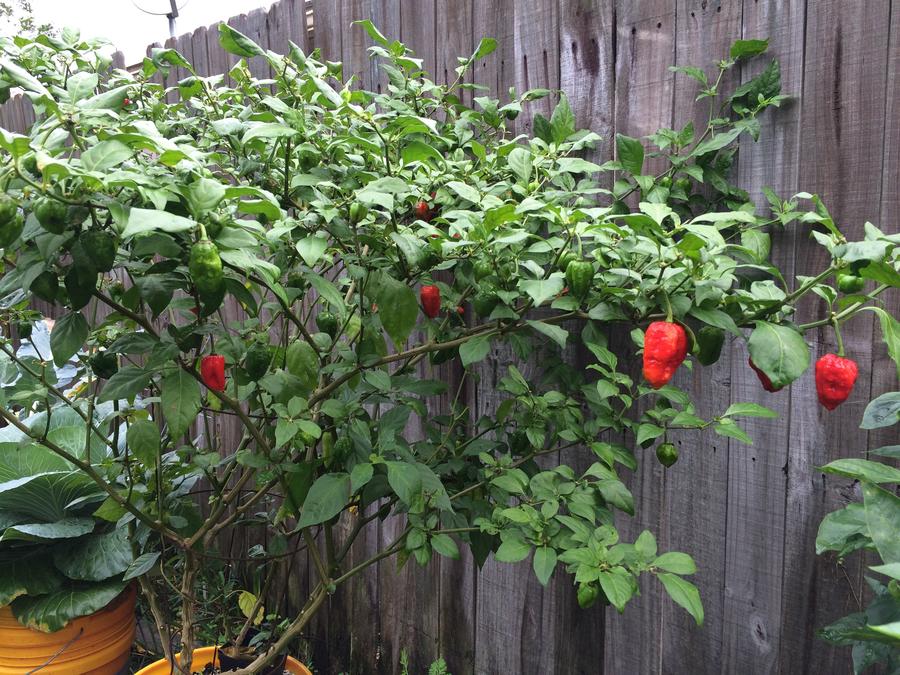
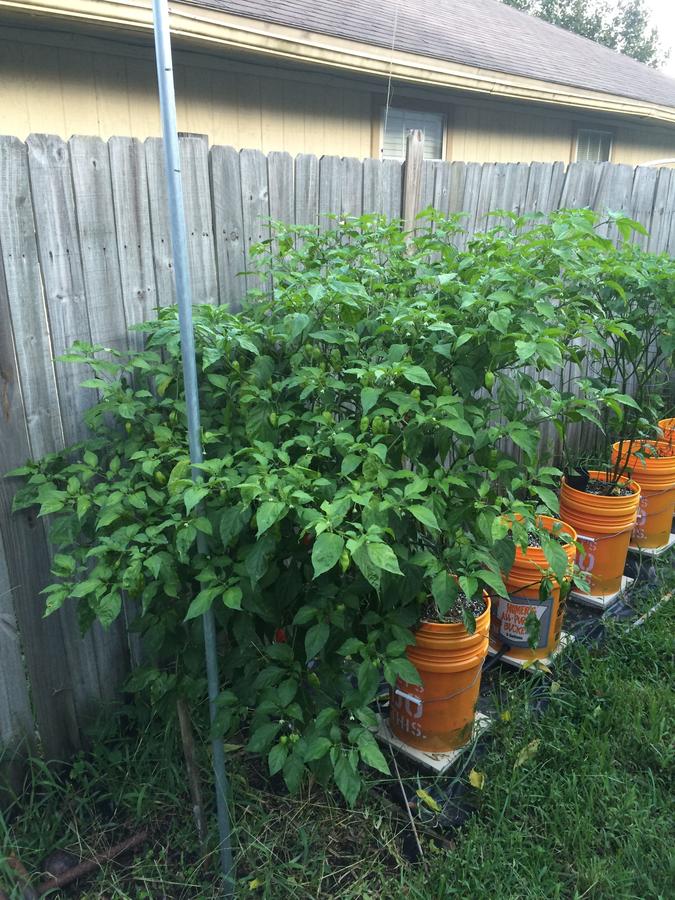
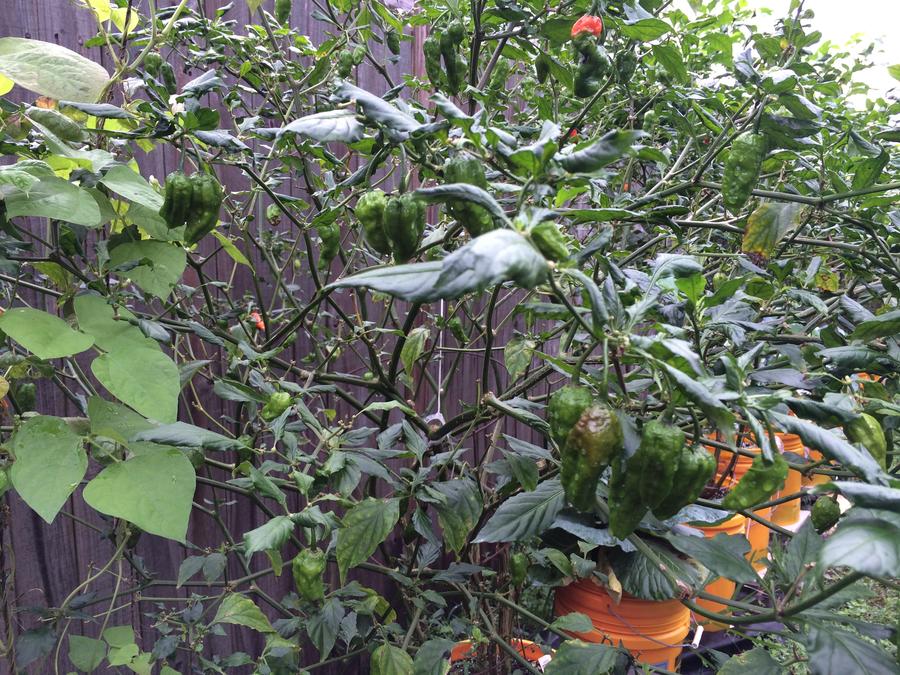
My soil plants this year are 4 eggplants, three Early Girl tomato plants, 4 Habaneros, 2 Poblanos, 2 giant Jalapenos, 4 Jalapenos, one Fantastico Tomato Plant and 2 Patio Tomato Plants, not to mention my herbs!
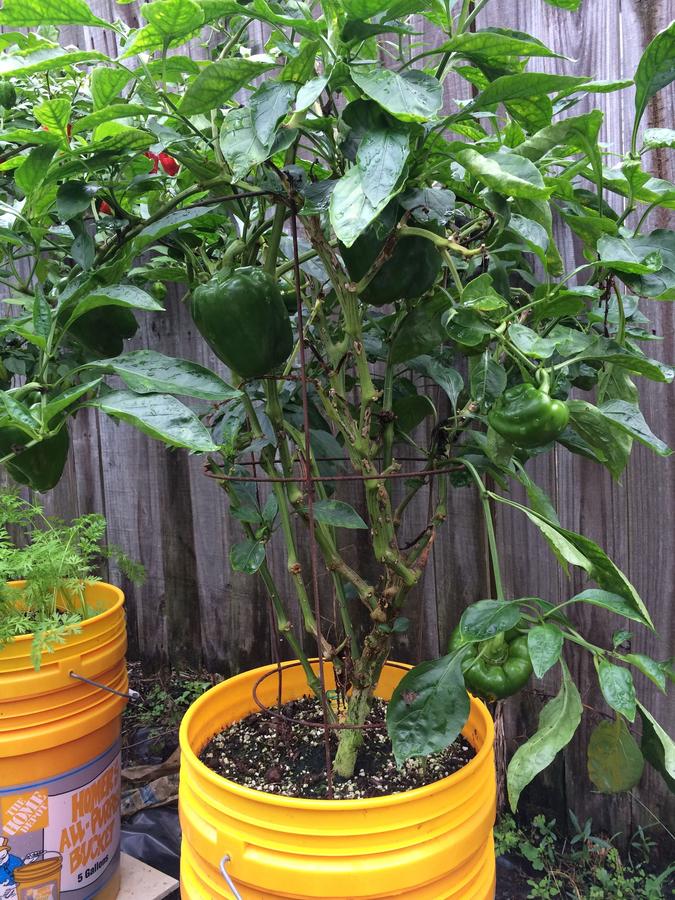
This year I decided to prune the plants as well as top off some of the peppers, I did not do all of them because I was a nervous wreck, after all I cut off more than half of the pepper plant that was loaded with flowers OMG!!!
Giant Jalapeno

Giant Jalapeno
Regular Jalapeno
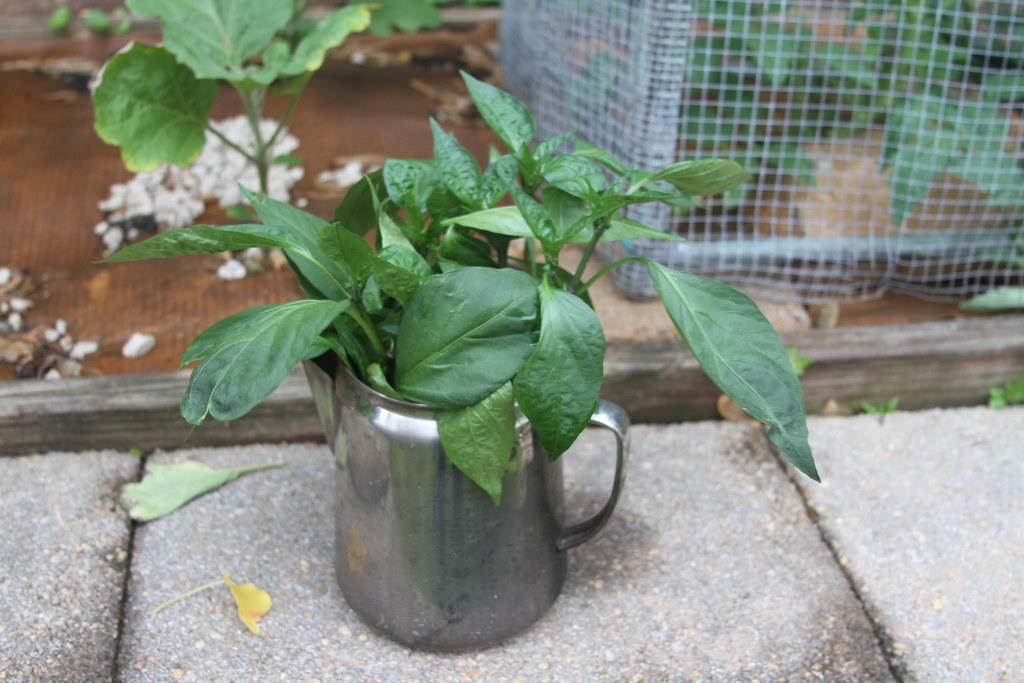
The cuttings were placed in a container with tap water and looked dead yesterday, this morning they perked up very nicely so I placed them in partial sun, in retrospect I should have pruned most of the leaves I will do that tonight and maybe add some nutes to the water.
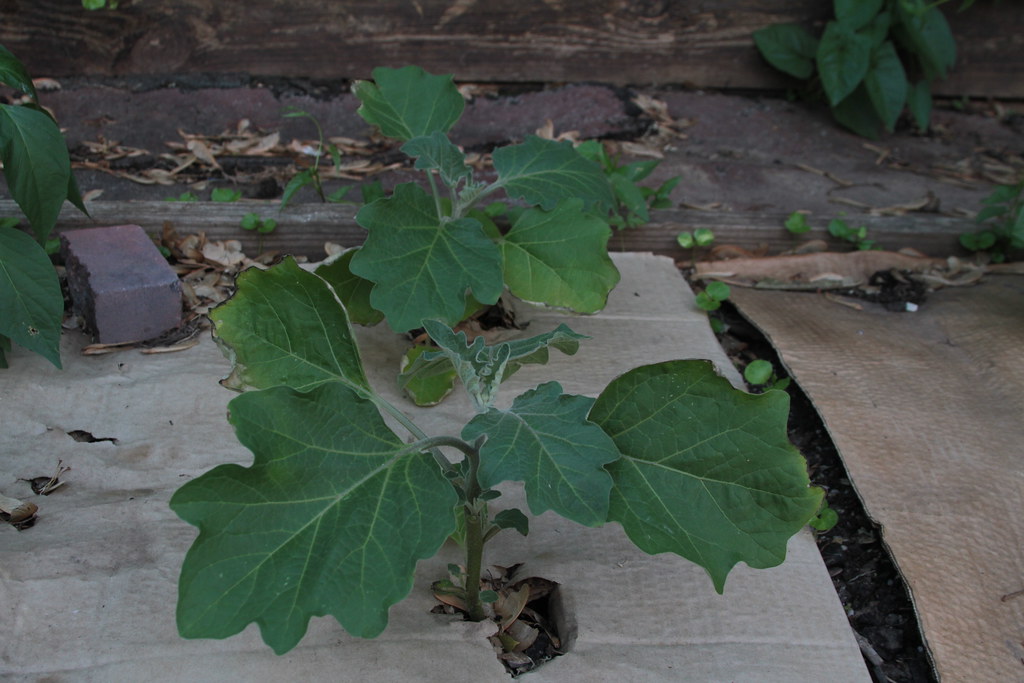
I figured I would try my luck at eggplant again this year (My favorite garden veggie) , I haven't had any luck with eggplants over the years but I am hoping this year will be different.
I will be pruning some and may try cloning a couple.
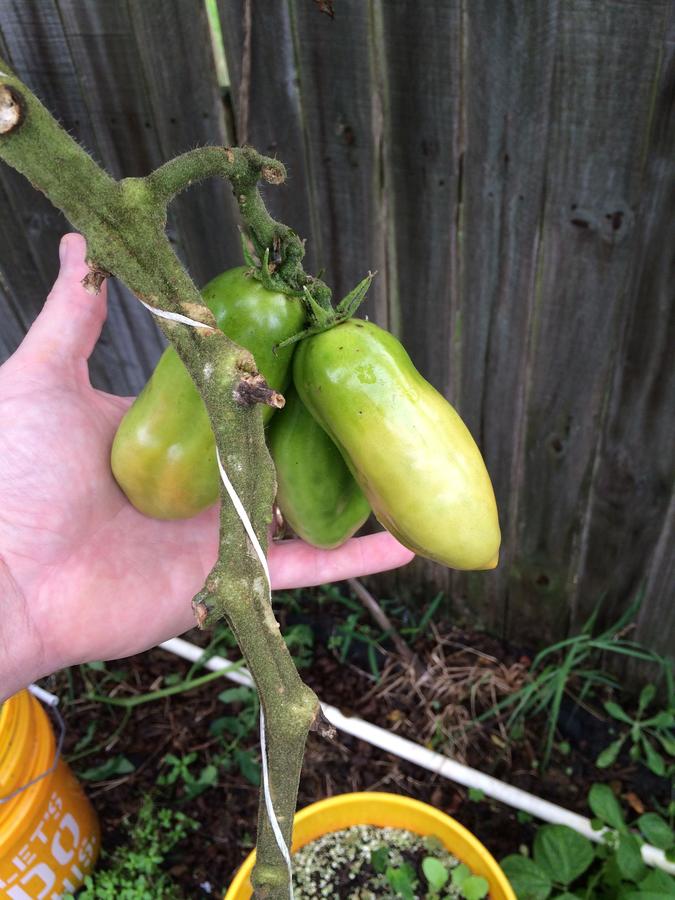
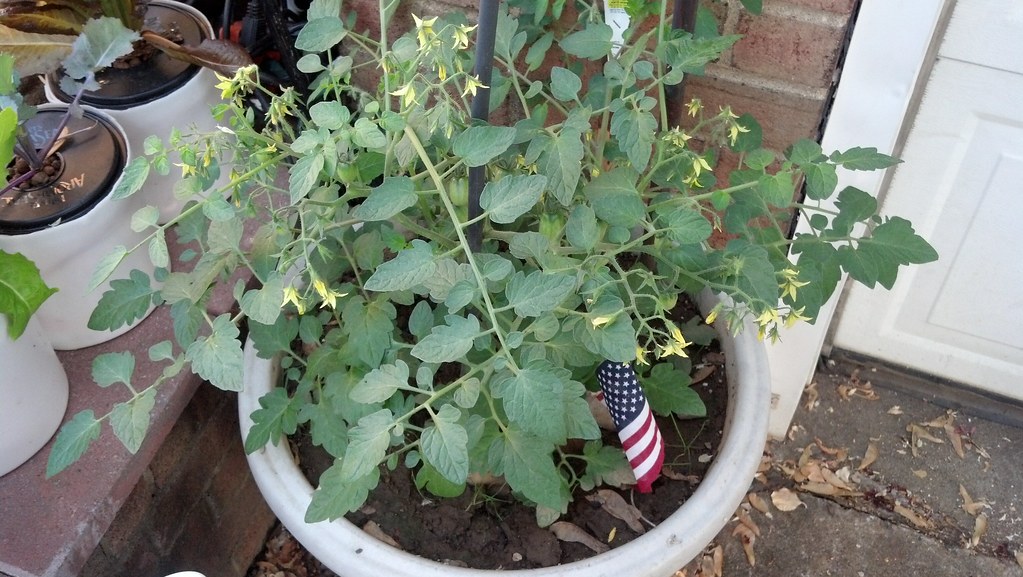
I have a tomato plant out front in a planter next to the pond, last year the tomato plant in this planter kicked ass, it was nice to snack on when working on the pond or hanging out front.
Hopefully this Fantastico Tomato plant will provide the same.

Early Girls in the Back, and there's one in the URDWCHS, I'm gonna clone an Early Girl and add a 2nd to the Hydroponic setup.
The reason I posted this in "small spaces" is because that is the reason I got into this type of gardening (limited space) I am also working on some other projects like vertical gardening, NFT Systems and a bunch of other things.
If I can impress Mrs. SQWIB with this years crops, she may let me get a greenhouse!!! Well she put me on a diet and I replaced bread with Romaine SO SHE BETTER LET ME GET A GREENHOUSE!!!
Deep Water Culture Tomatoes / Peppers / Eggplants
I decided I wanted to expand on my tomatoes and other veggies and with a limited planting area, I chose the DWC method of hydroponics, This is a trial run and if all works well, I will double the size and plumb in a Recirculating Deep Water Culture w/nutrient reservoir and control bucket.
Most likely using the underflow design.
For my Fertilizer (Nutes) I used Bobbies formula, I also added about 1/4 ounce of vinegar to drop the ph to around 6- 6.5
N P K
Nute Mix per 5 gallons for tomatoes (20-18-38)
- 12 grams Calcium Nitrate Fertilizer 15.5-0-0
- 12 grams Hydroponic Tomato Fertilizer 4-18-38
- 6 grams epsom salts Magnesium Sulphate
Started with this
- 5 gallon buckets x 6
- 6" inch Mesh Net Pot Lid for 5-3 GALLON BUCKET x 6
- Nutes (see above)
- Hydroton Grow Rocks
- Elite Airline Tubing, 20 Feet
- Air Pump - This is the one I used from my fish tank
- (1) 12 way air control manifold
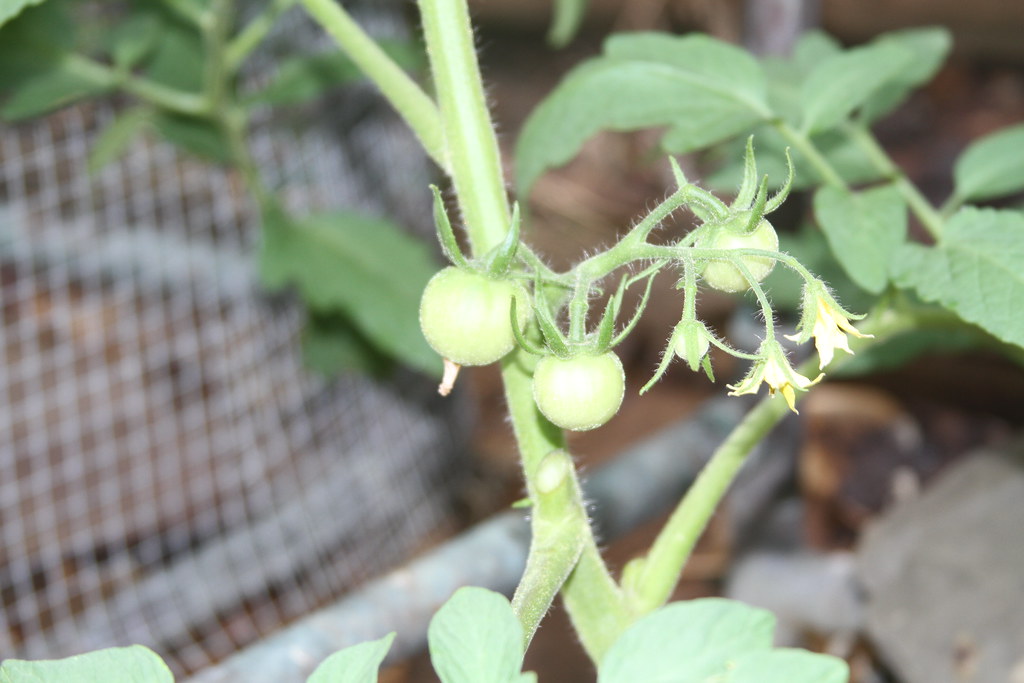
Early Girl Tomato, Patio tomato, Black Beauty Eggplant,
May 18th 2015
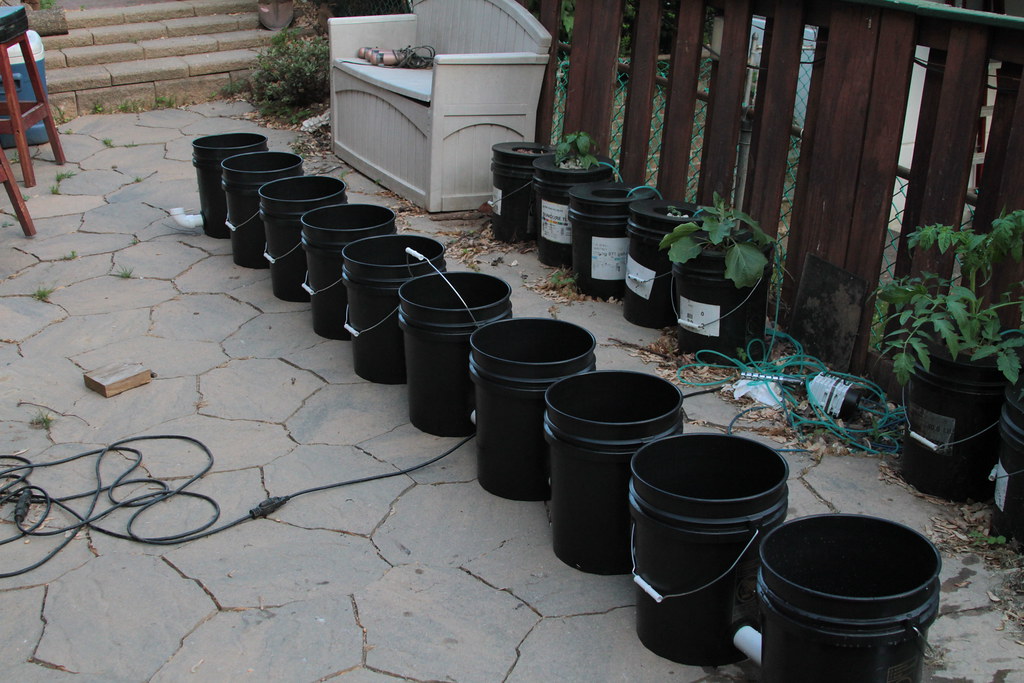
It's been about 3 weeks and so far everything is looking real good, so I decided to go a step further and build an "Undercurrent Recirculating Deep Water Culture Hydroponic System". URDWCHS for short, lol...
I will try out 10 buckets this year and may add two more next year if this system works.
- 5 gallon buckets x 10
- 6" inch Mesh Net Pot Lid for 5-3 GALLON BUCKET x 10
- Nutes (see above)
- Hydroton Grow Rocks
- (11) Check valves (only needed if pump is lower than the air stones)
- (6) - Elite Airline Tubing, 20 Feet cut in half
- (1) Air Pump - This is the one I used from my fish tank
- Eco Plus 2" x 3 3/4" Large Round Air Stone x 10
- (1) 12 way air control manifold
- 4-Inch Round Air Stone for Control Bucket
- (1) Danner model #7 pump (note that the inlet is barbed and not threaded, see pic below)
- 1.5" PVC Elbows x 11
- 1.5" x 10' PVC x 2
- 1/2" x 10' PVC X2
- 1/2" PVC Union x 2
- 5 - 1/2" PVC Elbows
- 1/2 in. Schedule 40 PVC Female Adapter
- 1/2 in. Schedule 40 PVC Tee x 1
- 1-1/2 in. x 3/4 in. PVC Sch. 40 Reducer Bushing x 1
- 3/4 in. Schedule 40 PVC Male Adapter
- 3/4 in. x 1/2 in. PVC Sch. 40 S x S Reducer Coupling
- 8 oz. PVC Cement
- 27-Gal. Storage Tote in Black
- 1-1/2" uniseals x 22
- Dixon BAS974 Brass Fitting, Swivel Adapter, 3/4" GHT Female x 1/2" NPTF Female
- Kerick Valve MA052 PVC Mini Float Valve, Tank Mount, Adjustable Arm, 1.5 gpm at 60 psi, 1/2" NPT Male
- Milwaukee 49-56-0147 2-1/2-Inch Ice Hardened Hole Saw
- Milwaukee 49-56-7055 Hole Saw Arbors for 1-1/4-Inch & Larger Hole Saws
Danner Model 7 pump (Amazons picture is wrong)
you will need a piece of 1" hosing and two pipe clamps with this pump, if it's a threaded inlet purchase the
1/2 in. x 1/2 in. PVC Sch. 40 MPT x FPT Riser. The rubber hose actually worked out well, it adds a bit of flexibility juggling the components around.
- I started by cutting eighteen 2.5" holes in the buckets using the bucket handles as a center reference (eyeballing).
- Each hole was carefully drilled by putting pressure on the bucket and bending slightly so the hole would not be oblong.
- Each hole was shaved with a sharp knife then sanded, then the uniseals were placed in the bucket.
- The last bucket in line has a hole that comes out of the front for the return.
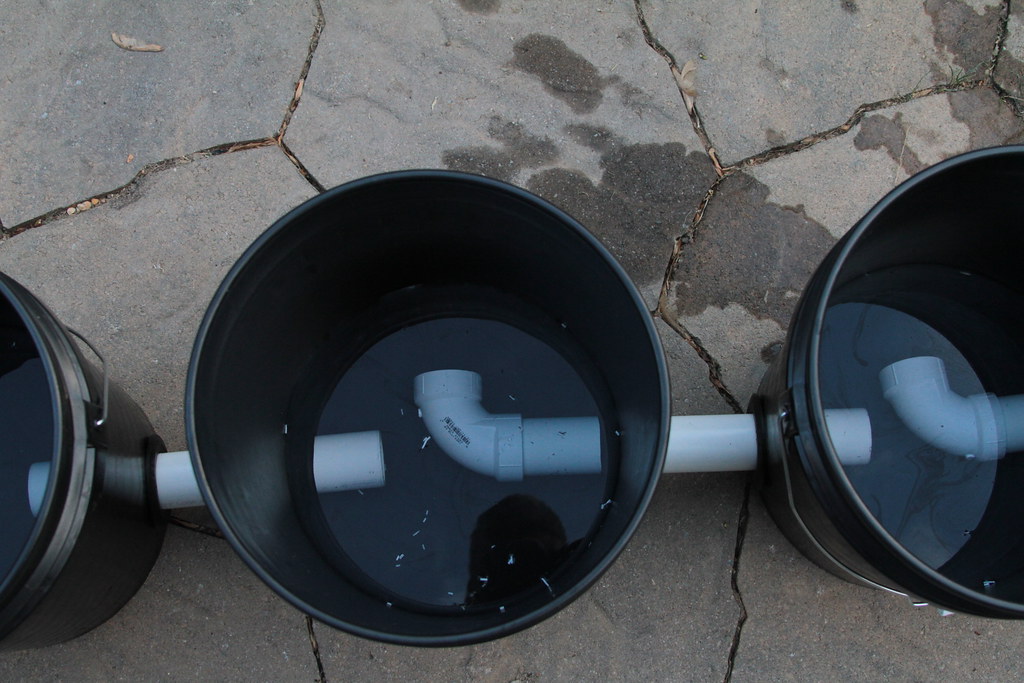
- then I cut 10 pieces of 1-1/2" PVC to 12" lengths and one piece at 6", each piece was beveled and wiped down with a deglazer.
- Buckets are at 18" centers (6" gap in between each bucket) but can go out to 22" centers.
- The 12" PVC tubes are press fit in to each bucket using a dab of silicone o-ring lube food safe Dimethylpolysiloxane.
- the tubes are wiped clean after insertion and alignment.
- After all the buckets were plumbed in...
- Each bucket inlet is then fitted with a 1-1/2" elbow.
- I took two elbows and capped the ends, filled with water and checked for leaks, I was very nervous about leaks because of the nightmares I have heard about the uniseals on round 5 gallon buckets. Fortunately there was not one leak.
Then the return line is plumbed in
- 6" nipple (1.5" PVC Pipe)
- 1.5" elbow
- 1.5" x 3/4" reducer bushing
- 3/4" male adaptor
- 12" 1.5 PVC Pipe
- 3/4" - 1/2" SXS
- 10" OF 1/2" PVC Pipe
- one side of the union
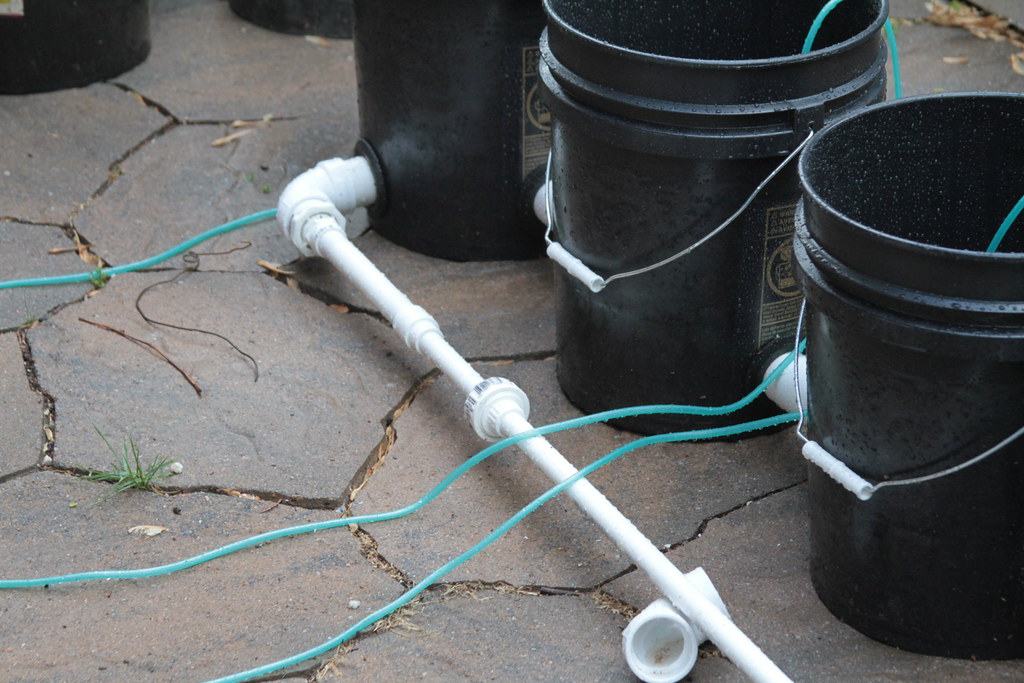
then the 2nd part of the union is glued on to a 10' piece of 1/2" PVC Pipe, this goes to a 12" 1" black rubber hose and is clamped to the pipe and pump with hose clamps.
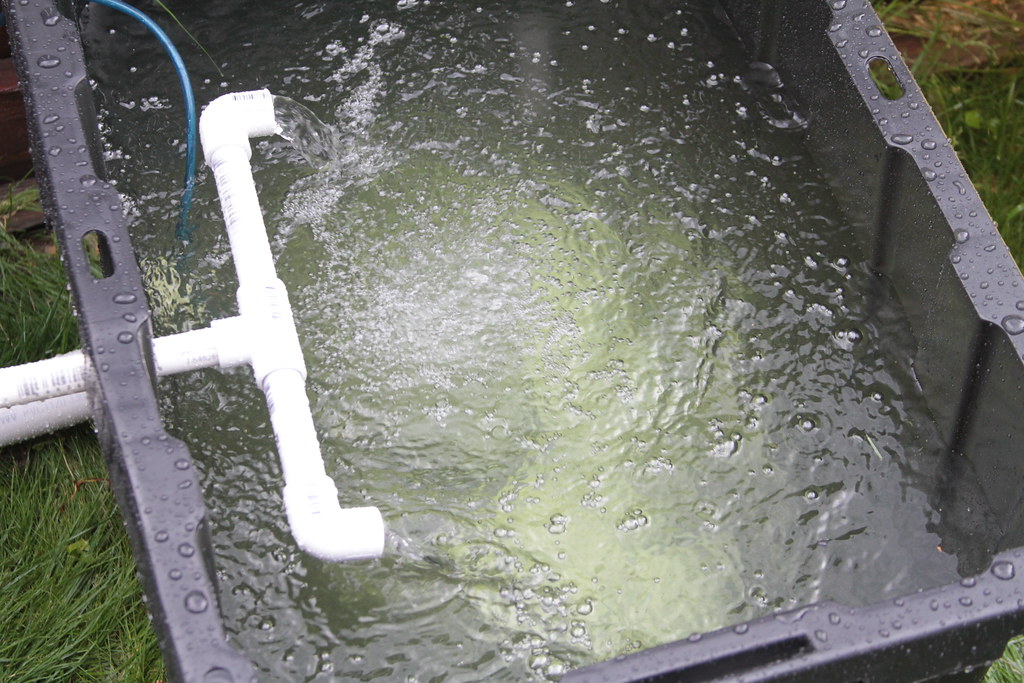
The control tank is drilled at the highest point to allow the 1/2" PVC pipe to slide in and then ther e is another smaller hole drilled at the same level for an air line.
from the pump on the outlet goes the 1/2" female adapter
- 10" 1/2" PVC Pipe
- 1/2" Elbow
- 14" 1/2" PVC Pipe
- 1/2" Tee
- two 1/2" nipples
then an elbow is placed on each nipple
The threads on the pump needed a ton of teflon tape
The only problem with a system like this is there is 0 tolerance for mistakes, a small leak and you're done, the air pump fails and you're done, you run your system dry and you're done the pump fails... well you might be OK if that happens.
All the air hoses are cut to the same length, I purchased twenty foot air hose sections and cut them in half, the pump is placed above the air stones to act as an airlock (anti siphon) in the event of a pump failure or power outage.
I measured the system by pouring in 5 gallon buckets, its roughly 60 gallons when operating. Once hooked into the Nute reservoir the system will be 115 gallons circulating about 6x per hour.
I ran the system for half an hour with the garden hose overflowing the buckets for a cleaning.
Did some math, then added the nutes.
The new system in place and only need a few minor tweaks.
New air stones will be added today as well as a float for a 55 gallon gravity fed nute reservoir . I will also need to raise the feed line off of the concrete to reduce heating up the nutes and run the electric cord under ground.
I was worried it would look obnoxiously huge, the only part that looks a little BOLD is the control tank.
(1) Patio Tomato Plant, (2)Early Girl Tomato Plant, (3)open, (4)Poblano Pepper or Bell pepper?,(5)Black Beauty Eggplant, (6)open, (7)open, (8)open, (9)Cloned Fantastico tomato plant, (10)Black Beauty Eggplant.
I wanted a mix of plants to see which ones did well in the DWC system using my current nute formula, I'm a bit worried combining eggplant with tomatoes as they like different nutes.
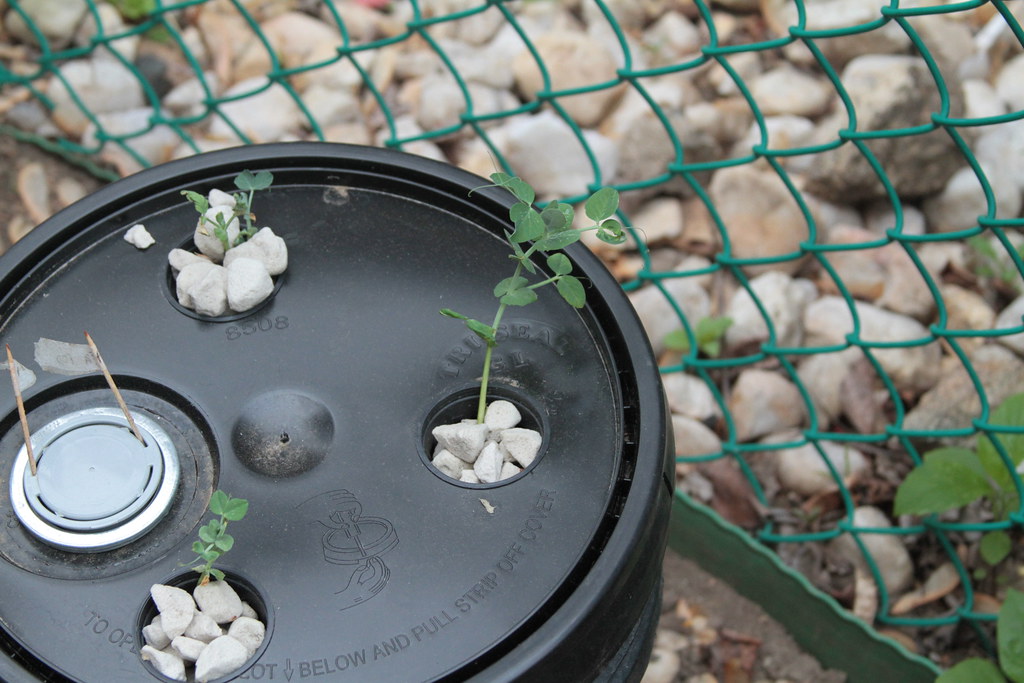
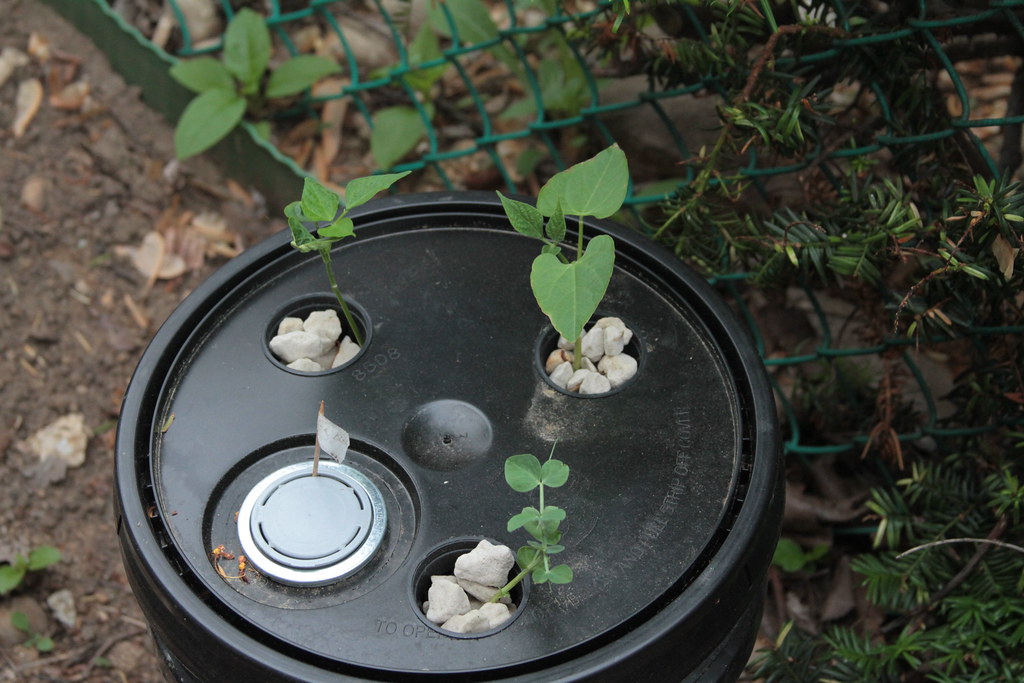
Kratky Peas and String Beans.
I could never use this area before because there was a huge Bradford pear tree here. The tree was cut down last fall and I had to come up with a way to close off this area so the dog and turtles don't tear it up, but also allow access for the turtles. For Some reason they love it up there.
For my Fertilizer (Nutes) I used Bobbies formula, I also added about 1/4 ounce of vinegar to drop the ph to around 6- 6.5N P K
Nute Mix per 5 gallons for Sugar Snap Peas (20-18-38)
- 12 grams Calcium Nitrate Fertilizer 15.5-0-0
- 12 grams Hydroponic Tomato Fertilizer 4-18-38
- 6 grams epsom salts Magnesium Sulphate
Behold FREE Pallets.
Cutout for the turtles bottom right
- May 4th, 2015
May 16th, 2015 (L)
- May 27th, 2015 (L)
- May 28th, 2015 (L)
- May 16th, 2015 (R)
- May 27th, 2015 (R)
- May 28th, 2015 (R)
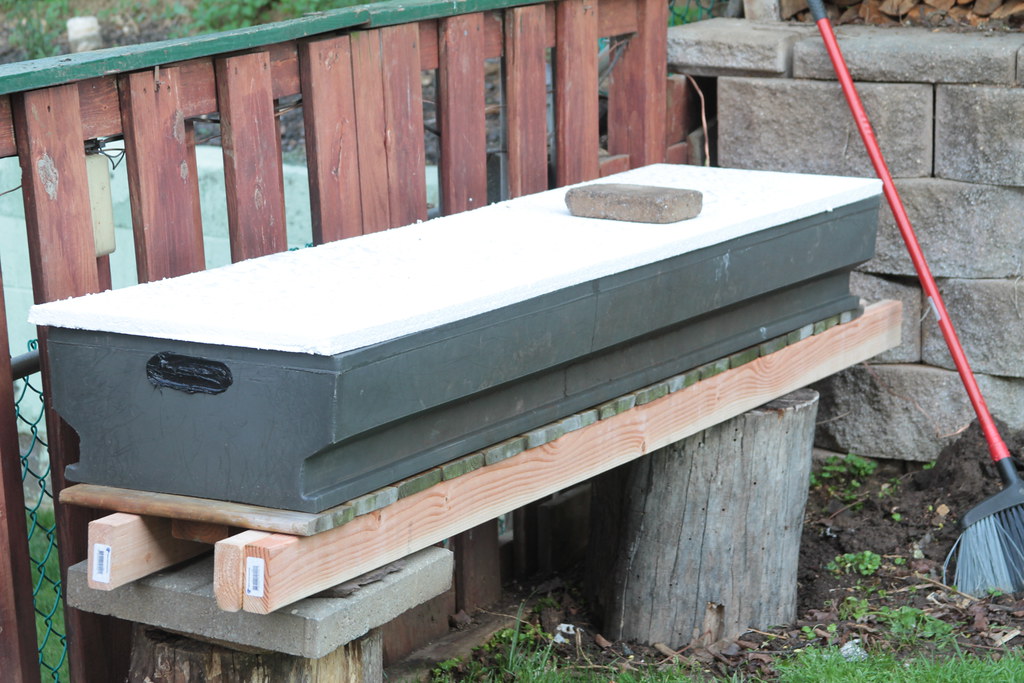
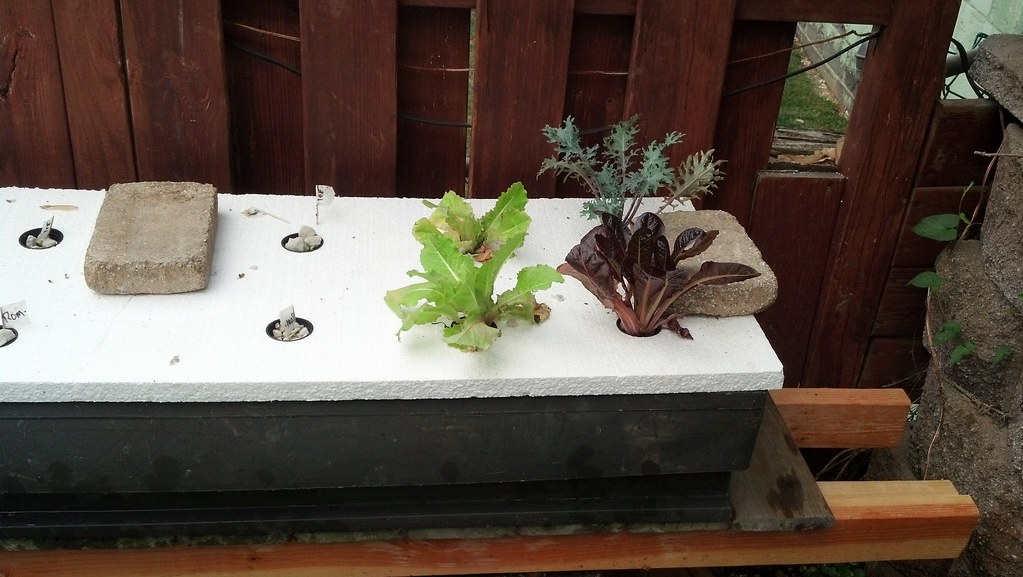
Kratky Grow Bed
This is an old slide out container that was in the front of my RV that was never used. I sealed up the ends with pond liner and Dow Coring 732 silicone to make a Kratky Grow Bed.
I think its 16" wide by 80" long, it's small but doesn't overpower the yard..
I had to lower the PH a smidgen by adding a 1/4 ounce of white vinegar per 5 gallons of water, PH was at 7.5, lowered to around 6.
For my Fertilizer (Nutes) I used Bobbies formula, I also added about 1/4 ounce of vinegar to drop the ph to around 6- 6.5N P K
Nute Mix per 5 gallons for Grow Bed (20-18-38)
- 12 grams Calcium Nitrate Fertilizer 15.5-0-0
- 12 grams Hydroponic Tomato Fertilizer 4-18-38
- 6 grams epsom salts Magnesium Sulphate
May 18th, 2015
Red Russian Kale, Romaine and ??? The iceberg and spinach is from seed and not looking good.
L-R Sugar Snap Peas, Habaneros and Poblanos?
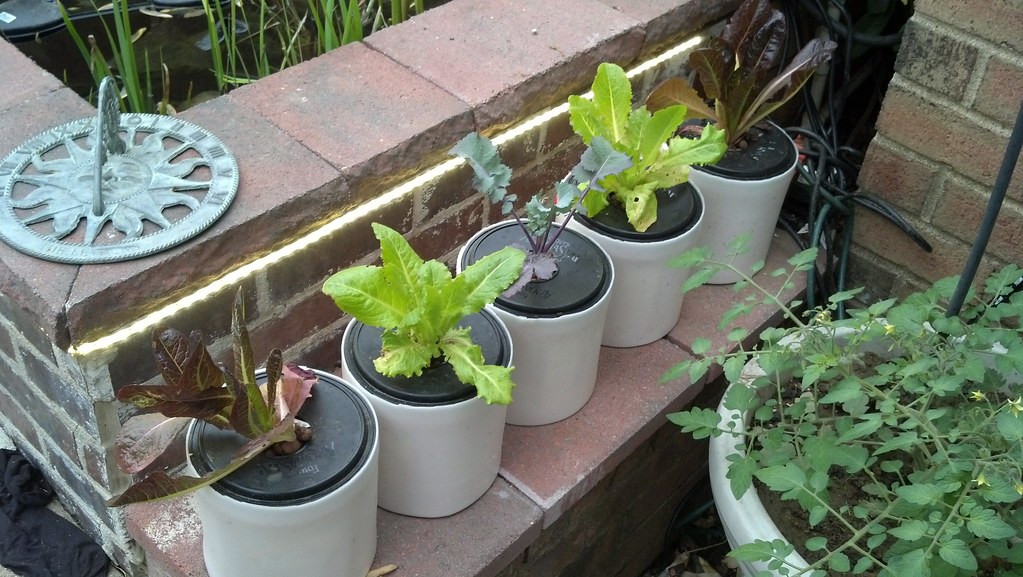
Kratky Lettuce in Folgers Cans
(Used established plants)
- Folger coffee cans (change out to 2 gallon buckets)
- 2" Net Pots Changed out to 3" Net Pots
- Nutes (see above)
- Hydroton Grow Rocks
- Jiffy 7 Peat Pellets
- Spinach/Lettuce seeds.
- Cheap plastic container to start seeds
- Foam wrap Reflectix
- Foil Tape
For my Fertilizer (Nutes) I used Bobbies formula, I also added about 1/4 ounce of vinegar to drop the ph to around 6- 6.5
N P K
Nute Mix per 5 gallons for Kratky Lettuce (20-18-38)
- 10 grams Calcium Nitrate Fertilizer 15.5-0-0
- 10 grams Hydroponic Tomato Fertilizer 4-18-38
- 5 grams epsom salts Magnesium Sulphate
- May 5th, 2015
- May 18th, 2015
- May 19th, 2015
- May 21st, 2015
- May 25th 2015
These were purchased the beginning of May and planted the week before mothers day.
I figure 5- 6 weeks should be OK, However I'm not sure if the nutes will last that long in hotter weather, I'm gonna try 1-1/5 gallon buckets next year.
- May 27th 2015
Yesterday when I got home the lettuce was bone dry, I added a bit of pond water because I wasn't up to mixing any nutes, the next day I added some nutes from my DWC system as that was being upgraded. These guys are really drinking a lot the last few days and I have been careful just adding a few inches of water at a time.
I will definitely be upgrading this to 1.5 gallon containers and 3" net pots.
- May 28th, 2015
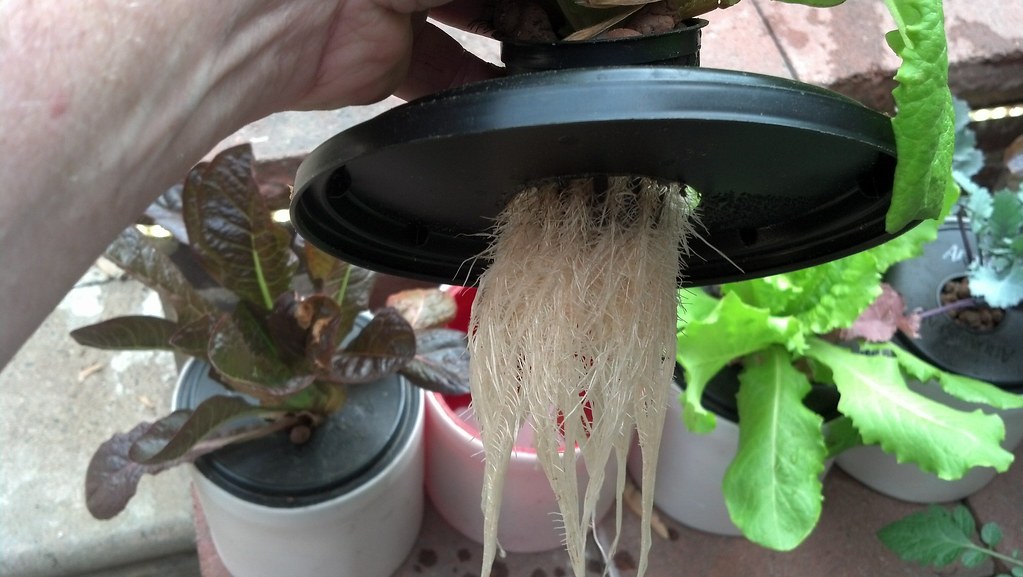
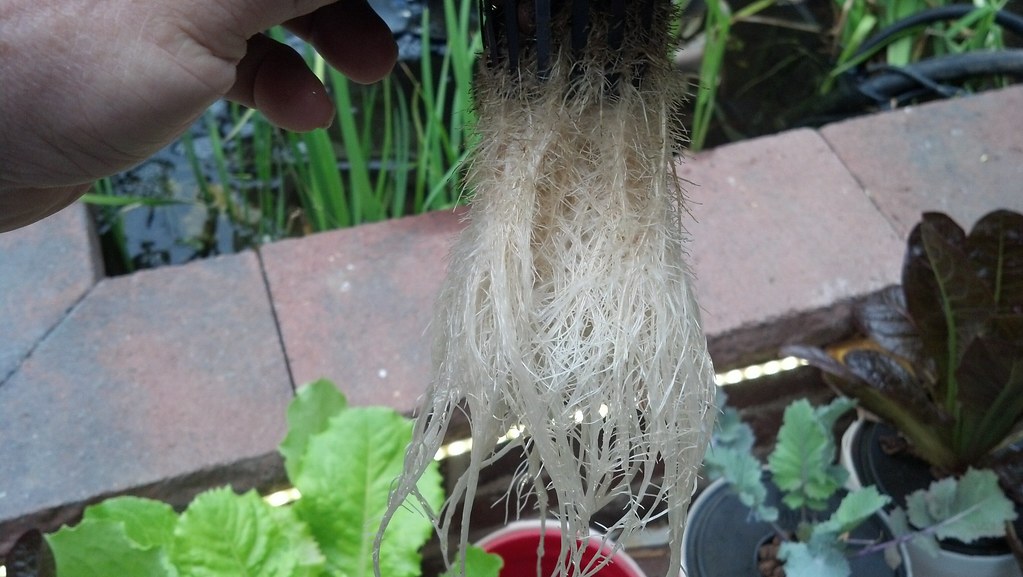
Roots are getting a tad dirty, time to harvest these soon.
This head was almost completely flat yesterday.
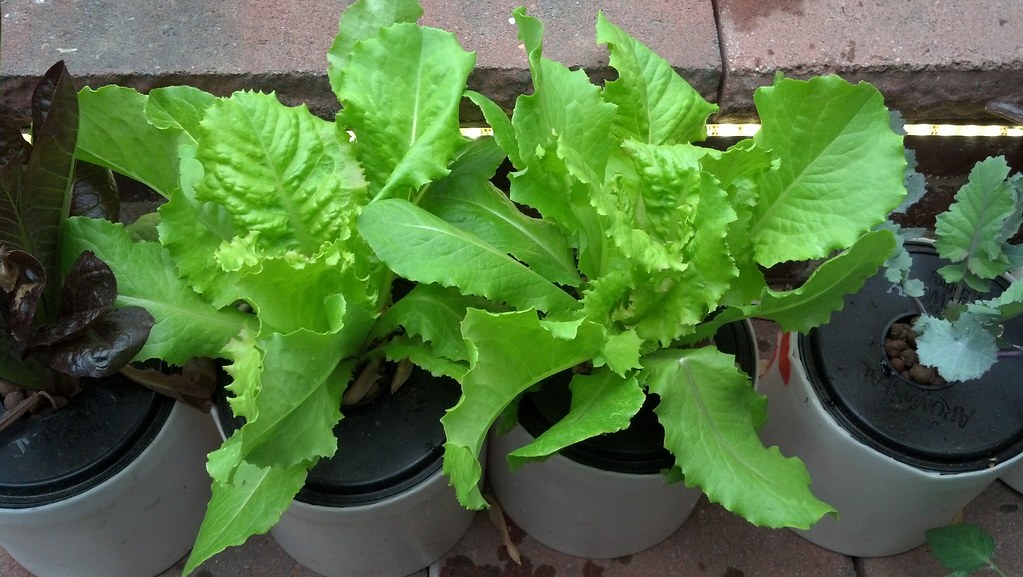
The Red Romaine is really looking good.
The Russian Red Kale is hanging in there but I think the Kale in the Pond Planter is doing better.
The colors of the leaves are much brighter in the Aquaponic planter than the Kratky Lettuce but also much less mature.
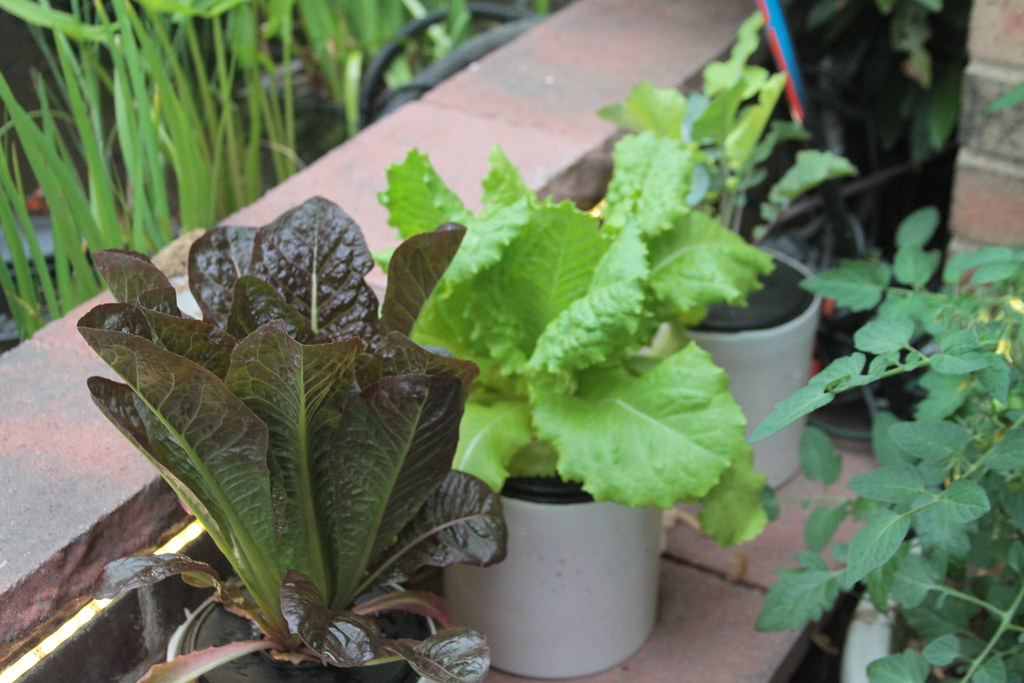
These Lettuce plant were purchased grown already, I tried planting seeds with no success,
I would call this a total success but needs tweaking.
I have been so impressed with how the lettuce done in these kratky containers, with the exception of the containers being too small resulting in the nutes lasting less than three weeks I decided to remedy that problem I ordered 2 gallon buckets, this will more than triple the volume of nutes.
Another problem was the lettuce was top heavy and kept falling over and the net pot pulling out, I will glue the net pots in or at the least try to have a tighter fit.
Today I put out two new containers with nute solution, I'm trying to germinate 4 Black Seeded Simpson right in the planter with grow stones... keep your finger crossed.
Here's my newer setup, I am working on if the Black Seeded Simpson germinate.
- 2 gallon buckets and lids
- 3" Net Pots
- Nutes (see above)
- Hydroton / Grow Rocks
- Spinach/Lettuce seeds.
- Foam wrap Reflectix
- Foil Tape
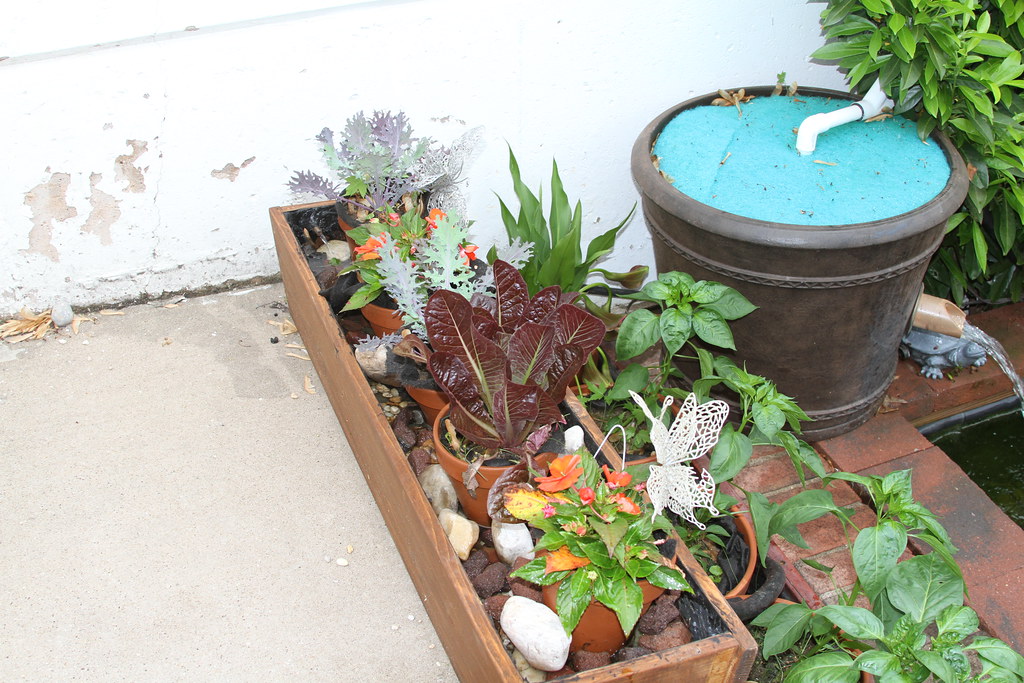
Aquaponic Veggie filter
(started growing vegetables in here in 2013 and last year 2014 with some success)
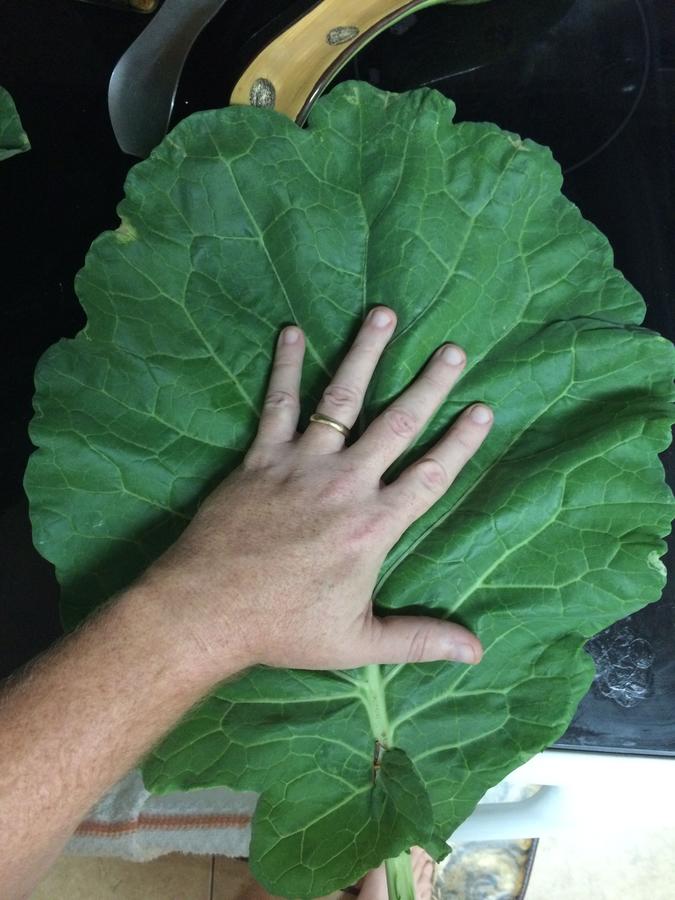
Basically my veggie filter is an up-feed filter from the pond, the water travels a pipe outside the main pond and under the veggie filter, the water flows up through a few hundred pot scrubbers and 3-4" thick polyester filter media, up along the clay pots about 2" high. The clay pots rest on the filter media, the pots are lined with a pond underlayment to assist in wicking, the pots are filled with a clay soil and potting soil, then the water exits the veggie filter through three feeder tubes back into the pond, the dwell time in the veggie filter is several minutes.
I usually grow peppers in these planters with a little fertilizer.
2012 veggie filter.
2013 veggie filter. (Photo July 8th)
Tomatoes grew but only had a few fruits and the Chinese egg plant developed one small fruit. The Canna Lily kicked ass.
2014 Veggie Filter (Photo June 28th)
The peppers did well but could be better, I may up the Nutes this year
- Roma on the left only produced a few tomatoes.
- (Photo September 12, 2014)
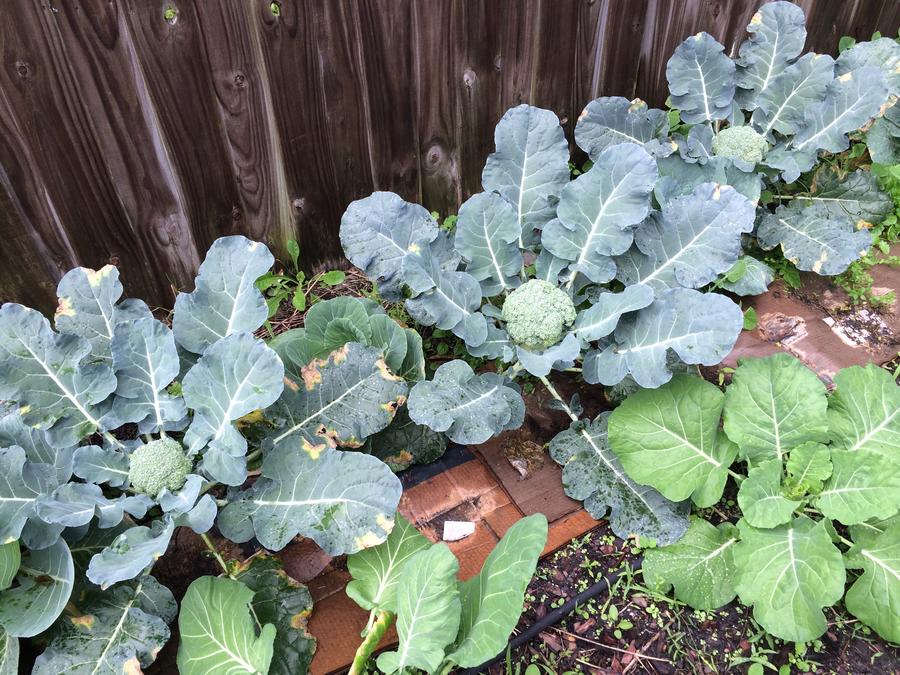
2015 Veggie Filter (May 8th)
L-R Three Bell peppers, three Poblano peppers, Calla Lily in the very back and some Water Hyacinths. The phlox to the extreme left is in the ground.
May 8th, 2015
May 11th, 2015
May 18th, 2015
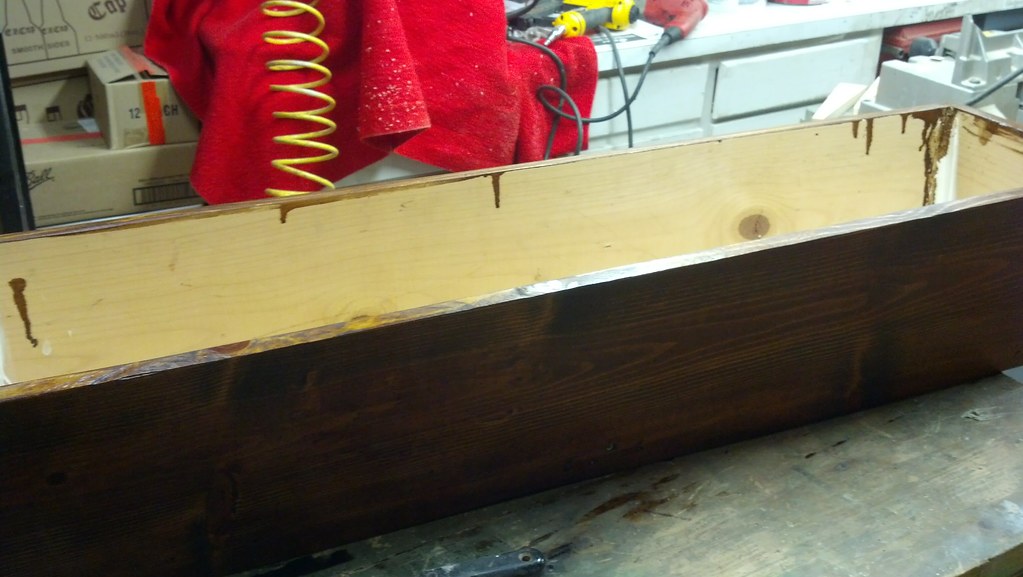
Aquaponic Planter (Updated for 2015)
Nightmare
Nightmare
- Wood Planter
- Roof Flashing Rubber
- Plasti Dip Black Multi-Purpose Rubber Coatin
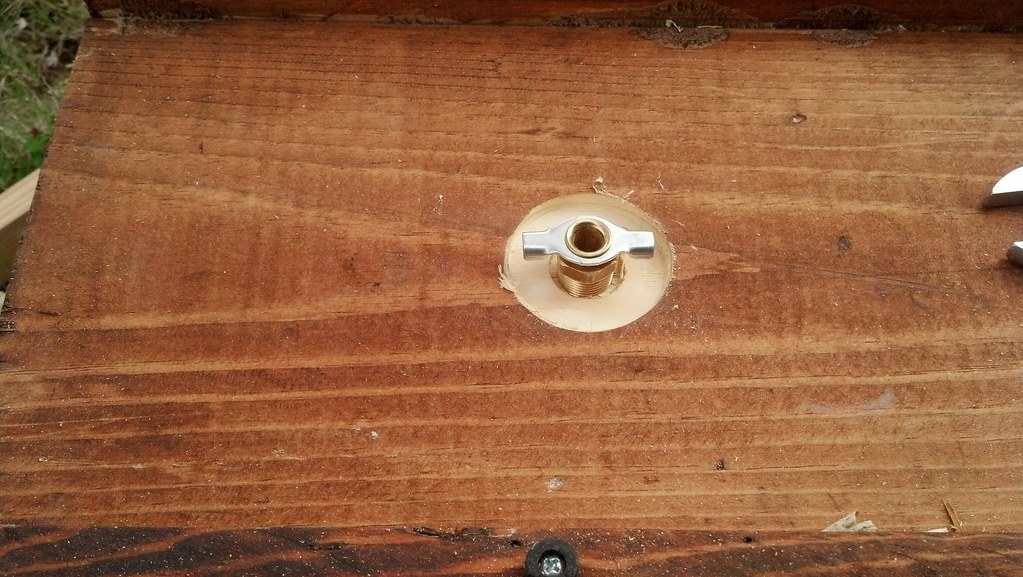
- 3/8 copper tubing and pipe
- washing machine hose
- small cheap pump
- 4 freaking tubes of Dow Coring 732 silicone
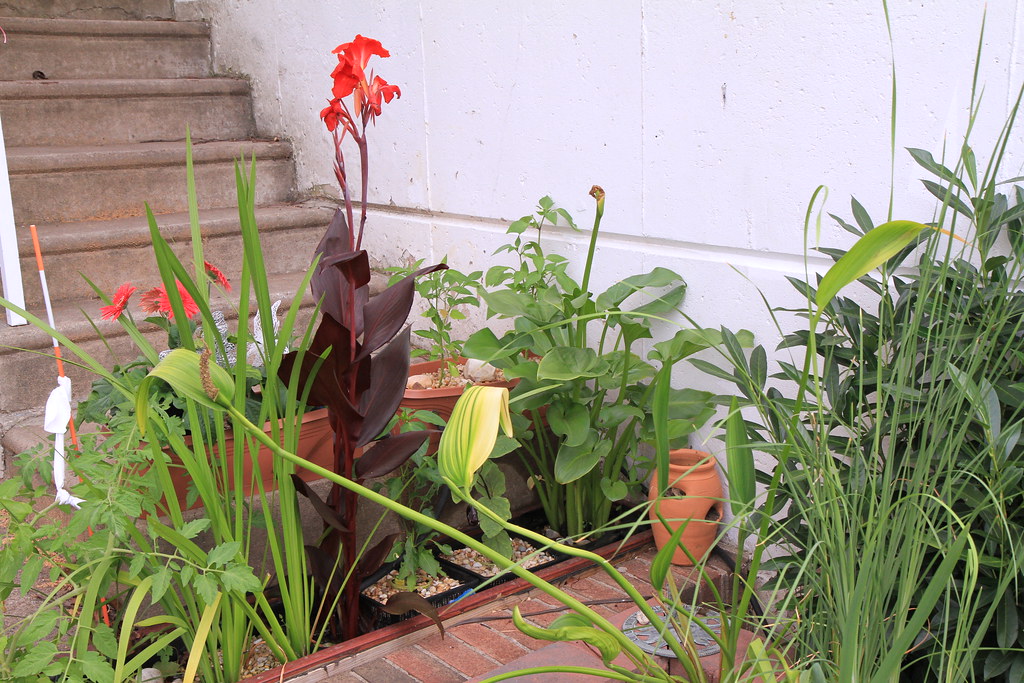
This is the old flower planter that we plant impatiens in. I tried a few cayenne peppers in there with no success, this year I may try spinach or something along side the impatiens. The New planter bottom is layered with some filter media then covered in pea gravel, the terracotta pots are lined with pond underlayment to promote wicking and the pots sit inside the pea gravel, the water flows from the top fills up the planter to the outflow submerging an inch or so of the terracotta pots, then empties in the veggie filter. Dwell time is a few minutes. There is a bottom drain that will be left open in the winter for proper drainage.
2014 Planter
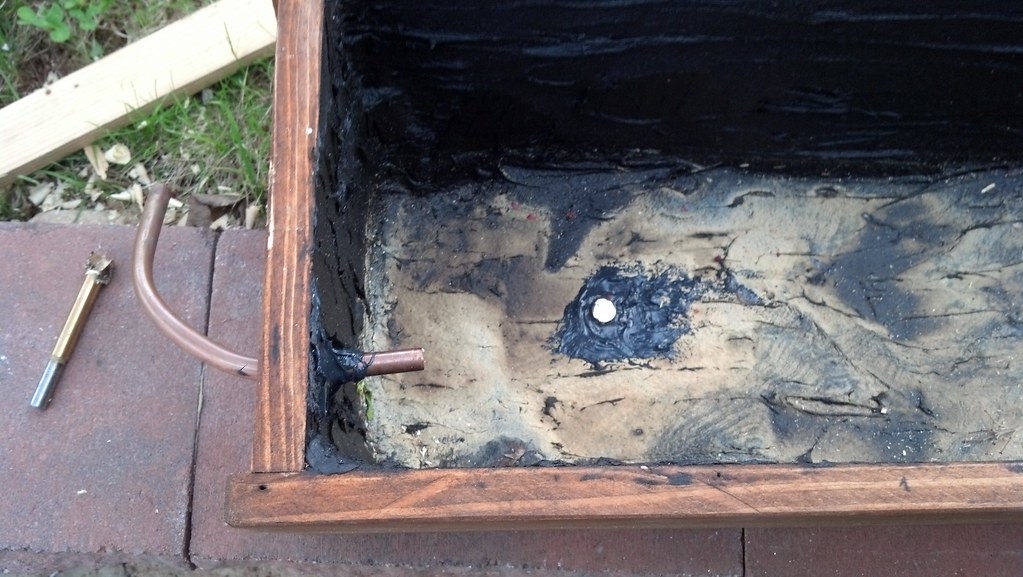
For the new build I used some scrap 3/4 I had laying around, cut on the table saw, air nailed and glued with PL-500 and caulked the joints, the inside was coated with some Henry 201 ashphalt Roof Coating I had laying around then sprayed with Performix 11203 Plasti Dip Black Multi-Purpose Rubber Coating Aerosol - 11 oz.
I do not recommend using the Henry 201 and if you do, you will need to coat it as it may leach harmful by products into the pond.
The outside was stained with some TWP Redtone that I had left over and will probably re-stain every other year. The inside was coated with Henry 201...again do not use this.
Rubber feet were placed on the bottom so the wood does not rot where it is in contact with the concrete.
OK let me just say that this thing is getting expensive and becoming a nightmare, after I sprayed with the plasti-dip and set up... it leaked, I let it dry 24 hours, sealed with two tubes of Dow Coring 732 silicone dried 24 hours and it leaked..., I ordered 3 more tubes of Dow Coring 732 and will give it one more shot.
In hindsight I should have cut 5 rubber panels from pond liner and sealed them to the sides and bottom then seamed the corners ...oh well, live and learn.
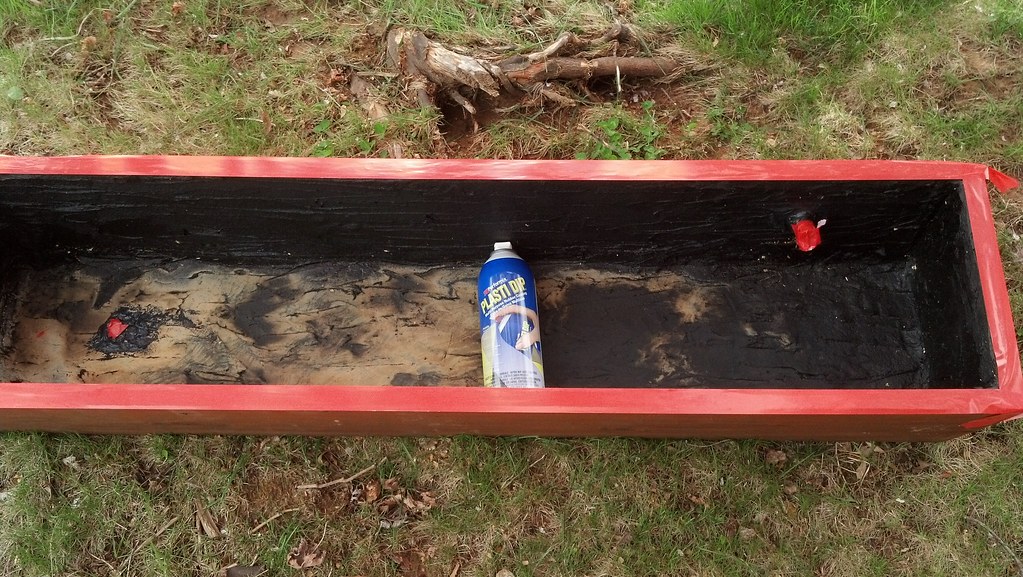
Do not build this how I did it!!!
Finally, the dam thing is done!!
L-R Red Russian Kale, Impatiens, Red Russian Kale, Romaine, Impatiens. I'll have to have Laura tidy up the planter pots a bit.
This is the Dirt Farmer section!
Herbs
I did away with my herb garden on the deck when I resealed the deck, it was nice to have access to fresh herbs from the kitchen but it was too much work trying to keep the soil moist, my last ditch effort was I removed the pots and placed in a pond liner and filled the liner with soil.
- April 28th 2013
Herbs were moved to the back yard pond perimeter and the front of the yard and all wintered over but the rosemary.
For My herbs I have Chives, Sage, Thyme, Italian Oregano by the back pond. The front of the house I have Purple Sage, Oregano, Chocolate mint, that wintered over and added Thyme and Herb Lemon Verbena this spring, I placed the Basil next to the Pond Bench. I also tossed in another Arp Rosemary and Dwarf Sage plant in the garden closest to the house. Once the Rosemary and Basil get larger and I can get a couple suckers, I'll clone those. I had to remove the chocolate mint from the front lower herb garden and transplanted on the upper garden for a ground cover it was strangling my sage and on its way to the oregano.
I also took two cuttings one from the Sage and one from the Oregano that is in the back pond and transplanted them on the hill in the front yard, for some reason these two plants are much more aromatic than my other plants
Front of the house photo chocolate mint center of photo.
- May 10th 2015
- May 28th, 2015
Sage and Rosemary
- May 26th, 2015
Sage, Oregano transplanted from the back pond herbs and Chocolate Mint removed from the front yard. I know the chocolate mint will grow out of control but I'm hoping it will make a good ground cover.
- May 26th, 2015
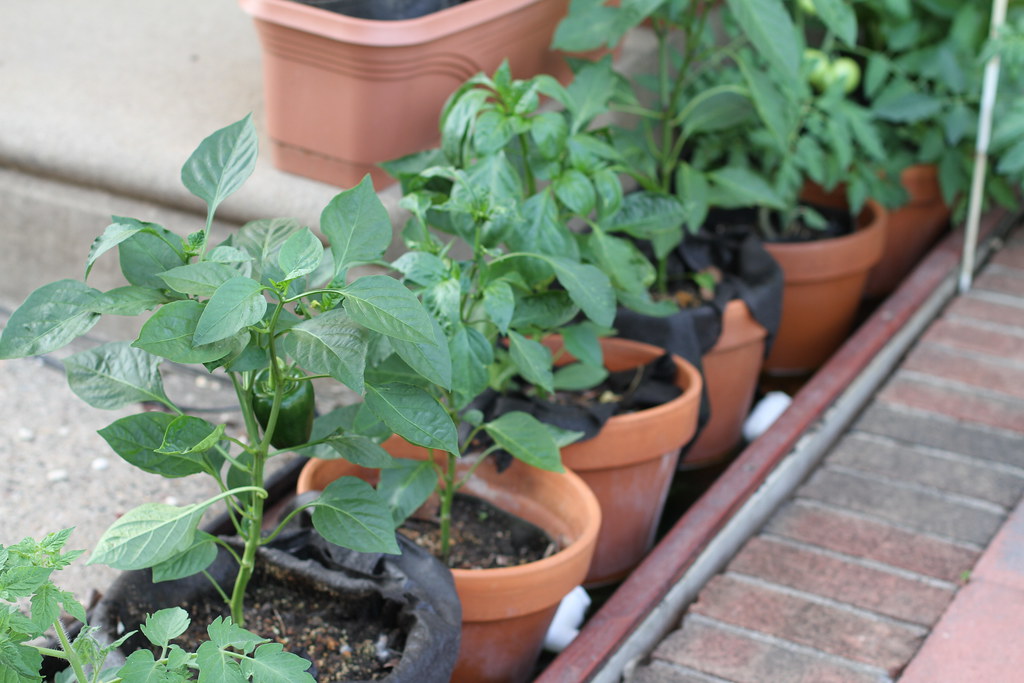
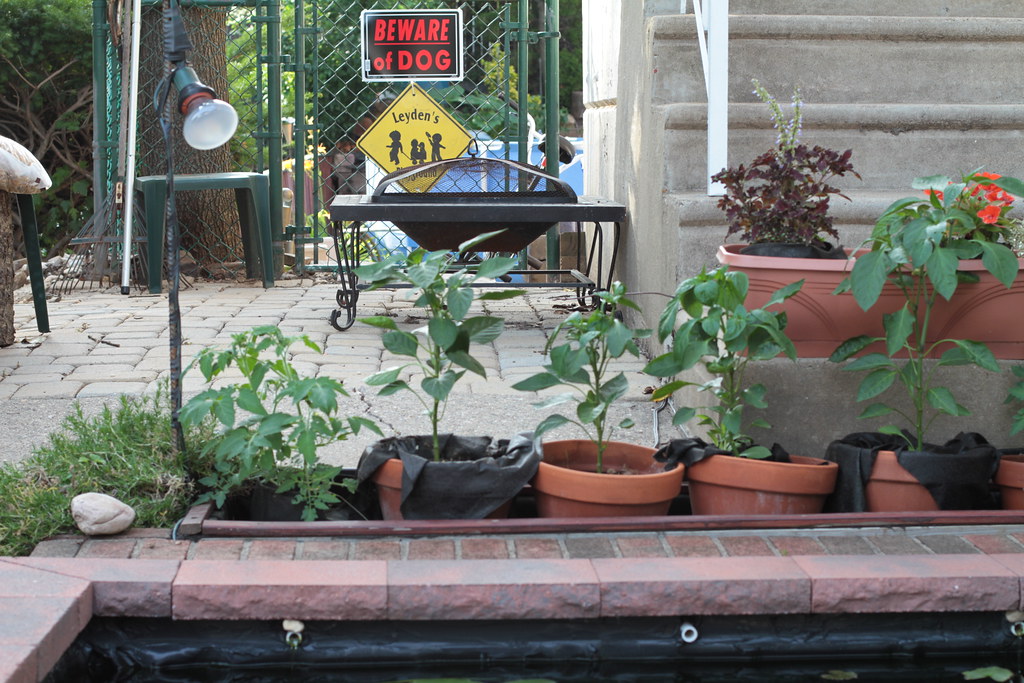
Dirt Farming
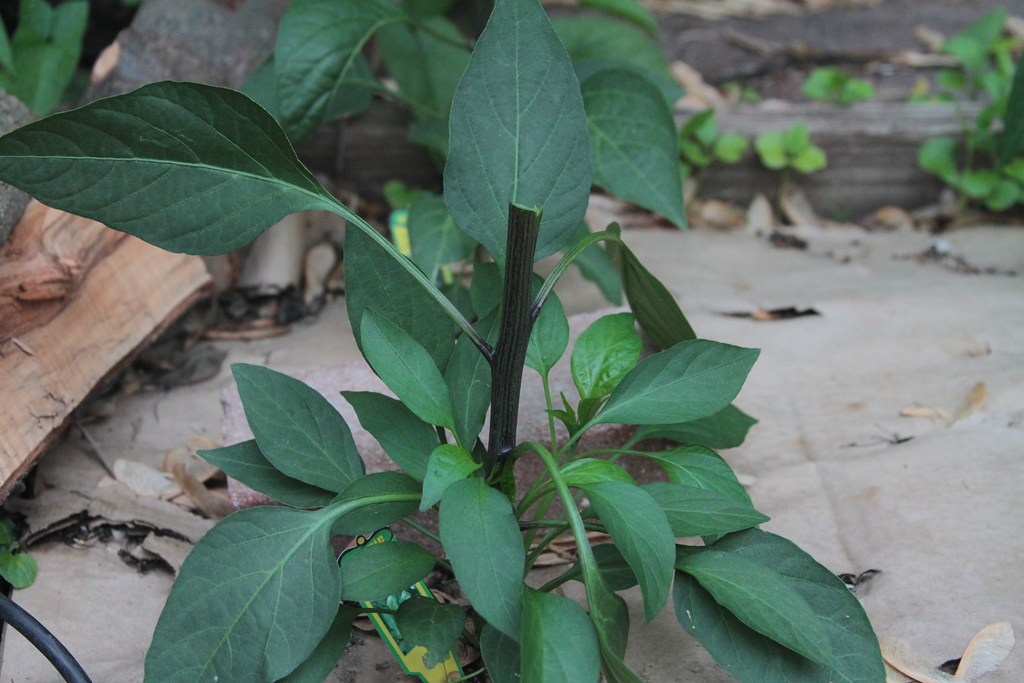
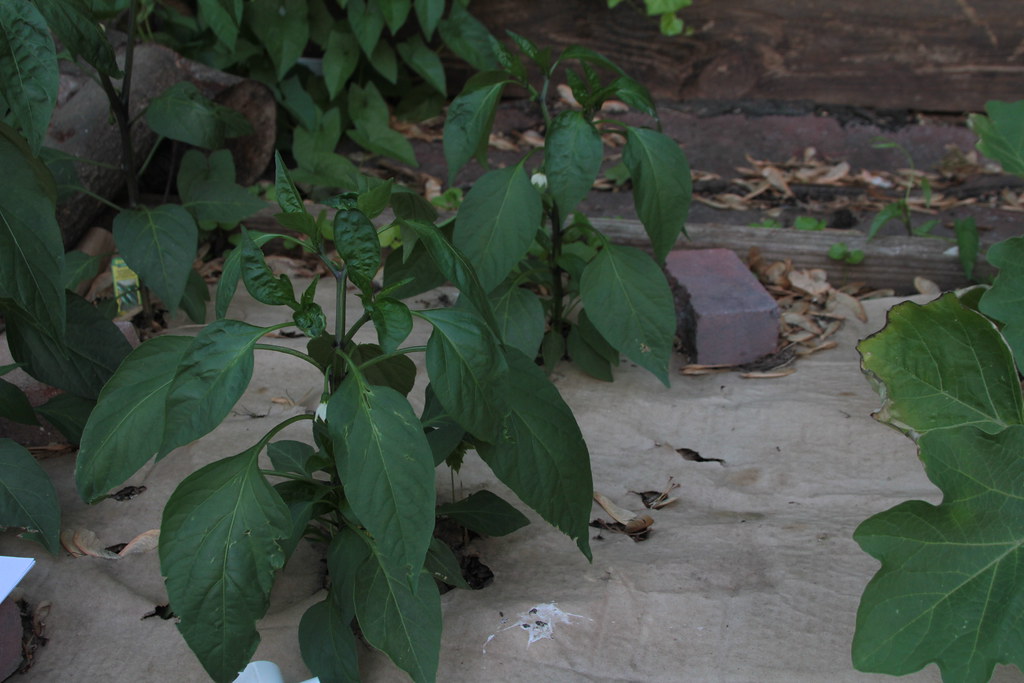
My soil plants this year are 4 eggplants, three Early Girl tomato plants, 4 Habaneros, 2 Poblanos, 2 giant Jalapenos, 4 Jalapenos, one Fantastico Tomato Plant and 2 Patio Tomato Plants, not to mention my herbs!
This year I decided to prune the plants as well as top off some of the peppers, I did not do all of them because I was a nervous wreck, after all I cut off more than half of the pepper plant that was loaded with flowers OMG!!!
Giant Jalapeno
- May 27th 2015
Giant Jalapeno
Regular Jalapeno
- May 27th 2015
The cuttings were placed in a container with tap water and looked dead yesterday, this morning they perked up very nicely so I placed them in partial sun, in retrospect I should have pruned most of the leaves I will do that tonight and maybe add some nutes to the water.
- May 28th 2015
I figured I would try my luck at eggplant again this year (My favorite garden veggie) , I haven't had any luck with eggplants over the years but I am hoping this year will be different.
I will be pruning some and may try cloning a couple.
- May 27th 2015
I have a tomato plant out front in a planter next to the pond, last year the tomato plant in this planter kicked ass, it was nice to snack on when working on the pond or hanging out front.
Hopefully this Fantastico Tomato plant will provide the same.
- May 20th, 2015
- May 26th, 2015
Early Girls in the Back, and there's one in the URDWCHS, I'm gonna clone an Early Girl and add a 2nd to the Hydroponic setup.
- May 28th, 2015