Newbie and new RF Build
- Thread starter carolinasmoke
- Start date
-
Some of the links on this forum allow SMF, at no cost to you, to earn a small commission when you click through and make a purchase. Let me know if you have any questions about this.
You are using an out of date browser. It may not display this or other websites correctly.
You should upgrade or use an alternative browser.
You should upgrade or use an alternative browser.
SmokingMeatForums.com is reader supported and as an Amazon Associate, we may earn commissions from qualifying purchases.
jwsimpleville
Meat Mopper
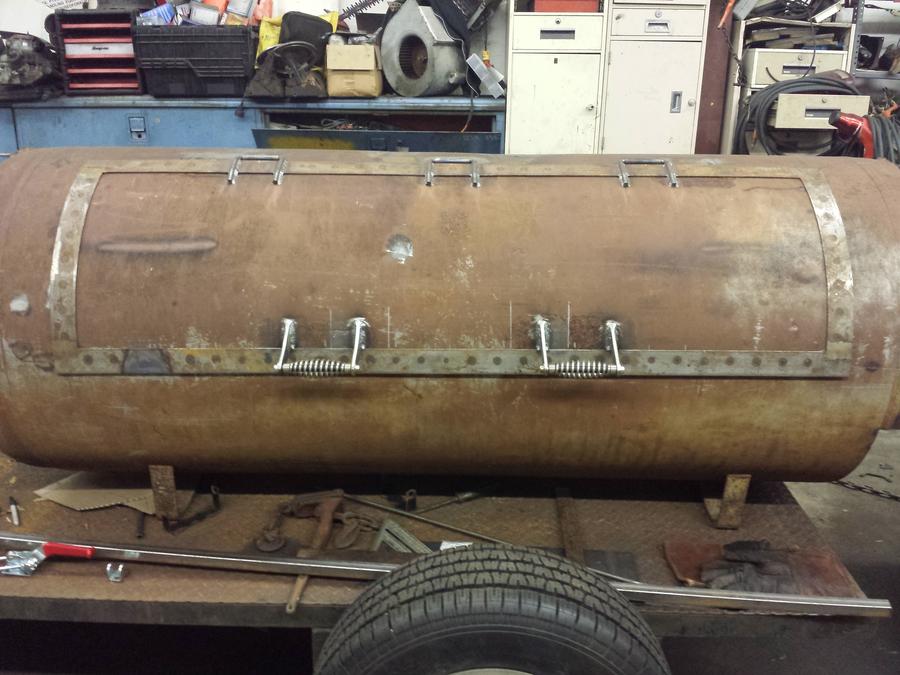
Here's a few pics from a different phone as my Galaxy S4 has a MUCH better camera than Brad's iPhone.
Closed
Open
Closeup of right spring
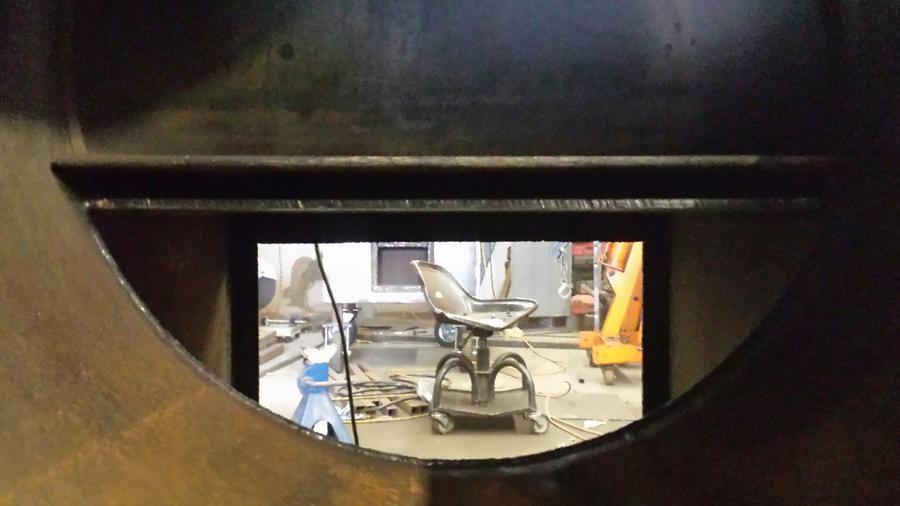
Inside view from firebox opening with lid closed
Closed
Open
Closeup of right spring
Inside view from firebox opening with lid closed
alaska
Meat Mopper
jwsimpleville
Meat Mopper
Most 86 through 99 Chevrolet & GMC model trucks and SUV's have springs like this. We got these from a 95 Chevy 1500 destined for the scrapyard.
Last edited:
uga fan
Smoke Blower
Just had another idea.. Has anyone seen or heard of a smoker with doors that would slide open like say a bread box would open? Doors inside the CC instead of on the outside, in a channel with maybe some ball bearings or something to help it glide. Then u could counter weight it and basically no one would see the weight. Just kicking around thoughts..
jwsimpleville
Meat Mopper
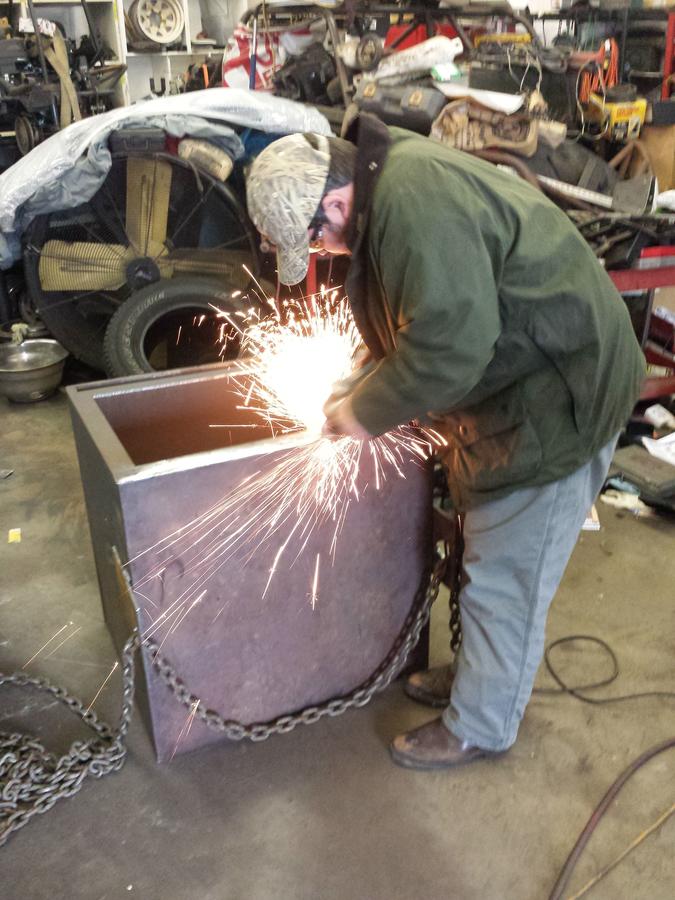
So we got some more work done today.
Brad finished up the grinding of the firebox edges and corners
And using the overhead hoist, we got the firebox tacked into place and positiined so we could do a full weld on 100% of the firebox to cook chamber opening.
Here was a cool action shot Brad took
I do like this action shot the best though.
jwsimpleville
Meat Mopper
Here's a few more pics of the firebox now mounted fully
This is a weld bead on the outside where the firebox joins the cook chamber
Here is the whole inside weld picture.
A little closer shot
This was the side and bottom where you have to really know your welding positions on a project this big as you can't really roll it over and you can only avoid overhead welding for so long.
Any questions, comments, criticisms, concerns or emotional outbursts?
Let's hear it.
ribwizzard
Master of the Pit
So, I have a question for everyone... How many cut the opening into the back of the firebox Before welding it to cook chamber? And how many cut the opening After it's welded?
I just wonder, because I've always welded it on, then used a torch dragged along the bottom of the tank to cut the opening, I guess I'm to lazy to try to make the two radius's match up!
I just wonder, because I've always welded it on, then used a torch dragged along the bottom of the tank to cut the opening, I guess I'm to lazy to try to make the two radius's match up!
jwsimpleville
Meat Mopper
Ohh I almost forgot, we added a latch to the front to pull down and close the small gap we had.
Ok, now Any questions, comments, criticisms, concerns or emotional outbursts?
Let's hear it.
Ok, now Any questions, comments, criticisms, concerns or emotional outbursts?
Let's hear it.
Last edited:
jwsimpleville
Meat Mopper
So, I have a question for everyone... How many cut the opening into the back of the firebox Before welding it to cook chamber? And how many cut the opening After it's welded?
I just wonder, because I've always welded it on, then used a torch dragged along the bottom of the tank to cut the opening, I guess I'm to lazy to try to make the two radius's match up!
We actually dry fit the firebox to the cook chamber and using a Graphite pencil traced the line.
Then after a little free hand with the plasma cutter we matched it back up and it couldn't have been smoother.
I can see how drag cutting it after its been tacked into place would save time though.
Last edited:
ribwizzard
Master of the Pit
When trying to align everything with no one to give you a hand, some may find it easier. And when using .045 wire, less chance of burn through.
You did a very nice clean job on this one though, don't get me wrong...
You did a very nice clean job on this one though, don't get me wrong...
uga fan
Smoke Blower
Nice looking rig!! No criticism at all. Only question I have is the clearance between the firebox and the ground.. If this is going to be pulled behind a truck I think u will have issues with the firebox scraping. Or it could just be the camera angle, idk.. But it looks great!!
ribwizzard
Master of the Pit
jwsimpleville
Meat Mopper
It,s the camera angle, there's almost 11.5" ground clearance and there is almost to much tongue weight as is.
I'm just waiting to see if it evens out after we add the wood bin and finish the rest of the firebox.
I'm just waiting to see if it evens out after we add the wood bin and finish the rest of the firebox.
jweller
Fire Starter
Lined them up, traced the opening, pulled apart and cut, realigned and welded.So, I have a question for everyone... How many cut the opening into the back of the firebox Before welding it to cook chamber? And how many cut the opening After it's welded?
I just wonder, because I've always welded it on, then used a torch dragged along the bottom of the tank to cut the opening, I guess I'm to lazy to try to make the two radius's match up!
Last edited:
buda q
Smoke Blower
I traced onto a piece of cardboard, transferred to the fb, cut it out, onto a floor jack, and up into position.
ribwizzard
Master of the Pit
So, if your very first cut on the cook chamber ( when using a tank) was notching for the firebox, you could still do it while the tank was sitting on its original legs, level, and mount the firebox from the top as if building the cooker upside down. Makes everything easier to handle and easier to level, and you don't have to flip the tank but one time. Then flip it over , stick a level on top of the firebox, and mark everything from there.
Just trying to give the newbies reading these posts some pointers to make fab easier for them.
Just trying to give the newbies reading these posts some pointers to make fab easier for them.
radioguy
Master of the Pit
I cut the FB opening first before welding to CC. Mine was a "special" case where the scrap steel sheet for FB was not big enough for all the FB sides to be "full" pieces. I chose to make the FB side the one I made out of 2 pieces (spliced) The bottom 1/3 was welded to the FB. The top 2/3 piece was marked for CC opening against CC, then cut, ground, tacked to FB and checked for final fit before final weld.So, I have a question for everyone... How many cut the opening into the back of the firebox Before welding it to cook chamber? And how many cut the opening After it's welded?
I just wonder, because I've always welded it on, then used a torch dragged along the bottom of the tank to cut the opening, I guess I'm to lazy to try to make the two radius's match up!
RG
jwsimpleville
Meat Mopper
Got a little more done today,
Here's a picture of the air gap been the firebox and baffle plate, it's 1" above the top of the firebox.
We just lays the 2 pieces in, we figured on getting them welded this weekend.
Here's a picture of the air gap been the firebox and baffle plate, it's 1" above the top of the firebox.
We just lays the 2 pieces in, we figured on getting them welded this weekend.
ribwizzard
Master of the Pit
SmokingMeatForums.com is reader supported and as an Amazon Associate, we may earn commissions from qualifying purchases.
Similar threads
- Replies
- 3
- Views
- 1K
- Replies
- 6
- Views
- 4K
- Replies
- 0
- Views
- 1K
- Replies
- 172
- Views
- 17K
- Replies
- 4
- Views
- 6K
- Replies
- 4
- Views
- 568
SmokingMeatForums.com is reader supported and as an Amazon Associate, we may earn commissions from qualifying purchases.
Hot Threads
-
Beef Stew
- Started by Gonna Smoke
- Replies: 30
- Chili, Soups, and Stews
-
I need a new knife set.
- Started by JLinza
- Replies: 26
- Slicers, Grinders, Tools, Equipment
-
Nice But Reasonably Priced Starter Guitar Suggestions?!
- Started by Rafter H BBQ
- Replies: 23
- Blowing Smoke Around the Smoker.
-
Beef Ribs
- Started by banderson7474
- Replies: 14
- Beef
-
Please help
- Started by Chad Errey
- Replies: 14
- General Discussion


