michiganbushman
Newbie
- Oct 25, 2014
- 16
- 25
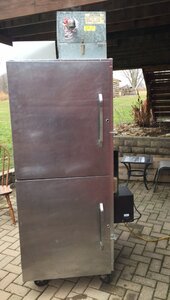
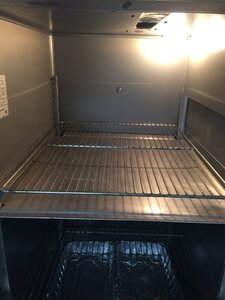
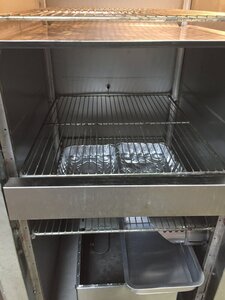
After going an entire year without a smoker it was time to get one built. I had been searching for just the right type of stainless freezer/fridge/warmer etc to make a smoker out of and a deal came along on a commercial freezer. I really liked this because the inside is all smooth with no condenser coils and stuff to get all yuckified.
This one had a protected interior light and I was able to re-purpose the circulation fan that was part of the cooling system.
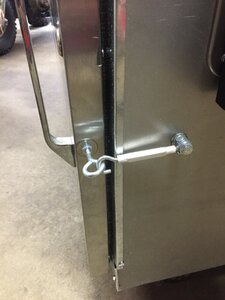
Step one was to remove the plastic trim around the doors as well as the plastic inside door faces and the rubber seals. I replaced all those with sheet metal and installed a heat proof door seal.
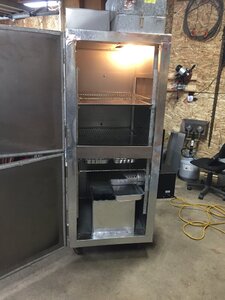
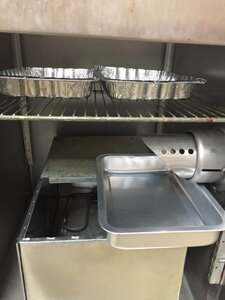
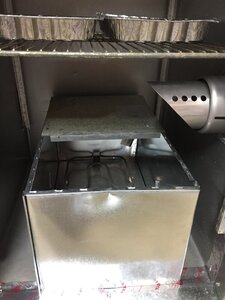
Next was to install the heating element on the bottom. I put in a raised floor of about 3/4" for the element to sit on. It is removable for cleaning and also keeps the element off the floor. I then built a shield box around the element out of duct work. The element can get the sidewalls next to it really hot so this helps shield that area as well as focus the heat in the center and up. Over top of the element I put a piece of sheet metal that was part of the original freezer and it fit perfectly on the surround below it. It too is removable. This protects the element from drips and or dropping anything on it.
The element is a 1500 watt.
I removed all of the freezer coils and machinery from the top of the freezer. The box that was for circulating the cold air into the freezer I left intact.
After removing all of the unnecessary items and wiring I installed the fan back into the box with only its wiring pigtail as well as the light pigtail. These I drilled a hole into the upper box and sealed it with a grommet. The circulation box is effectively now my exhaust box. There are three holes in the top of the cabinet that were for cold air. I plugged two of them. On the side wall is a thin rectangle duct that is for air returning back from the fan. It blows down the side of the cabinet while the fan draws it back up the center.
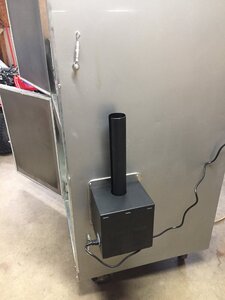
I sealed the box with heat seal and placed it back on top. In the end of it I put a hole for some black pipe with a ballcock valve to act as my smoke stack with damper.
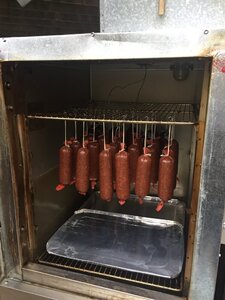
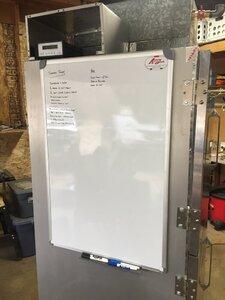
After that I installed a Bradley smoke generator to the side of the unit.
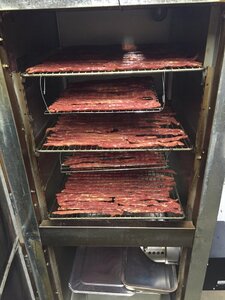
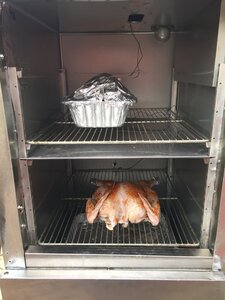
The unit already had adjustable shelves and is on castors so I can roll it in and out of the garage easily.
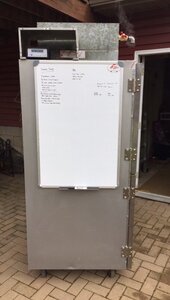
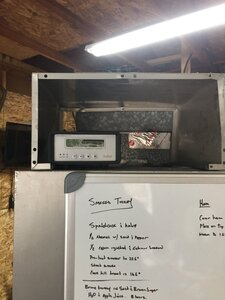
I added a dry erase board to keep track of the times and temps. I always think I can remember what time I started this and that but I always forget.
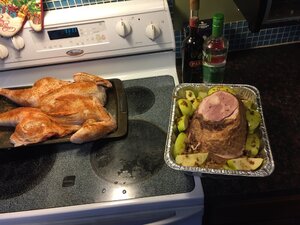
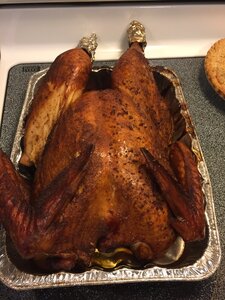
Yesterday I was able to track the times and temps on my turkey to make sure it wasn't in the danger zone for too long.
I know the Auber will tell me but I still like the idea of being able to write stuff down and I can take a picture of the board and file it away in the smoker file of my lap top for future reference.
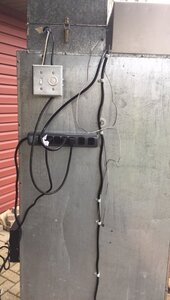
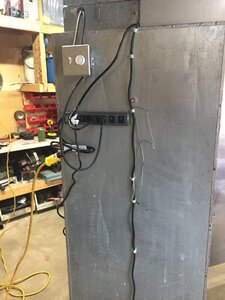
All of this runs off an Auber wifi enabled 1800 watt controller with three temp probes. I mounted a power strip on the back of the cabinet and also wired the fan and the light into their own separate controls. The fan I put on a dimmer switch so it is adjustable. I still need to clean up the wiring a bit. I want to run some conduit but that will have to wait for a bit while I put the smoker through its initial trial runs.
I think that is mostly everything.
Thanks for looking!
This one had a protected interior light and I was able to re-purpose the circulation fan that was part of the cooling system.
Step one was to remove the plastic trim around the doors as well as the plastic inside door faces and the rubber seals. I replaced all those with sheet metal and installed a heat proof door seal.
Next was to install the heating element on the bottom. I put in a raised floor of about 3/4" for the element to sit on. It is removable for cleaning and also keeps the element off the floor. I then built a shield box around the element out of duct work. The element can get the sidewalls next to it really hot so this helps shield that area as well as focus the heat in the center and up. Over top of the element I put a piece of sheet metal that was part of the original freezer and it fit perfectly on the surround below it. It too is removable. This protects the element from drips and or dropping anything on it.
The element is a 1500 watt.
I removed all of the freezer coils and machinery from the top of the freezer. The box that was for circulating the cold air into the freezer I left intact.
After removing all of the unnecessary items and wiring I installed the fan back into the box with only its wiring pigtail as well as the light pigtail. These I drilled a hole into the upper box and sealed it with a grommet. The circulation box is effectively now my exhaust box. There are three holes in the top of the cabinet that were for cold air. I plugged two of them. On the side wall is a thin rectangle duct that is for air returning back from the fan. It blows down the side of the cabinet while the fan draws it back up the center.
I sealed the box with heat seal and placed it back on top. In the end of it I put a hole for some black pipe with a ballcock valve to act as my smoke stack with damper.
After that I installed a Bradley smoke generator to the side of the unit.
The unit already had adjustable shelves and is on castors so I can roll it in and out of the garage easily.
I added a dry erase board to keep track of the times and temps. I always think I can remember what time I started this and that but I always forget.
Yesterday I was able to track the times and temps on my turkey to make sure it wasn't in the danger zone for too long.
I know the Auber will tell me but I still like the idea of being able to write stuff down and I can take a picture of the board and file it away in the smoker file of my lap top for future reference.
All of this runs off an Auber wifi enabled 1800 watt controller with three temp probes. I mounted a power strip on the back of the cabinet and also wired the fan and the light into their own separate controls. The fan I put on a dimmer switch so it is adjustable. I still need to clean up the wiring a bit. I want to run some conduit but that will have to wait for a bit while I put the smoker through its initial trial runs.
I think that is mostly everything.
Thanks for looking!
Attachments
-
 ACRT0745.JPG72.5 KB · Views: 108
 -
 FGSS1900.JPG94 KB · Views: 99
 -
 FMRY7261.JPG92.1 KB · Views: 117
 -
 IMG_3225.JPG128.8 KB · Views: 103
 -
 IMG_3226.JPG98.2 KB · Views: 110
 -
 IMG_3227.JPG112.5 KB · Views: 104
 -
 IMG_3228.JPG98.2 KB · Views: 107
 -
 IMG_3229.JPG103.6 KB · Views: 114
 -
 IMG_3230.JPG80.8 KB · Views: 116
 -
 IMG_3231.JPG102.4 KB · Views: 124
 -
 IMG_3232.JPG97.1 KB · Views: 114
 -
 IMG_3233.JPG130.7 KB · Views: 112
 -
 IMG_3234.JPG98.7 KB · Views: 113
 -
 IMG_3235.JPG100.2 KB · Views: 101
 -
 IMG_3236.JPG148.6 KB · Views: 113
 -
 IMG_3237.JPG166.5 KB · Views: 116
 -
 IMG_3238.JPG117.8 KB · Views: 107
 -
 IMG_3245.JPG186.9 KB · Views: 102
 -
 QOFJ7011.JPG99.1 KB · Views: 111