New Brinkmann Trailmaster Vertical Smoker

  • Some of the links on this forum allow SMF, at no cost to you, to earn a small commission when you click through and make a purchase. Let me know if you have any questions about this.
SMF is reader-supported. When you buy through links on our site, we may earn an affiliate commission.
Well I'm glad it's not just me.  I have RTV and the fiberglass gasket between the halves of my FB.  the gaps were too big for just RTV so I added the gasket.  My door actually closes to the edge of the other side of the CC, so there's no overlap on part of it.  I'll see if lifting helps with the door not latching.  That might give me some overlap.  the bracket that holds the FB on the wheel bracket also doesn't seem to be angled properly to attach to both.  Going to work on fixing that tonight.
 
Yeah. I had to "modify" my bracket as well. I had to back the screws out of the hinges to allow the door to be lifted. I want to put some washers in there so I don't have to lift it every time I shut the door. Again, quality isn't quite up to snuff, but for the price it is a great smoker. 
 
  • Like
Reactions: samuraijack
Well once I attached the bracket to the FB first then to the leg bracket it worked fine.  I ended up taking the FB back apart and using the rope gasket between the pieces.  Even with the RTV it had way too many big gaps and the FB door doesn't seem like it's going to be that big of an issue for smoke leakage.  I got the gasket on the water door as well.  

I have to RTV the gap at the exchange box in the CC and the bolt hole in the exchanger that wont actually accept a bolt then deal with the CC door so hopefully I can season it on Sunday.
 
Does anyone else feel the latch on the CC should actually go the other way versus the instructions which show it facing towards the door?  it seems to slide into the groove in the locking bracket with the end tab pointing into the CC 
 
Haven't installed my latches yet, but I was able to maintain a decent 250 for a couple hours without a charcoal basket.. temporarily solved the door problem by running a bungie cord from the handle to one of the FB support braces on the back side.  I was getting smoke that seemed to be leaking from the bottom of the FB.. most likely the seam closest to the CC
 
Yeah. I am a little annoyed at how poorly the door seals on my smoker too. I was going to do a few more mods to help it, but I got lazy. Plus I've smoked four 10lb butts, six racks of ribs, a fatty, and a 14lb brisket (all at separate times) with no problem, so it seems to be working even with the poor seal around the door. My biggest complaint is that I have to lift the door about 1/2 - 3/4 of an inch to latch it. That really gets old when you have 10lbs of pork butt in one hand and are trying to shut the door with the other. I want to add some washers to the hinge to see if I can shim it up a little bit. I also want to add a hole to run all of my probes through. I'm currently running them through the water pan door. Let me know how those latches work for you Samurai. Post some pics of where and how you mounted them. I am thinking about getting a set for mine as well.
 
Where can you buy food safe RTV gasket sealant? And is it too late to modify the smoker with RTV and gaskets if I've smoked already?:icon_eek:
 
Doc, You can buy food safe RTV here: http://bbqgaskets.com/

It's never too late. You just have to clean any area you want to seal. That will allow the RTV or peel and stick gaskets to stick to the metal. Talk to the guys at BBQGaskets. I'm sure they would be happy to help. They will even make recommendations on what gaskets and sealant to get depending on the smoker you have.

Hope this helps...
 
Last edited:
I finally got around to assembling this smoker, putting the gaskets in it and everything. It's still a leaky sucker. My door actually has a gap of up to 1/16" on the lower 1/3. It just does not close. I've ordered some latches that should solve that problem and some more sealant to seal every screw hole and the top and bottom.

I've got the stoker running the curing smoke on it right now. I'll put pictures up, probably in a new thread, once it's done and I start a cook in it. Right now I've got it running a test to see how long 5lbs of charcoal will last. Between bottom rack to top rack there is a difference of 16 degrees on an empty smoker. The hottest empty rack appears to be the next to lowest, possibly because of the water pan forcing the heat to the outside and I am taking my readings from the center of the racks.
 
So I removed the damper and the screw, and bought a 4" aluminum vent cap at HD.  I also picked up a damper to put in the cap, and the whole assembly fit very nicely into the little smoke stack.  I just had to make a small cut in the cap pipe to fit around the screw brace and jammed the vent cap into the chimney with a little RTV.  We'll see if the wind can pull it out, but I don't think so, it was a nice tight fit.  I realize I didn't take a picture of that while I was doing it, but this is what it looks like completed.

WaywardSwede or anyone else,

Where did you get the damper to fit into the cap you found at HD? I've been looking for a damper but can't find anything small enough to work in a 4" cap.

Thanks

I think he means over the stack. He had to cut a notch in it to slide over the bump out for the screw for the original damper. Find a stack that fits over a 4" pipe and you should be golden. I haven't looked for one, but I would like to get one.
 
I purchased this smoker a couple months ago. I finally had time to assemble it this past weekend. I seem to have lucked out. Found no dents, dings etc. Door closed and lined up perfectly. I had already ordered the gasket kit. I applied the RTV and the included gaskets seals. I also replaced the thermometer with a 3" river country gage. I will season the smoker this friday. I will apply a coat of paint after the season burn to where ever its needed. I will also paint some graphics to the CC door using a stencil I made . I will use some high temp paint. Im Planning to smoke some ribs and turkey breast this weekend.

595a3c1ab7916afbcef4f8a97fbbad81.jpg


9a167434e66eefeffc7ae23b410e8b6d.jpg


This will be painted onto the CC door with white high temp paint.
4316ffdaad8518def68667e8d390a19b.jpg
 
  • Like
Reactions: davidreynolds
Good morning all, I may have a simple question but I'm unsure of myself. I am buying a Brinkmann Trailmaster Vertical Smoker, I'm going to cure it and the owners manual says maintain 250 for two hours and then increase to 400 for 2 more hours. I understand that the damper is to regulate tempature but how do I do this. I've had an offset before and did ok with it, biggest issue was it got too hot and took too long to cool back down to desired temp. I've also had where I couldn't even get the temp in the right ball field, wanted to smoke a turkey at 250 and ended up smoking it at 350. So if anyone is willing to break this down barny style that would be awesome. Thanks in advance.
 
Hello Smokerjoe...  when I seasoned mine, I started 2 chimneys of charcoal.  While that was heating up, I coated the entire interior of the cooking chamber with veggie oil. Once the charcoal was well engaged, I poured them both into the firebox and closed the lid.  I had the rig sitting in the warm sun all this time so it was not all that cold once started.

I left the upper damper wide open.

I opened the draft vent in the firebox wide open.

It did not take long to get up to 250 degrees according to the factory thermometer.

When the thermo read about 300, I began to adjust the firebox draft, closing it until the temp stabilized where I wanted it.

While this was happening, I took a couple of short chunks of oak wood and placed them atop the firebox, pre-warming them.

After two hours, I added another chimney of charcoal and a chunk of wood.

The temp in the CC rose fairly quickly to about 450 degrees.  I had to damp down the firebox draft.

I used the wood to add heat until the seasoning was dun.

I did cheat a little by adding some apple wood chips to the firebox while this was going on.  Figured it wood not hurt to add some tasty smoke...
 
Last edited:
Wow, great article! I'm on my second cook on mine, and I would definitely like more air flow control! That small vent just doesn't seem to get it. My temps either spike really high, or drop really low. I'm still getting to know this smoker. I did use gaskets on the doors and the sealer on the leaks.

I think it's a pretty cool smoker...I just need to get more time with it. You know, wine & dine it and whisper sweet nothings! lol
 
Seasoned the smoker this weekend. Had minimal to no smoke leaking. Gasket and RTV Sealent worked great. Sunday evening I did my first smoke. I picked up 2 boneless turkey breast. About 3.5lbs a piece. Turned out awseome. I had to play around with the dampners for a bit to maintain the right temp. Overall I'm happy with how it worked.. And even happier how the turkey came out.

92fde009d4ed2e74ce86a1d12afd1f1d.jpg
 
Last edited:
Nice turkey.

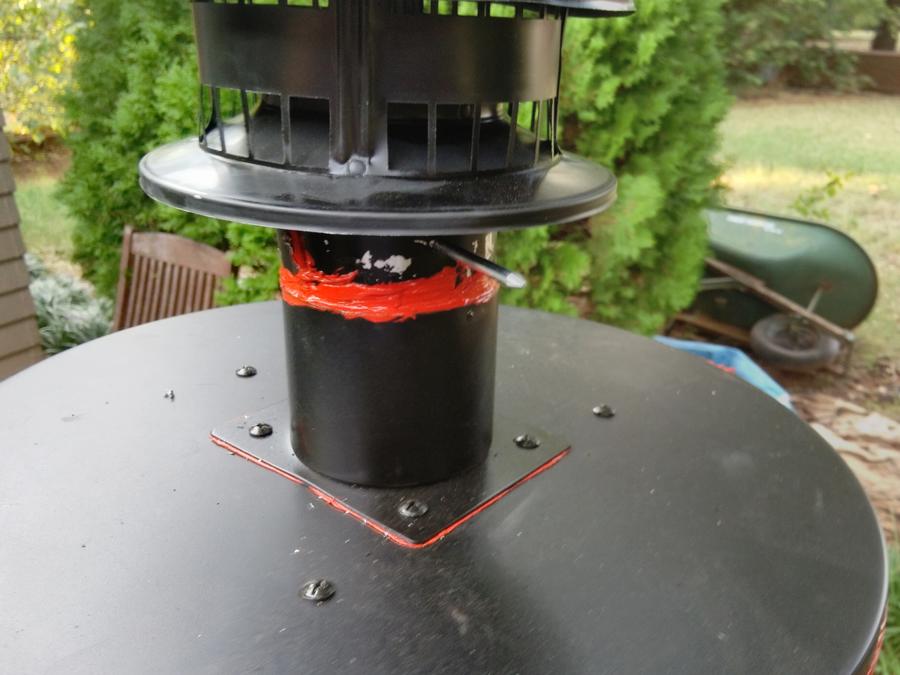
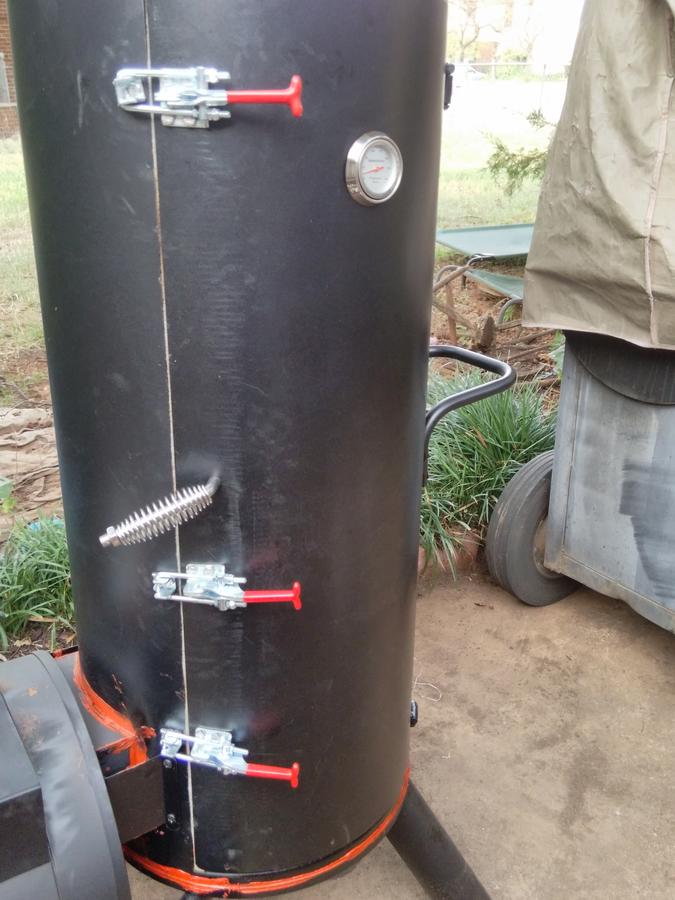
I finally got around to finishing my mods today, am actually waiting on the sealant to cure so I can paint it.  The early pics from the assembly and initial mods:

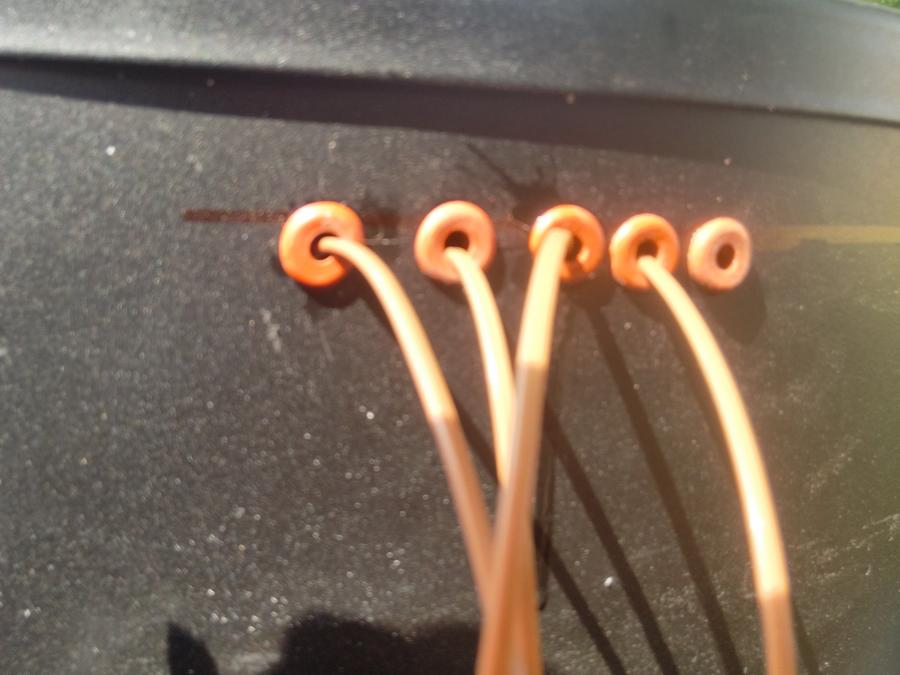
Adding holes to pass my pit and meat probes through to the cooking chamber.


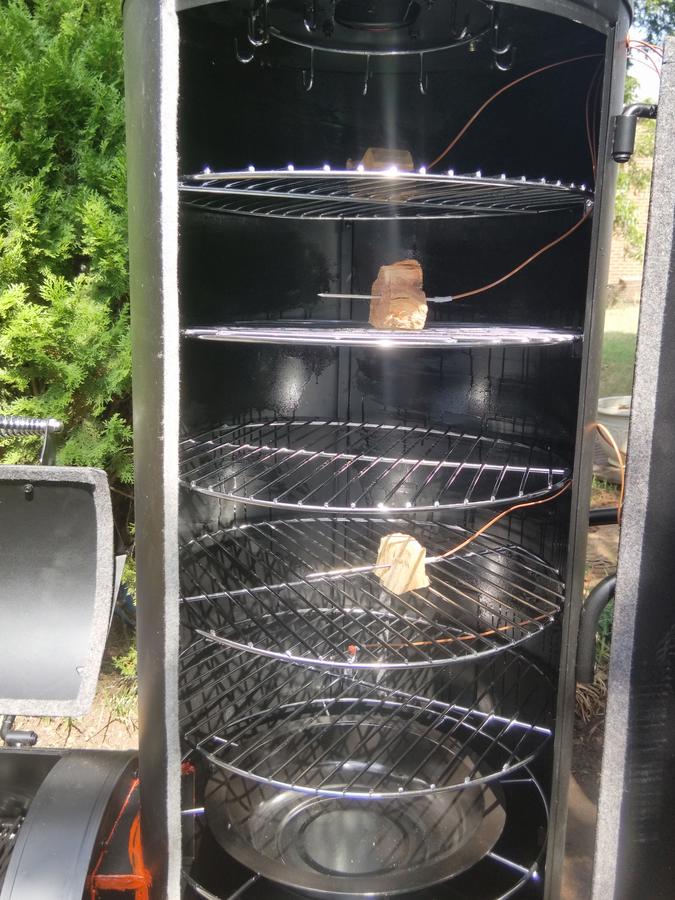
Getting ready to fire it for the first time.  I wanted to record temperatures from the bottom to the top to give myself and idea of where the ideal spot for the pit probe might be.


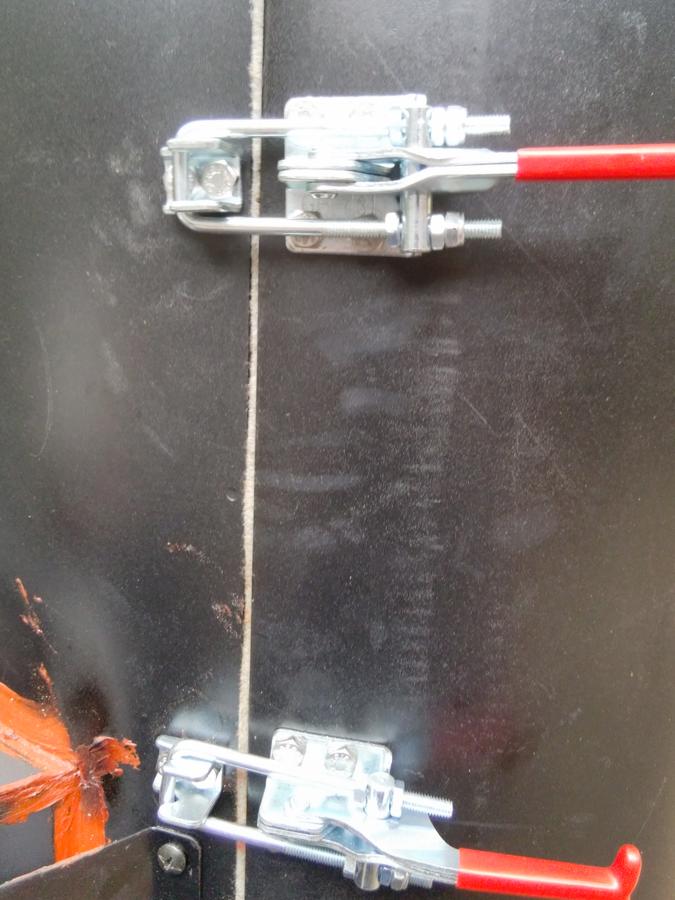
You can't see it too well, but there is a nice gap here when the door is fully closed.  Even placing extra gasket here didn't stop the leaking completely.  I would have installed the door latches that came with the kit from bbqsmokermods but those push latches would have just made this gap worse.


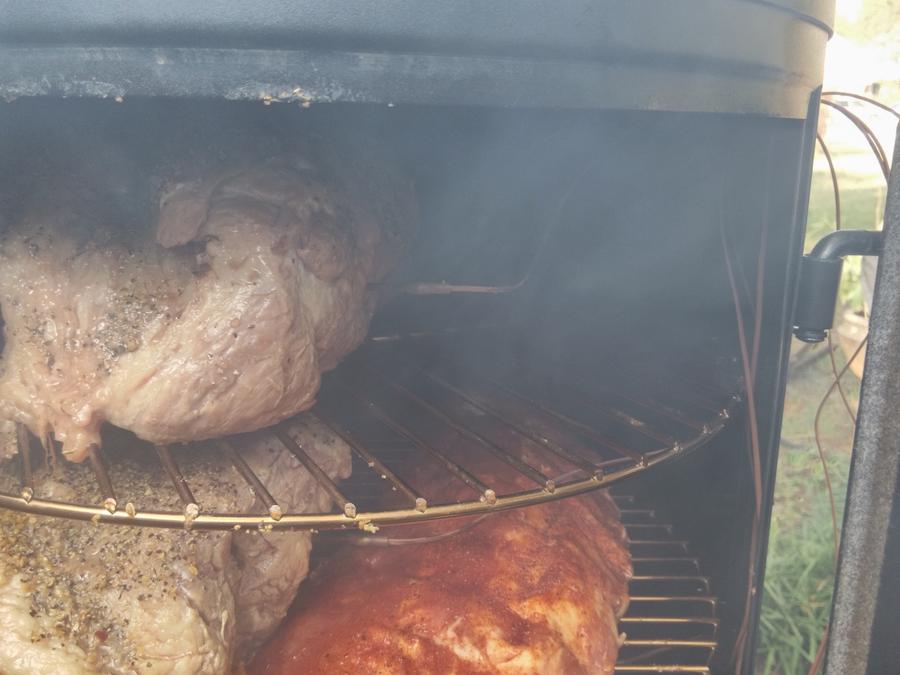
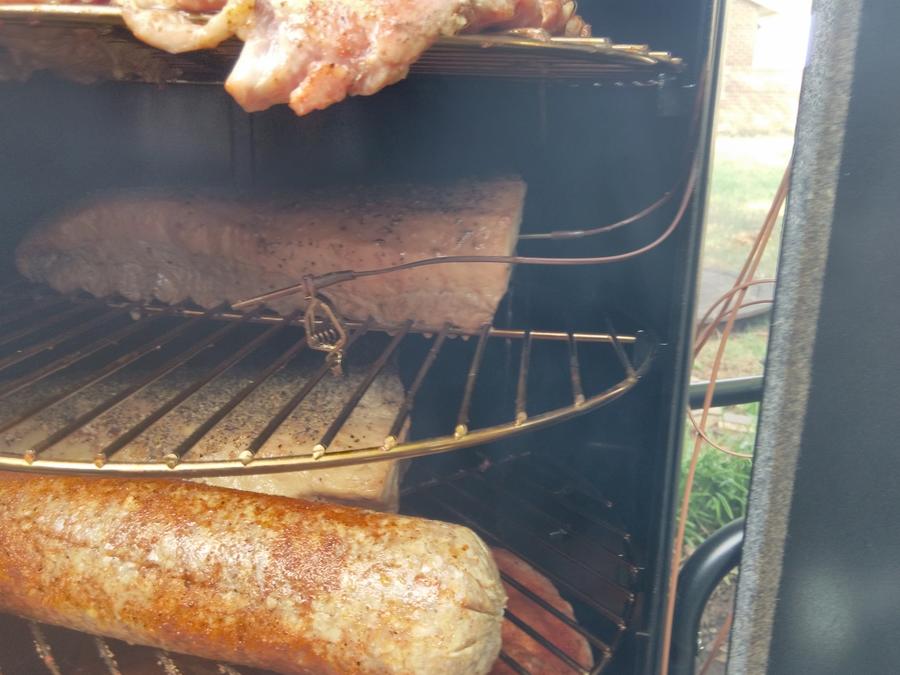
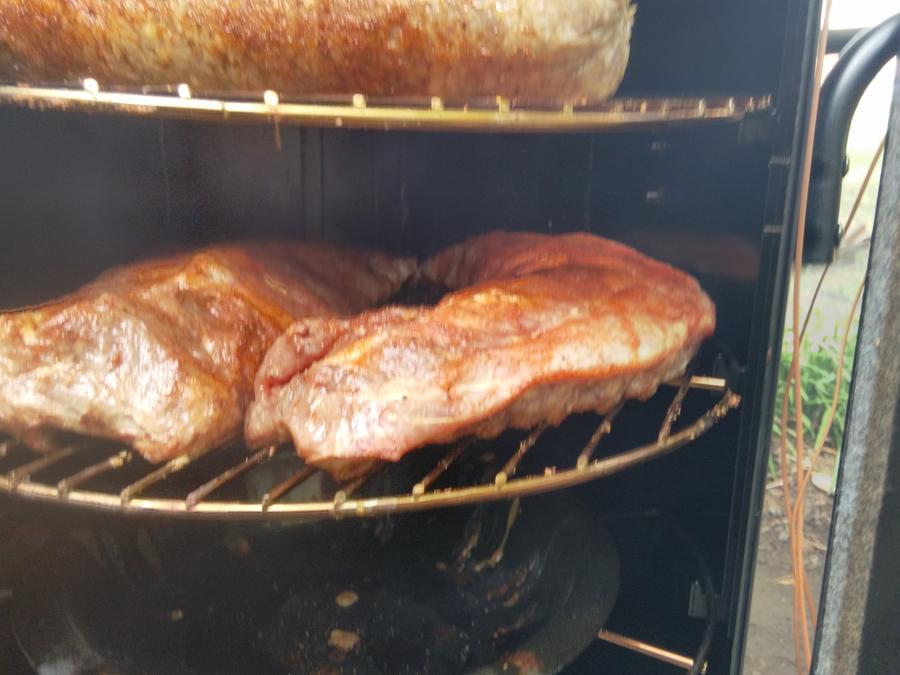
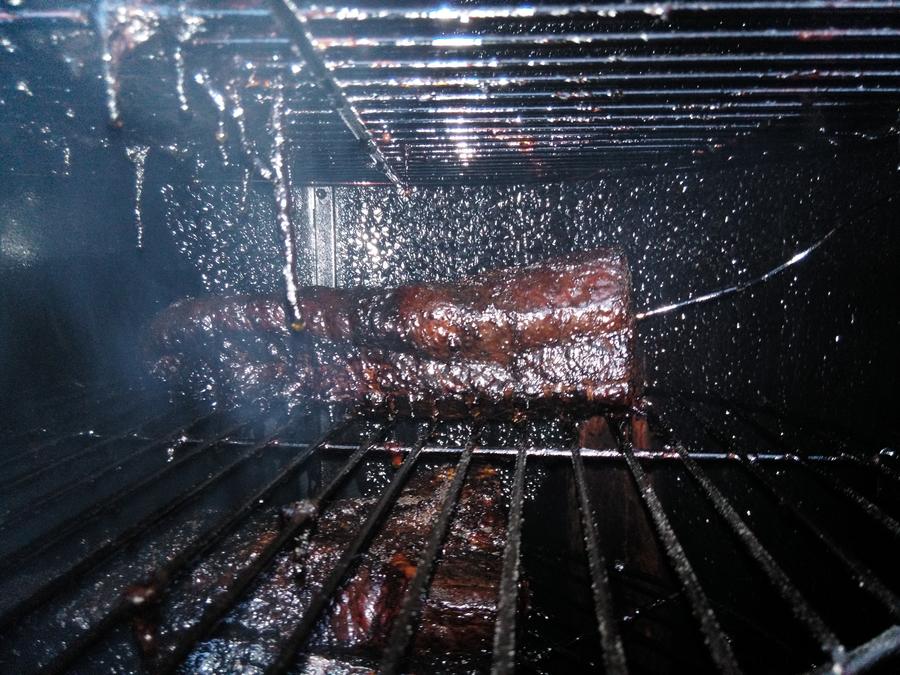
Curing done, time to load her up and test her out.  This was on a Sunday afternoon and since I was off Monday, I decided to do a big cook at about 5pm.  We have 2 15lb briskets cut in half, 3 slabs of baby backs and a log of Blue & Gold sausage.


I'm not a foil person, I'm not a mop person and I'm not a baste person.  I'm a leave it alone and let it cook person.  And let me tell you, those ribs sitting under those briskets soaking up the drippings were wonderful.


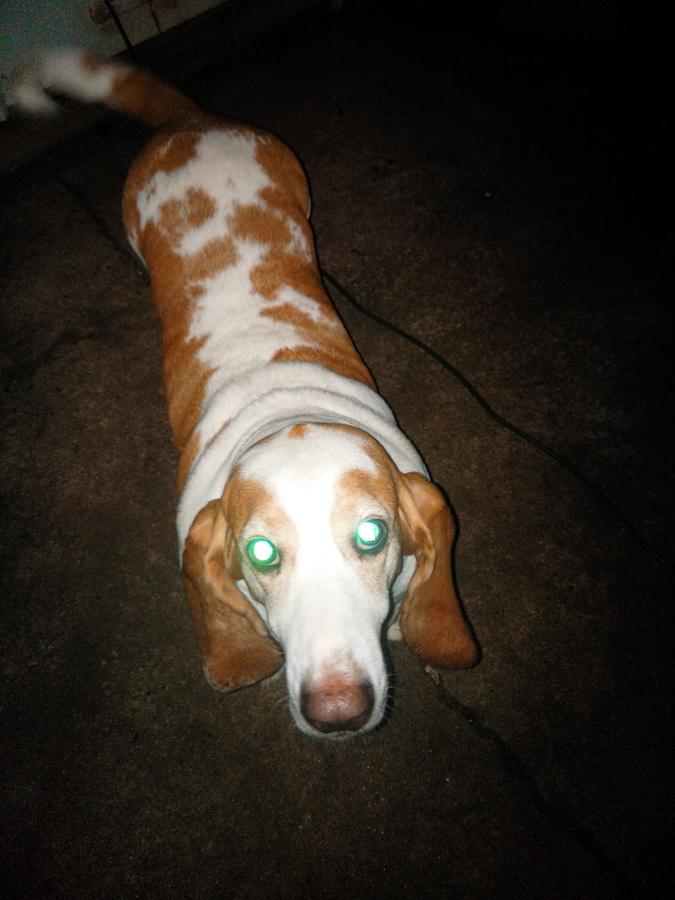
Someone decided to stand guard all night while the briskets cooked.


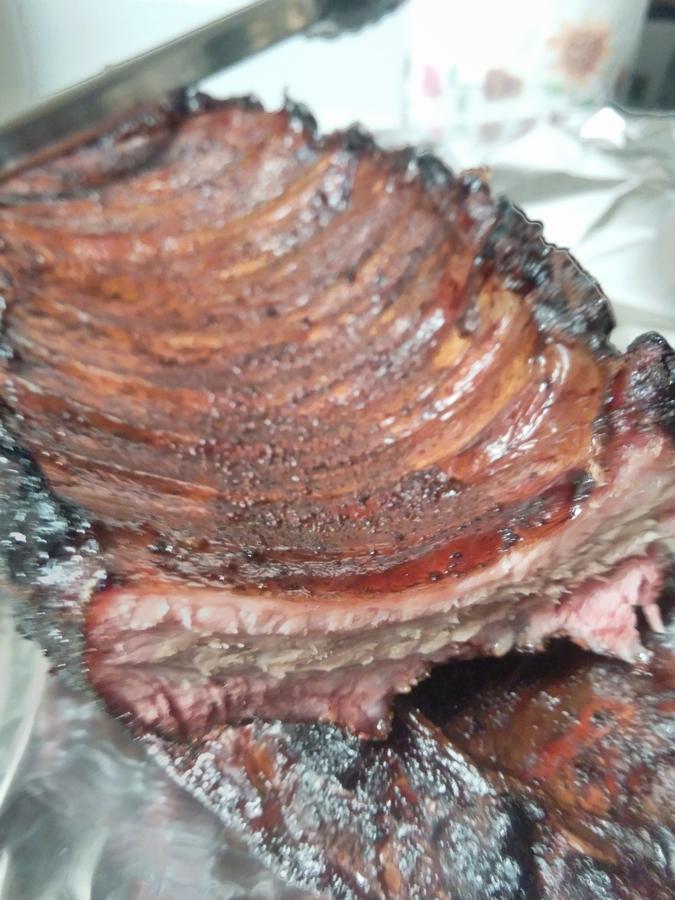
Right over 20 hours after they went on, the briskets hit 195 internal temperature.  The stall time on this cook is probably one of the longest I have even seen.  This is right before being pulled, wrapped and placed in an ice chest to rest.


I don't seem to have any pictures of the brisket after I sliced it, but it was wonderful.

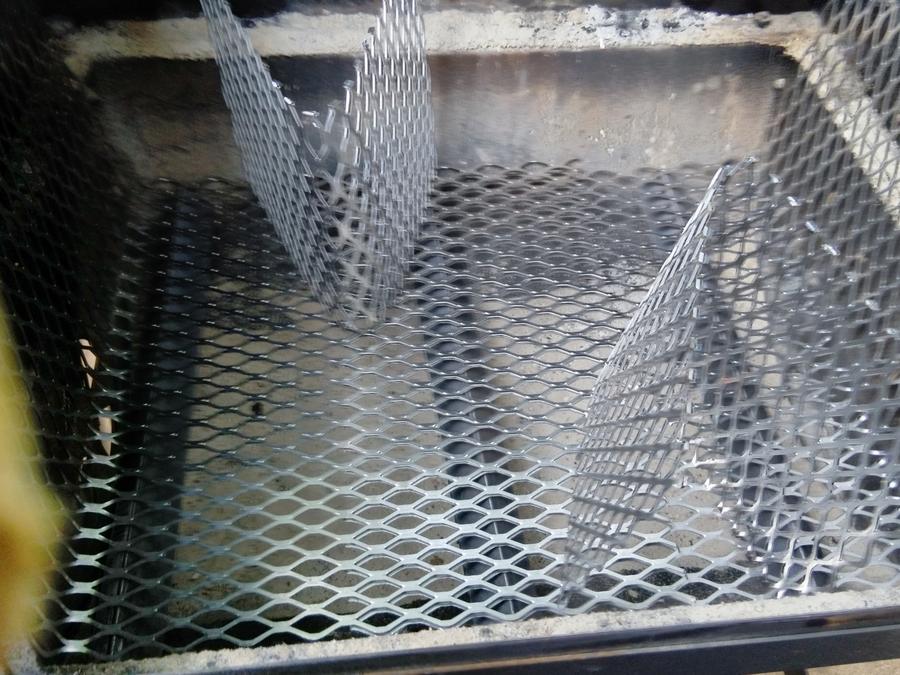
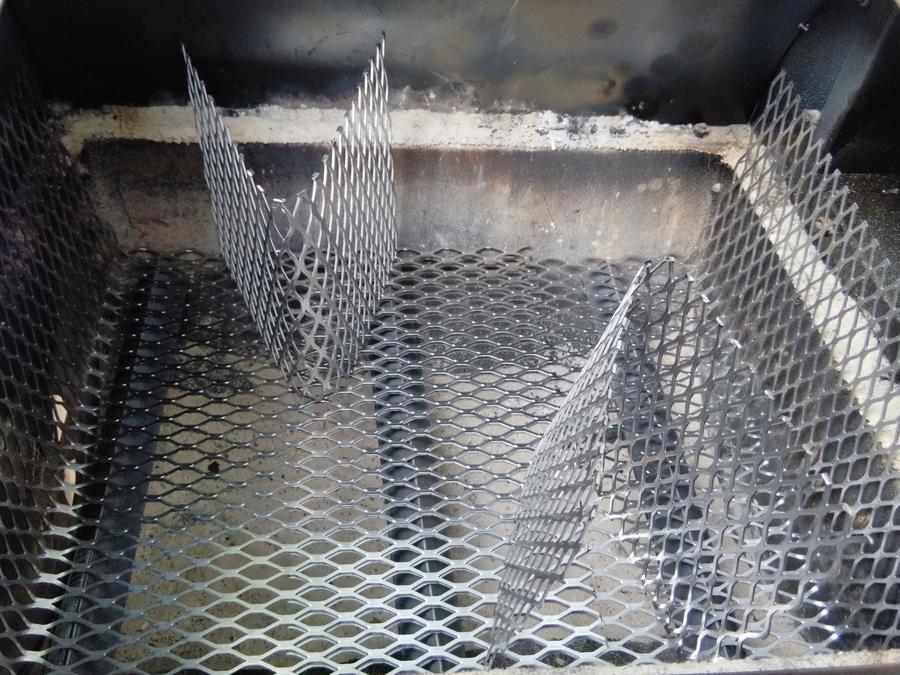
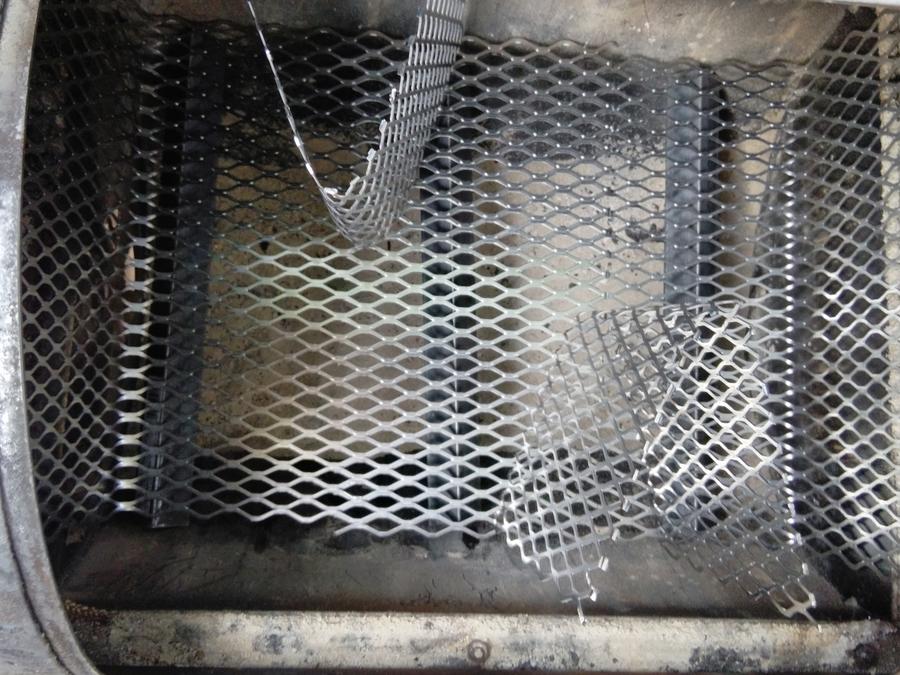
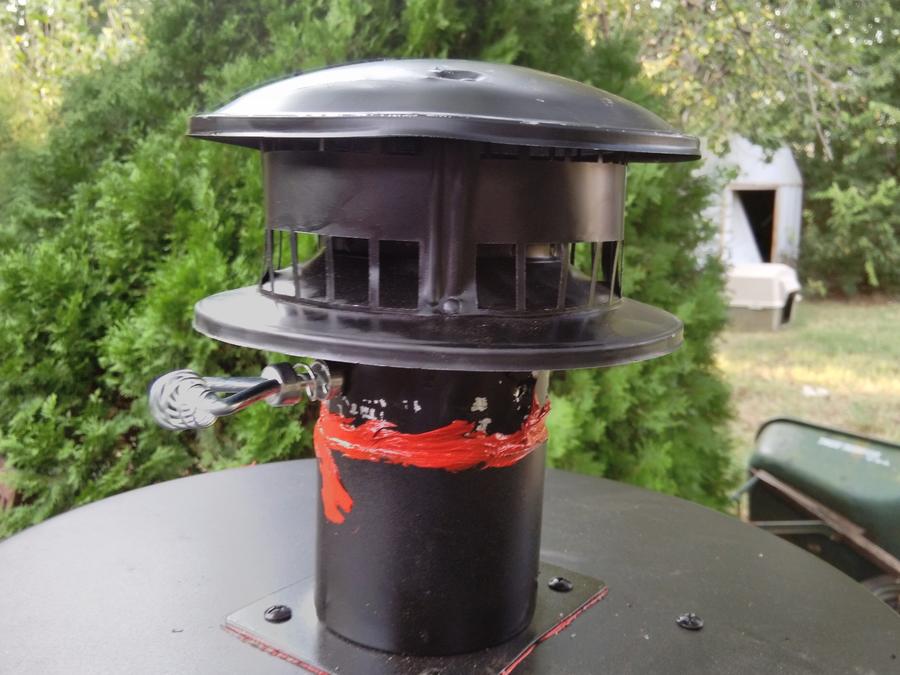
I didn't like that the smoker leaked like crazy at the top and the bottom because it was just spot welded.  And that drip pan is so small it fills up very fast when filling the smoker up with meat.  So I ordered a few more things and hope to have the smoker working the way I want it to.
 
  • Like
Reactions: 5oclock
I didn't mention in the previous post that my Stoker had no trouble keeping the cooking chamber at temperature.  Because of the leaks I burned more fuel than I liked, but I think I will have that down now.

Okay, so all my parts came in for the second round and I've got everything where I want it.  The firebox on this thing is small IMO.  I decided that building a box to put inside it would make the box too small for long cooks and opted to go this route.  I picked up 3 ft of angle iron and 2 12'x24" sections of expanded metal from Lowes.  I cut the angle iron into 1 ft pieces and made supports for my expanded metal.  The expanded metal I cut 6 1/2 inches off of each piece and bent 6 inches 90 degrees.  These bends form the walls at the ends of the firebox.  I took the two 6 1/2 inch pieces and bent them into V shapes. these will be the channels for my S curve.  The bottom of the grate is now at the top of the air inlet where my fan will go.  This will push the air up through the fire into the cooking chamber.


I found the damper I was looking for on Amazon.  It's a 4" cast iron damper.  I didn't think to get a picture of it before I installed it into the vent cover.  And the vent cover wasn't all beat up the way it is now until I installed it yesterday and placed the cover on it last night.


I found the latches I wanted and picked up three of them to ensure I had enough to pull my door straight.


As you can see here that gap is now gone.


And as you may have noticed throughout the pics, everywhere I leaked got covered in sealant.

So, tomorrow once the sealant has cured I'll fire it up again and see how she looks.  I am expecting much better fuel consumption and much less leaking.  I'll probably cook a couple of fatties since it is against the law to fire up a smoker and not cook anything. 
yahoo.gif
 
  • Like
Reactions: remmy700p
SmokingMeatForums.com is reader supported and as an Amazon Associate, we may earn commissions from qualifying purchases.

Latest posts

Hot Threads

Clicky