I was finally able to get things together to do my build. I will put as much details into the thread as I can think of. if I miss something you want info on please ask. The only reason i was able to complete and do this build was because others helped me. I will have a couple things that are little different. So here we go......
Supplies List:
1ea Jumbo Joe Grill $60.00
1ea 80 QT Stainless Steel Pot (Bought from EBay, PM me if you want the link) $110.00
2ea Charcoal Grates (for a Weber 22" Grill) $10.99ea
1ea 6' Shelf Bracket (the coating will have to be burned off) $2.98
1pk Clips 12ct (the coating will have to be burned off) $2.98
2ea All Thread 1/4"x12" $1.07ea
1ea Expanded Metal 12"x24" (there are a couple different gages of metal. I went with the thicker one) $16.99 Tractor Supply
10' Wire (To be used for the charcoal basket. I used what we had)
1pk SS Pan Phillips Machine Bolts 1/4" - 20 x 2 1/2" 4ct (3" would work a little better) $1.98
1pk SS Pan Philips Machine Bolt 1/4" - 20 x 3/4" 6ct $1.98
1pk SS Acorn Nuts 1/4" - 20 3ct $1.98
2pk SS Hex Nuts 1/4" - 20 10ct $1.98ea
1pk SS Lock Washers 1/4" 12ct $1.98
3ea Black Steel Pipe Nipple 3/4" $1.00ea
3pk Conduit Lock-nut Steel 3/4" 2ct $0.48ea
2ea Black Cap 3/4" $1.45
1ea Ball Valve 3/4" $11.12
1ea High-Temp Red RTV Silicone Gasket Maker (Food Grade) $8.13 Amazon
1ea Adjustable Dial Thermometer 2" (River Country) $16.95 Amazon
So total cost was $272.49.
Before people start with the you could have bought an 18" WSM for a little more. The WSM will not be as flexible as mine will be. I also spent a little more on a few things that don't have to be bought like the adjustable brackets, levers for the vents and the charcoal grates for the shelves. However I like having the heavier duty shelves. You can also save a bit on the pot if you can find a 30 gallon steel drum with the correct measurements, they vary slightly, but you will need to cut it down to size. I would highly recommend for you to make one if the true mini is a bit too small for you. I will be making a true mini for my dad for Christmas.
Equipment:
Tape Measure
Seamstress Tape Measure
Marker
Masking Tape
Speed Square
Drill
1/4" Drill Bit (Get one that is for drilling hard metals)
1/2" Drill Bit (Get one that is for drilling hard metals)
1" Drill Bit (Get one that is for drilling hard metals)
Center Punch
Hammer
Vice
Dremel Tool
Cut off Wheel
Grinding Wheel
Jigsaw
Jigsaw Blade (on for cutting hard metals)
Lubricant for cutting the metal
Pliers
Screw Drivers
Beer
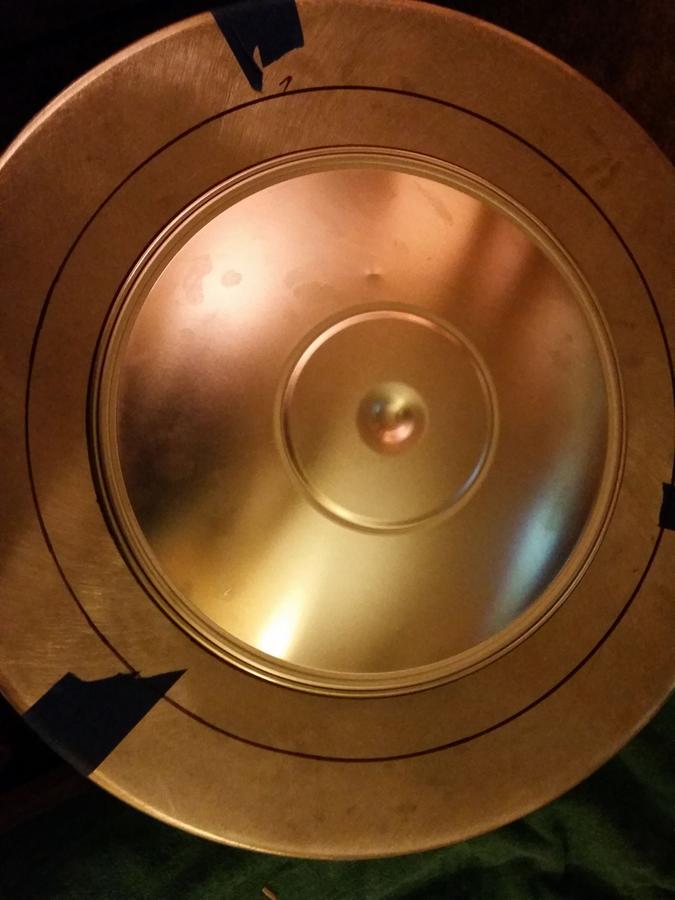
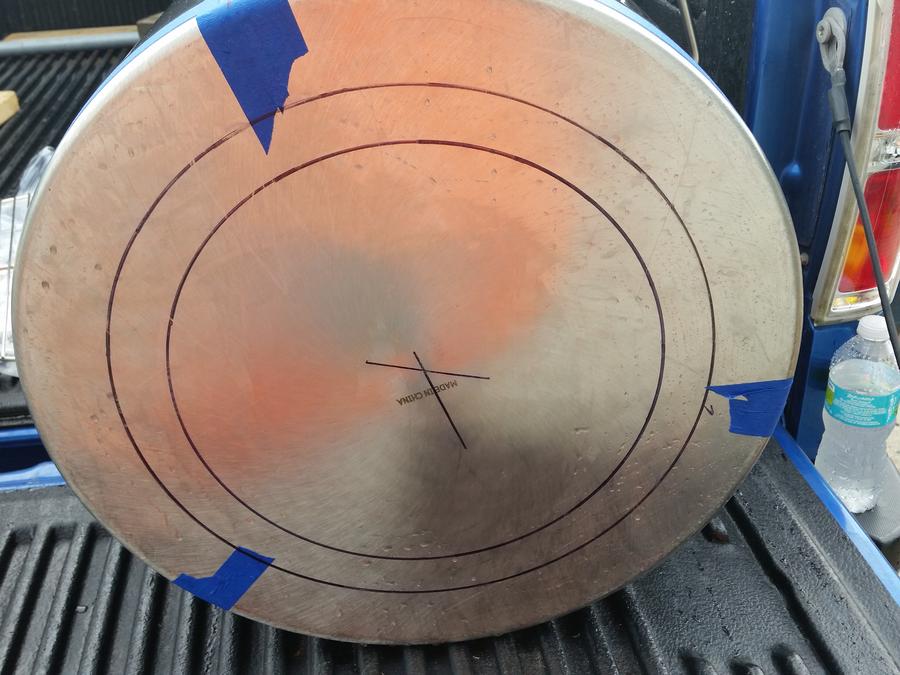
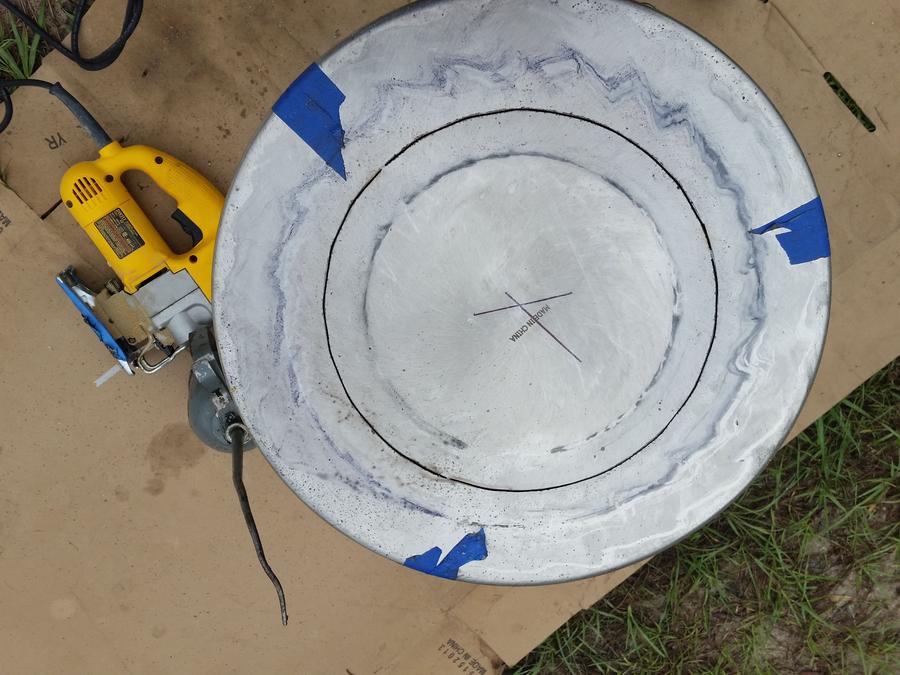
While I was waiting on some parts to show up and the time to work on the build outside. I mocked up several of the cuts and holes to be drilled. The outer circle was made with the charcoal grate that came with the grill. The center circle was made with the ash pan for the grill. I measured to try and center as best possible.
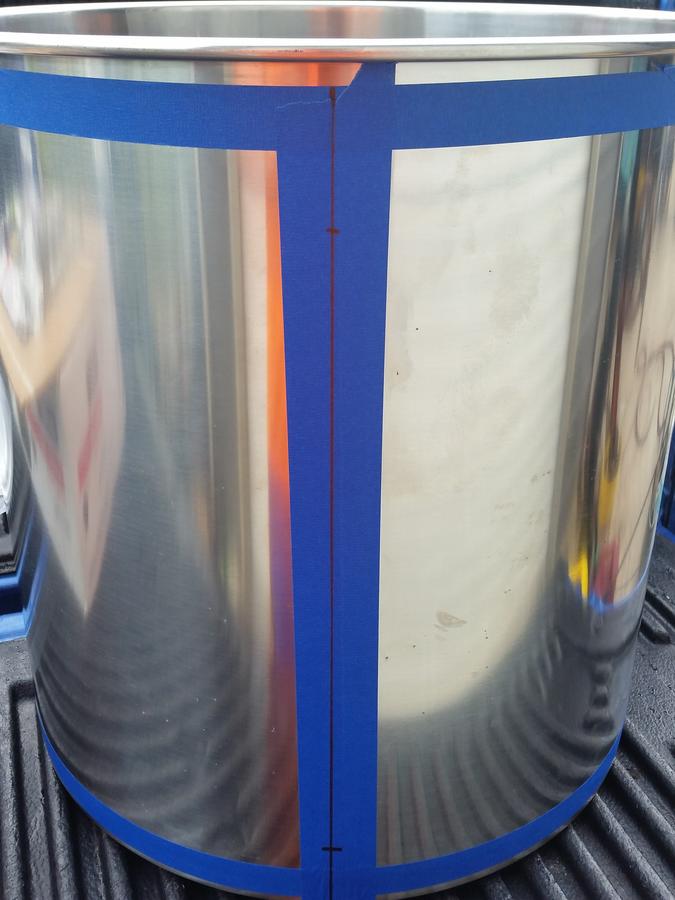
For the holes on the sides. I ran a strip of tape around the top of the pot. Then found the center between the handles. At that point I measured around the pot and divided the number by 3. The measured from the center mark in either direction for the other 2 marks. I ran 2 strips of tape the length of the pot to draw a line on for the bracket mounting holes. I used the speed square to draw a square straight line down the pot. From the bottom I market a spot at 2" and from the top I lined up the hole with the top grommet for the handles on the pot (I even had a win with the fact the holes lined up with the shelf brackets.)
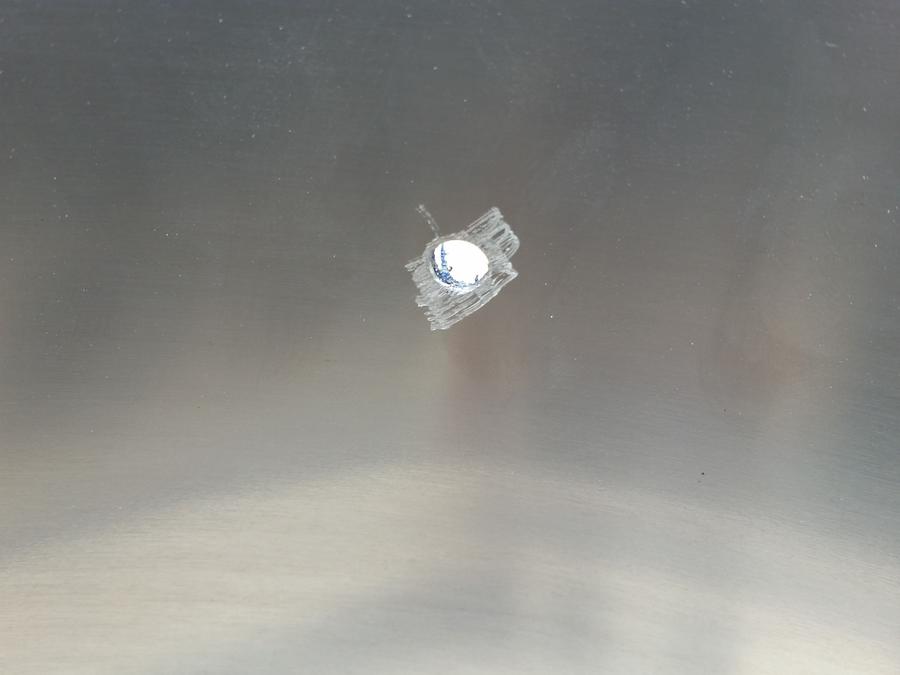
I used the center punch to make a starter dimple for the drill bit. After drilling I used the dremel with a grinding tip to smooth out the burs.
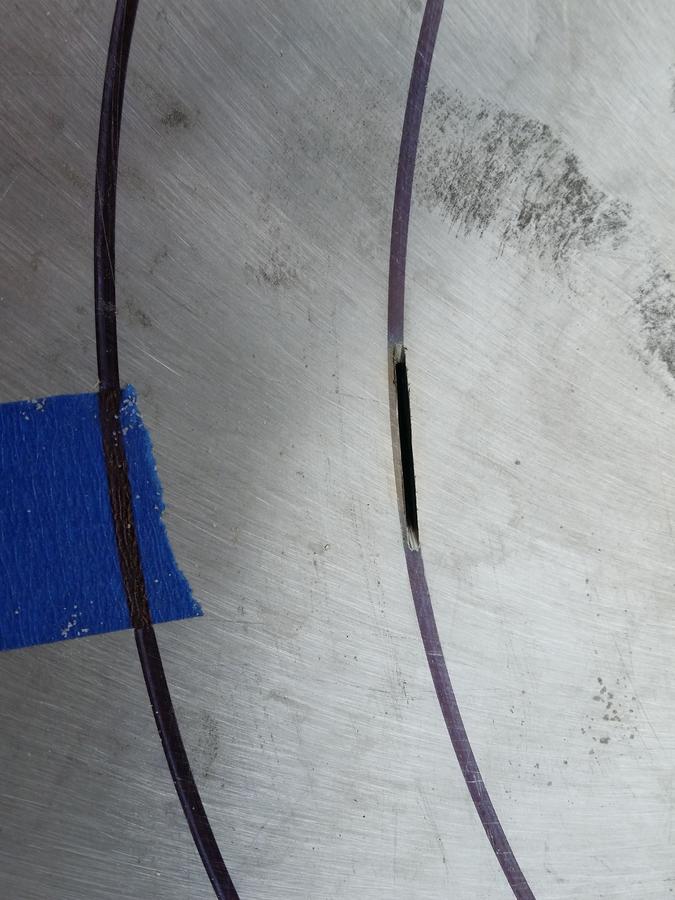
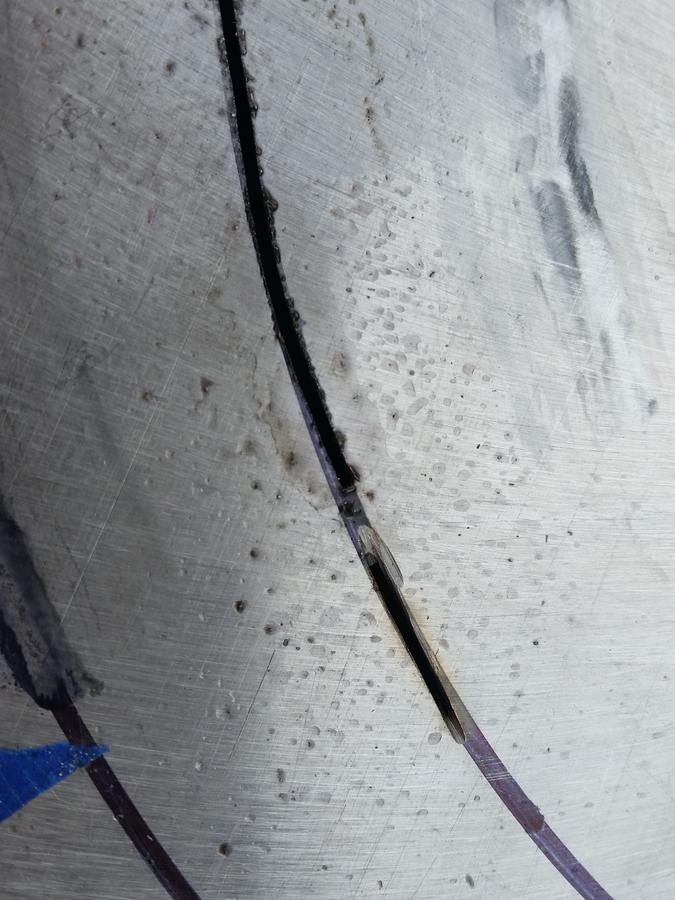
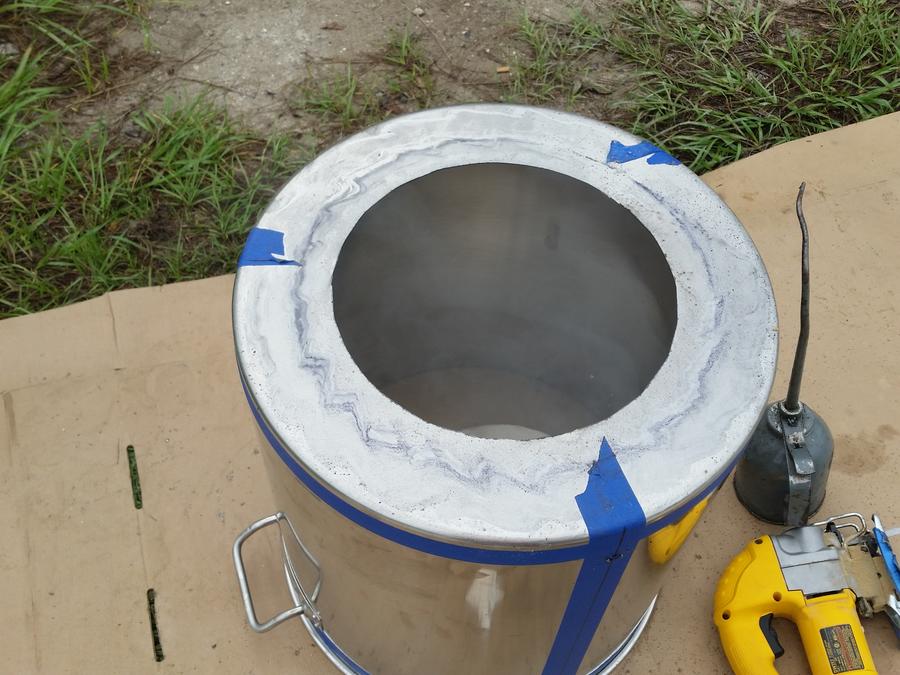
To cut out the bottom I got a little creative with my process. I wanted to save the bottom for another build, so did not want to drill a hole to put the jigsaw blade in. So I used the cutoff wheel to make 3 small cuts. I then cut along the line to about 1/4" before the next score. Then remove the saw and start cutting again. the reason for this is by the time you get past half way the center will vibrate uncontrollably. Then I used the cut off wheel to finish off the last little bit. Then ground the burs again with the grinding wheel and dremel.
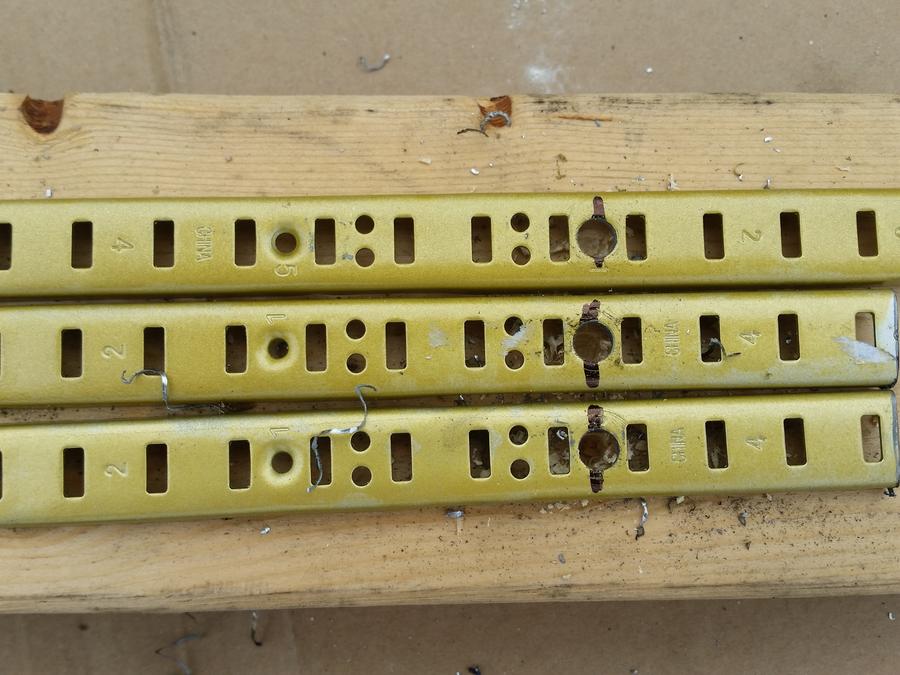
I then cut the shelf brackets down to size, ground the edges and drilled the holes for mounting bolts. As I write this it is raining out and not able to burn off the coating. Tomorrow hopefully......
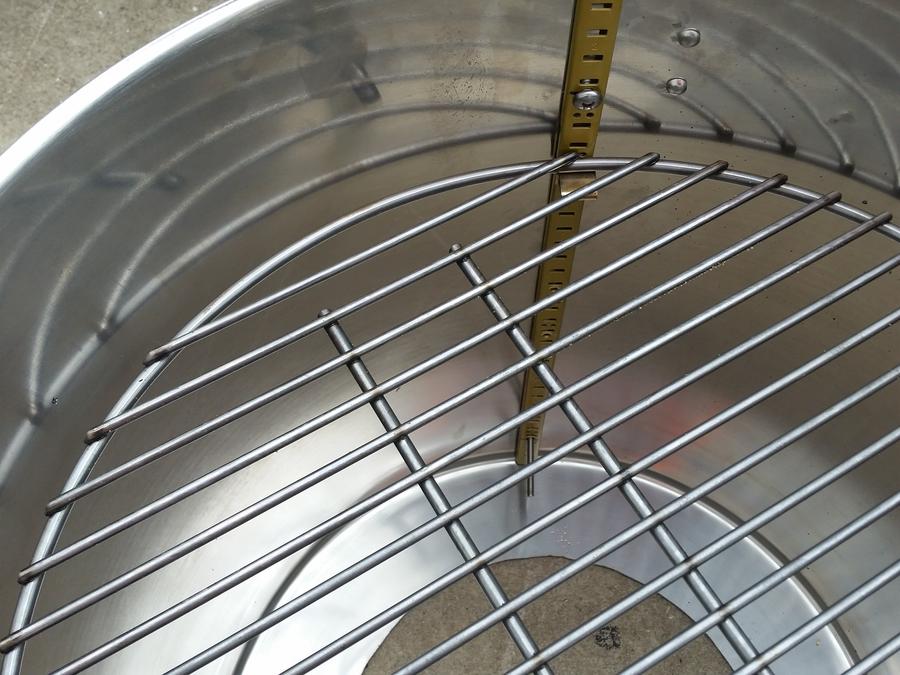
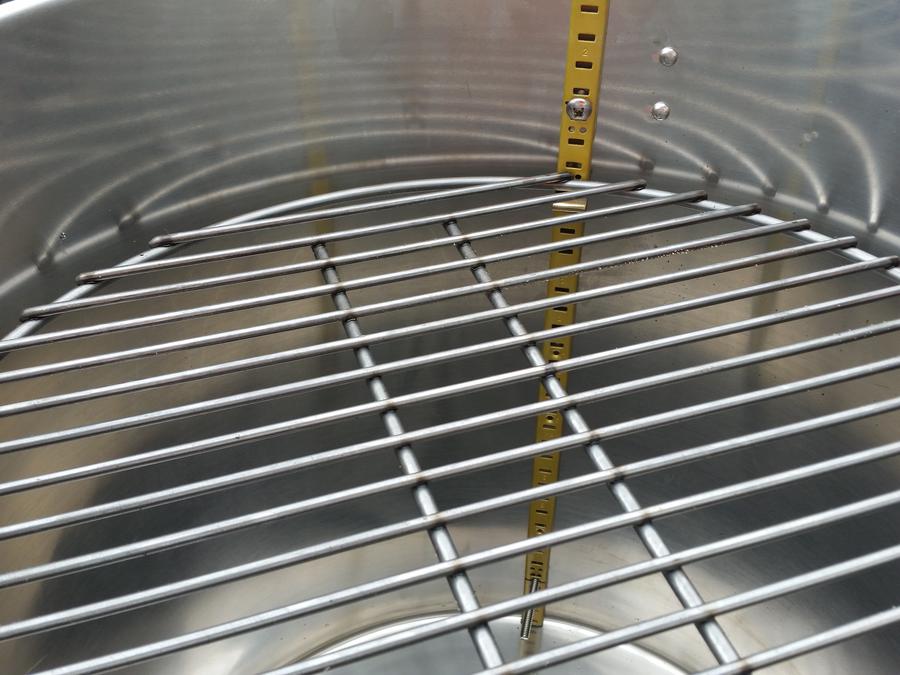
I mocked up the pot with the brackets and clips to see how the grate would sit. I must say I am very happy with it. I know many will just run bolts through the pot to sit the grates on. That works very well, but I wanted to have adjustable shelving.
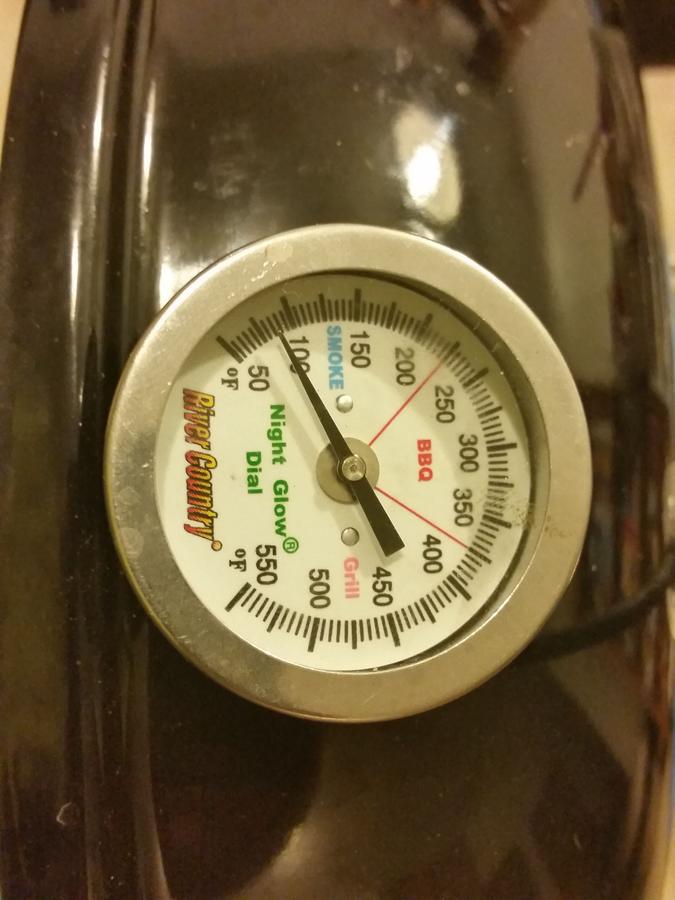
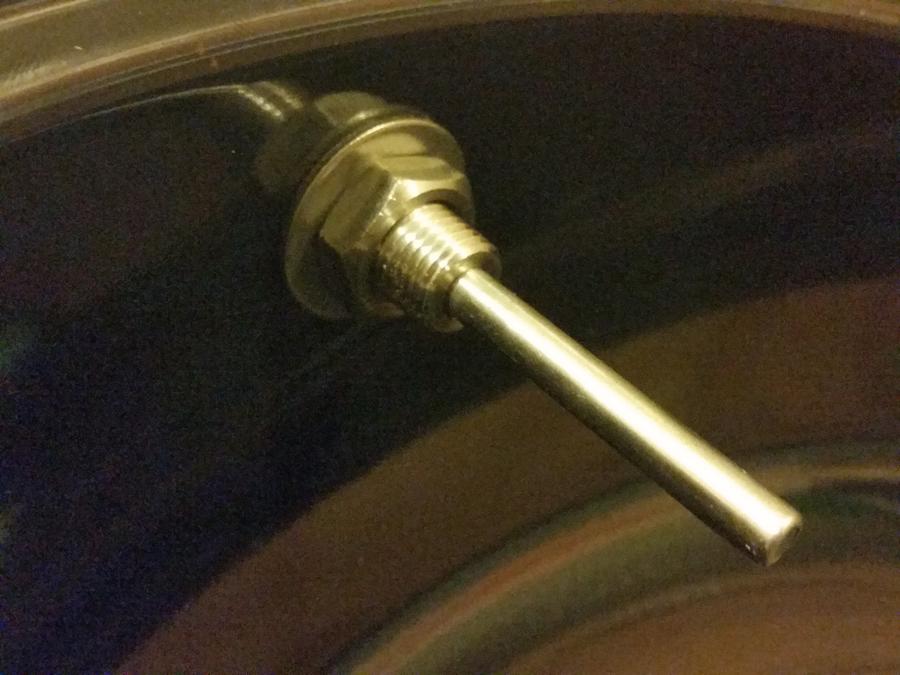
For the thermometer I wanted it on the lid, not the pot. I will be making an insert that will be a pizza oven and I use a digital thermometer for temp monitoring during my smokes. So I centered the hole with the front of the lid and measured up 2" from the top of the lip on the lid. Drilled the 1/2" hole and mounted the thermometer. I put a very small amount of RVT on the outside to seal the small gaps.
I did calibrate the thermometer last night. Got it to with in a couple degrees, again it is only used as a guide.
I attached the lid handle. Sealed with a small amount of RVT on the outside.
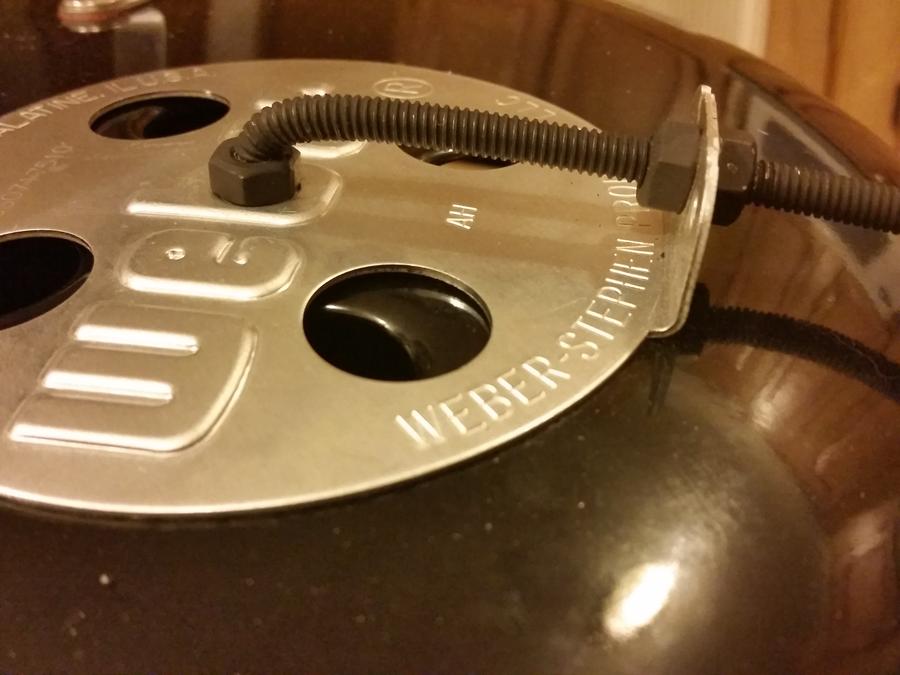
For the top vent I wanted an additional handle to make it easier to adjust and to match the bottom vent. I used 1/4" all thread for this. I bent the all thread and drilled a hole in the stock handle. Using 1/4" hex nuts i placed one on the top of the vent and used stock nut and washer to mount the vent. Where I ran the all thread through the handle i placed a hex nut on either side and tightened. I painted with high heat paint. I still need to find something for the end of the all thread handle.
For the bottom vent I did the same process as the top vent.
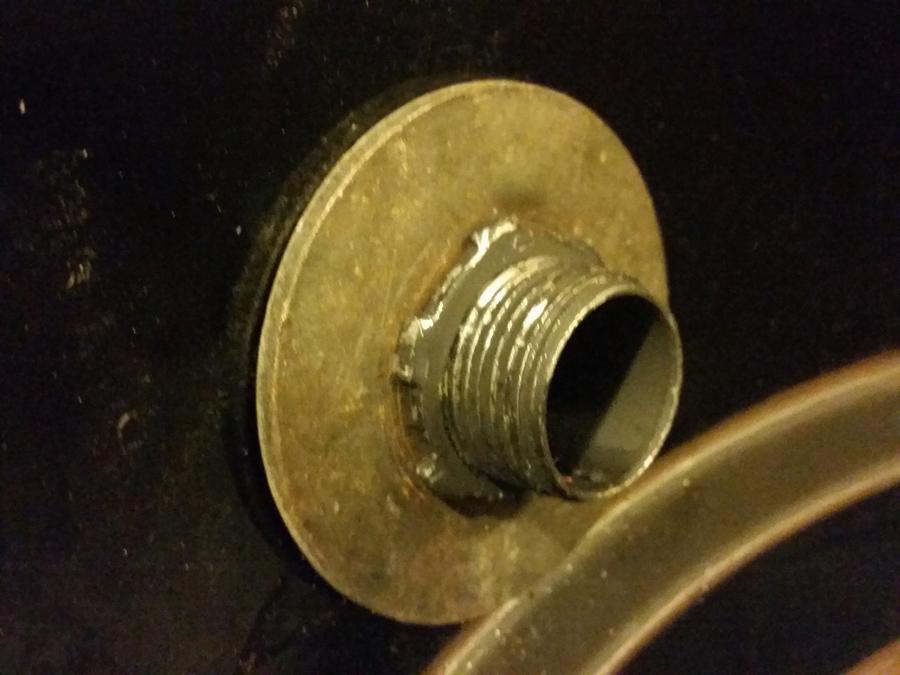
I decided to run with 2 capped vents and 1 ball valve, all 3/4". I lined up the 2 outside holes for the capped vents with the front legs of the grill and centered the hole for the ball valve. It was a bit unnerving hearing the powder coating cracking after using the center punch. After drilling the 3ea 1" holes I had to clean them up a bit with the grinding tip and dremel. Placed 1 steel pipe nipple into each hole and locked with the lock nuts. I also placed RVT on the outsides to seal. The ball valve was a bit tricky because the nipple did not go far enough in and the lock nut did not take up the slack. So I used a washer on the back to take up the extra gap.
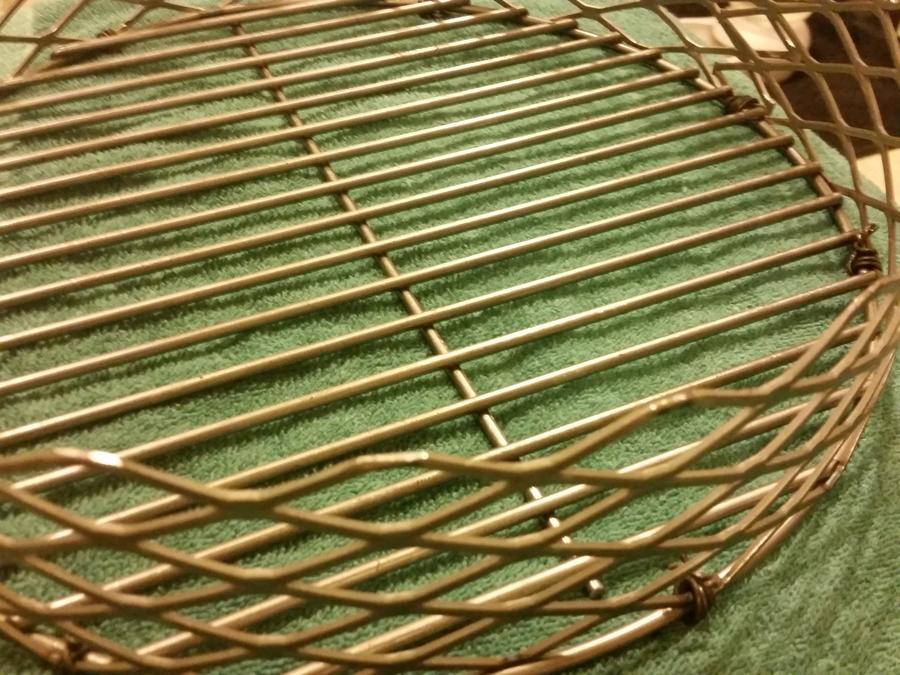
For the charcoal basket I did pretty much the same as most do. I cut the 2 strips of expanded metal and used wire to tie them to the stock charcoal grate.
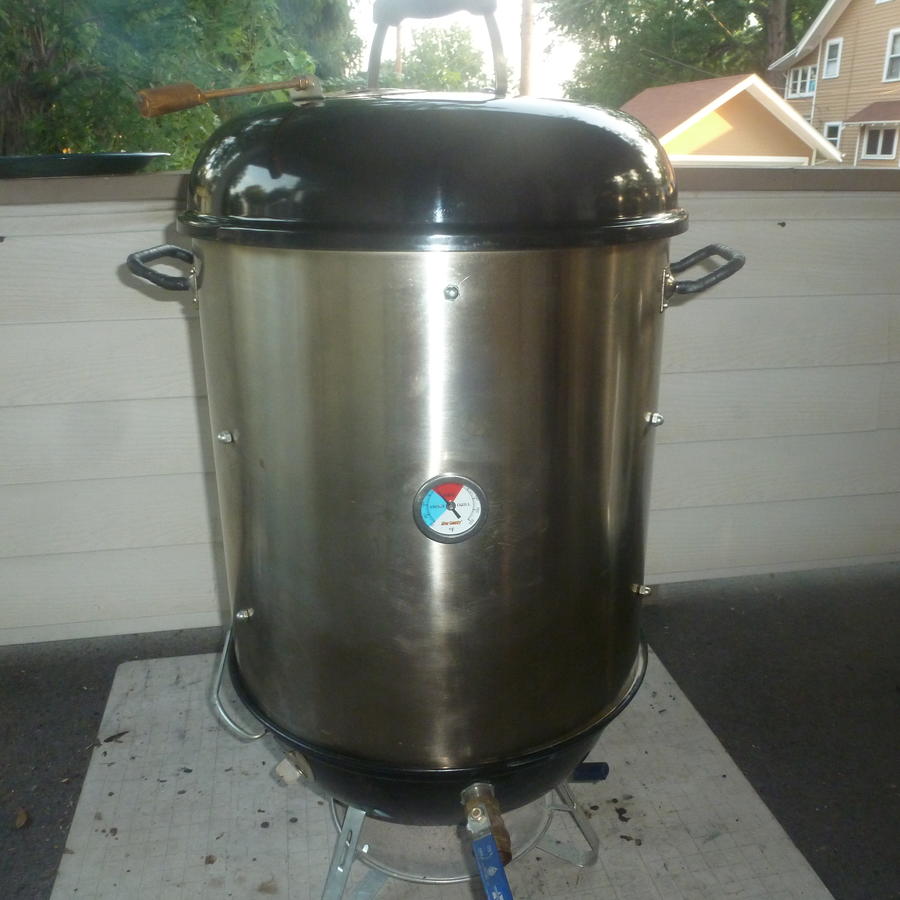
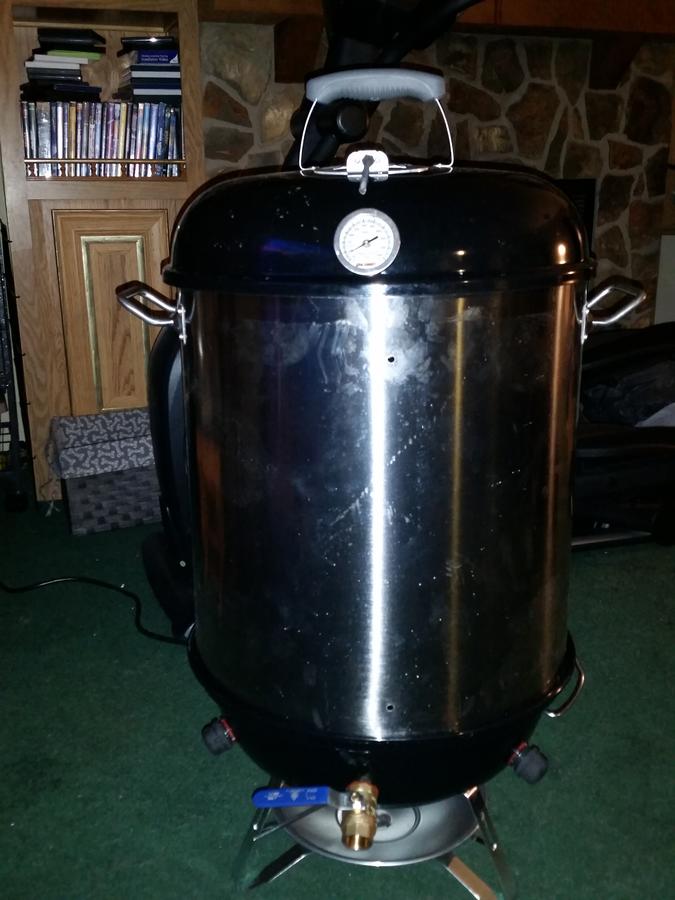
More to come after I get the brackets burned off and installed. Hopefully the weather will cooperate........
This is a bad picture, but it will give some reference....
Supplies List:
1ea Jumbo Joe Grill $60.00
1ea 80 QT Stainless Steel Pot (Bought from EBay, PM me if you want the link) $110.00
2ea Charcoal Grates (for a Weber 22" Grill) $10.99ea
1ea 6' Shelf Bracket (the coating will have to be burned off) $2.98
1pk Clips 12ct (the coating will have to be burned off) $2.98
2ea All Thread 1/4"x12" $1.07ea
1ea Expanded Metal 12"x24" (there are a couple different gages of metal. I went with the thicker one) $16.99 Tractor Supply
10' Wire (To be used for the charcoal basket. I used what we had)
1pk SS Pan Phillips Machine Bolts 1/4" - 20 x 2 1/2" 4ct (3" would work a little better) $1.98
1pk SS Pan Philips Machine Bolt 1/4" - 20 x 3/4" 6ct $1.98
1pk SS Acorn Nuts 1/4" - 20 3ct $1.98
2pk SS Hex Nuts 1/4" - 20 10ct $1.98ea
1pk SS Lock Washers 1/4" 12ct $1.98
3ea Black Steel Pipe Nipple 3/4" $1.00ea
3pk Conduit Lock-nut Steel 3/4" 2ct $0.48ea
2ea Black Cap 3/4" $1.45
1ea Ball Valve 3/4" $11.12
1ea High-Temp Red RTV Silicone Gasket Maker (Food Grade) $8.13 Amazon
1ea Adjustable Dial Thermometer 2" (River Country) $16.95 Amazon
So total cost was $272.49.
Before people start with the you could have bought an 18" WSM for a little more. The WSM will not be as flexible as mine will be. I also spent a little more on a few things that don't have to be bought like the adjustable brackets, levers for the vents and the charcoal grates for the shelves. However I like having the heavier duty shelves. You can also save a bit on the pot if you can find a 30 gallon steel drum with the correct measurements, they vary slightly, but you will need to cut it down to size. I would highly recommend for you to make one if the true mini is a bit too small for you. I will be making a true mini for my dad for Christmas.
Equipment:
Tape Measure
Seamstress Tape Measure
Marker
Masking Tape
Speed Square
Drill
1/4" Drill Bit (Get one that is for drilling hard metals)
1/2" Drill Bit (Get one that is for drilling hard metals)
1" Drill Bit (Get one that is for drilling hard metals)
Center Punch
Hammer
Vice
Dremel Tool
Cut off Wheel
Grinding Wheel
Jigsaw
Jigsaw Blade (on for cutting hard metals)
Lubricant for cutting the metal
Pliers
Screw Drivers
Beer
While I was waiting on some parts to show up and the time to work on the build outside. I mocked up several of the cuts and holes to be drilled. The outer circle was made with the charcoal grate that came with the grill. The center circle was made with the ash pan for the grill. I measured to try and center as best possible.
For the holes on the sides. I ran a strip of tape around the top of the pot. Then found the center between the handles. At that point I measured around the pot and divided the number by 3. The measured from the center mark in either direction for the other 2 marks. I ran 2 strips of tape the length of the pot to draw a line on for the bracket mounting holes. I used the speed square to draw a square straight line down the pot. From the bottom I market a spot at 2" and from the top I lined up the hole with the top grommet for the handles on the pot (I even had a win with the fact the holes lined up with the shelf brackets.)
I used the center punch to make a starter dimple for the drill bit. After drilling I used the dremel with a grinding tip to smooth out the burs.
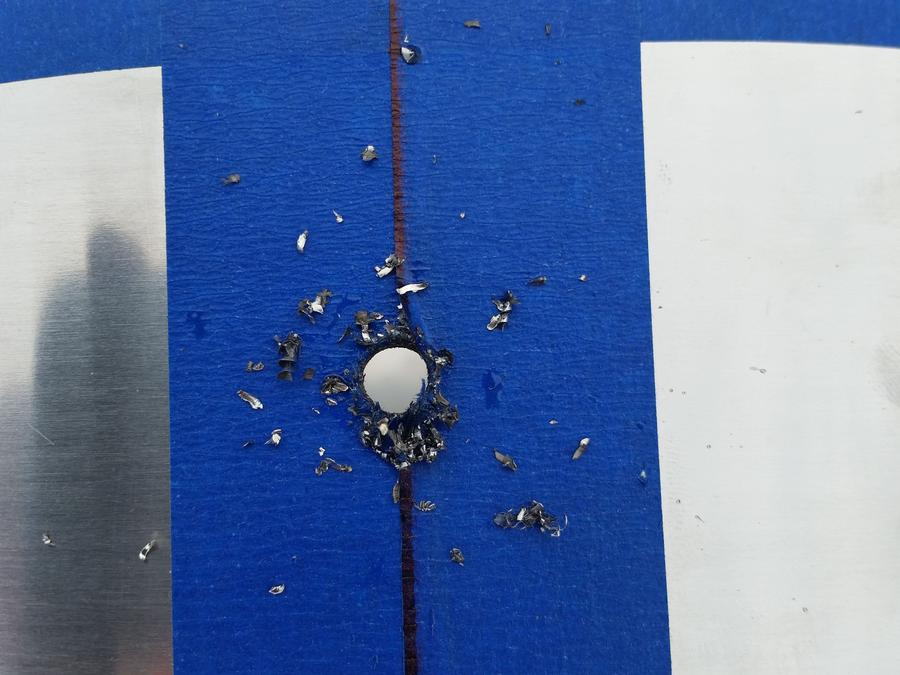
To cut out the bottom I got a little creative with my process. I wanted to save the bottom for another build, so did not want to drill a hole to put the jigsaw blade in. So I used the cutoff wheel to make 3 small cuts. I then cut along the line to about 1/4" before the next score. Then remove the saw and start cutting again. the reason for this is by the time you get past half way the center will vibrate uncontrollably. Then I used the cut off wheel to finish off the last little bit. Then ground the burs again with the grinding wheel and dremel.
I then cut the shelf brackets down to size, ground the edges and drilled the holes for mounting bolts. As I write this it is raining out and not able to burn off the coating. Tomorrow hopefully......
I mocked up the pot with the brackets and clips to see how the grate would sit. I must say I am very happy with it. I know many will just run bolts through the pot to sit the grates on. That works very well, but I wanted to have adjustable shelving.

For the thermometer I wanted it on the lid, not the pot. I will be making an insert that will be a pizza oven and I use a digital thermometer for temp monitoring during my smokes. So I centered the hole with the front of the lid and measured up 2" from the top of the lip on the lid. Drilled the 1/2" hole and mounted the thermometer. I put a very small amount of RVT on the outside to seal the small gaps.
I did calibrate the thermometer last night. Got it to with in a couple degrees, again it is only used as a guide.

I attached the lid handle. Sealed with a small amount of RVT on the outside.
For the top vent I wanted an additional handle to make it easier to adjust and to match the bottom vent. I used 1/4" all thread for this. I bent the all thread and drilled a hole in the stock handle. Using 1/4" hex nuts i placed one on the top of the vent and used stock nut and washer to mount the vent. Where I ran the all thread through the handle i placed a hex nut on either side and tightened. I painted with high heat paint. I still need to find something for the end of the all thread handle.
For the bottom vent I did the same process as the top vent.
I decided to run with 2 capped vents and 1 ball valve, all 3/4". I lined up the 2 outside holes for the capped vents with the front legs of the grill and centered the hole for the ball valve. It was a bit unnerving hearing the powder coating cracking after using the center punch. After drilling the 3ea 1" holes I had to clean them up a bit with the grinding tip and dremel. Placed 1 steel pipe nipple into each hole and locked with the lock nuts. I also placed RVT on the outsides to seal. The ball valve was a bit tricky because the nipple did not go far enough in and the lock nut did not take up the slack. So I used a washer on the back to take up the extra gap.
For the charcoal basket I did pretty much the same as most do. I cut the 2 strips of expanded metal and used wire to tie them to the stock charcoal grate.

More to come after I get the brackets burned off and installed. Hopefully the weather will cooperate........
This is a bad picture, but it will give some reference....
Last edited: