First Time Build

  • Some of the links on this forum allow SMF, at no cost to you, to earn a small commission when you click through and make a purchase. Let me know if you have any questions about this.
SMF is reader-supported. When you buy through links on our site, we may earn an affiliate commission.

Wet Spaniel

Smoke Blower
Original poster
Dec 10, 2017
109
126
Yorkshire Dales, U.K.
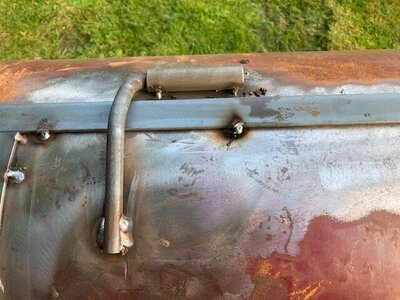
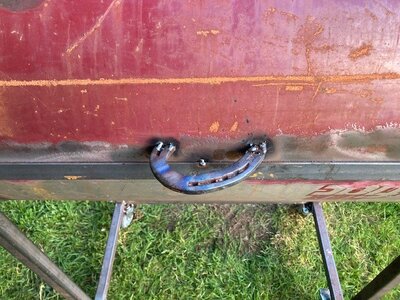
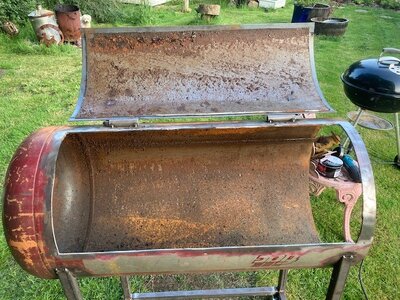
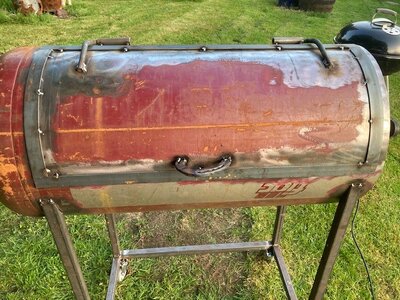
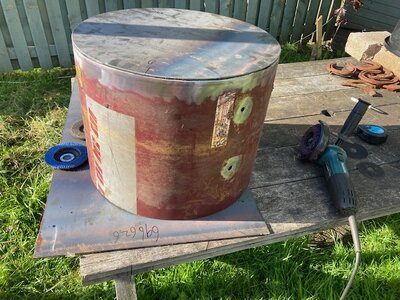
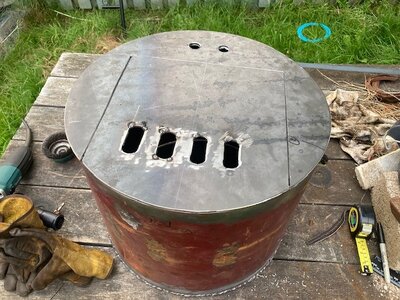
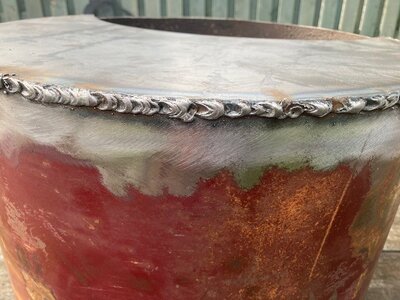
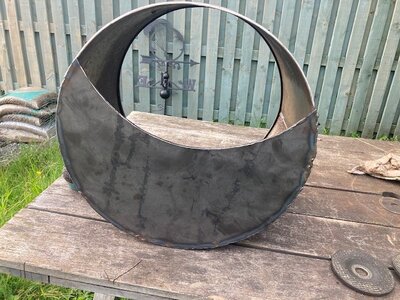
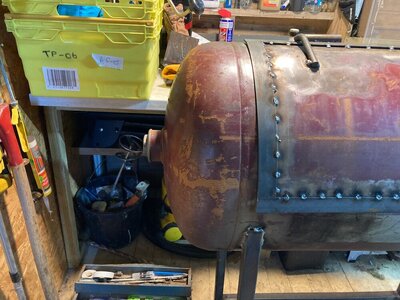
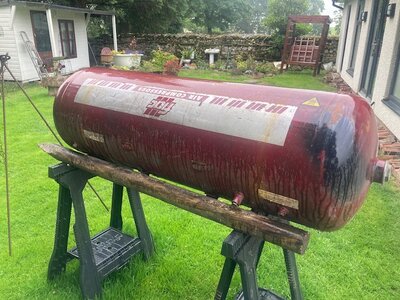
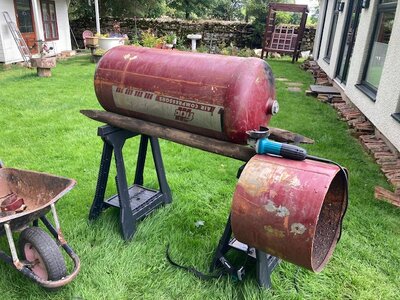
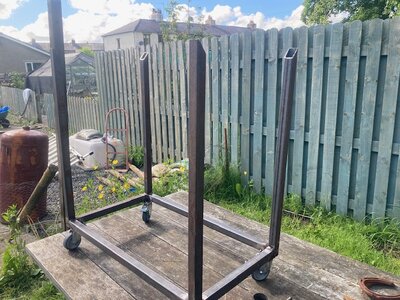
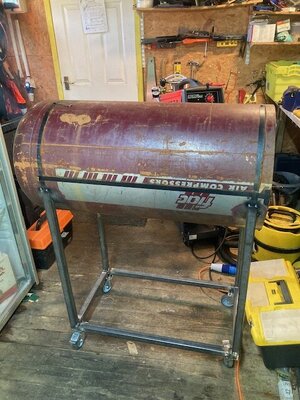
After buying an air receiver tank a long time back, months of prevaricating and at least half a year of teachimy myself to weld via YouTube, I eventually but the bullet today and started welding. So far, the welds have a face that only a father could love, but everything’s sticking together - and I’m happy with that. I am using approx 1/3 of the cylinder for the firebox - due to,the dimensions of the tank I’m using, this works out perfectly as the tank was a bit too skinny to use full size.

I’m hoping that as I progress through the build, my welding will improve, for me though, as long as it cooks at the end of the day, I’ll be a happy man. Any comments/suggestion/observations will be very welcome.
 

Attachments

  • 596B9D08-C632-4EB0-B6E7-F7F7039E7AF7.jpeg
    596B9D08-C632-4EB0-B6E7-F7F7039E7AF7.jpeg
    132.7 KB · Views: 127
  • B8BE1630-3932-457D-B505-B2A9170A5DEA.jpeg
    B8BE1630-3932-457D-B505-B2A9170A5DEA.jpeg
    157.5 KB · Views: 117
  • 5B692E17-1D98-4939-83F8-8E2C221D7331.jpeg
    5B692E17-1D98-4939-83F8-8E2C221D7331.jpeg
    161.7 KB · Views: 113
  • DEE98FCF-E905-4426-8A32-B363C14677F3.jpeg
    DEE98FCF-E905-4426-8A32-B363C14677F3.jpeg
    115.4 KB · Views: 105
  • 48923B82-17EE-44E3-9C62-15D62D6A2FC9.jpeg
    48923B82-17EE-44E3-9C62-15D62D6A2FC9.jpeg
    110.2 KB · Views: 113
I’m assuming you have a wire feed welder, also assume you are using flux wire?

At any rate, welding is all about the “puddle” and your ability to see it. Temp and wire feed rate need to be right, then just follow the puddle and touch both sides of the weld seam.
 
  • Like
Reactions: Wet Spaniel
I had a little more time to work on my smoker tonight. It was a nice afternoon so I brought everything outside (my workshop is a wooden shed) I managed to get the hinges tacked on, the door cut, and the baffles tacked before the midges (British no-see-um's) convinced me it was time to quit. I know the welding isn't pretty, but I'm getting more confident and am over the moon that things are sticking together. I had an offcut from a horseshoe to use as a temporary handle, i will be changing it, but the final handle will definitely include shoe form my wife's horse.

I was anxious to start this, but I'm really enjoying it now!
 

Attachments

  • four.jpg
    four.jpg
    83.9 KB · Views: 107
  • two.jpg
    two.jpg
    120 KB · Views: 106
  • three.jpg
    three.jpg
    145.9 KB · Views: 105
  • one.jpg
    one.jpg
    134.2 KB · Views: 109
  • Like
Reactions: Up_In_Smoke
Hello Wet Spaniel! So far, so good! All welders have to start somewhere...so just keep at it! Good advice given by SmokinEdge SmokinEdge about carefully watching the weld puddle. Just try to keep the end of the wire at the leading edge of that puddle and, as SmokingEdge said, trace your arc back and forth slightly beyond the edges of the joint. If you haven't seen his welding instruction videos, I highly recommend Jody Collier. His YouTube channel is called Welding Tips and Tricks. LOTS of helpful videos there for improving Mig welding techniques...and the guy really knows his stuff!

One other piece of advice if I may:

You may have already done this...and if so please just disregard. There are several helpful online pit calculators that you can use to get the ratios of your dimensions correct. What I mean is, for a cooking chamber (CC) of a certain volume, the fire box (FB) should be a certain volume...and height and volume of the smoke stack...and the total area of the opening between the FB and the CC...and the size of the air intakes on the FB. The ratios of all those numbers are an important key to your smoker drawing properly when you build a fire in it. Sorry for rambling - I hope that makes sense.

Again - if you've already run those calculations, just disregard. But if you haven't done this, I strongly suggest you do so while it's not still too late to make adjustments.

As I said, there are several helpful pit calculators online. Here's a link to the one I like to use. It's fairly simple and straightforward - although I believe that all calculations are in Imperial units. Being as you are in the UK, I'm assuming your measurements are all metric you'd to convert the numbers accordingly.


Good luck! I hope that helps and that I didn't just confuse you.

Red
Hi Red, that's a wealth of really useful information - thank you. up to now I've only tacked things together whilst I still practice running longer welds - I will look up Tony's youtube channel, thank you. I've done the calculations RE firebox etc (and had fun and games with cubic inches etc :) ) my cylinder was relatively long and thin so rather than make a square firebox, I was able to take a section from it with the appropriate volume to match the cook chamber. I've just got to do the maths on the area of the chord of the circular box then I can start cutting the end caps/doors.

I'd just like to say thank you to all you guys for volunteering your ideas/suggestions, smoker fabrication/use isn't that big of a thing this side of the pond so I'm grateful for all the help I can get.

I suspect once it's made, this will be the only offset smoker in a 75 mile radius!!
 
Not a huge leap forward this weekend, but a satisfying one. I have 3 x circle/part circle end caps to make for the firebox and smoker side. I cut the first today with a grinder and I was amazed how easily it went. I’m sure many of us are ‘of that age’ ……god bless bifocal safety glasses 😃😃
 

Attachments

  • 19CF17AE-E437-4E20-BD75-1B0803951486.jpeg
    19CF17AE-E437-4E20-BD75-1B0803951486.jpeg
    165.9 KB · Views: 103
  • B2E30607-94D8-4C94-9BF2-FE080D89DB33.jpeg
    B2E30607-94D8-4C94-9BF2-FE080D89DB33.jpeg
    167.4 KB · Views: 94
Started work on the firebox today I know that's not exactly 'stacking dimes' but it's mine, and I'm happy!!!

I am absolutely loving this build !!

Your making great progress! While those welds are not exactly "stacking dimes" they are likely passable for a project like this. If I may offer a little constructive advice without offending...

I'd say the one area you can improve on to produce better quality welds is travel speed. The welds in your pics show inconsistent travel speed. Keep practicing, and concentrate on making your "weaving" motions and your speed from left to right (or right to left, as the case may be) more constant.

Keep at it - it's beginning to take shape now!

Red
 
  • Like
Reactions: JLeonard
Your making great progress! While those welds are not exactly "stacking dimes" they are likely passable for a project like this. If I may offer a little constructive advice without offending...

I'd say the one area you can improve on to produce better quality welds is travel speed. The welds in your pics show inconsistent travel speed. Keep practicing, and concentrate on making your "weaving" motions and your speed from left to right (or right to left, as the case may be) more constant.

Keep at it - it's beginning to take shape now!

Red
Red, thank you for the advice. And, please don't worry about offending me - I will happily take good advice all day long. I appreciate the comment, I will work on timings - cheers!
 
  • Like
Reactions: seenred
Last line in a video I posted not long ago about BBQ grills was about home built cookers..."the uglier the welds the better the food."
Follow the advice on here and you'll be cranking out killer eats and feeding the neighbors!

Jim
 
I have yet another question if I may… my tank has a slight dome on the end where my smokestack needs to be. Would I benefit from making a collector/plenum to sit the stack on, or could I fit the stack directly to the tank? I’m guessing either option will involve some work be it fabrications a 90 degree elbow in a 5 inch pipe or building a collector box.
 

Attachments

  • 45504182-10BB-4321-A690-20C3D2C8EEB2.jpeg
    45504182-10BB-4321-A690-20C3D2C8EEB2.jpeg
    156.3 KB · Views: 62
  • Like
Reactions: JLeonard
If you're wanting to have the exhaust at or close to grate level, I'd recommend a plenum or have the exhaust exit the end of the cooker as opposed to the top...
 
  • Like
Reactions: Wet Spaniel
Looking good. Take a look at my build, I had a similar situation and made a plenum out of an old mailbox. Be sure to get it low in the cook chamber. At or below your grate. Try for smooth transitions think friction.

RG
Lefty RF build
 
  • Like
Reactions: Wet Spaniel
I have yet another question if I may… my tank has a slight dome on the end where my smokestack needs to be. Would I benefit from making a collector/plenum to sit the stack on, or could I fit the stack directly to the tank? I’m guessing either option will involve some work be it fabrications a 90 degree elbow in a 5 inch pipe or building a collector box.

I would probably do a collector as well. Nothing elaborate - just a box with a curve cut that matches the curve of the bell end. I'd suggest attaching it at or very near grate level. Something that looks similar to this:

1720358639714.png


In the smoker in this pic, the stack is bolt-on - making it easy to remove if clearance under doorways is an issue. If clearance in not a problem, it could certainly be welded permanently.

Red
 
SmokingMeatForums.com is reader supported and as an Amazon Associate, we may earn commissions from qualifying purchases.

Hot Threads

Clicky