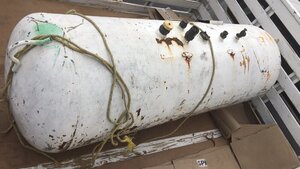
First 80 gallon Reverse Flow build

  • Some of the links on this forum allow SMF, at no cost to you, to earn a small commission when you click through and make a purchase. Let me know if you have any questions about this.
SMF is reader-supported. When you buy through links on our site, we may earn an affiliate commission.

andres

Newbie
Original poster
May 11, 2015
20
12
PHOTO-2019-10-29-12-27-40.jpg
PHOTO-2019-10-29-12-27-39 (1).jpg
IMG_9051.JPG
IMG_8901.JPG
IMG_9036.JPG
Hello everyone!

This is my first smoker build ever, I usually bbq in my weber kettle (I live in Mexico) but I wanted to step up the smoking a little bit and found an old 80g propane tank in my shop and thought that it would be a cool project.

The tank is around 13/64" thick so I thought I would be able to clean it and use It. Im going for tuning plates on the inside and built the firebox from a plate I had 1/8" thick. Just sent it to laser cut and Im starting to weld everything in place.

Im starting to be worried about the rust on the inside, I thought I would be able to have it clean and 100% rust free but I cant seem to get it done.

Is there any advice on how to proceed on this? I thought about using rustoleum high heat paint on the inside but started reading threads telling its not such a good idea.

Anyway, any advice would be greatly appreciated.
IMG_8893.JPG
IMG_8905.JPG
IMG_8905.JPG
 
Last edited:
i've used high heat paint on the outside of my off set, I don't think I would paint the inside though, I would just wire brush or something like that and after a couple of smokes the inside will be coated nicely, but this is my opinion, maybe some of the pros will chime.
 
I built my RF from a very old compressor tank. Don't sweat the rust, just clean it up with a knotted wire brush (grinder). Knock off all the loose stuff. Wipe it down with vegetable, canola oil when you season it. Spray oil works great. I dont recommend any paint as it is not food safe.

Its looking good so far! Have fun good luck

RG
 
The smoker I purchased has either been painted or powder coated from the factory even inside the firebox. If you want a professional end result I would have the tank media blasted and talk to a professional powder coating company. Most of their coatings can handle high heat but you will want to season the pit at higher temperatures than you will ever use it.
My fire box coating is intact except for the inside lid where the coating or high heat paint has scorched when I had the smoker up to almost 400 degrees during the second seasoning cycle. Like the others have mentioned I would not coat or paint the inside of the firebox. just keep it clean and wiped down with a light coat of oil when not in use. If I had a option I would have preferred the inside of my firebox was never coated or painted. So I just made sure to heat it well above the temperatures I plan on smoking food at during the seasoning process.
 
The pics of interior don’t look too bad. If you have access to a pneumatic needle gun, use it to knock off the large scale rust and then hit it with a number 80 flap wheel, wipe down with mineral spirits until clean, dry and then season with canola oil....do not paint interior.
 
The pics of interior don’t look too bad. If you have access to a pneumatic needle gun, use it to knock off the large scale rust and then hit it with a number 80 flap wheel, wipe down with mineral spirits until clean, dry and then season with canola oil....do not paint interior.
Wow thats new for me, I do have a pneumatic needle gun, just hit it without nails, I´ll try that.
 
Thank you all for the replies, I think Im going for seasoning on the inside and rustoleum on the outside, I think Id rather paint it myself every couple years than going for electrostatic paint. Thanks!
 
  • Like
Reactions: smokerjim
After cleaning out my firebox today what I thought was scorched paint - powder coating was just soot from burning wood. Once I wiped the interior down with some olive oil the coating is still in perfect shape. I have no idea what they used inside my smoker box and main smoke chamber. I will write the manufacturer to find out. ( but I would do the same thing as you that pit looks too heavy to haul around anyways )
 
I mounted the chimney today, grills with some "on sale" steel I found on a local shop. Getting ready for paint, and adjusting details.

I did not weld the tuning plates, as I like the idea to be able to clean and reach under so I want to try it and see if I can leave the plates unwelded but there is some space in between so maybe its not such a good idea. Any thoughts on tuning plates? Maybe some aluminum foil before each run to fill the gaps.
IMG_9210.JPG
IMG_9211.JPG
IMG_9213.JPG
IMG_9222.JPG
IMG_9223.JPG
 
Here is a pic of the tuning plates as I have them.
IMG_9226.JPG
IMG_9227.JPG
 
You probably will want to get the tuning plates mounted so that they set above the firebox opening . Otherwise you will have a hard time controlling the cc temps. I would suggest installing a permanent deflector plate about 8-10” just over the top of the fb-cc opening. Then reposition the tuning plates so that they run flush with the top of the new baffle. The baffle will always run hot, but it will redirect the smoke and heat so it doesn’t simply run up the wall to the stack (heat and smoke will always follow the path of lest resistance). Welding the plates down and filling gaps with foil will prevent you from “tuning” the gas flow. Keep in mind it may well take several cooks and a lot of tuning before you finally have it dialed in. Even then, you will probably find it needs fine tuning as variables (ambient temperature, wind, fuel, and tray loading) change.
 
Since the exhaust stack is set up for a reverse flow, it will probably work better if you ditch the tuning plates and install a solid plate to direct heat and smoke towards the back side and then flow across the grates. The reversal plate Is generally used to catch and drain moisture and grease.
 
  • Like
Reactions: daveomak
Tuning plates are not used in a conventional offset smoker... Put in a RF plate, just above the FB/CC opening to direct the heat to the opposite end of the CC and rerouting it back to the stack...
Also, upper air inlets across from the FB/CC opening, help to even out temps across the cooking surface by moving heat out of the FB without adding air to the fire...


BASIC RF DESIGN 2 - Copy.jpg


1573584297107.jpeg
Smoker exh and int 3 Ahumadora.jpg
Smoker Exh and Intakes 2.jpg
 
  • Like
Reactions: Jabiru
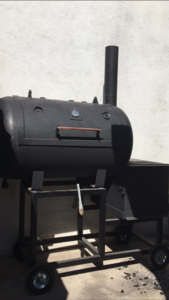
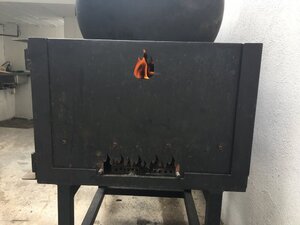
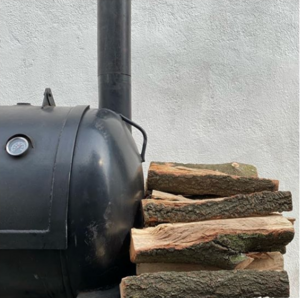
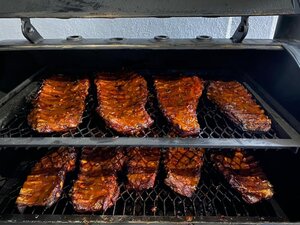
Its been a year since I started the built of my first 80g smoker, and now Im running small, I want more space haha. I just got a 125 gallon tank to start project smoker #2. I will change several things from the first build (firebox grate, vents design), and will start a new thread. I wanted to leave pictures of my finished first project. On the second one Im going to try to go with a tank firebox, as I might be able to get my hands on another 125 or 80g tank soon. Thanks everyone for the help on that first build!!!
IMG_1143.PNG IMG_1215.JPG Screen Shot 2020-05-01 at 12.42.55 PM.png d7fe7231-ae0c-4b23-a022-e029e6256237.JPG


And here is the new project!!

B7CDCCED-2BAA-40B2-96FB-F4337946B14D.JPG
 
SmokingMeatForums.com is reader supported and as an Amazon Associate, we may earn commissions from qualifying purchases.
Clicky