Fine tuning Mypin PID T-Series Question

  • Some of the links on this forum allow SMF, at no cost to you, to earn a small commission when you click through and make a purchase. Let me know if you have any questions about this.
SMF is reader-supported. When you buy through links on our site, we may earn an affiliate commission.
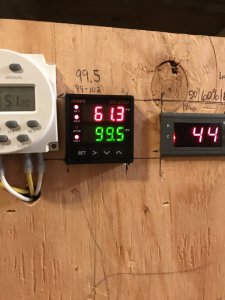
I received my new auber pid today and just wanted to make sure I’m hooking it up correct so I don’t fry it
Pin 1&2 obviously are power in
Pin 6-10 are self explanatory
Now do I need a jumper wire form pin 11 to 13 or do I not need to do anything with the rest of the pins? SYL-2362 is the pid model number. Thank you

Most likely not. The only time you would need to worry about wiring up 11/13 is if you are using the J2 relay output to control some external function such as a warning buzzer, light, etc.... which used a "normally closed" output. J1 and J2 are basically dry contact relays inside the PID and my recommendation would be to get your incubator running and stable before adding any bells and whistles such as external alarms, etc..... (ie, don't use them now).

The owners and configuration manual for the SYL-2362 is here:

https://www.auberins.com/images/Manual/SYL-2362/instruction/1.6.pdf
 
Thanks for the reply. I found the instructions last night after i posted this. I think that’s all I to hook up is the ssr connections and power
 
How do I change from C to F? I got this switched over but some stuff is way wrong
 
Here is what it reads when it’s an ice water. I’m kind of scrambling right now because I have these eggs in here
 

Attachments

  • E0E18A5B-6279-4F24-BE01-EF41B054AA80.jpeg
    E0E18A5B-6279-4F24-BE01-EF41B054AA80.jpeg
    104.4 KB · Views: 15
Sigh, if the other one was stable, you should have waited until the eggs were through the cycle, but at this point it is what it is.....

Go into the setup menu like this:
  1. Push "SET" button
  2. Enter "0089"
  3. Push "SET" button again to enter the configuration menu
  4. Keep pushing "SET" button until you see "CorF" in the display
  5. Change the "CorF" value to 1 (0 is for centigrade) by using the arrow buttons
  6. Keep pushing "SET" button until you see "End"
You do the same but with "0036" to change the tuning parameters and "0001" is for controlling temperature and alarm settings.

Also the very first value you will see in that menu is the "IntY" or "input sensor selection". Make sure it is set to match your temp probe type correctly "Y" is for K type sensor. If that is set wrong, it will also not read the temp correctly (I seem to recall you had a K sensor, if not use the correct code from the manual).

Full manual PDF is here:

https://www.auberins.com/images/Manual/SYL-2362/instruction/1.6.pdf
 
I already have that done. I am just trying to get the offset right while it’s an ice water right now
 
OK I think I have the offset correct now. Shall I hit the auto tune button or are there other settings that I should adjust?
 
So your are saying it is reading 61.3 with the probe in ice water?

That is WAY OFF. Offset should only be a couple of degrees or fraction of a degree normally. Should be no more than 5 off at the most. You still have a bad component. Try the other K temp sensor. Also how do you have the temp sensor wired? They are polarity sensitive.

Positive lead from probe goes to positive terminal on PID, and negative to negative. If you have them backwards the temp will do the opposite of what you expect (temp rises in real life, but display temp will go down if reversed). Or it will not read at all depending on sensor.

--------------------------------------------
Edit -

I was typing as you replied.

I would first let it run for 15 minutes to see just how far off it is. If it's close enough to work, you may want to leave it. If not, then it needs adjustment/tuning.

Not sure how the auto tune will affect your hatch of eggs, but again, it is what it is. The PID needs to be tuned either manually or on auto tune and in this instance, auto tune would be the lesser of the two evils so to speak.
 
I bought a new one when I bought this PID the other day. I am using a RDT thermal coupler know From auber
 
I am set at -14.8° On my offset that gives me my 32°F. I tried to do the boiling water but from the store over to the thermal coupler I could only get 182° out of it
 
I was kind of in a panic because I swapped my bad PID with another mypin PID and I couldn’t get my heater to turn on. So then I grabbed this other new one and hooked it up and had no idea how to set anything on it so while I had the wife nagging at me and one of my kids trying to talk to me it was kind of a disaster
 
My target temp is 99.5 and my mercury thermometer is up to 115* inside. I have it on auto tune now and the temp keeps climbing. It flashes on and off just like the other one I had. Why???when the temp is above the Target temp it shouldn’t be flashing at all until it drops below the target temp
 
Somethings not right here this won’t keep temp where I want it to. Output light keeps flashing even after the target temp is exceeded
 
Somethings not right here this won’t keep temp where I want it to. Output light keeps flashing even after the target temp is exceeded
Is there a jumper wire on one of the thermocouple terminals to another open terminal?
 
If you set the Integral to 0 and the Derivative to 0 you are in Proportional mode if you set P to 1 or higher on my Auber. So if you set p to 7, then 7 degrees below it gets to set point your at 100% then five degrees below set point your at 71% output then at set point your at 0%. So I set my smoker to p=1 so one degree below set point I'm at 100% then it flashes at 50% till it hits set point which is light out at 0%. If you set p=10 then 9 degrees below set point is 90% output, 8 degrees below set point is 80% etc till you get to your set point. I do this for more power when the temp drops and not wait a long time when it's flashing because lots of air is moving through the smoker and I want heat fast.
 
If p=0 it is in on/off mode and doesn't matter what I or D is set to so lit goes off at set point and on one degree below set point.
 
If you set the Integral to 0 and the Derivative to 0 you are in Proportional mode if you set P to 1 or higher on my Auber. So if you set p to 7, then 7 degrees below it gets to set point your at 100% then five degrees below set point your at 71% output then at set point your at 0%. So I set my smoker to p=1 so one degree below set point I'm at 100% then it flashes at 50% till it hits set point which is light out at 0%. If you set p=10 then 9 degrees below set point is 90% output, 8 degrees below set point is 80% etc till you get to your set point. I do this for more power when the temp drops and not wait a long time when it's flashing because lots of air is moving through the smoker and I want heat fast.
Ok this is the info I needed last night. So I set my P-0 but it over shoots now so I need to change it to P-1 to get it tighter? I want this to hold as tight as possible to 99.5°. After I changed the setting like you said it shot the temp up to 102°
 
SmokingMeatForums.com is reader supported and as an Amazon Associate, we may earn commissions from qualifying purchases.

Latest posts

Hot Threads

Clicky