I want to begin by throwing a shout out to a few folks for helping me get into making charcuterie, and everything involved with the build, salami making, etc. Firstly,
 SmokinAl
, for always being available and also turning me on to Two Guys and a Cooler. Which leads me to
 Cajuneric
, for taking the time to answer emails, texts & even speaking with me over the phone several times;
 indaswamp
, for the inspiration to even do this, as well as countless conversations, and tons of information and guidance. Without you guys, this wouldn’t be happening.
On to the pepperoni. Now, I’ve got a few projects already going in my drying chamber, not yet complete. And my chamber has only been running for a little over a month. But things seem to be progressing nicely, and, for my birthday in late August I received an Apera ph meter. So I was eager to start something new. I had read about fast fermented, semi dry sausages while reading The Art of Making Fermented Sausages; and I had three pepper crusted casings that I have been itching to use. Through my countless hours of research I ran across a video by Two Guys, giving ideas for what to make with said casings. Being a pepperoni nut, I knew that was something I wanted to try. But I also felt like dialing in the ph was going to be an important factor. Now that I had my Apera, it was game time!
Knowing the casings held about 12 lbs of meat, I started digging in the freezer. I found some pork shoulder, venison from last years late season buck (big nice back strap) & some back fat from a previous project. After trimming, I ended up with 5581g of meat and fat, close enough. Into the freezer that went, while I prepared my seasonings & starter culture. The recipe I followed was based on Two Guys’ pepperoni recipe, only I went with Flavor of Italy starter culture, as it is a fast-ferment culture. I also used cure #1 rather than 2, since this was a semi dry product with a quicker turnaround time. Oh and since I will be smoking this to temp (136) I used non fat dry milk as well.
Ingredients and amounts used:
Venison-845g
Pork shoulder-3055g
Back fat-1681g
Total-5581g
NFDM- 2%
Salt- 2.75
Cure1- .25
Dextrose- .4
Sugar- .3
Black pepper- .3
White pepper- .1
Paprika- .8
Fennel (toasted)- .3
Anise (toasted)- .2
Cayenne- .2
Flavor of Italy 1.25g to 1/2 cup distilled


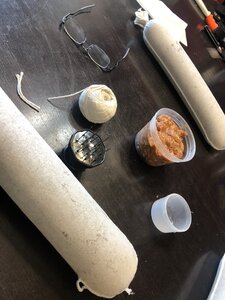
Here’s a look at the casings. You can buy these from the Sausage Maker site. A little pricy (3 for $12, I think) but it makes for a gorgeous product. And they are very user friendly.


My seasoning blend and notes I took along the way. I also took a pic of the fennel. It smelled so good all toasted like that. I highly recommend toasting your aromatics before grinding them.
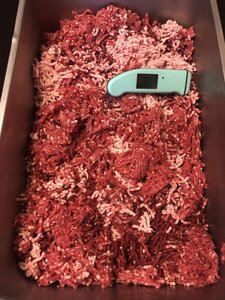
Now it was time to get the meat out and grind. I wanted it as close to frozen as possible. Using a Cabelas #32 with a 4.5mm plate. After grinding, meat was about 31 degrees. Cold enough, but at the advice of others, next time I’ll try and get that even lower.

After mixing, it was time to stuff (sorry no pics, I mix by hand with a timer set so I do it for at least 7-8 minutes), my hands hurt so bad they were swollen for about 15 minutes. I think I was on the verge of frostbite lol.
I then got my LEM Mighty Bite 5lb stuffer, filled the chilled hopper w meat, and got to stuffing. This was about as smooth as I could have hoped for.


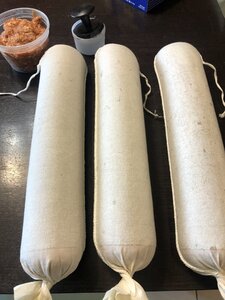
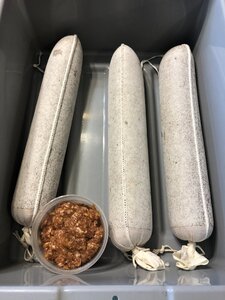
After stuffing I tied them all, pricked them real good and got them ready for fermentation. They were a little too long for my brute fermenting can, so I just used a meat lug covered in Saran Wrap places that into the oven w the oven light on.

I also took the forcemeat that was left over, and placed that into the lug as well, for my ph test sample.

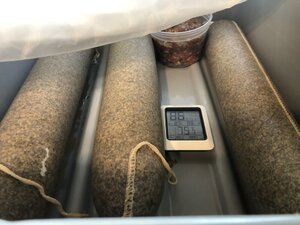
And here they are ready for a 24/hr or so nap.
The next day, after work, I rushed home to check the pepperoni’s ph and get my smoker ready for them to go straight from fermentation to smoking/cooking. I was like a kid at Christmas, with all of his toys out to play with!!
When I peeled back the Saran Wrap, the smell of fermentation and anise was overwhelmingly good!

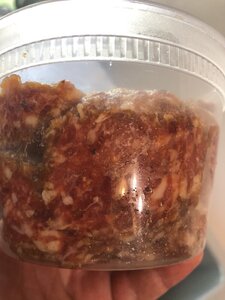
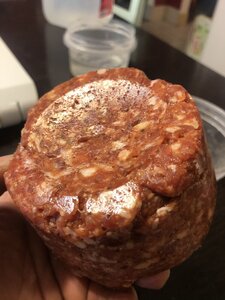
And as you can see the colors were pretty vivid.

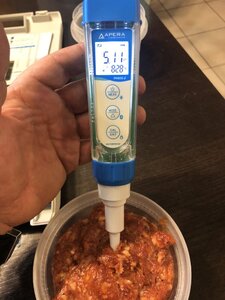
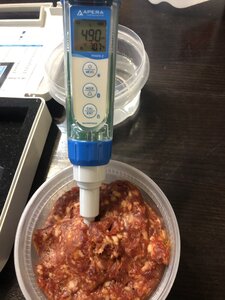
My first test ph was at 5.1. I failed to mention my target ph was 4.9...close, but not quite there. So I went down to the fatboy, got some lump charcoal going and began the process of bringing her up to temp.
One of the main reasons i bought the apera was I liked the fact that you can really dial in your desired ph. I was literally able to set an alarm through the Apera app on my phone, leave the meter in the sample and go about my business! Talk about useful.

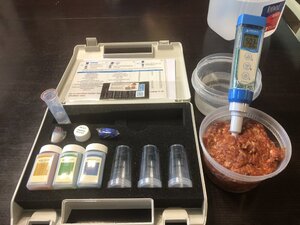
Suddenly, my kitchen looks like a laboratory. Some of my high school teachers would likely be wincing right now at this sight! Never was much for science, my how things have changed!


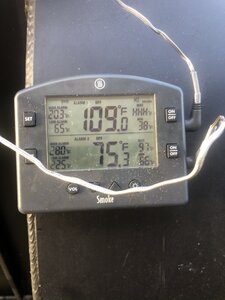
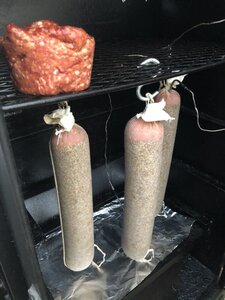
Hit the target ph just in time, smoker temps just right!! I also decided (thanks Inda) to throw the sample in the smoker too. I’m so glad I did that!

Look at the texture & color already from the fermentation!

Into the smoker they go. This process took 9 hours. I gradually increased the temps until I hit 136, and I controlled the temps perfectly. Zero fat rendered out (I will edit this post with the exact smoke schedule when I get in front of my notes). It was almost 4am at this point. I was dead tired, but I ripped a hunk of meat off the sample and it was at that moment that I knew I had a special product, assuming what was in the casings tasted as good as the sample did!! I was yelling with excitement in my back yard. No exaggeration.

Here they are after smoking, and you can see how red the sample is.

Casings already beginning to separate from the pepper.
Now it was time to get them into the drying chamber. But the meat temps were high and I wasn’t keen on the ice bath method given the casing material. So what I decided at that moment was to hang them in my bacon fridge (lower temps than the drying chamber) until I woke up at 8:30 for work (yes you heard that right, up till 5am, at work by 9). They were 53 when I transferred them to the drying chamber.

Hanging out with the bacon...

And into the chamber with the salumis.
Now, my research and studies are ongoing. And after sharing my progress I received different feedback from different folks. Some said not to dry in the chamber but use the lower temp bacon fridge, some said not to dry at all. So, I left one in the drying chamber for a week (it’s still there). The other one I placed in the bacon fridge in a paper bag. The third one got cut into to make sure it was as good as the sample. Even better! So I tossed it in the bag with the other chub and waited until last night to cut, slice, sample and eat. I gotta tell you, this product exceeded my expectations. Not only is it wonderful straight off the chub, but it’s incredible on a pizza as well.


I was so happy with the pepper crust, but equally as happy with my particle definition, and very few air pockets. Hard work finally starting to show through in the finished product.


Dinner time. Cauliflower crust pepperoni pizza. Even my better half said it was the best pepperoni she has ever eaten in her life, better than hormel. She ain’t lying!

And I still have one more chub drying!!
I hope y’all enjoy this thread as much as I enjoyed putting it all together. If I missed anything, I’ll be sure and edit.
On to the pepperoni. Now, I’ve got a few projects already going in my drying chamber, not yet complete. And my chamber has only been running for a little over a month. But things seem to be progressing nicely, and, for my birthday in late August I received an Apera ph meter. So I was eager to start something new. I had read about fast fermented, semi dry sausages while reading The Art of Making Fermented Sausages; and I had three pepper crusted casings that I have been itching to use. Through my countless hours of research I ran across a video by Two Guys, giving ideas for what to make with said casings. Being a pepperoni nut, I knew that was something I wanted to try. But I also felt like dialing in the ph was going to be an important factor. Now that I had my Apera, it was game time!
Knowing the casings held about 12 lbs of meat, I started digging in the freezer. I found some pork shoulder, venison from last years late season buck (big nice back strap) & some back fat from a previous project. After trimming, I ended up with 5581g of meat and fat, close enough. Into the freezer that went, while I prepared my seasonings & starter culture. The recipe I followed was based on Two Guys’ pepperoni recipe, only I went with Flavor of Italy starter culture, as it is a fast-ferment culture. I also used cure #1 rather than 2, since this was a semi dry product with a quicker turnaround time. Oh and since I will be smoking this to temp (136) I used non fat dry milk as well.
Ingredients and amounts used:
Venison-845g
Pork shoulder-3055g
Back fat-1681g
Total-5581g
NFDM- 2%
Salt- 2.75
Cure1- .25
Dextrose- .4
Sugar- .3
Black pepper- .3
White pepper- .1
Paprika- .8
Fennel (toasted)- .3
Anise (toasted)- .2
Cayenne- .2
Flavor of Italy 1.25g to 1/2 cup distilled
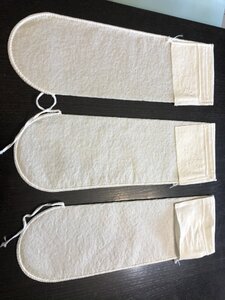
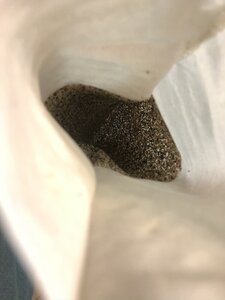
Here’s a look at the casings. You can buy these from the Sausage Maker site. A little pricy (3 for $12, I think) but it makes for a gorgeous product. And they are very user friendly.
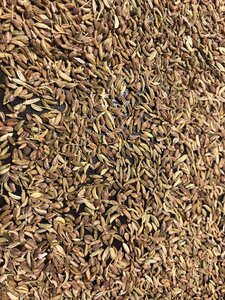
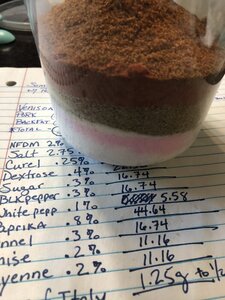
My seasoning blend and notes I took along the way. I also took a pic of the fennel. It smelled so good all toasted like that. I highly recommend toasting your aromatics before grinding them.
Now it was time to get the meat out and grind. I wanted it as close to frozen as possible. Using a Cabelas #32 with a 4.5mm plate. After grinding, meat was about 31 degrees. Cold enough, but at the advice of others, next time I’ll try and get that even lower.
After mixing, it was time to stuff (sorry no pics, I mix by hand with a timer set so I do it for at least 7-8 minutes), my hands hurt so bad they were swollen for about 15 minutes. I think I was on the verge of frostbite lol.
I then got my LEM Mighty Bite 5lb stuffer, filled the chilled hopper w meat, and got to stuffing. This was about as smooth as I could have hoped for.
After stuffing I tied them all, pricked them real good and got them ready for fermentation. They were a little too long for my brute fermenting can, so I just used a meat lug covered in Saran Wrap places that into the oven w the oven light on.
I also took the forcemeat that was left over, and placed that into the lug as well, for my ph test sample.
And here they are ready for a 24/hr or so nap.
The next day, after work, I rushed home to check the pepperoni’s ph and get my smoker ready for them to go straight from fermentation to smoking/cooking. I was like a kid at Christmas, with all of his toys out to play with!!
When I peeled back the Saran Wrap, the smell of fermentation and anise was overwhelmingly good!
And as you can see the colors were pretty vivid.
My first test ph was at 5.1. I failed to mention my target ph was 4.9...close, but not quite there. So I went down to the fatboy, got some lump charcoal going and began the process of bringing her up to temp.
One of the main reasons i bought the apera was I liked the fact that you can really dial in your desired ph. I was literally able to set an alarm through the Apera app on my phone, leave the meter in the sample and go about my business! Talk about useful.
Suddenly, my kitchen looks like a laboratory. Some of my high school teachers would likely be wincing right now at this sight! Never was much for science, my how things have changed!
Hit the target ph just in time, smoker temps just right!! I also decided (thanks Inda) to throw the sample in the smoker too. I’m so glad I did that!
Look at the texture & color already from the fermentation!
Into the smoker they go. This process took 9 hours. I gradually increased the temps until I hit 136, and I controlled the temps perfectly. Zero fat rendered out (I will edit this post with the exact smoke schedule when I get in front of my notes). It was almost 4am at this point. I was dead tired, but I ripped a hunk of meat off the sample and it was at that moment that I knew I had a special product, assuming what was in the casings tasted as good as the sample did!! I was yelling with excitement in my back yard. No exaggeration.
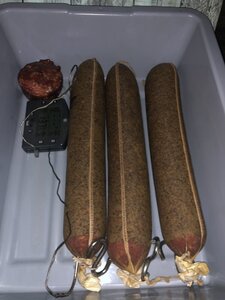
Here they are after smoking, and you can see how red the sample is.
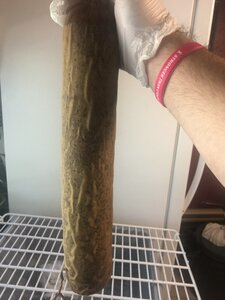
Casings already beginning to separate from the pepper.
Now it was time to get them into the drying chamber. But the meat temps were high and I wasn’t keen on the ice bath method given the casing material. So what I decided at that moment was to hang them in my bacon fridge (lower temps than the drying chamber) until I woke up at 8:30 for work (yes you heard that right, up till 5am, at work by 9). They were 53 when I transferred them to the drying chamber.
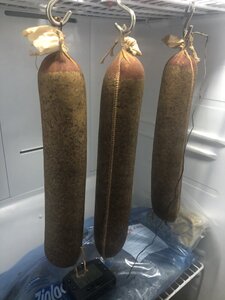
Hanging out with the bacon...
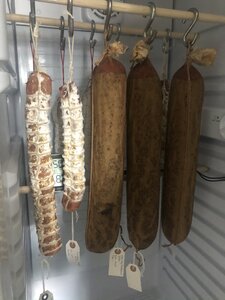
And into the chamber with the salumis.
Now, my research and studies are ongoing. And after sharing my progress I received different feedback from different folks. Some said not to dry in the chamber but use the lower temp bacon fridge, some said not to dry at all. So, I left one in the drying chamber for a week (it’s still there). The other one I placed in the bacon fridge in a paper bag. The third one got cut into to make sure it was as good as the sample. Even better! So I tossed it in the bag with the other chub and waited until last night to cut, slice, sample and eat. I gotta tell you, this product exceeded my expectations. Not only is it wonderful straight off the chub, but it’s incredible on a pizza as well.
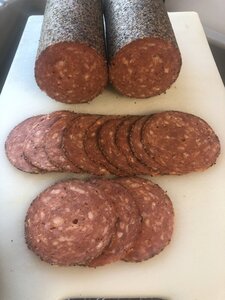
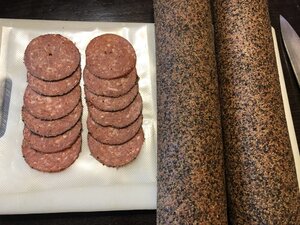
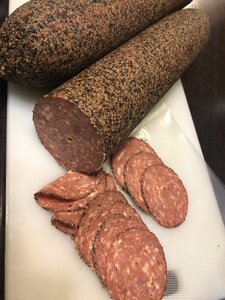
I was so happy with the pepper crust, but equally as happy with my particle definition, and very few air pockets. Hard work finally starting to show through in the finished product.

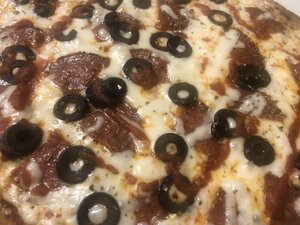
Dinner time. Cauliflower crust pepperoni pizza. Even my better half said it was the best pepperoni she has ever eaten in her life, better than hormel. She ain’t lying!
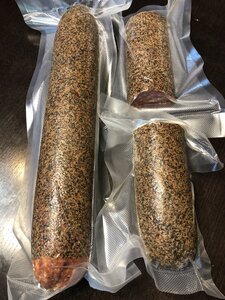
And I still have one more chub drying!!
I hope y’all enjoy this thread as much as I enjoyed putting it all together. If I missed anything, I’ll be sure and edit.


