This has taken a while. No big deal retired anyway with a sort of working POS small smoker anyway.
So the saga begins. Wife suggests converting an old aluminum steamer trunk into a propane smoker since I'm so PO'd at rewiring our electric Centro unit so much. An MES clone I believe.
Nice box about 16 x 24 x 40
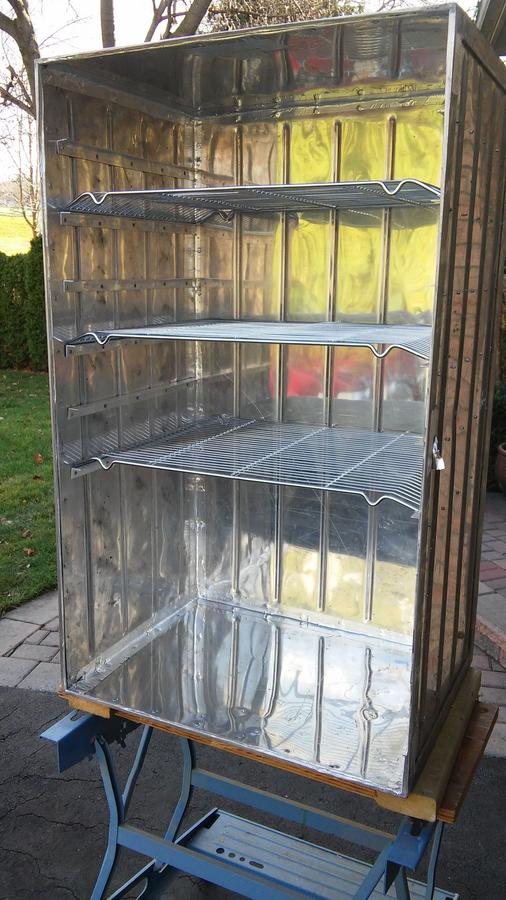
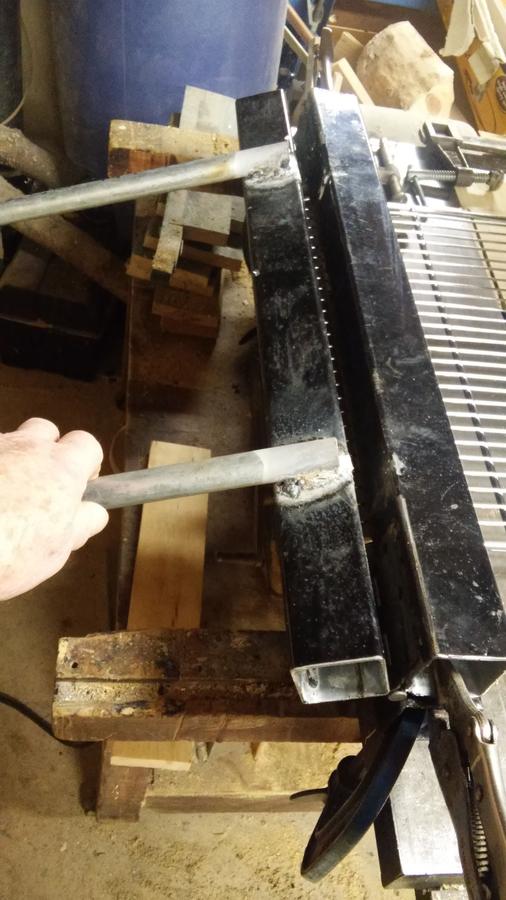
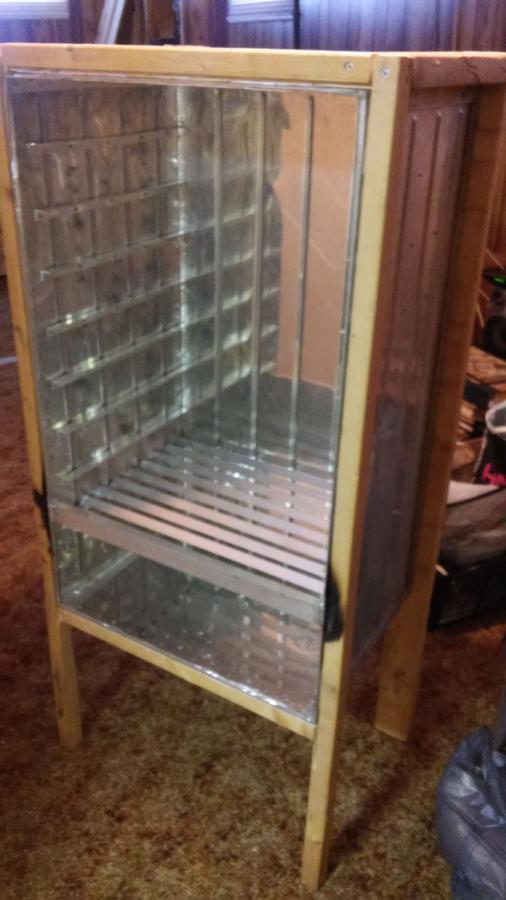
Strip all the hardware, and remove the door. Cut the lip off the main box so wire racks can get in. Attach aluminum angle to support the shelves.
Try and find shelves of the right size. 23 !/2 x 16. Best I can find are 24 x 16. So built a homemade bending brake and bend each end a bit so they fit.
Shelves fit fine.
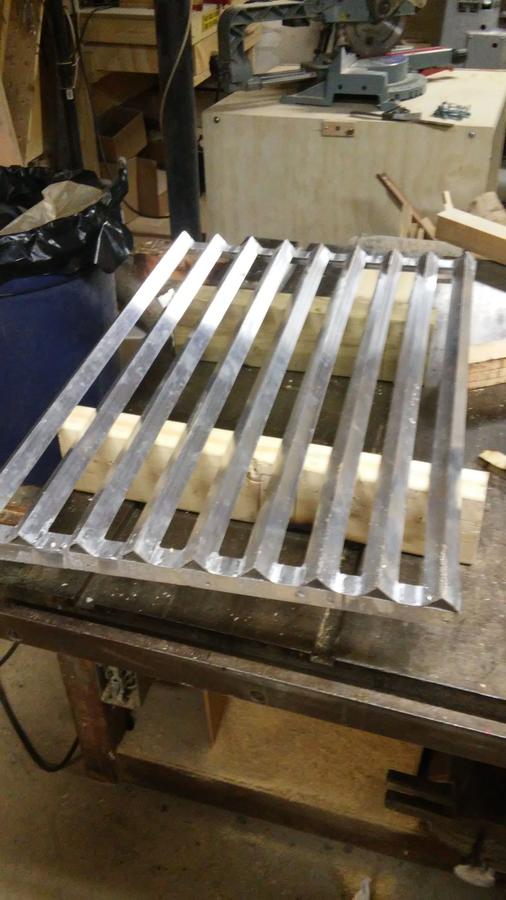
Next build a grate to separate firebox from coking chamber. Aluminum angle soldered together. Yes, soldered with a propane torch.
Then door sawed into 2 pieces. (sorry missed that pic.) Then soldered a bar where the doors would meet to seal against when gasket installed.
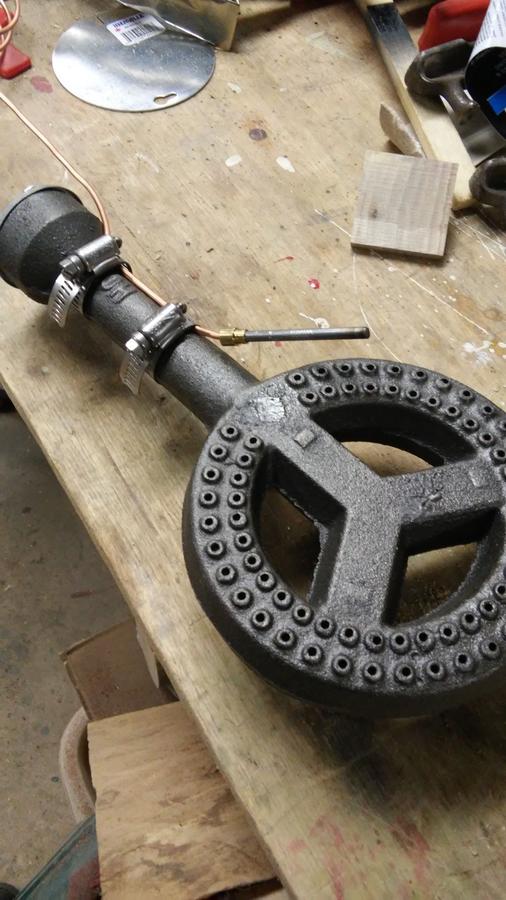
My burner. Turns out it is a little hot. More on that later.
Notice the thermocouple which will go to a safety valve in case the flame goes out. Safety first.
Thanks to GlenWillets for the idea to use the burner as the pilot. http://www.smokingmeatforums.com/t/232758/digital-temp-mod
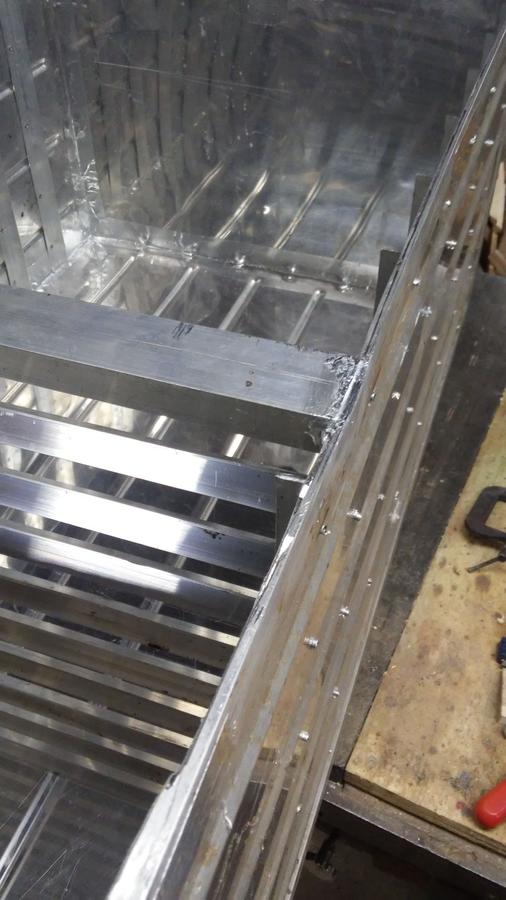
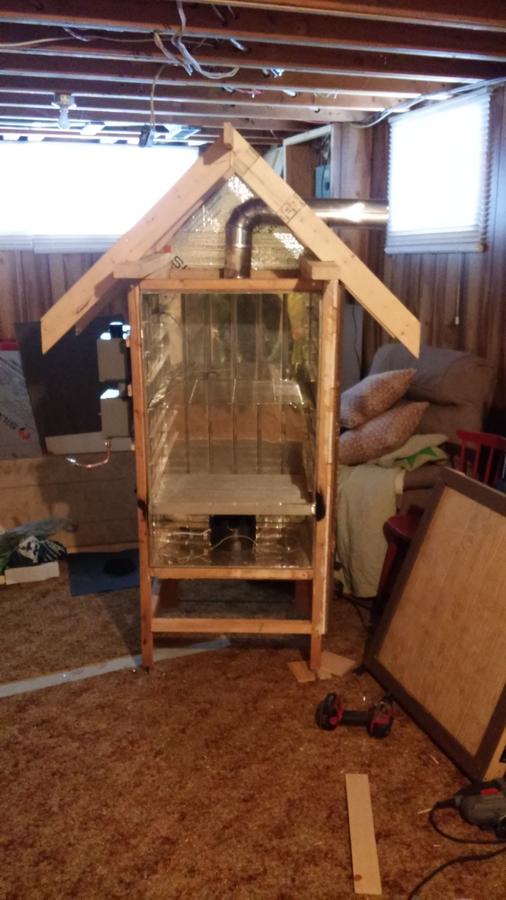
Started to build the carcass around the trunk.
A little charring when I had to repair the solder joints. No structural damage. This is about when I missed taking some pictures. Sorry. Saga continues though.
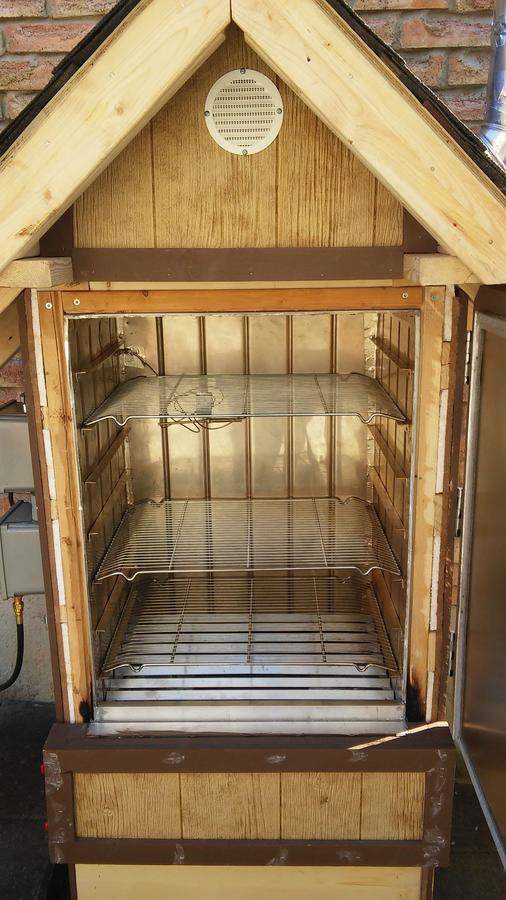
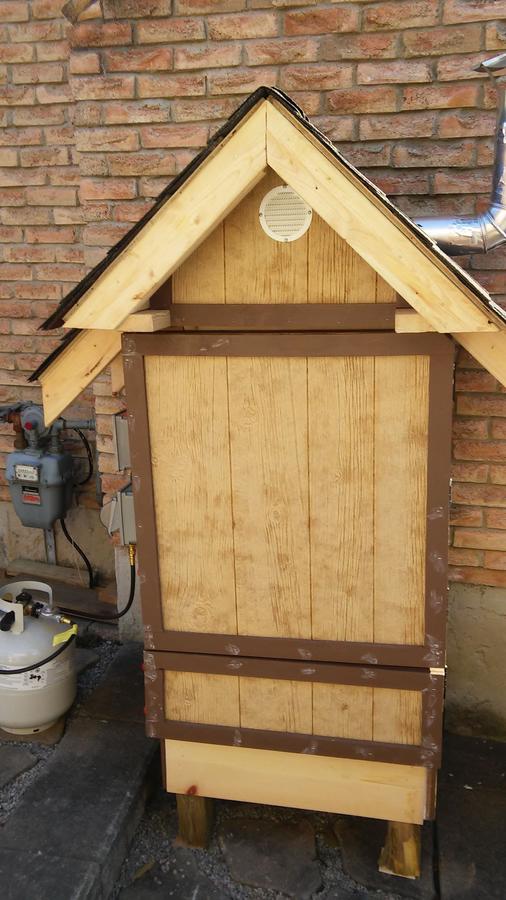
Insulated with 1 1/2 in of Rock wool insulation then 1/2 in. of silverboard. Then covered in 1/2 in. of fiber siding. Total R value of about 12. Doors too. A bit heavy but has good hinges.
All corners edged in walnut stained wood for aethetics.
Still need to stain the rafters but it has become too cold for that right now. No hurry since it's now at least functional. And an utility drawer under the fire box door where there is just a board at the moment to cut down on wind drafts.
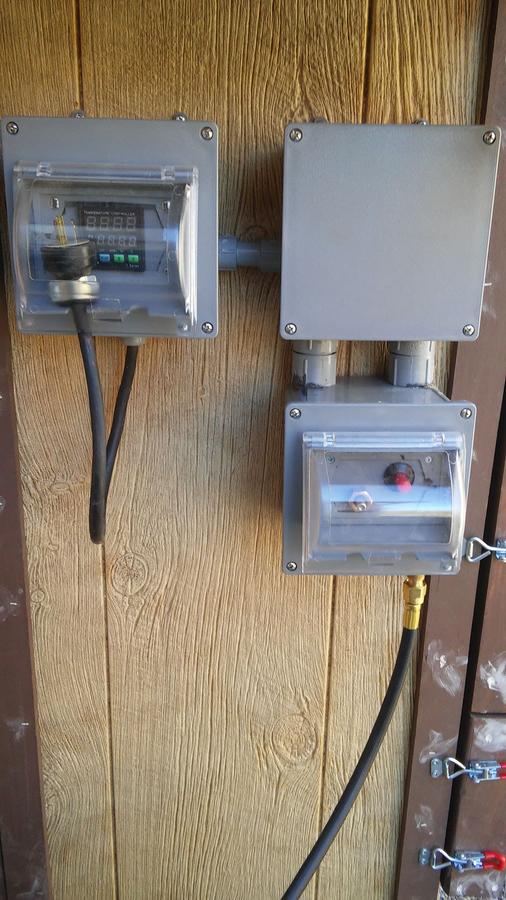
It's controlled by a TA4 pid with a K type thermocouple and a solenoid to control the propane. There is a needle valve controlled bypass around the solenoid to maintain a low pilot like flame. Main line controlled by a safety valve with a thermocouple on the burner in case of flame blow out.
When I tested it, even after adjusting the needle valve down to minimum the low flame generated enough heat and the smoker is so well insulated that I could not maintain any temps lower than 300 F. So I used some aluminum tape to block some of the burner jets as a test. The whole outside ring to be exact. Then I could maintain 160 F easily. High temp silicone in the jets is a semi-permanent solution and the jets can be unplugged if I want in the future.
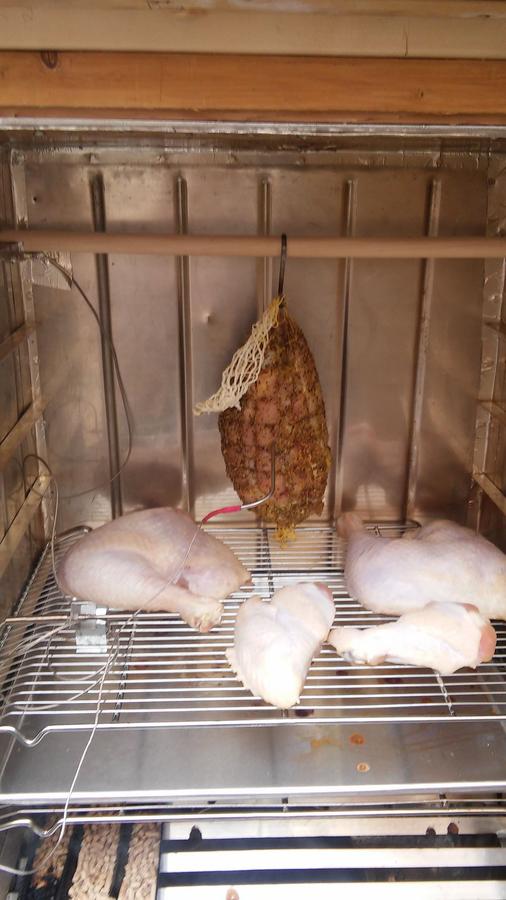
I can use my AMPNS for cold smoking, AMPNS or chunks (in a frying pan) for hot smoking or use just as an oven. I can maintain temps consistently from 160 F to 450 F but don't see ever using the higher temps. Maybe to crisp chicken skin. I can go from 160 to 350 in about 2-3 minutes if needed.
Fun project. There's 7 shelves at 16 x 23 1/2 for a total of 2632 sq. in. of cooking space. More than enough for the 2 of us.
Hope you enjoyed.
So the saga begins. Wife suggests converting an old aluminum steamer trunk into a propane smoker since I'm so PO'd at rewiring our electric Centro unit so much. An MES clone I believe.
Nice box about 16 x 24 x 40

Strip all the hardware, and remove the door. Cut the lip off the main box so wire racks can get in. Attach aluminum angle to support the shelves.
Try and find shelves of the right size. 23 !/2 x 16. Best I can find are 24 x 16. So built a homemade bending brake and bend each end a bit so they fit.
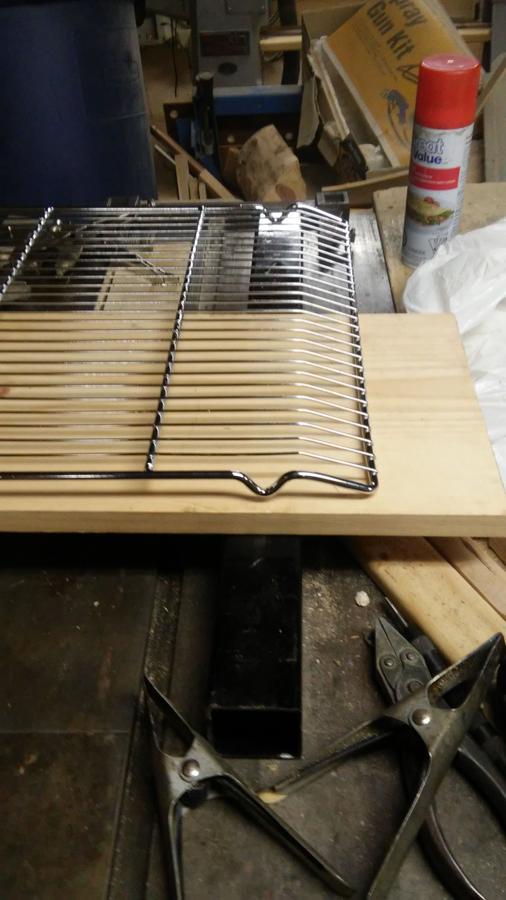
Shelves fit fine.
Next build a grate to separate firebox from coking chamber. Aluminum angle soldered together. Yes, soldered with a propane torch.
Then door sawed into 2 pieces. (sorry missed that pic.) Then soldered a bar where the doors would meet to seal against when gasket installed.
My burner. Turns out it is a little hot. More on that later.
Notice the thermocouple which will go to a safety valve in case the flame goes out. Safety first.
Thanks to GlenWillets for the idea to use the burner as the pilot. http://www.smokingmeatforums.com/t/232758/digital-temp-mod
Started to build the carcass around the trunk.
A little charring when I had to repair the solder joints. No structural damage. This is about when I missed taking some pictures. Sorry. Saga continues though.
Insulated with 1 1/2 in of Rock wool insulation then 1/2 in. of silverboard. Then covered in 1/2 in. of fiber siding. Total R value of about 12. Doors too. A bit heavy but has good hinges.
All corners edged in walnut stained wood for aethetics.
Still need to stain the rafters but it has become too cold for that right now. No hurry since it's now at least functional. And an utility drawer under the fire box door where there is just a board at the moment to cut down on wind drafts.
It's controlled by a TA4 pid with a K type thermocouple and a solenoid to control the propane. There is a needle valve controlled bypass around the solenoid to maintain a low pilot like flame. Main line controlled by a safety valve with a thermocouple on the burner in case of flame blow out.
When I tested it, even after adjusting the needle valve down to minimum the low flame generated enough heat and the smoker is so well insulated that I could not maintain any temps lower than 300 F. So I used some aluminum tape to block some of the burner jets as a test. The whole outside ring to be exact. Then I could maintain 160 F easily. High temp silicone in the jets is a semi-permanent solution and the jets can be unplugged if I want in the future.
I can use my AMPNS for cold smoking, AMPNS or chunks (in a frying pan) for hot smoking or use just as an oven. I can maintain temps consistently from 160 F to 450 F but don't see ever using the higher temps. Maybe to crisp chicken skin. I can go from 160 to 350 in about 2-3 minutes if needed.
Fun project. There's 7 shelves at 16 x 23 1/2 for a total of 2632 sq. in. of cooking space. More than enough for the 2 of us.
Hope you enjoyed.