1950's Crosley Shelvador build

  • Some of the links on this forum allow SMF, at no cost to you, to earn a small commission when you click through and make a purchase. Let me know if you have any questions about this.
SMF is reader-supported. When you buy through links on our site, we may earn an affiliate commission.
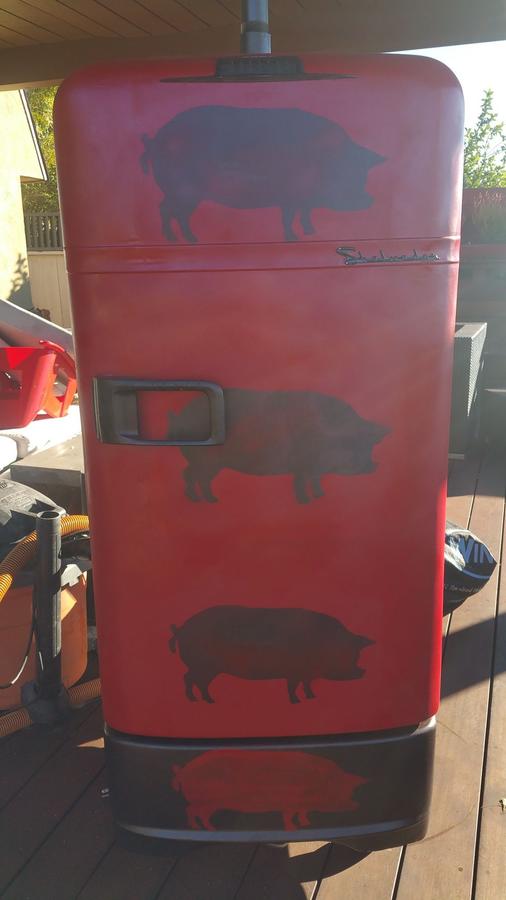
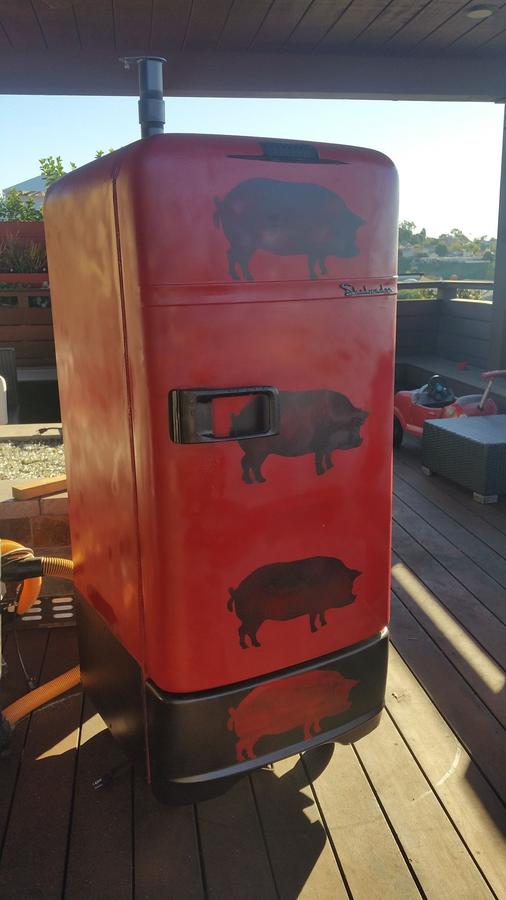
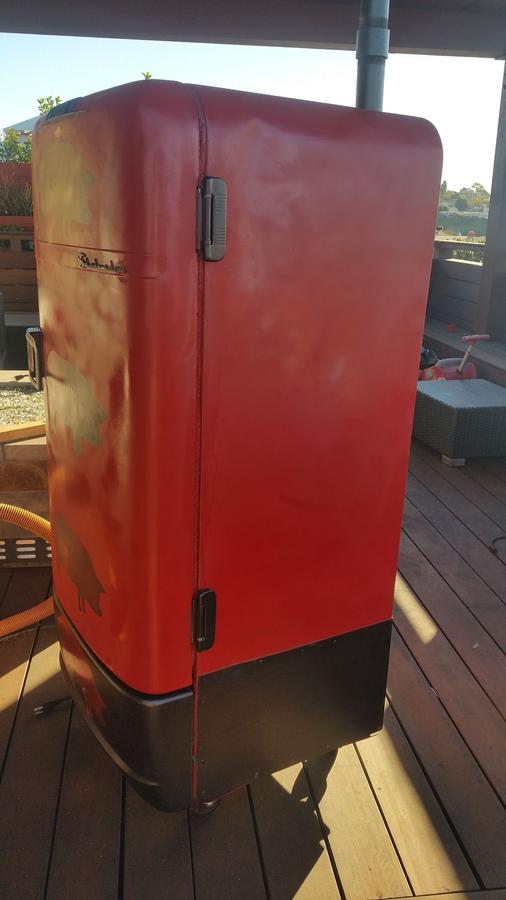
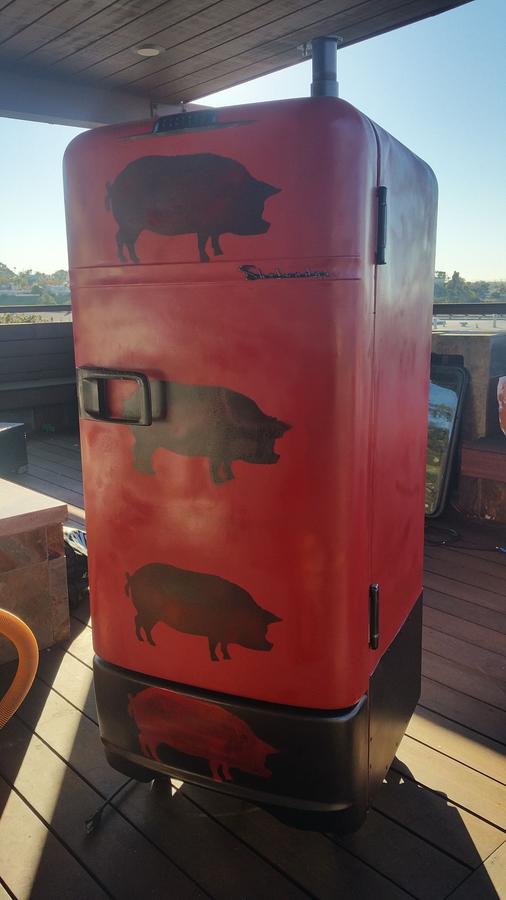
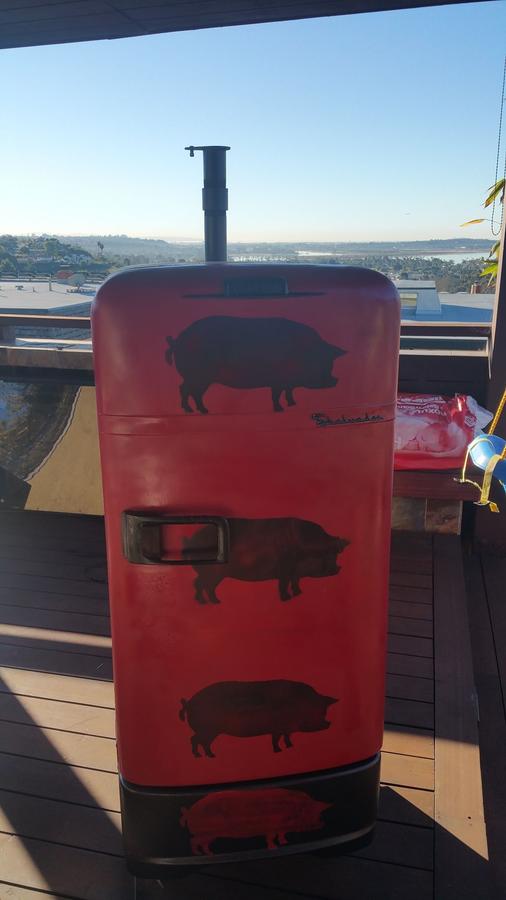
Wow, that is an awesome fridge build. I really like the option to hang sausage or bacon or install shelving too.

Back in the day I had an old fridge smoker I used, the old fridges make such good smokers, there is some nostalgia with them also.

Very cool, thanks for sharing the pics and happy smoking!
 
A question that I have for others...I ordered the same gasket/flange/seal that Scooter ordered and although it fit, there was about a 1/2" gap in between the door and the fridge.  It would definitely seal but I didn't like the fact there was a 1/2" gap.  I am going to order some smaller gaskets to get the gap down.  Is having this gap normal?  When I install the door (with no gasket installed) there is only about a 1/4" or less gap.

Also, I have used all steel (not stainless or anything plated/galvanized/etc.).  This ultimately introduces rust.  Can I assume that (as with other smokers) after I oil everything up and season it with oil, this will stop the rust?  I am assuming so but have never built anything like this and am interested.
 
Last edited:
Nice build thread. I recently picked up 2 old fridges. One is a GE and the other is a Crosley Shelvador. Basically posting so I can refer back to your thread as a reminder to make a spot for the sausage like you have done. Nice work and I like that red with the gray.
 
A question that I have for others...I ordered the same gasket/flange/seal that Scooter ordered and although it fit, there was about a 1/2" gap in between the door and the fridge.  It would definitely seal but I didn't like the fact there was a 1/2" gap.  I am going to order some smaller gaskets to get the gap down.  Is having this gap normal?  When I install the door (with no gasket installed) there is only about a 1/4" or less gap.

Also, I have used all steel (not stainless or anything plated/galvanized/etc.).  This ultimately introduces rust.  Can I assume that (as with other smokers) after I oil everything up and season it with oil, this will stop the rust?  I am assuming so but have never built anything like this and am interested.


It looks like you replaced the liner that was on the door.... When replacing the liner, it is imperative that the liner be fastened with the door in a perfect plane.... How to do that.....

Drill a hole in each corner or the door so you can insert a sheet metal screw... then cross string from corner to corner forming an X in the middle.... shim, tweak or what ever, until the strings are just touching in the center of the X... NOW the door is in plane and will fit the body of the refer and leave no gaps.... CAREFULLY attach the skin without moving the door from it's tweaked position...
 
You asked about seasoning the steel. Yes oil everything up good and high temp season it. I'd use flax seed oil on the racks and bake them in an oven @ 425 for a hour (if they'll fit). I'd do at least three coats on the racks.

Somebody above mentioned puttin a damper on your exhaust. Your exhaust should be wide open when smoking at all times. So no need for a damper.

Maybe I missed it, how are you planning on controlling your burner? Homemade PID or plug in play? I have been looking at Aubers plug n play to control that same burner.

http://www.mementotech.com/newauber/index.php?main_page=product_info&cPath=8&products_id=381
 
Last edited:
I am using an Auber PID controller also.  Mine only has a single probe.  I use my Guru to monitor the temp of the meat/smoker as I can see it anywhere I have an internet connection (call me a geek).

I decided to do a test burn/season yesterday even though I don't have a gasket on the door.  I was pleasantly surprised by the seal b/w the door and smoker (without a gasket).  Smoke definitely escaped but not nearly as much as I thought.  I got the fridge up to about 390 in about 40 minutes.  I kept it there for about 2 hours and the gradually brought it down with the PID  when you look at the door (after the season) you can clearly see where there is a good seal - the metal that was exposed is seasoned and non exposed metal is not.  I hope I do not have any rust issues with this not be seasoned like the rest of the door.  Not sure if I am explaining this in a manner that others will understand.  I am talking about the area where the door meets the smoker...the flat metal piece on the inside of the door and the flat metal trim pieces around the door.  I will get a picture when I can to better describe it.

I ordered several different sizes of gaskets from mcmaster (love that store) and I will return the ones I don't need.  It is better to me to spend a little more on a shipping return than have to make numerous orders to get what you need.  I hope to finish the door seal and the paint job this weekend.  This project is taking way too much time!!!
 
So, I have been lazy and not uploaded the final smoker pictures.  No excuses!

Smoker is working great.  Fired it up for some ribs last weekend.  It also works as a great warming box/oven for those large Thanksgiving dinners.

Having a good PID controller makes huge difference.  Allows you to set it and forget it.

I didn't want the pig images to be perfect so I painted over them with a little of the red/black metallic paint.  Gives it a little 'worn' look.

Enjoy...


  • Like
Reactions: dirtsailor2003
 
Here is where things start to get challenging.  I am very happy with the left and right inner trim pieces.  The top and bottom pieces (and where the 4 meet each other) are not perfect...but as this is my very first time doing something like this...it will have to do!

I am using high temp food grade silicone for the seams.  I have read so many different posts if the high temp permatex (red) is food safe (and if I even need to worry about it being food safe) so I decided to go with food grade silicone.  I am still using the permatex on seals that would not be in the 'inner' cooking area.  Again, not perfect...but will definitely do!


This is all I have for now.  I hope to get the bottom steel plate on and then the 3" casters today.  I also plan on putting on a couple of coats of paint.  I will then be traveling for work all next week so don't expect anymore pictures for a week (after today).  

Always looking for any comments/suggestions.
How does the plastic trim that goes over the shell come off? I'm thinking about having someone fab the trim like you did in one piece, are you satisfied with the way the sheet metal turned out? And was it difficult to put the shell back in with the new insulation?
 
Like the plate above the element, looking to use a small 240v. commercial oven element with a oven thermostat similar to the cold smoker I built.
 
mtfallsmikey,

Hopefully these pictures help with your build.  Reviewing pictures from a previous Crosley really helped me.  I took a ton of pictures during the tear down and 100% referenced those over and over during the rebuild.

Am I satisfied with the sheet metal - short answer is yes.  It was the first time that I work with sheet metal like this.  I consider myself a handy person and you only learn to do things by trying them first (and TONS of research via Google/this site).  Does it look perfect - no.  Does it function/work as desired - yes.  Putting the metal on the door was pretty straightforward.  Cutting the pieces used for the trim and then bending it to fit the needed trim/molding was another learning process.  One of the problems/challenges is the inside of the fridge is not 100% square.  Where the inner walls meet each other there is a line/bump.  It appears it is a weld holding the pieces together but I am not 100% sure.This doesn't allow the trim/mold pieces to meet each other at a 90 degree angle.  For mine, I left a small gap b/w these pieces and filled it with food grade high temp silicone (the red stuff inside the fridge).  Hopefully this makes sense.  If you have 1 piece fabbed this might cause some issues.  Check yours out after reading this and see if you have the same thing/this makes sense.

For metal fabrication I highly suggest a good jig saw with good blades and a grinder with a metal smoothing blade.  After cutting I always used the smoothing blade to take the edges off the metal.

For the plastic trim piece - it pops right out with a little tug after taking all the screws out.

I am using a Brinkman 1500W element (120).  It is plenty for this fridge and will heat it up.  During season I took it 400.
 
I removed the compressor/coil this weekend, lightened it enough so I could put it on a furniture dolly.. the plastic trim on the inside (surrounding the inner case, not the door) does not appear to have any screws in it, will probably break it off to get it out. Not sure why yours did not have the case extending down the sides, you built a skirt around the bottom, won't have to do that on mine. anyway, won't be ripping it apart anymore until after the holidays, thanks again for all of the pics and details!
 
mtfallsmikey, the skirt that I build around the bottom was only for looks.  I wanted something on the bottom to break up the look a little.  If you look at the bottom of the fridge in earlier pictures you will see that the side goes all the way down.  Make sense?  Good luck!
 
SmokingMeatForums.com is reader supported and as an Amazon Associate, we may earn commissions from qualifying purchases.

Latest posts

Hot Threads

Clicky