Let me start by saying that I am far from an expert in just about everything, including the skills used in this build and especially the art of smoking. I welcome any and all feedback!! Follow along as I bumble my way through this build and learn with me as I figure out what works and what doesn't!
Origin Story:
I had been researching smokers for a while and was starting to get that itch.......the itch of a man that "needs" a new toy. I really wanted to do a fridge build, and still do, but about the same time, I got a good friend to buy a GMG Boone Prime. What a lovely piece of cooking tech! More research........and more research..........Rec-Tec and Pit Boss and Traeger, oh my! But alas, I have always had champagne tastes on a beer budget. Even a solid $500 grill seemed to be a stretch. That's when that little DIY light started blinking! Then this happened.......https://www.smokingmeatforums.com/threads/pellet-pro-hopper-offset-build.294456/#post-2045638
This will be the second chapter of that story.
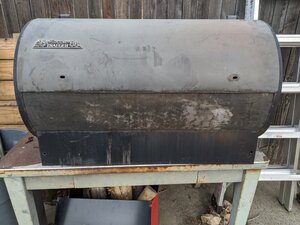
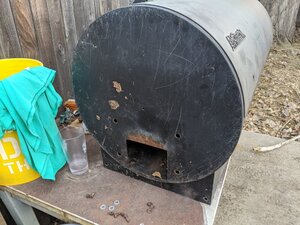
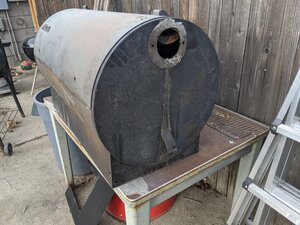
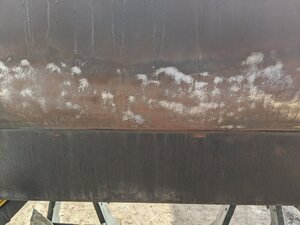
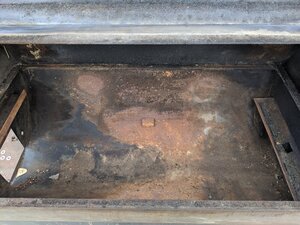
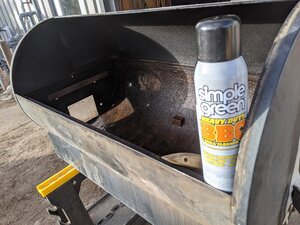
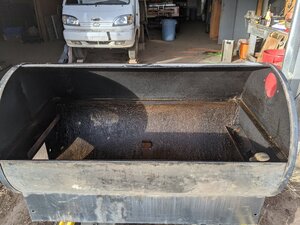
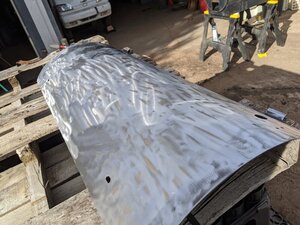
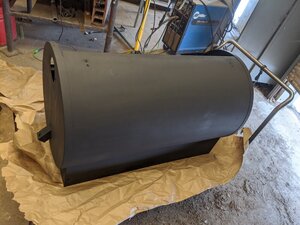
I found a used Traeger Texas 34 body on Craigslist for $25 and got to work! Started by stripping off as much rust and peeling paint as I could.


After a few emails with their customer service folks, I jumped on to https://smokedaddyinc.com/ and ordered up the following
NOW THE FUN BEGINS!
This is where it becomes more of a build than just an assembly. I had seen all of the fancy extra options that existed in pellet grill land; the sear stations, the extra probe ports, the upgraded grill grates, pellet dumps, and the like. Naturally, I wanted some of them!
The first "extra" I wanted was a way to get some direct searing much like what Pit Boss has on some of their grills. Except I have a drip pan and a diffuser.....So, taking inspiration from RCAlan, I set out to make a sliding diffuser!
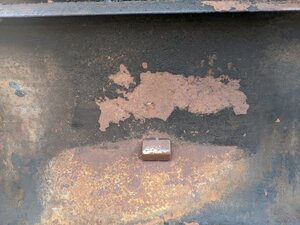
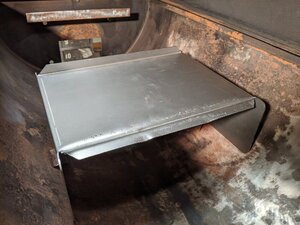
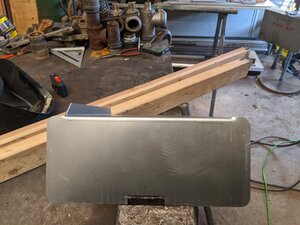
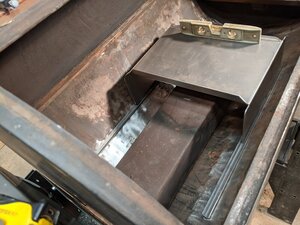
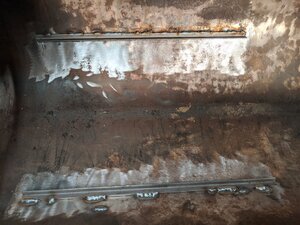
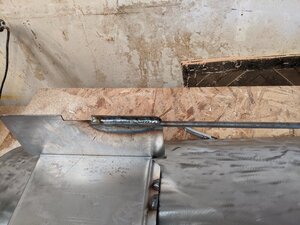
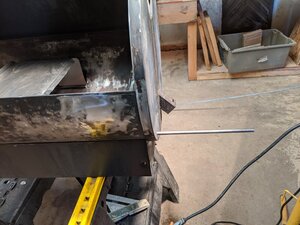
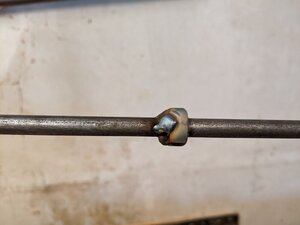
The first job was to cut out the little angle brackets the hold the diffuser in place, easy enough. Next was to add some rails for the diffuser to slide on, easy job for some 1/4" angle iron. After mocking up the spacing needed I welded those in place. Then I got some 3/8"(I think) rod for the sliding handle, welded it to the diffuser and drilled a hole for it in the grill body. I did do some test fitting before this and found that there was slight interference with one of the lips or flanges of the diffuser and the bottom of the drip pan so I threw the diffuser into the shop vice and made an adjustment. Basically just taking the 90deg bend and making it flat. I planned to have the handle of the diffuser rod act as my travel limit stop for pushing it away from the burn pot and welded up a nut to act as a travel limit stop when pulling the diffuser back over the burn pot.


Now for the drip pan!
Apparently I felt it wasn't necessary to take pictures of this part of the build but I'll do my best to explain and post some photos later.
This part was fairly easy, cut a hole about the size of the burn pot into the center my nice new drip pan haha! I made a square hole about 5"X5" with an angle grinder, so no....not that pretty. Then I cut a matching size square out of another, similar-gauged sheet steel, welded a bit of that 3/8" rod to it to make a handle and drilled another hole in my grill. This matching size square will be my "Direct Sear Hatch!" or a mimic of the Pit Boss Broiler Slider, whatever you want to call it. Also, I added two little retaining bits to the bottom of the drip pan for the hatch to rest on when covering the area above the burn pot.
Grill Grates were next and again, no photos of the build...........IDIOT! I'll at least get better photos up soon after posting.
These were also fairly easy and straight forward. weld up three grates using leftover 1/4" angle iron, some flat bar, and a few sheets of expanded metal from The Home Depot https://www.homedepot.com/p/Everbil...n-Plain-Expanded-Metal-Sheet-801427/204225784
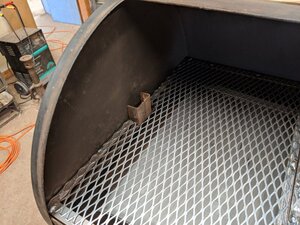
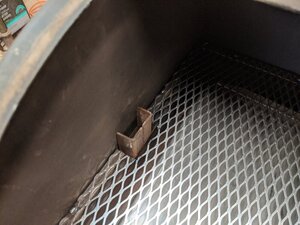
After test fitting, I realized that the spot for the controller's temp probe was obstructed by my custom grates so I made a minor adjustment to the right side grate and added some protection for the probe using the two little pieces of angle that originally held the diffuser in place.


Home Stretch!!!! Paint and handles.
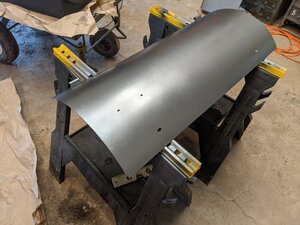
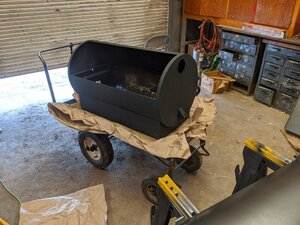
Painting was quick and easy. I'll probably add a few more coats this summer when the weather's nice but this job will certainly last the year. I used the Rust-Oleum High Heat paint for the body https://www.autozone.com/paint-and-...m-hi-heat-bbq-and-stove-paint-12oz/631973_0_0 and some VHT high temp engine enamel for the lid https://www.autozone.com/paint-and-body/engine-paint/vht-cast-iron-engine-paint-11oz/464602_0_0


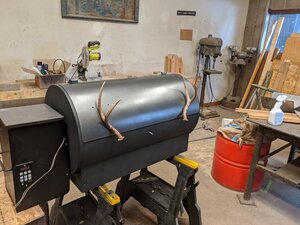
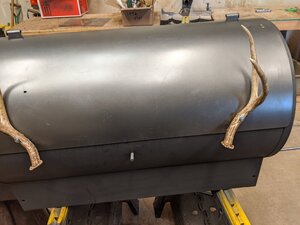
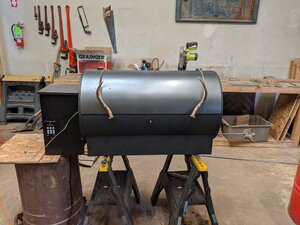
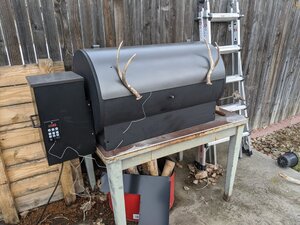
For the lid handles, I utilized the antlers from last year's forky buck. For the diffuser slider, I had the antlers from my first elk, which had broken off his left side, so I threaded the 3/8" rod, drilled out and glued a nut into the base of the broken antler and boom! Perfect handle! I still need to find a handle/knob for the sear hatch so for now, oven mitts or hot pads will be the way to go.


I don't know if video clips can be uploaded here but here is the quick one I made and posted to Reddit.
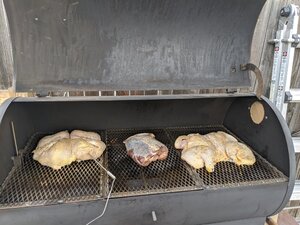
Got it all assembled and back home! Did a good burn-in and got some stuff ready for the maiden voyage.


There are many updates that will be made and I'm sure this build is far from finished. Thanks for reading and following along!
Origin Story:
I had been researching smokers for a while and was starting to get that itch.......the itch of a man that "needs" a new toy. I really wanted to do a fridge build, and still do, but about the same time, I got a good friend to buy a GMG Boone Prime. What a lovely piece of cooking tech! More research........and more research..........Rec-Tec and Pit Boss and Traeger, oh my! But alas, I have always had champagne tastes on a beer budget. Even a solid $500 grill seemed to be a stretch. That's when that little DIY light started blinking! Then this happened.......https://www.smokingmeatforums.com/threads/pellet-pro-hopper-offset-build.294456/#post-2045638
This will be the second chapter of that story.
I found a used Traeger Texas 34 body on Craigslist for $25 and got to work! Started by stripping off as much rust and peeling paint as I could.
After a few emails with their customer service folks, I jumped on to https://smokedaddyinc.com/ and ordered up the following
- PID Controller Upgrade https://smokedaddyinc.com/product/pellet-pro-exclusive-pid-controller-pellet-grill-upgrade/
- Auger Upgrade https://smokedaddyinc.com/product/2rpm-auger-motor-0-4amp/
- 13 Gauge Diffuser https://smokedaddyinc.com/product/oem-replacment-heat-diffuser-heavy-duty-10-gauge/
- Large Drip Pan https://smokedaddyinc.com/product/oem-replacement-drip-pan-heavy-duty-11ga/
NOW THE FUN BEGINS!
This is where it becomes more of a build than just an assembly. I had seen all of the fancy extra options that existed in pellet grill land; the sear stations, the extra probe ports, the upgraded grill grates, pellet dumps, and the like. Naturally, I wanted some of them!
The first "extra" I wanted was a way to get some direct searing much like what Pit Boss has on some of their grills. Except I have a drip pan and a diffuser.....So, taking inspiration from RCAlan, I set out to make a sliding diffuser!
The first job was to cut out the little angle brackets the hold the diffuser in place, easy enough. Next was to add some rails for the diffuser to slide on, easy job for some 1/4" angle iron. After mocking up the spacing needed I welded those in place. Then I got some 3/8"(I think) rod for the sliding handle, welded it to the diffuser and drilled a hole for it in the grill body. I did do some test fitting before this and found that there was slight interference with one of the lips or flanges of the diffuser and the bottom of the drip pan so I threw the diffuser into the shop vice and made an adjustment. Basically just taking the 90deg bend and making it flat. I planned to have the handle of the diffuser rod act as my travel limit stop for pushing it away from the burn pot and welded up a nut to act as a travel limit stop when pulling the diffuser back over the burn pot.
Now for the drip pan!
Apparently I felt it wasn't necessary to take pictures of this part of the build but I'll do my best to explain and post some photos later.
This part was fairly easy, cut a hole about the size of the burn pot into the center my nice new drip pan haha! I made a square hole about 5"X5" with an angle grinder, so no....not that pretty. Then I cut a matching size square out of another, similar-gauged sheet steel, welded a bit of that 3/8" rod to it to make a handle and drilled another hole in my grill. This matching size square will be my "Direct Sear Hatch!" or a mimic of the Pit Boss Broiler Slider, whatever you want to call it. Also, I added two little retaining bits to the bottom of the drip pan for the hatch to rest on when covering the area above the burn pot.
Grill Grates were next and again, no photos of the build...........IDIOT! I'll at least get better photos up soon after posting.
These were also fairly easy and straight forward. weld up three grates using leftover 1/4" angle iron, some flat bar, and a few sheets of expanded metal from The Home Depot https://www.homedepot.com/p/Everbil...n-Plain-Expanded-Metal-Sheet-801427/204225784
After test fitting, I realized that the spot for the controller's temp probe was obstructed by my custom grates so I made a minor adjustment to the right side grate and added some protection for the probe using the two little pieces of angle that originally held the diffuser in place.
Home Stretch!!!! Paint and handles.
Painting was quick and easy. I'll probably add a few more coats this summer when the weather's nice but this job will certainly last the year. I used the Rust-Oleum High Heat paint for the body https://www.autozone.com/paint-and-...m-hi-heat-bbq-and-stove-paint-12oz/631973_0_0 and some VHT high temp engine enamel for the lid https://www.autozone.com/paint-and-body/engine-paint/vht-cast-iron-engine-paint-11oz/464602_0_0
For the lid handles, I utilized the antlers from last year's forky buck. For the diffuser slider, I had the antlers from my first elk, which had broken off his left side, so I threaded the 3/8" rod, drilled out and glued a nut into the base of the broken antler and boom! Perfect handle! I still need to find a handle/knob for the sear hatch so for now, oven mitts or hot pads will be the way to go.
I don't know if video clips can be uploaded here but here is the quick one I made and posted to Reddit.
Got it all assembled and back home! Did a good burn-in and got some stuff ready for the maiden voyage.
There are many updates that will be made and I'm sure this build is far from finished. Thanks for reading and following along!


