Old fridge - slow build will start soon

  • Some of the links on this forum allow SMF, at no cost to you, to earn a small commission when you click through and make a purchase. Let me know if you have any questions about this.
SMF is reader-supported. When you buy through links on our site, we may earn an affiliate commission.
Few weeks ago my dad asked me if I needed to borrow his angle grinder for the project; told him I have 5 already.

When he asked why I have 5, I explained that I despise having to switch between various abrasives on angle grinders - so I got one for each kind.

He laughed at me.
Ok, so I don't have 5, but 2 small and 1 bug one. But you're right, saves alot of time! Ooopppsss, add 1 more...have a cordless one as well!

Ryan
 
Since the last update:
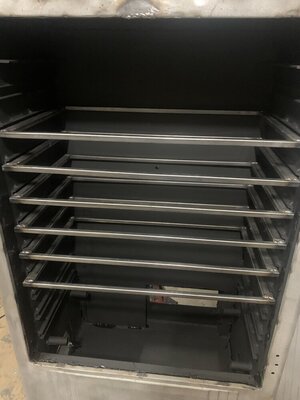
-All rack supports are fully welded in place
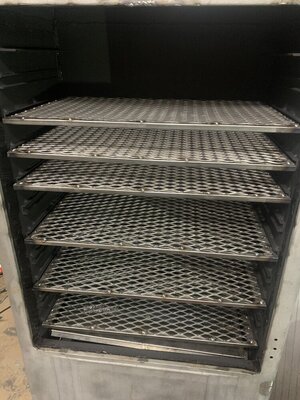
-Rack frames are built (been lazy on cutting up the expanded metal)
-Interior is painted & all inner seams are sealed

Racks will NOT be painted; the paint I've been using is food safe for the inside of the cabinet, however it is NOT food safe for food contact surfaces.

Used 1x1/2 & 1/2x1/2 for the racks. Slides in and out about perfectly.

Racks are 25" wide and 14" deep - I'll be cutting the mesh to 24"x14" so that I can get as much out of my 48"x48" sheet of mesh as possible.

6 racks for now, I have room to build 4 more later if I need them.

94EFFDB7-B559-42C9-BA71-A72CE059CB0D.jpeg
 
Felt like a slacker by not finishing the racks.

Better

21E99D89-6816-4E3E-A6BE-2D442B212508.jpeg

They are a bit too clean tho :emoji_laughing:
 
  • Like
Reactions: DougE
Will be longer than I'd like. Have a lot of body work to do still. Also waiting on the re-made hinges to finish up; buddy has been super busy at his shop. Not something I'm capable of making with the equipment & experience I have.

Need the humidity to drop a bit more before I even consider painting it; it's been brutal here lately.
 
Well, I'm still around... surgery went off without a hitch. Doctor specifically ordered me NOT to work on the smoker till further notice tho.

Damnit
 
great news about your surgery!! hang in there, hopefully it won't be too long till you can work on your smoker!!
 
Well, I haven't forgotten about this site... or the smoker.

Finally recovered enough from the surgery, but now I'll be starting a new job soon (was retired almost a year, I can't stand it).

The hinges were in worse shape than I originally thought. Took them to a friend who works at a machine shop, he's going to rebuild them for me - he's just really busy and hasn't gotten to them yet.

Will update as progress is made - there is just a hold-up still.
 
  • Like
Reactions: Brokenhandle
That was a fun read catching up
I’ve got an old fridge in the garage intended for a smoker cabinet
Maybe I’ll just purchase something ….?
Nice build and write up
 
I haven't forgotten about this project (the wife has ensured that!). Wrist is about 90-95% - still having some issues that were not planned on.


Still waiting on my buddy to make the hinges so I can start buttoning some things up. He had some stuff happen in life - family comes first, so... I'll wait patiently for him to have time again.
 
  • Like
Reactions: indaswamp and DougE
Welp, time to bring this thread back from the dead. Lot has happened in the past year, but I finally got my hinges done last week. Will hopefully have some time around the holidays to wrap this thing up!
 
Welp, time to bring this thread back from the dead. Lot has happened in the past year, but I finally got my hinges done last week. Will hopefully have some time around the holidays to wrap this thing up!
Wow! I can’t wait to see the finished product. I’ve been following this since you started.

Fred
 
Well, it was nice to get working on the project again. Got the hinges installed in the door, and did a lot of tac welds today that’ll get ground flush to keep things looking decent. Then time for some body filler, primer and then paint.

Looking at my check list there isn’t a ton of stuff left, but I’m going to take my time so that it’s fun and doesn’t turn into a chore.

Hopefully I can finish it in 2023.
 
  • Like
Reactions: cashnow
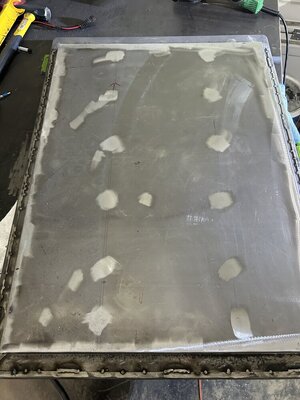
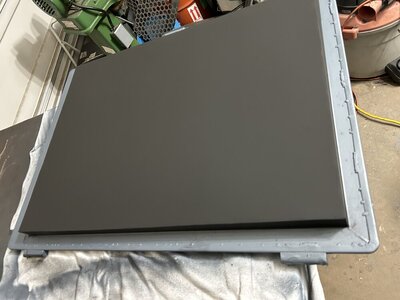
Painted the outside of the door, primer, 3 coats of color using thin coats to prevent drips, then 2 coats of clear. Then flipped it over and laid it on a pile of soft towels to keep from screwing up the finish….

Put the logo in place. Waiting for some high temp caulking to get here (my old stash is mia, probably due to a garage clean out months ago). Going to seal the logo to the body with the caulk so that there is no risk of water ingress into the door.

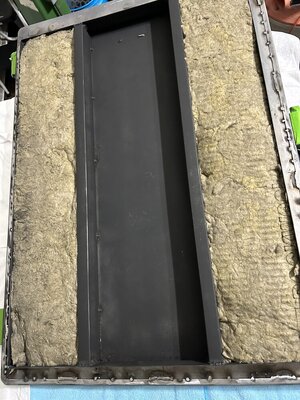
Then a strip of insulation gets put in place and capped off with some 16ga sheet.

Once capped, I’ll smooth some areas out with the caulking, paint the inside of the door and then start the body work on the smoker.

Looking more and more like this will be Cookin in 2023!

IMG_9202.jpeg
IMG_9212.jpeg
 
Some more work this weekend.

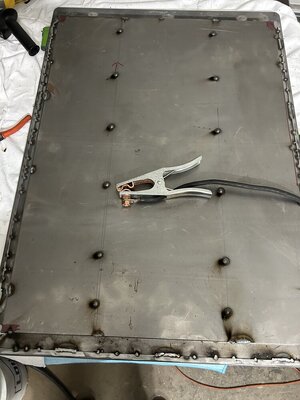
Got the cover panel on the door, aside form welding the edges in, also spot welded it to the supports internal. Painted the outside of the door the blue and the inside portion black to match the rest of the cabinet.

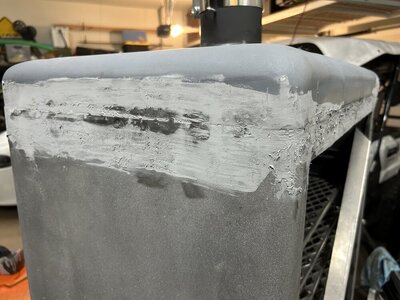
After knocking some welds down, applied lab metal (high temp) to fix a dent in the lid and finish sealing the top to the body. The old/thin metal did NOT respond well to welding, so this was after than burning holes everywhere.

With luck, next weekend I’ll have the lab-metal knocked down smooth & get the cabinet painted!


IMG_9221.jpeg

IMG_9235.jpeg

IMG_9237.jpeg

IMG_9236.jpeg


My welding hasn’t gotten that much better, but my grinding skills are on point! 😂
 
SmokingMeatForums.com is reader supported and as an Amazon Associate, we may earn commissions from qualifying purchases.

Latest posts

Hot Threads

Clicky