Old fridge - slow build will start soon

  • Some of the links on this forum allow SMF, at no cost to you, to earn a small commission when you click through and make a purchase. Let me know if you have any questions about this.
SMF is reader-supported. When you buy through links on our site, we may earn an affiliate commission.

strikerfired

Fire Starter
Original poster
Feb 7, 2016
61
73
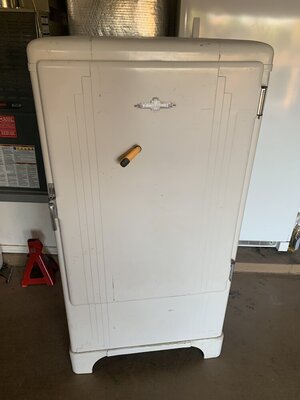
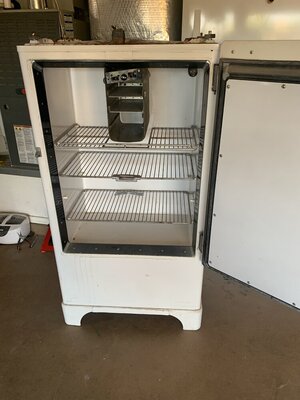
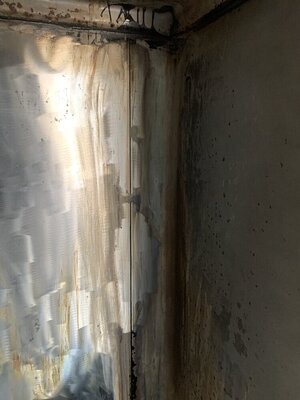
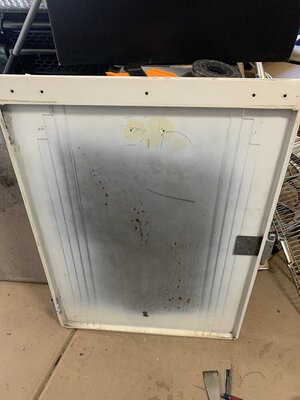
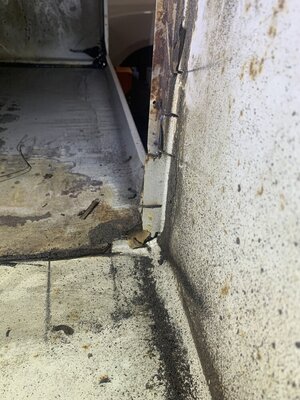
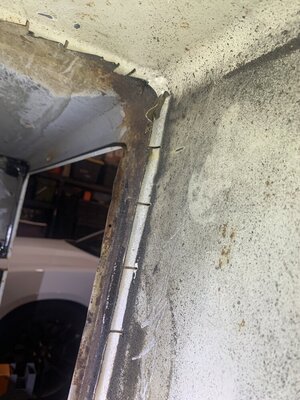
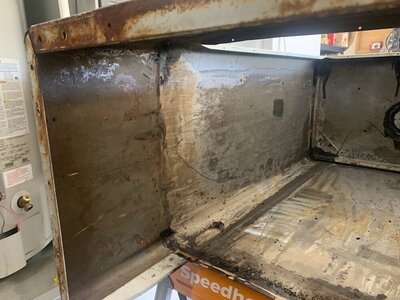
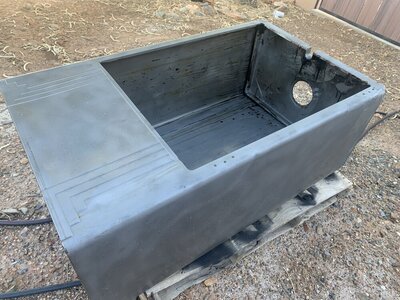
Found an old fridge locally that I'm going to use to build a new smoker. Was originally thinking of building one from the ground up, but I couldn't build a cabinet for what I picked this thing up for.

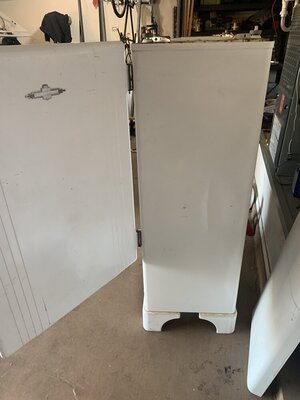
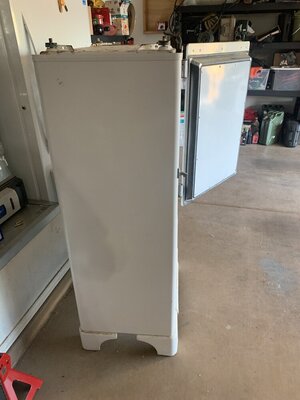
Whole body is steel, inner panels are steel as well. The compressor parts have already been gutted... previous owner was just using it to store beer in on their porch.

The plan as of today:
-Sandblast the entire thing to remove old paint and rust
-Body work a few dents out
-paint with high temp paint; current planned theme is more like an old hot-rod with a flame paint job (cuz.... why not?)
-remove all insulation and replace with high temp type.
-extend the bottom down to increase chamber size; where the compressor used to be.
-put some ~6" casters on the bottom with re-enforcements to keep the legs from folding in. I want to be able to move it pretty easily.
-Cold smoke tube on the right side
-pellet hopper on the left side
-4" exhaust with a damper installed to control air flow for fine tuning the heat/smoke.
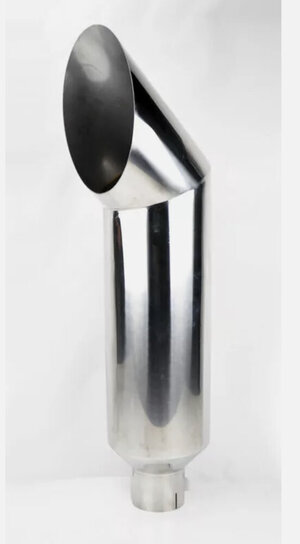
-Over the 4" exhaust, I'll use a "smoke stack" exhaust tip, the type you see on some diesel pickup trucks rollin around. It'll be an 8" diameter pipe, however it'll just be for looks.. the 4" pipe will continue through it for flow purposes.

Once I get it apart, I'll see what kind of re-enforcements will be needed on the sides to support the shelves. Plan on welding in some steel to aid in support, as needed. Current plan is to have as many shelves as I can stuff in there, 3-4" apart. Will be using this to smoke large batches of jerky, sausage, etc.

This will augment my Yoder 640; as sometimes it just doesn't have enough room. Really happy with that smoker otherwise.

D347B1CF-1AB7-4C89-A159-30E8A964C620.jpeg

D538B9FD-3965-49A0-B843-36E8C66E705C.jpeg

5975E384-4AC2-435E-99C4-6B6115E943C4.jpeg

8779AC88-0778-4541-8B8B-726C445BB20F.jpeg
 
SF, I'm guessing that all shelves will be removable for cleaning, and more space for taller items like pork butts or sausage hanging?
 
The shelves will slide in and out with some stops built in, and yes be removable for taller items.

I've smoked a brisket and 4 pork shoulders at once on my Yoder. Outside of big batches of jerky (I tend to make 15-25 pounds at a time) and large batches of kielbasa, I don't plan to use this thing too terribly much. I do plan on hanging sausages when smoking, so the shelves will be removed at that point. I have a big plastic storage bin (like what people would use for pool toys) that I store my BBQ "overflow equipment" in currently. Would just throw the extra shelves in there as needed.


I decided to tear into it a bit today. Felt like there was a million common-head screws in the thing... which figures, I hate common head screws.

Got the inner tub out and was happy to find non-asbestos insulation. I was really worried about that with the age of this thing. From the look of things, someone has had this thing apart before. I was a bit surprised, even though I shouldn't of been, at how much wood is inside this thing.

69960596-7C12-4F15-AE8E-ED3EC9EC38C2.jpeg
 
Last edited:
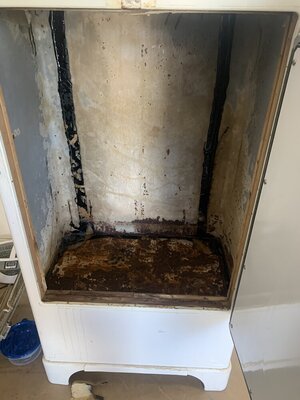
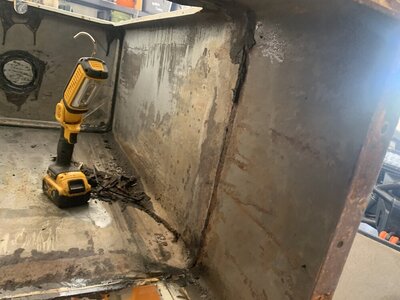
Alright, I'm done for the day on this thing. Got the fiberglass out and thrown away... trash pickup is today, so that was my motivation for getting that done. Ton of mold growing on that stuff.

Also found the bottom is rotted out, that sealed my thoughts for cutting the bottom out and extending it about 12" lower for the heat chamber.

CC0A972E-4C8D-4FEE-BA0F-FCA130B3A774.jpeg

C167E6B5-6883-494A-A3E7-D8AD5C250FDE.jpeg
 
I should of mentioned that. They will get changed, aside from the heat they are pretty rotted out. Plan on using some of the adhesive felt style as a replacement.

I’m just so far away from that point that it didn’t cross my mind when posting 😂

Next I’ll take the door apart (and off). Then cut the bottom out and cut some chip board to get a template for the new bottom placement figured out.

Going to use as much scrap material as I can out of my stash. I know I’ll have to get some material at some point, but might as well use what I have in the meantime.

Since I’m going to drop the bottom about 12” to increase the internal volume, now I’m planning on building out a new inner tub.

Will probably end up using angle iron welded to the chassis to create a mounting surface for the new tub, as well as a void for the insulation. This will be easier than using square tube in a curved corner.

I had spent a lot of time planning my own cabinet build, so having to go back to the drawing board with some of my plans. I’m excited tho that this is finally starting.
 
You'll have a solid smoker when you're done so I'm in for the ride as well! Pass me a beer please! :emoji_blush:

Ryan
 
Progress is going to be slow for a few days/week as I wait for some stuff to arrive.

Decided not to have the whole thing sandblasted, going to use some abrasive pads to strip the metal, and then use a harbor freight sandblaster (that I already have from other stuff) to do the areas the pads can't reach.

Waiting on more pads to get here, and a new grinding helmet, guess mine broke and I didn't realize it till I went to use it. Go figure.

Did some math (after coffee) and it looks like I'm going to need about 30' of angle iron to build the insulation standoff inside the body. Will need a 60x120 sheet of steel to extend the bottom down ~12" and line the walls/cover the insulation when done.

Rough math says my cook box will be about 45" H x 25" W x 14" D when I'm done.

I'd like to find some paint to use on the inside to seal the metal/prevent rust before I seal the cooking chamber up. Seems that finding food-safe, high temp paint is an oxymoron.


Have another project to knock out next week when a buddy is coming by. Building a rolling wood cabinet for my meat processing equipment, I'm tired of it taking up space on a wire rack. Going to have room to store my meat slicer, grinder, mixer, and sausage stuffer, as well as some folding tables strapped to the back of the cabinet that I use as a workspace when the processing is done.


Can you tell that I'm sick of paying game processing fees?


Edited to add:
Oof, that hurt. Following parts are on their way:
-Smoke Daddy Pellet hopper with extra outlet and weatherproof outlet cover
-Smokin-It cold smoke thing
-Damper for a 5" exhaust (from a wood stove)
-exhaust "tip" for some bling


If something happens to me after I'm done with this build, don't let my wife sell the smoker for what I told her I spent on it....
 
Last edited:
Well, for the next person that's attempting to do this....

The black crap you see in the cabinet once the fiberglass was removed was Butyl rubber. Heat gun + putty knife got rid of 99% of it.

Letting the cabinet soak with some rust remover, it's about as "food safe" as I could find. Wanted to stop as much as I could before I strip it further. I realize I'm probably not going to get 100% of it out, but I'd like to stop as much of it as possible.

Giving this stuff from amazon a shot

Once that's done, I'll hit it with some abrasive pads. Did a little test and they seem to do a lot better job of removing paint and rust without removing metal than my flapper disks would do.

Paint removal disks for angle grinder

They do scuff the metal up a bit, I don't think I'll need a leveling primer when done, but that's an option if the scuff/scratches are a little too deep. Again, no where near as bad as a 40 grit flapper disk used for grading down welds.

Was talking to the wife about the "fridge" this weekend and admitted that it was a lot bigger job than I thought it was going to be. She responded "I knew it would be, but now you have something to do instead of driving me crazy"

Welp, I guess there is that.


edit to add:

For those that are curious, here's the smoke stack that I'm going to use for the build. 5" Inlet (will have a damper inside the pipe) to an 8" outlet. After talking to SmokeDaddy's staff, they suggested more flow than a 4" pipe could muster.

97BF12D1-1282-44FE-9A94-49424D0B12C1_1_201_a.jpeg
 
  • Like
Reactions: Brokenhandle
Thought I'd post a small update as things progress.

Still removing butyl. Heat gun and putty knife got most of it, using GooGone to get the residual. Wipes right off after soaking for a few seconds. I'm happy with the results just need more time to finish cleaning it all out. This thing has a TON of butyl in it, including sealing around the bottom pan that I'm going to cut out.

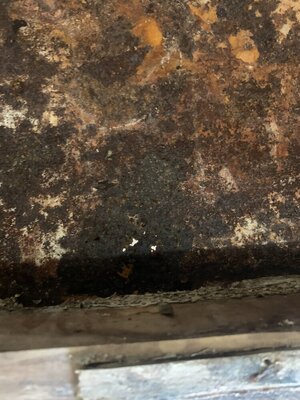
You can see the heavy rust in the bottom in this picture. Not even bothering trying to clean that up. It'll get cut out soon.
2F6E33FF-0536-44A3-A465-038007F1ED36.jpeg

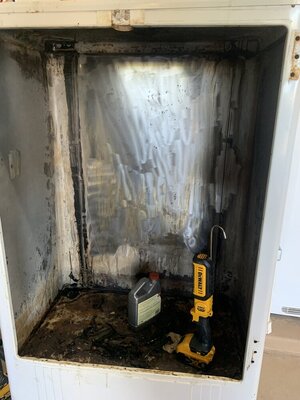
Butyl removed & some paint/rust removed with the above mentioned angle grinder wheels. In an exceptionally dumb move, I used the abrasive disk to try to remove the butyl residue. Flung that gunk EVERYWHERE (including all over myself). Won't do that again.

9EDFA736-4DFF-4364-A8CF-29CC6DD13873.jpeg


Got the door and all the associated trim/insulation removed. You can see some yellowish discoloration. near the top, that's where the butyl used to be that sealed/held on the General Motors logo to the fridge. Will work on restoring the badging before long.

AB344059-BF22-40A8-A7BA-523418E9B085.jpeg


Pellet Hopper from Smoke Daddy is here, as is the cold-smoke device from Smokin-It. The Smokin-It cold smoke won me over after watching a good YouTube video comparing cold smokers from SmokeDaddy and Smokin-It.

The stainless exhaust pipe pictured above showed up for the smoke stack. It is laughably large, but will work great. I can fit my head in the exit. A 5" cast iron damper (from a wood stove) arrived and fits great in the 5" pipe I'm going to use for the exhaust piping.

Ordered some DOM tubing to use as gussets for the framing that the hopper will bolt too. Didn't want to crush the inside walls or support structure within, so all the clamping force will be on the walls of the DOM instead.

Picked up some weld-nuts to attach inside the wall for the cold smoke. Not a fan of self-tapping screws for most things; since I'm building from the ground up I figured I'd do it right while I'm there.


While I was banging my head against a wall trying to find a good paint to use inside the chamber, I realized Yoder paints the inside and outside of their grills. After doing some research, I'm going to use paint from this place:

This is the same paint Yoder uses on their grills. While some people in different locations have had issues with the paint not holding up on their grills... my Yoder is uncovered year round and has held up great for several years now.

Last bit has been doing a few different crude drawings to figure out how I want the bracing for various things to work. The pellet hopper system weighs about 50 pounds and can hold about 30 pounds of pellets. I'll make sure it's properly setup to keep from pulling itself apart.

Part of why this is going so slow is the PPE to protect my lungs from all the nasty dust being kicked up while working on it.... can only stand to wear it for so long before I need a break. After a lung issue a few years ago, I really, REALLY try to protect them. Getting a replacement isn't exactly an option.

Otherwise, the plan next week is to get the bottom cut out and use some chip-board to make a template for the new bottom location.
 
  • Like
Reactions: Brokenhandle
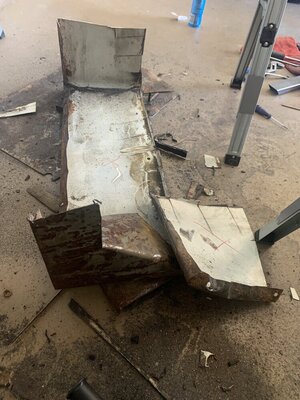
Well, after swearing and head scratching I got the bottom out of the fridge.

The base was 1 piece that also lined the lower body of the unit. If you remove one, you have to remove the other. I expected to find a bit of rust between that liner panel and the body of the fridge, but was presently surprised.

There was a TON of butyl rubber sealing everything up, not to mention a lot of crimped parts. Used a 4 1/2" cutoff wheel in the straight sections along with a 40 grit flapper disk to help cut the corners.

Was able to get it out, eventually.

Did some cuts ever 2-3" to make the metal more manageable as it was removed.

Was VERY surprised to find such little rust between the 2 panels. I was expecting a lot more, so I'll have less clean up than I was expecting.

73017683-3662-4A91-B487-6CD070D76B23.jpeg

7A80C913-788D-4EDE-8DE5-FFAF1C68A00C.jpeg

0BF5A83C-8B9B-414E-B35E-D6EBC60948FF.jpeg


4FD30792-FBC3-47C6-BDE1-B34C5178B0FE.jpeg

C4B85AAE-5967-4C15-BBC2-3D103F9A62C6.jpeg


I took a lot of care in attempting to not damage the body of the fridge. So far, so good. Just more butyl to remove, and a little bit of rust that I need to neutralize.

Edit:
Welp, after poking around a little bit, the top is held in place with Butyl as well. I had assumed that it was welded in place... nope.

The plan is to stop messing around. I'll put on some PPE and attempt to burn the butyl out of the top with a torch. I figure this will be the least-likely way to damage the top otherwise. This will burn off some paint too, so that could be a win-win?

Since the top appears to hold the structure in shape (now that the bottom is removed and won't be replaced for a bit)... I'll weld in some cross bracing in the body to keep it from collapsing too badly


I've started to realize I didn't buy a fridge, I bought a skin to build a grill out of!
 
Last edited:
Welp I 100% cheated. My harbor freight sandblaster and my 30 year old compressor was not up to the task.

Found a guy that does sandblasting locally... cheapest by a long shot (about 30% the price of his competition) but also has a reputation for missing some things.

Went with him and then spent an hour touching up the spots he missed. For what I spent, I was happy with the work - I knew what I was getting into by having him do it. This saved me a TON of time; my equipment just wasn't up to the challenge of blasting the whole fridge.

D38FF0CD-7877-4017-82E1-1C2FDBAF14FB.jpeg


Covered the exposed metal with FluidFilm to prevent new rust while I wait for a few things to happen. It removes very easily when I am ready to weld.

Gunna go by the metal shop tomorrow and see if I can find what I want to start the build on this thing.

It's been 100+ degrees every day this week, and I really lose motivation to work in the garage when it's that hot out. Wearing a leather jacket (PPE), a welding helmet and other gear just isn't fun when it's that hot out. Then again, I'm a hobby welder - I have never done this for a living and don't plan on it.

I don't know how the pipeline workers do it during the summer. Yikes.
 
Well, thought I'd post an update.

I did mention this would be a slow build, right?

Acquired a sheet of 12ga metal to make the new floor and patch up the back. Also got the angle iron, some square tubing, the expanded metal and some other bits and pieces to build with.

I tossed a portable AC unit in the garage which has been able to bring the humidity down to reasonable numbers, not to mention has helped with the temp in there quite a bit. If I'm able to keep the temp & humidity at reasonable numbers, I'll be able to start working on this sucker some more this week. After 24 hours, it filled a 5 gallon bucket up with water removed from the air!

First thing I need to do is pressure wash the oil off of the cabinet and then burn off the rest of the butyl rubber off. Along the top there is some sealed in there that I just can't scrape/chemically remove. Hoping to burn it off with a propane torch and then deal with the remains with the pressure washer. Once all that junk is gone, I can weld up the rust-holes in the skin, and then start framing the inside for the insulation and other stuff.
 
Finally got all of the Butyl stripped off. Combination of a putty knife, GooGone (great for dissolving the small residue), a propane torch, and a pressure washer with a 0 degree nozzle stripped it all.

F9B168D3-C970-4431-AEA0-B81D6EFD8360.jpeg

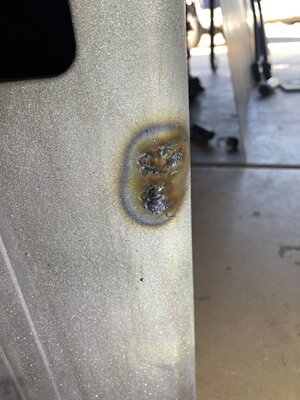
There were some small pinholes where the body had rusted through. Set my welder up for 18ga and started welding - completely NOT taking into account that the metal was thinner in that area due to the rust. That was a fun "OH $%@#$@" moment as I blew a much larger hole through the metal. Oh well, probably the ugliest weld I've ever done, but after hitting it with a grinder you'd never know how bad I screwed that up.

5381080B-7D79-4F68-90DD-A1697E7EDD56.jpeg

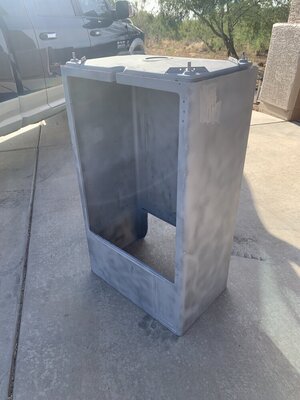
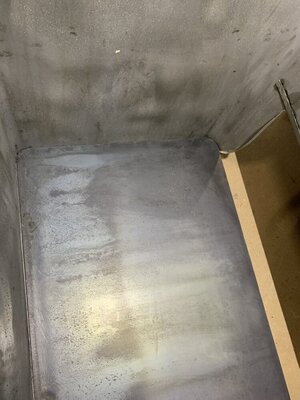
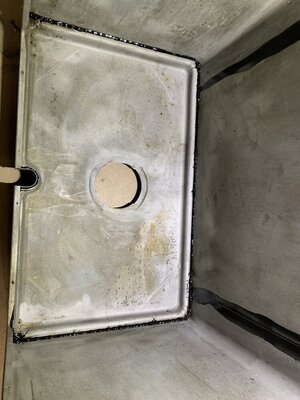
Cut the new sheet metal for the floor, got the corners rounded and tested the fit - holy crap, it fits!

3B738148-02E9-40E0-BCBD-D0E0AAFF2528.jpeg

Flipped the fridge upside down and sealed the seams where the butyl used to be. The top is spot-welded in place, once I blew the butyl residue out with the pressure washer, I needed to re-seal it. Used the same sealant that Yoder uses on their smokers around the firebox area for the top and along the rear seams.

F8444B6F-DE23-4078-857E-D6573A4480C5.jpeg


Next, need to drill some holes in the bottom plate where the legs attach and then weld in some studs so I can re-attach the legs. That area will NOT be serviceable in the future once the insulation is in place and welded shut. Once the legs are sorted out, I'll be making a filler panel for the back of the fridge. Also need to make a filler for the "notch" in the front where the compressor hoses used to be.

Increasing the chamber area created a lot more work, but I think it'll work a lot better as a result.
 
SmokingMeatForums.com is reader supported and as an Amazon Associate, we may earn commissions from qualifying purchases.

Hot Threads

Clicky