New Guy with a UDS

  • Some of the links on this forum allow SMF, at no cost to you, to earn a small commission when you click through and make a purchase. Let me know if you have any questions about this.
SMF is reader-supported. When you buy through links on our site, we may earn an affiliate commission.

nfrancis04

Newbie
Original poster
Dec 8, 2013
18
10
Owensboro, KY

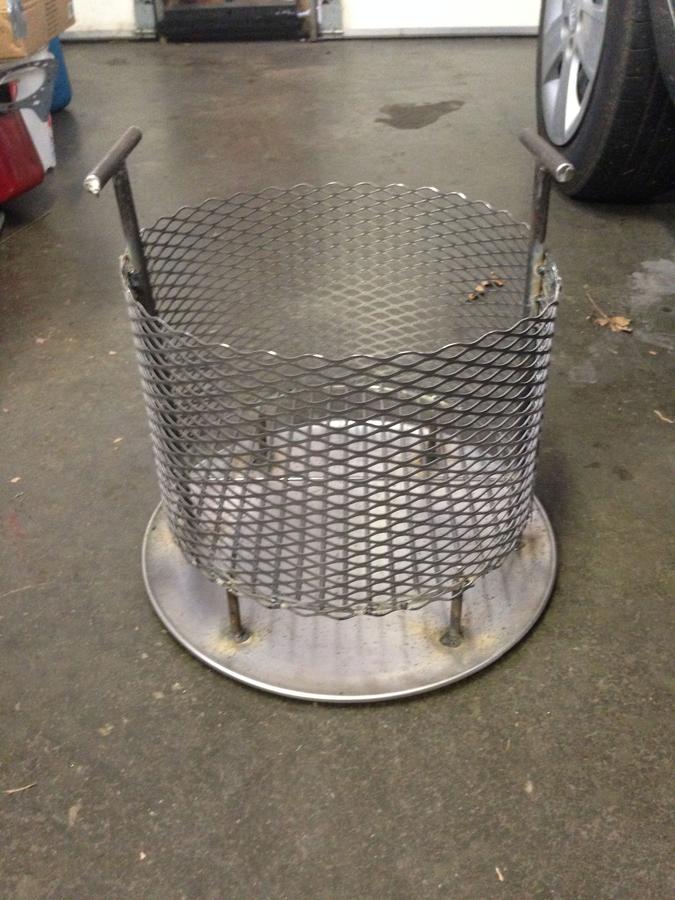
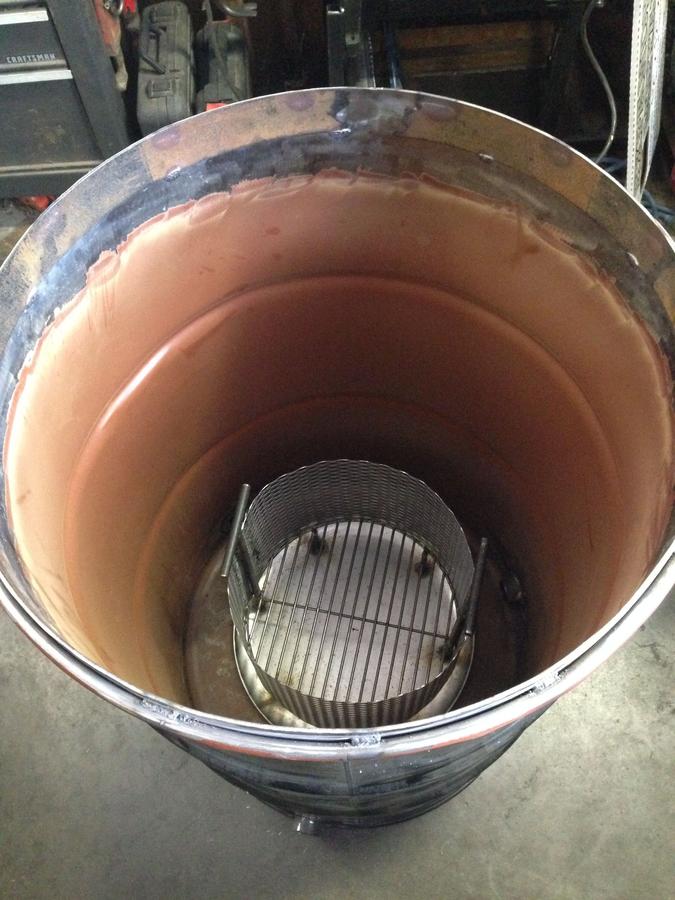
A 16" pizza pan, 3/8" round rod holding up a weber charcoal grate, expanded sheet metal welded to the bottom of grate, 1/2" round rod for t-handles


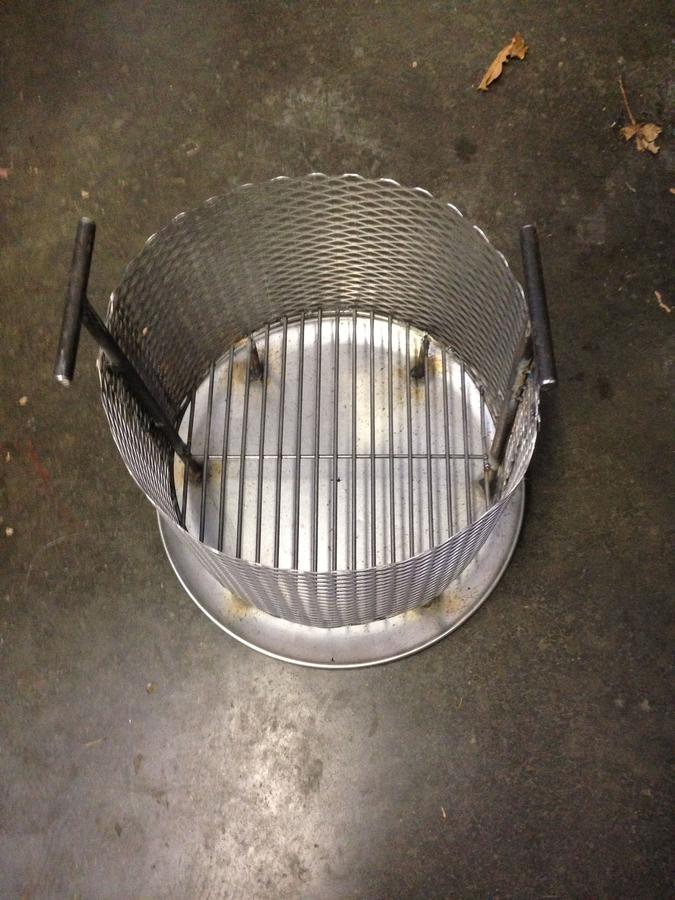
dimensions: 12" tall (3" spacers, with the pan and grate included the sheet metal was less 9", sorry don't have exact width of cut); the handles are 15" tall


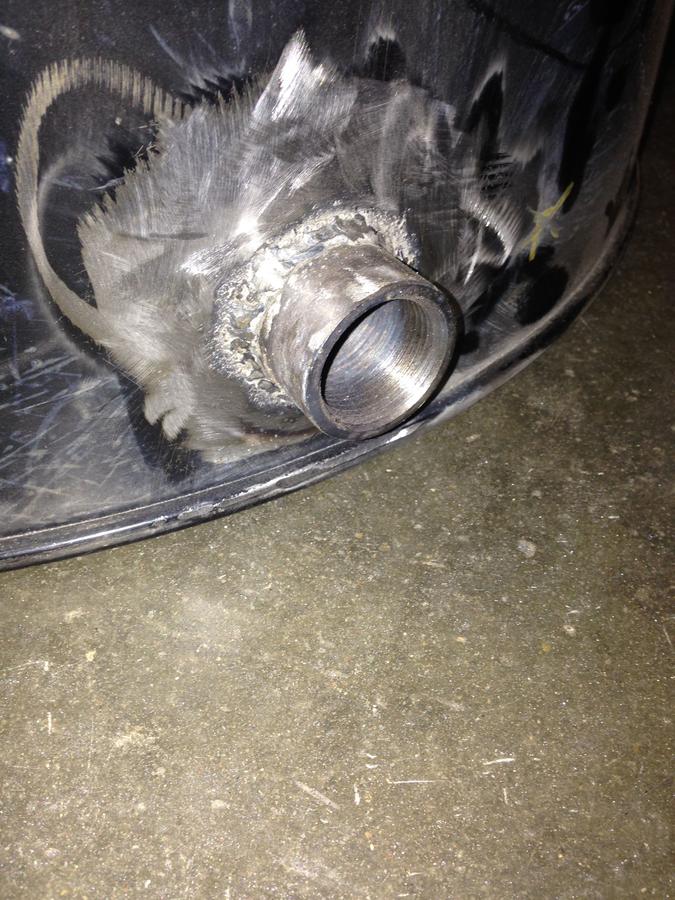
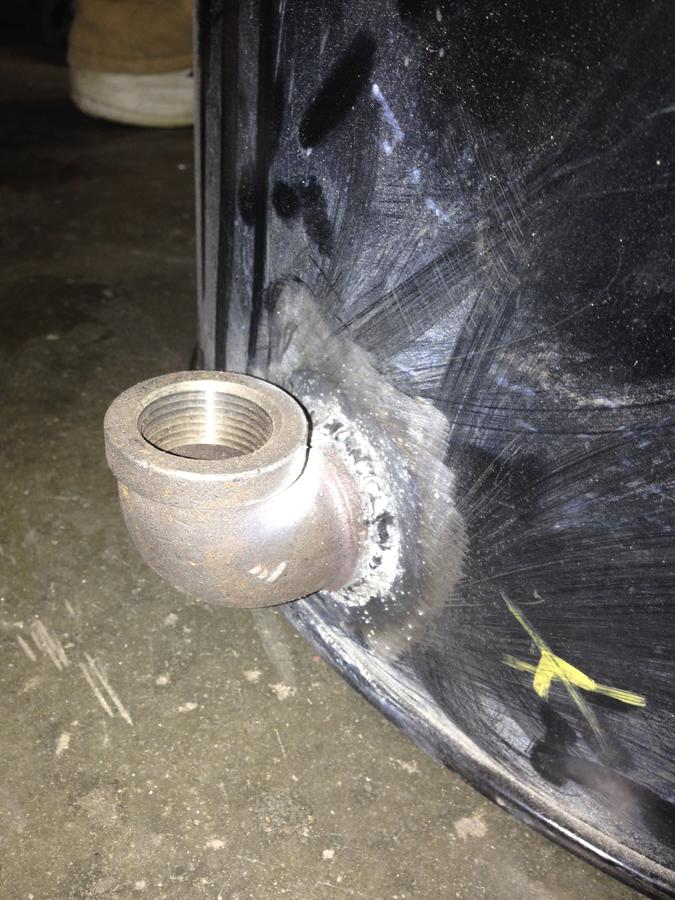
I will have 3 1" inlets for my air intakes. 2 will always be open with the option of being plugged and one with an elbow that will have a ball value 18" above to regulate  They were free and I can weld so that's what I did


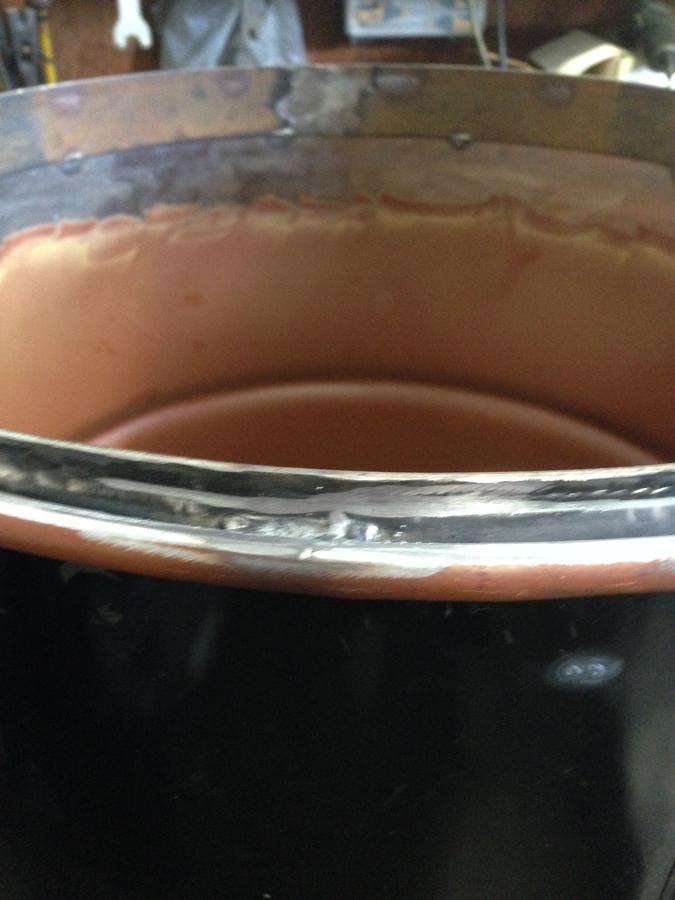
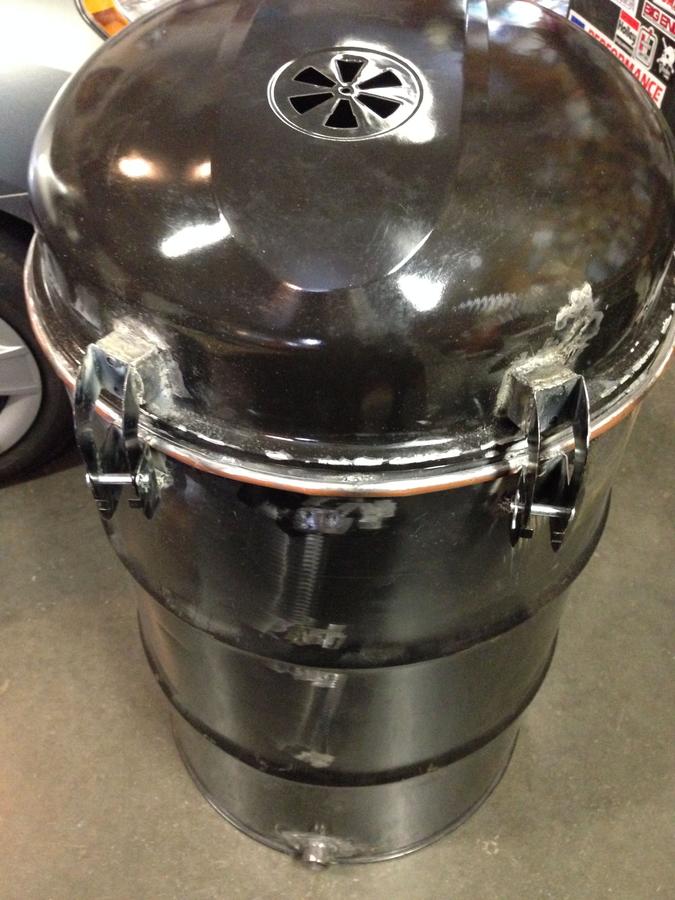
I will be using a dome lid (22.5" Char-Boil, it was cheaper than the Weber) and my barrel was larger in diameter so I added a lip to to house the lid.  The lip is 1/2" inch above the top of the barrel and is held in place with tact welds around the edge.  When the barrel is burned out I will add a bead line of high temperature silicone around the gap that is still present


The lip was still larger in diameter than the inside of my dome lid, I took a crescent wrench worked my way around the top and persuaded it inwards toward the middle of the barrel, which worked and now I have a close tight fit for my dome lid


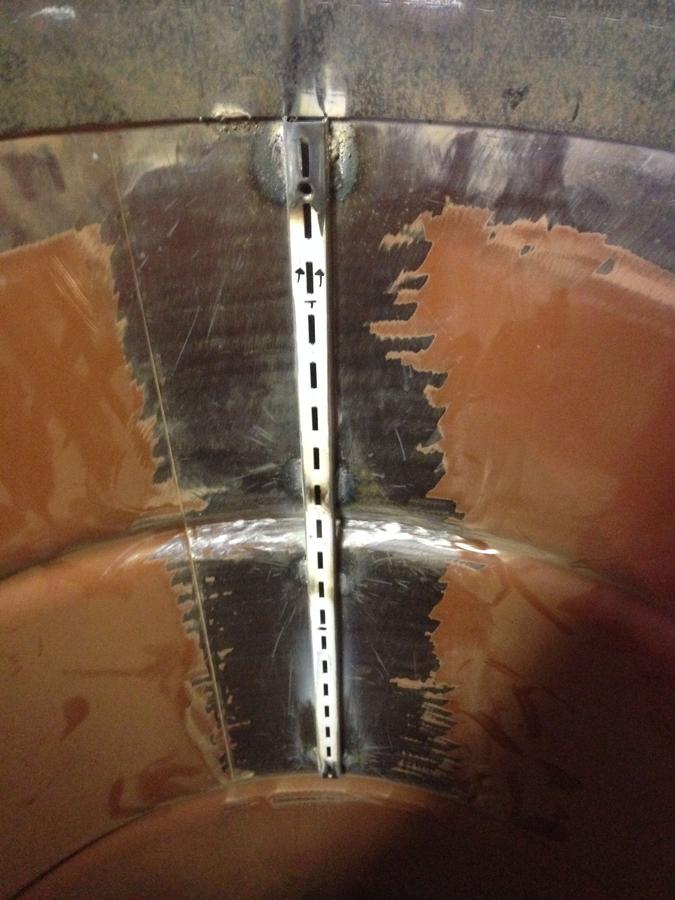
I wanted the option of having adjustable shelves, so again freebies, closet shelving racks.   From the top of my lip, it is 2" down, that is where I placed the top of the adjustable rack system.  I will run at least 2 grill grates, one at 2" and the other at 8", with other possibilities.  Also with having the shelving units run down my barrel, I also have the option of having a diffuser plate or water pan


The Char-Boil came with an already fabricated hinge system that fit the contour of both the lid and barrel, decided to use it but had to make some modifications for it to work


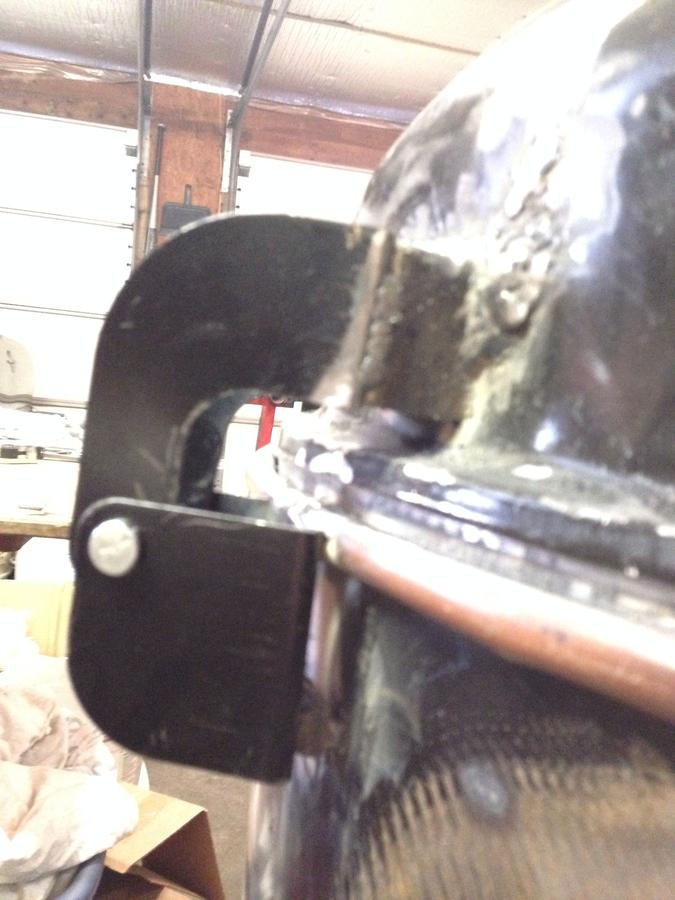
Kind of hard to see, for the piece attached to the dome lid, a 1" spacer was added (square tubing), and then welded to the arm which was then welded to the lid.  Disregard those bad welds, the lid metal was very thin and had some burn outs which then I tried to patch.  As far as the bottom piece, it was welded at the top where it met the top of the barrel and then a spacer added to the bottom, such a piece of extra round rod I had


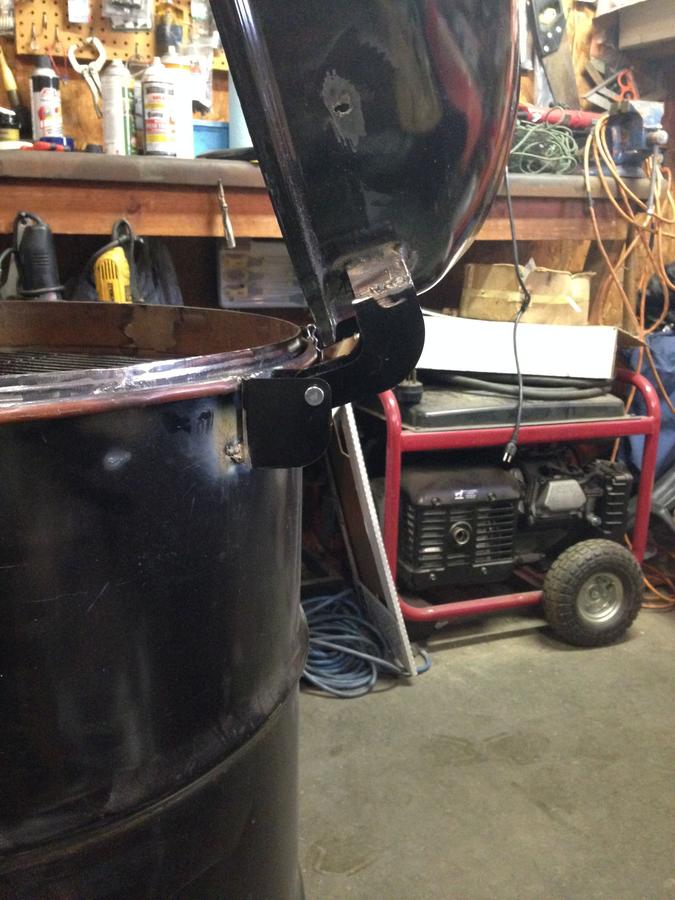
The lid opens and closes with ease.  It will be much easier than lifting a lid completely off and then trying to find a place to put it.

The next step in my process will be to burn the barrel out at least 2-3 times just to be sure.  The barrel does have a visible liner and held some type of oil, not exactly sure what type though.  Of course the firebox, grill grate(s) and lid will not be included in the burn but I had planned on completing my build process before I did my burn to get the metal that I added nice and clean as well.  After the burn, I plan on painting it not sure if I want to include a design of my Louisville Cardinals or just so nice and easy with black.  I shall keep the UDSNation informed as I continue my new hobby
 
Nice looking drum.

Interested in the hinged lid, my walmart has them cheap and I need a dome lid.
 
Wow that looks great, i can tell you put a lot of effort into it.  UDS are great cookers...look forward to seeing some Q come from that beauty. 
smile.gif
 
The Char-Boil was on sale and I wasn't about to pay for a brand new Weber.  I looked around my area for a used one and couldn't find one and since I obtained all of my raw materials for free and I splurged and brought a grill.  The lid material is very thin and was difficult to weld.  It still would be relatively easy to just bolt the hinge system with the addition of the spacers on both the top and bottom arms
 
Lol, remember I am a farmer. I can weld and fabricate.
 
Nice build there. Oh the dreaded food grade red liner. You may be grinding that out even after the burn out. Just saying. Been there done that. Also, the Weber hinged grates are in my opinion a must have on my UDS. Well worth the extra few bucks. Especially true on long smokes where you might have to or want to add some wood chunks without pulling multiple racks out.
 
Last edited:
Both grill grates will be Weber or the knock version of them.  I do like the "flaps" on them that allow you to reach down or whatever you have to do as well as the handles on the side.  The picture shown was the grill grate that came with the Char-Boil, nothing wrong with it, just showing what the inside of the drum would look like
 
Wow great looking set up. A lot of time and thought went into that. Love the hinged lid. Never thought of that. Great job.
 
question regarding the exhaust setup: will or shall I leave the exhaust open at all times or will it need to be dampered/closed at some point during the smoking process? I do have something in mind to put in place of the pre-existing exhaust cut out on the dome lid
 
I just have the flat barrel lid and find that with both holes open it is perfect. Now when you shut her down you will want to have those top vents seal real good to extinguish the fire fast and save all that nicely seasoned charcoal and wood for next time.
 
Just a little update, I have since burned my barrel out now 3 times, excessive? Maybe, but one fire was over a couple (more like a case) of beers with some friends the other 2 were to actually burn out the barrel.  The 2 to burn out the barrel were very hot fires where the barrel was laid on its side and then rolled on the ground to cover all sides of the barrel, including the bottom as well.  My question is my barrel was lined and since the 2 burn-outs about 90-95% of the liner is gone; this is a pure laziness factor, should I remove the remaining liner or will whats left and along with heat/burn-outs be fine and ok to smoke on?
 
Remove what is left . I used a grinder wheel that was like a flapper wheel with sand paper on it.

Got it at Lowes.
 
I would not burn it out again. I did it too many times on my first one and warped the metal around the air intakes. It still works but that metal is mighty thin down there now. Have to repaint the lower third at least once a year because of that. should have just went with the one burn out and not tried to accelerate the process with a leaf blower lol.
 
Last edited:
After grinding for what felt like eternity, I got the liner out of my drum.  Prolly not every last inch of it but I said f it I'm done and it will be as good as it will be.  I proceeded to wash inside and out of the drum and lid, warm water and dawn dish soap, and will now continue in the process:


Keeping the original exhaust and damper


Decided to "pretty" it up a bit, adding a 4" rain cap around the pre-existing exhaust cut out.  I trimmed the bottom of the rain cap so that it will sit level with the lid.  Also, notched the back of the rain cap so that you can still access the original damper


Tacked the rain cap to the lid in 3 spots (happy it didn't burn through this time) and then added Permatex RTV Silicone Gasket Maker High Temp Ultra Black around the edge and then smoothed it out with my finger for a nice even line


Same thing around the added lip I put inside the barrel.  Went completely around and added a generous amount where the gap was, went nice and slow and had a small bead line to get as much between the 2 pieces of metal.  Then went around and made it even just like the rain cap.

Next step will be to paint it.  In my city we have a Menards and they had Rustoleum High Heat Black paint (resists heat up to 1200 degrees so the can says) for $3 a can and so that's what I'm going with.  More than likely, after I let the silicone sit over tonight and throughout most of the day tomorrow, I'll paint it tomorrow evening/night and then let it set and hopefully do it first test run/seasoning on Saturday
 
I am in that I know how close it is and that there isn't really that much more to do.  Another thing is that it is suppose to rain all weekend where I live and I was wanting to do at least my test run/seasoning this weekend and then do a test cook before the holiday.  I would like to do a ham for the family x-mas dinner. 

I do have a question regarding my digital thermometer, I am going to run the wires through the side of the barrel.  Will holes on the side of the barrel be fine or should I use some type of fittings for the wires to run through?  I do plan to remove the whole thermometer set-up after every cook if that helps with any suggestions
 
I have seen lots of guys use high temp. silicon grommets. I personally don't know where the heck they find that stuff but would like to know. Also those threaded hollow tubes that come on light fixtures with the nuts that come with them works. That is what I have. Honestly with the stock lid on mine I just close the lid on the wires, (carefully). I don't find you really need that absolutely perfect seal when you are cooking, but more when you are done and want to put the fire out. With that nice build you got going there I would check out high temp. silicon grommets. I think I saw somewhere that weber's new grills have them installed already so I would guess they would have them available on their website. Let me know I would get some too. 
 

After raining all day yesterday, its finally ready to go


Started off with 10 brickettes in the chimney and then weighed out about 10lbs and put in the basket.  This is just my seasoning run, so I wanted to see how my drum would run as far as temperatures, really don't care how much fuel is consumed as of right now.  Instead of spreading the lit and already hot bricks over the entire basket I am trying in the middle.  Any thoughts on if this method is better?  Maybe not start in the middle and start on the side?  Don't do this at all?  Any input would be great


About a half can of vegetable oil spray over the entire the drum, lid, and grates it is ready to go.  All 3 air vents are open and the fire box is already burning hot.  Once the lid was closed temperatures rose quickly and was in the 200s in no time


Such a pretty site!!!  A lot of the smoke is coming from all the vegetable oil spray I put on the inside of the bar, maybe a little too much oh well.  At 250 I plugged one vent, then at 300 plugged the other, and then regulated the rest of the temp with my valve.  It definitely took some getting use to and how and when to close or open it.  At first it was a lot of back and forth adjusting it, the temp would rise and then fall and finally it settled in.  It ran for a solid 3 hours between 335 and 350, again this run is just for trial purposes and seeing what this black beauty can do.  The placement of my valve was between 1/2 and 3/4 of the way open.


For my wires to my thermometer all I did was make a slit the width of a cutting wheel blade on my grinder in the added lip on the inside of the barrel and then again on the lid.  Still a nice look as well as a tight fit for both the lid and wires for little to no air flow to the inside. 

After the 3 hours of higher temperature burning, I opened the lid and quickly removed the grates and see how much I had burned.  It appeared to have burned half of what I put in there, normal for a higher burn? I have no clue so again any comments on that would be greatly appreciated.  While everything was out I added some hickory chunks and brought the temperatures down to smoking temperature to see how my drum would hold up.  I moved as fast as I could between having the lid open and closing it again, maybe 2-3 minutes and it got hot.  So my temperatures were really high; close all the vents as well as the damper to get temps between the 220-235 range.  This took a solid 20-30 minutes to cool the barrel down.  For the past 2 hours till now, temps have burning consistent between the 220-235 range, setting comfortably 225-230 with the valve 3/4 or more open so hopefully it continues.

Couple of questions, my barrel still kind of has a metal smell to it coming out the exhaust, hard to explain but its not a smoke/hickory smell as much as I would think.  Will this be common until I get some cooks in it and let the oil do its job and season the drum?  And then my last question, is it bad luck to not name your drum, like that in naming a boat?  If so, I'll need some suggestions on a name.

Happy Holidays!!!
 

Nothing like a good snowy, Super Bowl Sunday cook, held 250 the entire cook and very pleased with that


Some baby backs before the big game.  Used the 2-2-1 method with a standard rub.  Foilded them and applied a light layer of BBQ sauce along with some apple butter.  Finished them with a coating of what was left in the foil and turned out great
 
SmokingMeatForums.com is reader supported and as an Amazon Associate, we may earn commissions from qualifying purchases.

Latest posts

Hot Threads

Clicky