After trying prosciutto a friend had made, I always wanted to make it. His was much dryer and had more flavor then what you buy commercially. Never had a room/area to make it in, then discovered (duh) you can make a curing chamber out of a fridge. Did all sorts of research on the internet last summer watched a number of you-tube videos and put together this chamber. Wish I had found this site when I started it would have saved time. I've only done one cure and it was a copicola since it was simple, curing time was short and if I screwed up it would be a too expensive lesson. I get a lot of enjoyment out of imagineering and making things as I do using them, so sometimes I go a bit overboard. You should see my ice fishing gear.
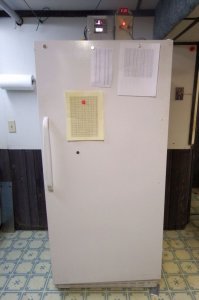
Used 17.5 cubic foot (500 L) fridge, all fridge no freezer.


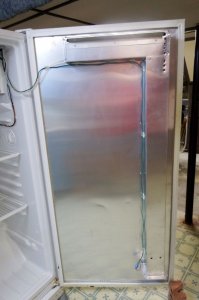
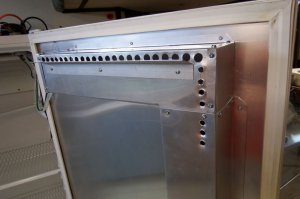
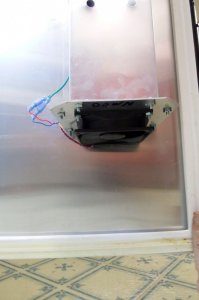
The door liner was replaced with a sheet of aluminum and air ducting was installed. A 12 vdc computer cooling fan is mounted at the bottom and blows up the ducting to the manifold across the top. This provides a gentle circulation of air maintaining a uniform temperature and humidity without blowing directly on what's being cured.


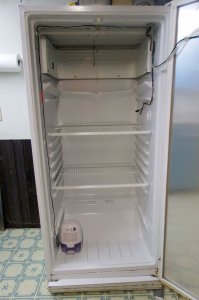
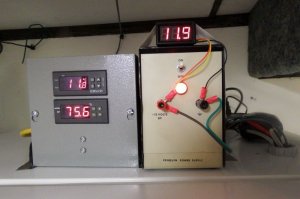
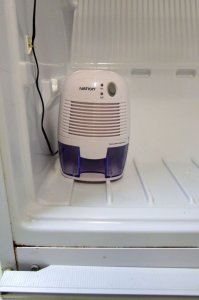
The temperature and humidity are controlled by separate controllers. The original fridge thermostat is set to the coldest setting and the digital one maintains the temperature. The humidity controller is connected to a dehumidifier. A 12vdc power supply powers the circulating fan.


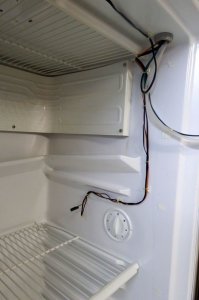
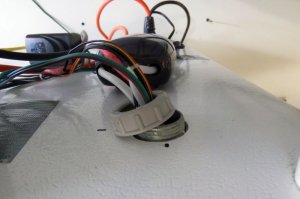
Drilled a 1 3/8” hole for the wiring and tubing, then lined it with a 1” conduit nipple with locking rings on both ends. This protects the wires/tubing from sharp edges. I made sure there were no internal wires or tubing were I poked the hole.


For air exchange I'm using an aquarium air pump. It pumps 7 L per minute the fridge is 500 L so about every 1.2 hours it pumps in the equivalent of the volume of the fridge.
If I'm doing the math correctly after 8 hours there is about 1% of the original air left in the fridge, so any air that is pumped in last for about 8 hours.
Later I plan on mounting the air pump in a box equipped with a HEPA filter then mount it outside so filtered fresh air is pumped to the chamber not basement air where the chamber is located. In the heating season the basement is OK as the furnace circulates the air through out the house, but during the warm months it is damp and stale.

Equipment: This is a list of the equipment that was used to make the chamber. Most of it was purchased online.
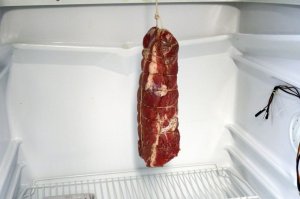
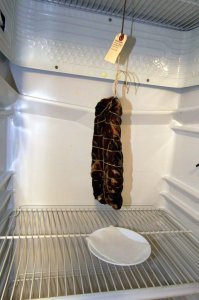
Started with a 1.91 kg (4.2 lbs) Capicola, Salt 3%, Pepper 0.5% and Cure #2 0.25%
Temperature average 55F, Humidity average 75%.
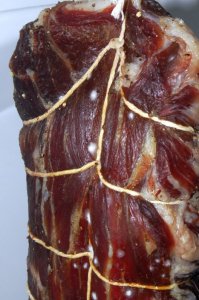
46 days later lost 42% weight
One problem, white mold at the 18 day mark, wiped down with vinegar, all good after that.


Ongoing modifications
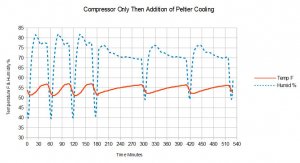
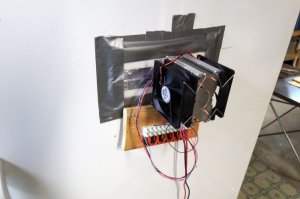
To eliminate temperature and humidity swings resulting from the fridge compressor on off cycles. I've been experimenting with a Peltier air cooling unit, have it mounted through the fridge door, its not pretty will mount it better after testing. This is a semiconductor cooler that can be, throttled to supply constant cooling. This is done by varying the voltage to the Peltier plate or the power to it can be turned on and off many times a minute with out damage, not like a fridge compressor. I have been testing single unit and it just doesn't have enough power to cool the fridge, almost though. The compressor still cycles but not as often. This can be seen in the graph below. For the first 180 minutes the fridge compressor was only used, then the Peltier unit was turned on.

I've ordered a double unit which should supply enough cooling. It will be controlled by a PID controller the same type the members on the Electric Smokers forums are using to modify MES ## smokers. (Inkbird °F and °C Display PID Stable Temperature Controller ITC-106VH)


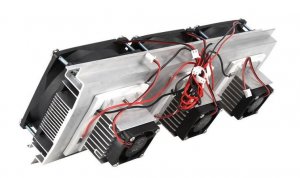
A heads up: I ordered this triple Peltier cooler and bench tested it. It does not cool nearly as well as the style above. I think the design of the hot side heat exchanger is more efficient.

That's it for now, thank you for your time, any questions please ask.
Used 17.5 cubic foot (500 L) fridge, all fridge no freezer.
The door liner was replaced with a sheet of aluminum and air ducting was installed. A 12 vdc computer cooling fan is mounted at the bottom and blows up the ducting to the manifold across the top. This provides a gentle circulation of air maintaining a uniform temperature and humidity without blowing directly on what's being cured.
The temperature and humidity are controlled by separate controllers. The original fridge thermostat is set to the coldest setting and the digital one maintains the temperature. The humidity controller is connected to a dehumidifier. A 12vdc power supply powers the circulating fan.
Drilled a 1 3/8” hole for the wiring and tubing, then lined it with a 1” conduit nipple with locking rings on both ends. This protects the wires/tubing from sharp edges. I made sure there were no internal wires or tubing were I poked the hole.
For air exchange I'm using an aquarium air pump. It pumps 7 L per minute the fridge is 500 L so about every 1.2 hours it pumps in the equivalent of the volume of the fridge.
If I'm doing the math correctly after 8 hours there is about 1% of the original air left in the fridge, so any air that is pumped in last for about 8 hours.
Later I plan on mounting the air pump in a box equipped with a HEPA filter then mount it outside so filtered fresh air is pumped to the chamber not basement air where the chamber is located. In the heating season the basement is OK as the furnace circulates the air through out the house, but during the warm months it is damp and stale.
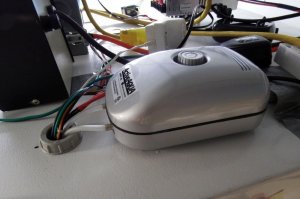
Equipment: This is a list of the equipment that was used to make the chamber. Most of it was purchased online.
- Temperature controller (SainSonic STC-1000 All-Purpose Temperature Controller with Sensor Probe) These controllers are popular with home beer brewing folks. They can be setup to control cooling or heating. In this application cooling.
- Humidity controller (AGPtek® WH8040 Digital Air Humidity Controller) These controllers can be setup to control a humidifier or dehumidifier. In my application it's configure to control a dehumidifier
- Dehumidifier (Ivation DehumMini Powerful Small-Size Thermo-Electric Dehumidifier)
- Fish aquarium air pump ( Hydrofarm Air Pump 2 Outlets 3W 7.8L/min) pumps 7.8L of air a minute.
- Computer cooling fan. I use one out of an old computer.
- 12 vdc power supply for fan.
Started with a 1.91 kg (4.2 lbs) Capicola, Salt 3%, Pepper 0.5% and Cure #2 0.25%
Temperature average 55F, Humidity average 75%.
46 days later lost 42% weight
One problem, white mold at the 18 day mark, wiped down with vinegar, all good after that.

Ongoing modifications
To eliminate temperature and humidity swings resulting from the fridge compressor on off cycles. I've been experimenting with a Peltier air cooling unit, have it mounted through the fridge door, its not pretty will mount it better after testing. This is a semiconductor cooler that can be, throttled to supply constant cooling. This is done by varying the voltage to the Peltier plate or the power to it can be turned on and off many times a minute with out damage, not like a fridge compressor. I have been testing single unit and it just doesn't have enough power to cool the fridge, almost though. The compressor still cycles but not as often. This can be seen in the graph below. For the first 180 minutes the fridge compressor was only used, then the Peltier unit was turned on.
I've ordered a double unit which should supply enough cooling. It will be controlled by a PID controller the same type the members on the Electric Smokers forums are using to modify MES ## smokers. (Inkbird °F and °C Display PID Stable Temperature Controller ITC-106VH)
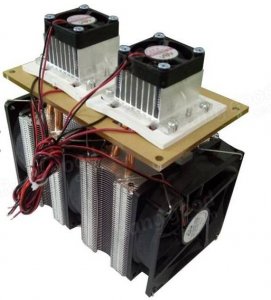
A heads up: I ordered this triple Peltier cooler and bench tested it. It does not cool nearly as well as the style above. I think the design of the hot side heat exchanger is more efficient.
That's it for now, thank you for your time, any questions please ask.


