My 80 Gallon build (Q-view pics added)

  • Some of the links on this forum allow SMF, at no cost to you, to earn a small commission when you click through and make a purchase. Let me know if you have any questions about this.
SmokingMeatForums.com is reader supported and as an Amazon Associate, we may earn commissions from qualifying purchases.
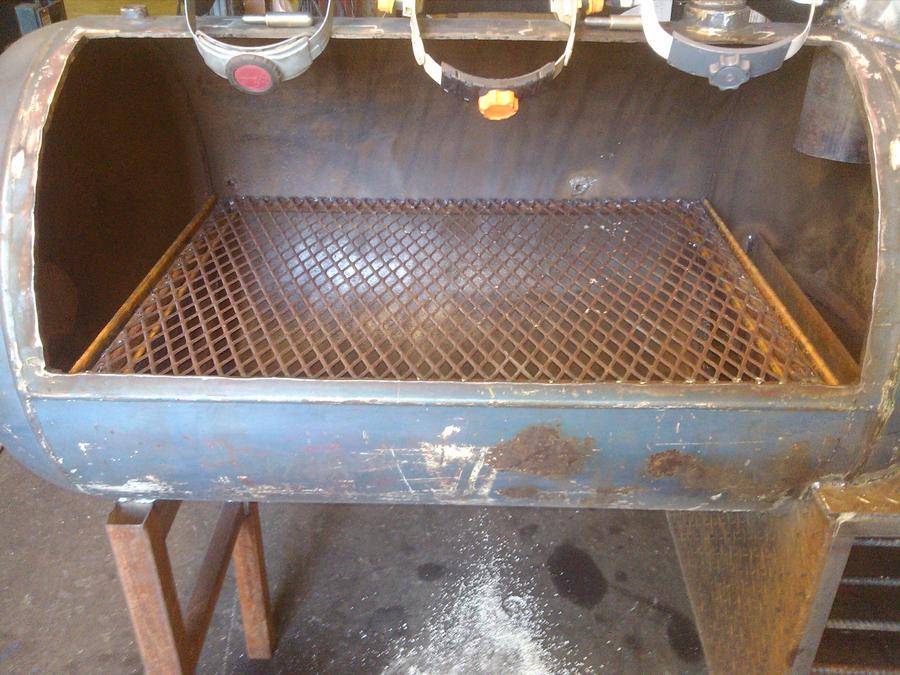
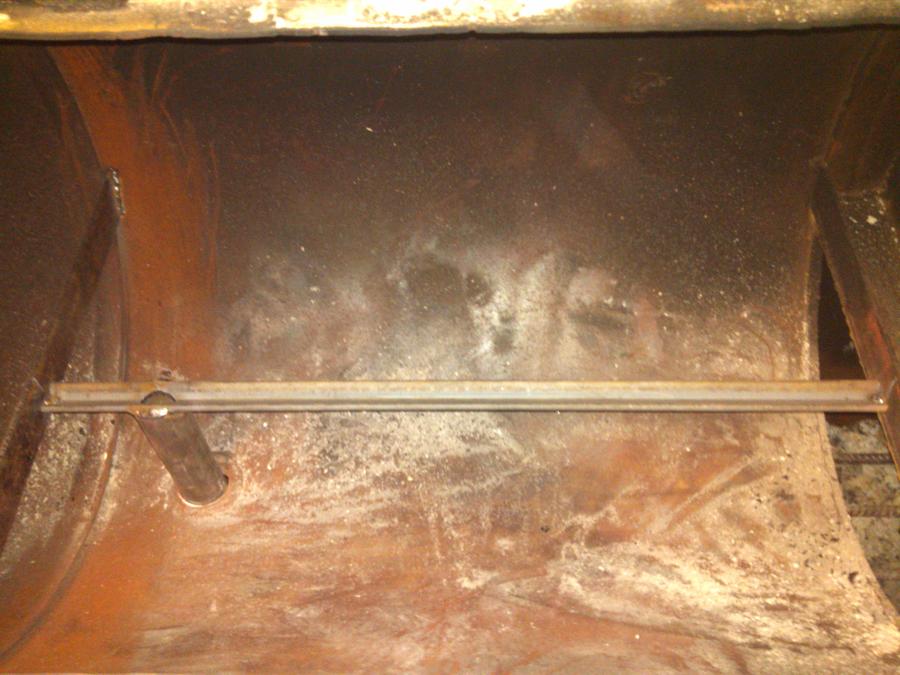
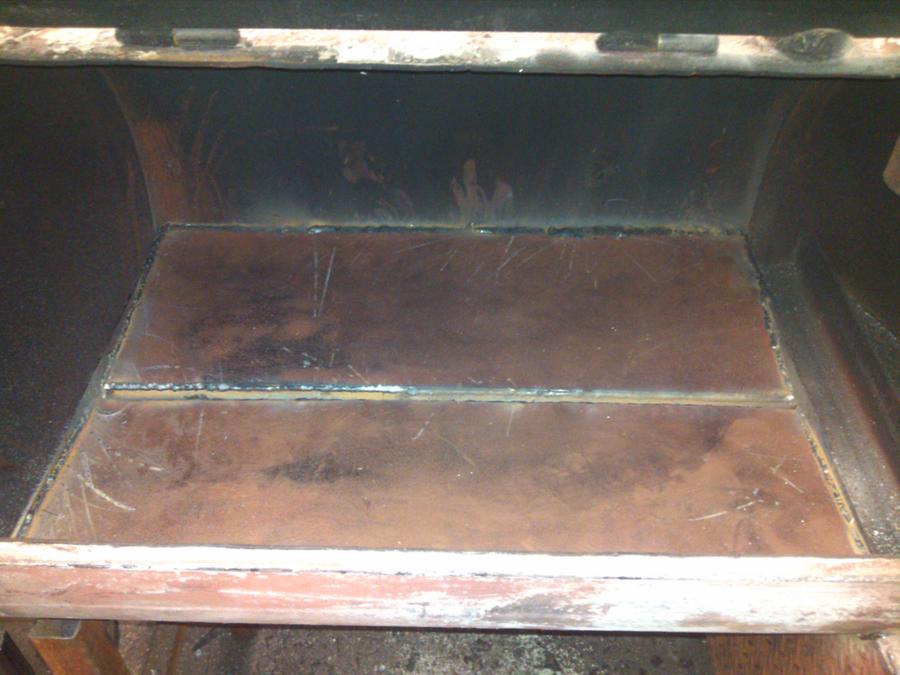
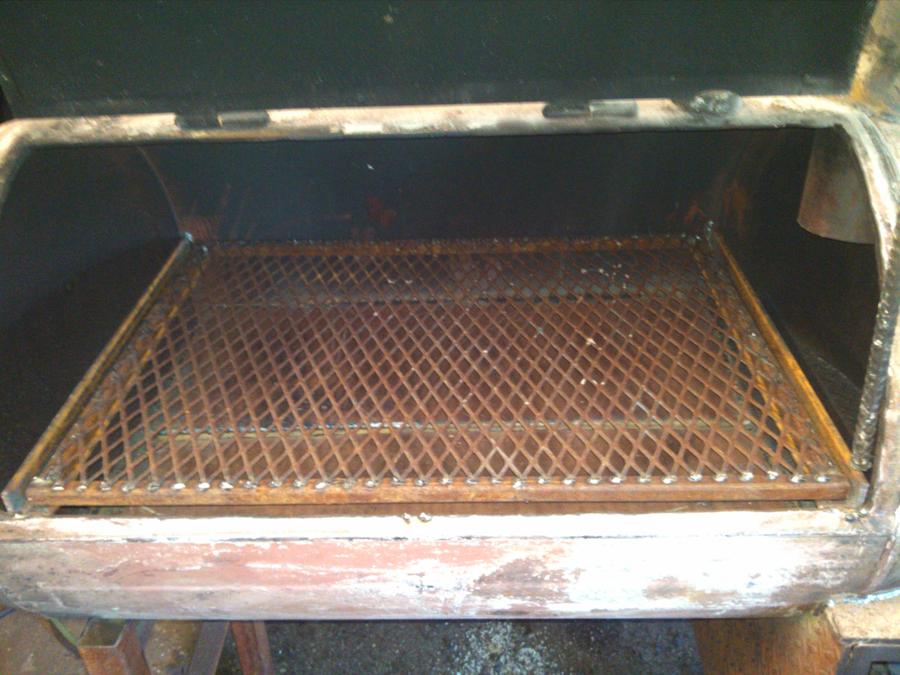
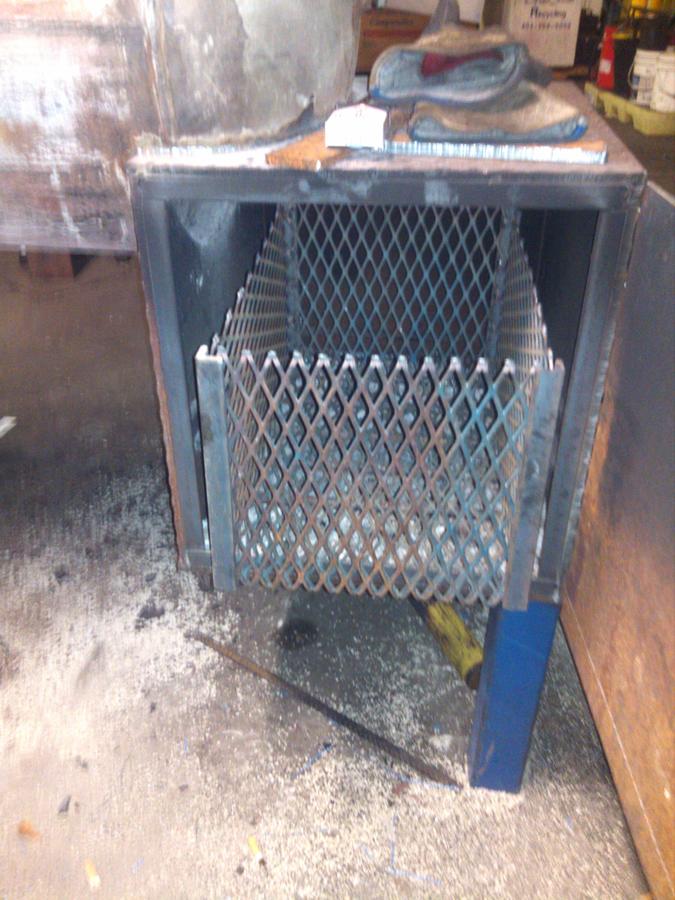
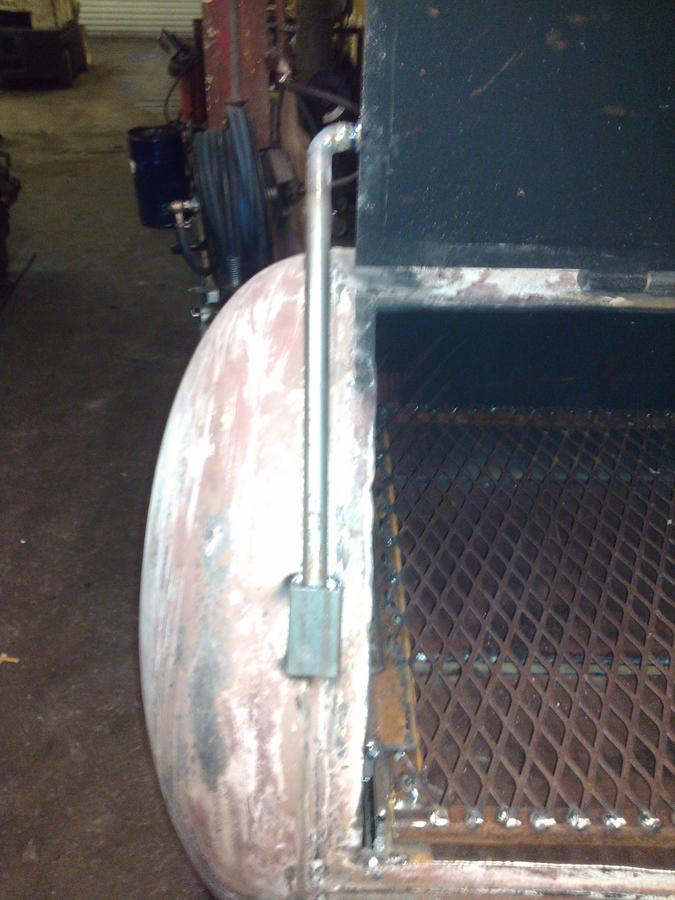
how much room do you have between the grate and the top of the firebox?  Honestly, Id like to see you have a little more room there. One thing to think about would be to make the grate more like a basket, so that it drops down in the center, but still clears the vent, and that would give you more ceiling height.  I had to do that one time and it worked out good, it kept the coals centered in the basket as they burnt down.
 
I have 13" from the top of the grate to the top of the firebox and 7" from the grate to the bottom of the firebox to chamber opening. I'm thinking of dropping the grate with a couple of pieces of 3" angle. That will give me about 16" to the top of the firebox. What do you think?
 
I was able to get alot done today, the boss was out and nothing broke! Pretty much got all the pieces made to finish the RF plate, got the cooking grate and supports made, got the vent handle made and dropped the FB grate. I didn't realize how much work goes into building a smoker but it is all worth it when I stand back and look at my creation with pride. I could not have done it without all you fine folks help.

Here are a few more pictures. Let me know what you think about the FB grate being dropped and if you think it will interfere with the intake vents.


New grate.


Shot of how it covers the vents. Hmmm


Vent handle made out of the rebar I scored.


Cooking grate just set in place, gotta do the burn out and install the RF plate before welding it in.
 
At first I was concerned about the angle blocking the airflow, but as I looked at it, I thought it might work as a baffle directing air under the grate.  I'm curious as to how it will actually effect it.  I have been enjoying this build and your doing a great job.  It has given me ideas for my own.  I'm eager to see it finished.
 
You could take a hole saw and punch out a few holes in the angle, or go ahead and install the second vent. If you install the second vent, put it right above the one you already have. The ideal is to allow fresh air( full of oxygen)   to sweep across the top of your flames as it travels towards your cooking chamber opening. This will help give you complete combustion in your firebox and a cleaner burning fire means cleaner tasting food.

Looking good though.
 
Did the burnout this morning and found out a couple of things. 1st ....paint comes off very easily when the surface it is applied to reaches about 700 degrees. 2nd...heat makes a slightly warped door fit quite nicely after it cools down. My firebox seemed to work well so I will hold off until the first good temp test to modify the fire grate.

Here are a couple of pics.


Looks like it came together pretty good Wildman! I also plan on using tread plate on my firebox (3/8, on the doors as well... gotta use whats available to you ya know, plus it looks good anyways)

And... you're keeping the "temporary" chain handle right?! 
icon_wink.gif
 
Kenny, evening.... Nice job on the smoker.... Looks like it will cook very well for you.....  I really like the chain handles, give the "complete" medieval look.... King Arthur  would be proud...   Dave
 
Getting closer everyday! Got the RF plate, drain and cooking grate installed. Man the RF plate and drain is tough to install and takes a bit of engineering. I've only got the FB door latch, cooker door prop rod, charcoal basket and exhaust cap left. Then paint, test and mount to trailer. I got a couple of cheap (Brinkman) thermometers from Home depot, for now, to mount in the door. Is there an optimal placement for them? Should the charcoal basket be as big as possible that will fit in the firebox? Also I have read about the biscuit test, what is the proper procedure for that?

Here are more picts.


Looking good only thing i have to suggest is on your cooking grate if you are planning on pulling it out. put a piece of angle on top of the one the grate sits on so it wont tip and dump your food on the ground (just makes a channel for your grate to slide thru) Π rotate that 90° hope u get the idea
 
Thanks Doodle, I had forgotten that and have corrected it. Here are some pictures of the latest progress. I think the only thing left is the FB door latch, let me know if ya'll see anything that I have missed.


Grate handle and stops


Charcoal basket


Door prop and temp gauges


Prop rod works like a charm. open the door and it falls right into place, disengauges with very little effort


now i just have to get the trailer legal and mount the smoker to it.
 
  • Like
Reactions: bbq city
Looks good you should get many years of family fun out of it. And let me know how that firebox basket works for you ive seen a few people with those but not much feedback i may make one for my build
 
I think I stole the prop rod idea from someone here but were all family so stealing is ok....right?

I got the FB latch done today with help from my brother in law and some over engineering. It works flawlessly with great tension from the spring.


I'm trying to figure out how to mount the smoker on the trailer and of the many pictures that I have seen here, when I set the unit on the trailer like the others it seems to be to tall. What is the ballpark height from the ground to the cook grate that most people set it at? It looks like for mine to be at between 36" and 40" high I will need to mount the smoker horizontally across the trailer and cook while standing on the trailer instead lengthwise with the trailer and standing on the ground.
 
Well I have mounted the smoker on a trailer finally. Had an old trailer I used to pull my motorcycle, it had been sitting for about 5 years and I was going to give it to my brother in law then he said to use it for the smoker. What a great guy! When I got it out of the bushes and started to modify it I realized that everything was so rusted, I should just start from scratch.

Here are some shots of the old and new.


I only used the axle and springs from the old trailer everything else I built new. When I mounted the smoker I had a bit of a balance problem. To even out the weight I took some old pieces of big flat bar I had in the scrap pile and put them on the nose of the trailer. I had to add about 250 lbs. but it is balanced nicely now.

You can see the flat bar on the nose in the pictures. I plan on putting a grill on the trailer also along with the typical storage for charcoal and wood. The wife wants me to put a table on also, which I have to admit is a good idea. I might have a couple more pictures tomorrow after I get the lights and fenders installed.


SmokingMeatForums.com is reader supported and as an Amazon Associate, we may earn commissions from qualifying purchases.
Clicky