Michigan-ready RF build
- Thread starter doodleq
- Start date
-
Some of the links on this forum allow SMF, at no cost to you, to earn a small commission when you click through and make a purchase. Let me know if you have any questions about this.
You are using an out of date browser. It may not display this or other websites correctly.
You should upgrade or use an alternative browser.
You should upgrade or use an alternative browser.
SmokingMeatForums.com is reader supported and as an Amazon Associate, we may earn commissions from qualifying purchases.
kingfishcam
Smoking Fanatic
I am quite tired of winter myself. The insulation is a very good idea. I would expect you will use less fuel in the summer as well as keeping temps in the winter.
handymanstan
Gone but not forgotten. RIP
maple sticks
Smoking Fanatic
Thanks guys...getting there.
05sprcrw, with everything vertical on this side, I was thinking about 12". I'm going to damper both chimneys, so I hope I can balance them. It should still be higher than the main cc stack...do you think that will be sufficient?
Got a fair bit more done...insulated and skinned the inside of one more side of the warmer and cut the plate for the opposite, fabbed and tacked in the damper tube between the cc and warmer, and got the whole mess lifted up on my welding table so I hopefully can make the interior welds from the framework to the FB floor at a comfortable ht. in other words, stick my head in what will be a smokey dark box, bang my head a bunch, and probably catch something on fire that shouldn't be. Nothing picture worthy today since it pretty much looks the same as it did yesterday. I did figure out a deflector/drip pan that should work pretty well and picked up some 7014 1/16" electrodes to put it together, but I want to get the grunt work done first...
Thanks for the encouragement, folks...I wouldn't have had the foggiest idea where to start without things I learned here and from other folks...so I want to return the favor for folks who might be tackling one of these in the future.
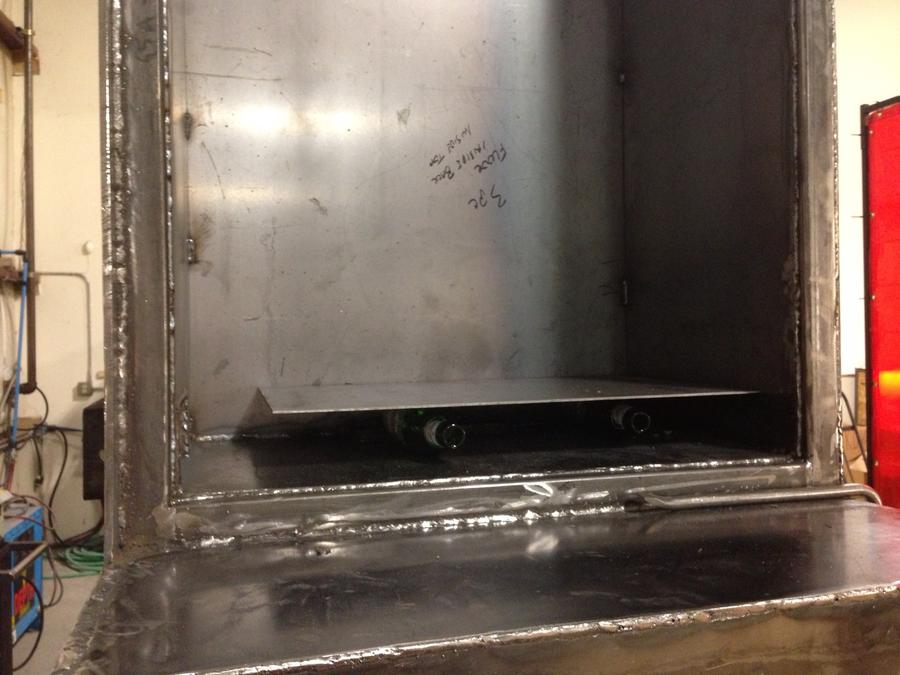
Wondering I'd anyone might have a thought here...imagine the plate in this pix up another inch or so above the heini bottles...with a vertical section about an inch higher, with an equal height edge along the front. Effectively, this would be a water plan or deflector from the firebox below, and the vertical section all the way to the floor would direct heat (coming from the cook chamber to the left) up...I'd place it on perhaps a 15 degree angle to the right. I'm thinking when running just the vertical cabinet, the firebox might be too hot and a deflector would help. I'd place two 4" x4" chimneys to the rear, making the smoke forced to cross the chamber. Thoughts?
Not too much done the last couple of days...but the skin is welded inside the warmer (ceramic insulation installed). Hope to get some time sat am, and maybe start on the doors.
Not too much done the last couple of days...but the skin is welded inside the warmer (ceramic insulation installed). Hope to get some time sat am, and maybe start on the doors.
DQ, I need a picture or drawing of the whole thing to know exactly what you are asking.... I'm old and s l o o o w.... bear with me.... Dave
I would start with some legs on the plate, they may need to be adjusted for length in the future.... moving it around for the best results would be a good option and ease of cleaning too... a drip pan could always be placed on it... I think it is always best to leave room for easy mods.... Dave
Got through welding out the skin today...man, that was a lot more welding than I really considered when I chose to use double walls!
Here's some progress pix:
insulation in for the final piece.
skin on. I'd honestly forgotten this piece, so the fit up was terrible to fit around existing welds. I did an absolutely horrible job welding this piece in, but if there's one place for ugly welds, it's inside!
FB damper
closed...
and the last little door which is on a hinge to tweak airflow in low temp runs. In doing this, I left room to close all the dampers and have a mounting point for a blower in the only place there's a single wall in the future.
i make a list at the end of most shop sessions while things are fresh in my mind. Might change them, but it helps me pick up where I left off.
my welders...I keep the oxy torch a bit away, though.
firebricks to line the bottom. Need to cut one.
here' the inside bottom of the upper/warmer chamber. The one on the left enters the cook chamber, and the one on the left goes down through 3" of ceramic insulation to the firebox. Every seam is fully welded out. Lots of grinding to do though!
look what came in the mail yesterday!
Thanks, Dave...so you're saying rather than building it to the wall, just make a little "table" and tack it down? Can do. Do you think the vertical piece is needed to direct the flow from the cook chamber upwards?
Do you think it will work without tacking it down ?? Would be easy to remove or move around and clean under ?? And adjust if needed later...Thanks, Dave...so you're saying rather than building it to the wall, just make a little "table" and tack it down? Can do. Do you think the vertical piece is needed to direct the flow from the cook chamber upwards?
I would leave it flat in the event you find it too large and need to make it smaller...
Once you get the smoker balanced and working the way you want it to work, then finalize the small details... That's the way I do most all my builds now.... I got tired of having to tear stuff out and redesigning it because my first assumption was incorrect.... Dave
Makes sense...I'd imagine gravity will still work by the time I get this fired up. One less thing to tackle now, too. Thanks for the advice.
Lots of little things done, but the kind of things that don't really show up.
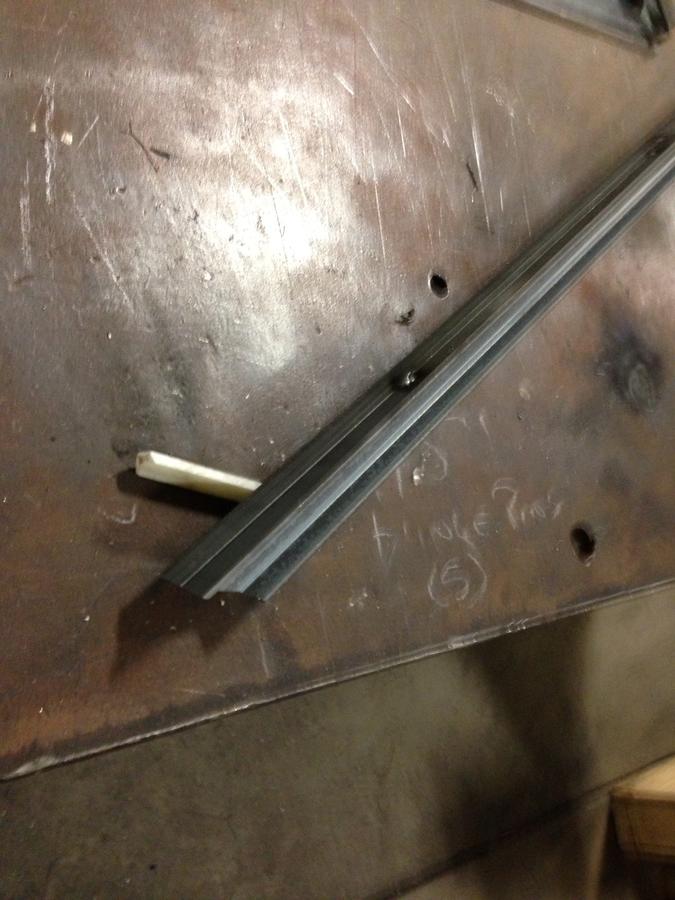
Cut the framework for the doors. Twinned them back to back with tack welds and cut the miters at the same time...keeps 'em square These channels will hold rope seals. There's an inner frame that extends inside the warmer and FB and is insulated. This framework meets the outer frame
Cut and installed two pieces of channel and installed them in the top/inside of the firebox, not covering the baffle, where I can slide a sacrificial plate in and out.
Started making hinges: And did a ton of grinding. Also laid it down for the last time and cut the inner and outer roof around the two stacks, which are now sourced and cut. I'd left the roof off to rig to as I've lifted and lowered it.
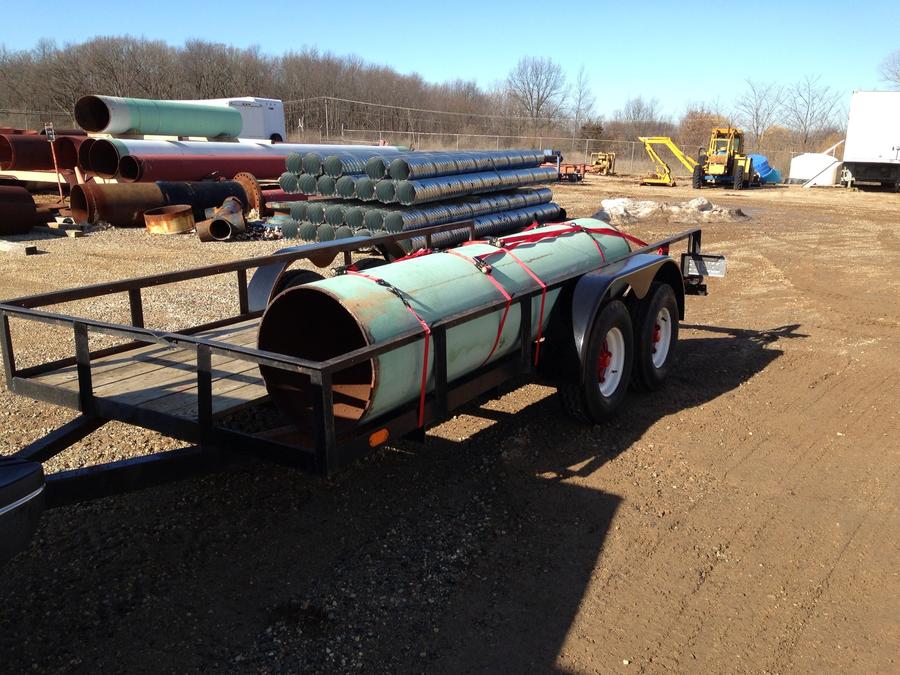
Picking up my cook chamber pipe in the morning while making some customer visits...the timing is perfect (although the holiday will make it hard to get to working on it. I may take it right to the sandblasted depending on the condition, but it will be a landmark anyway. I'm going to have 3-4 feet left over, so I'll either make a smaller unit to leave at the house or build a grill for the trailer...undecided.
Moving along!
Progress...
Design change #1...too high for this kind of weight. I'm gonna drop the skid 10" and cook from the outside vs. the inside of the trailer. Kinda saw this coming, but now I'm sure.
Design change #2...I'm thinking I'll go with a 72" vs 78" cook chamber. It's big enough, and will leave me a nice 33.5" section I can build a grill out of.
Any thoughts on the length...the FB calculates fine for 78", but I really don't need the capacity?
as far as the ugly welds go.. I call em "Gorilla welds"... "BIG, STRONG, AND UGLY"... 80% of my welds look like that.... :biggrin:
Looking good so far and when I first got started welding I had a guy tell me my welds look like "metallic diarrhea"
 it still makes me laugh to this day. Your welds look a lot better then that but the most important thing is they are strong and get the job done.
Dave...gonna leave the chunk alone for a while...got enough on my plate with this one, and my wife is in line for the next shop project...an empty wine bottle privacy fence/table thing, and I'm "back ordered" on some bottle trees for friends. Too good of a chunk of metal to scrap though. I'll think of something good when the dust settles from this one.
Jack D...happily, the worst welds are inside! All these seams took forever. If there is an upside though, I'm a much better welder now than when I started this!
05sprcw...now that just about made me spot out my beer! I hope you don't mind, but I'm borrowing that for sure!
Today I built and installed stacks for the warmer:
Installed and insulated the inner and outer skin for the top, installed the baffle and control handle for the warmer to cook chamber vent: Had a couple of And cut the pipe (3/8" not 1/4" as I thought) to length:
Company's coming Saturday, so I've gotta help get the house ready...Happy Easter, folks!
SmokingMeatForums.com is reader supported and as an Amazon Associate, we may earn commissions from qualifying purchases.
Similar threads
- Replies
- 6
- Views
- 3K
- Replies
- 3
- Views
- 570
- Replies
- 8
- Views
- 878
- Replies
- 59
- Views
- 4K
Hot Threads
-
Trying again… brisket going in.
- Started by SmokerNTraining
- Replies: 59
- Beef
-
Shotguns! Can We Chat?!
- Started by Rafter H BBQ
- Replies: 59
- Field and Stream
-
Featured Competition Ribs, Mustard/No Mustard
-
Selling a pistol, not so easy...Thoughts
- Started by sandyut
- Replies: 14
- Blowing Smoke Around the Smoker.
-
Too Cold For Me
- Started by BGKYSmoker
- Replies: 14
- General Discussion


