94.5 inches long
OD 31.5 inches
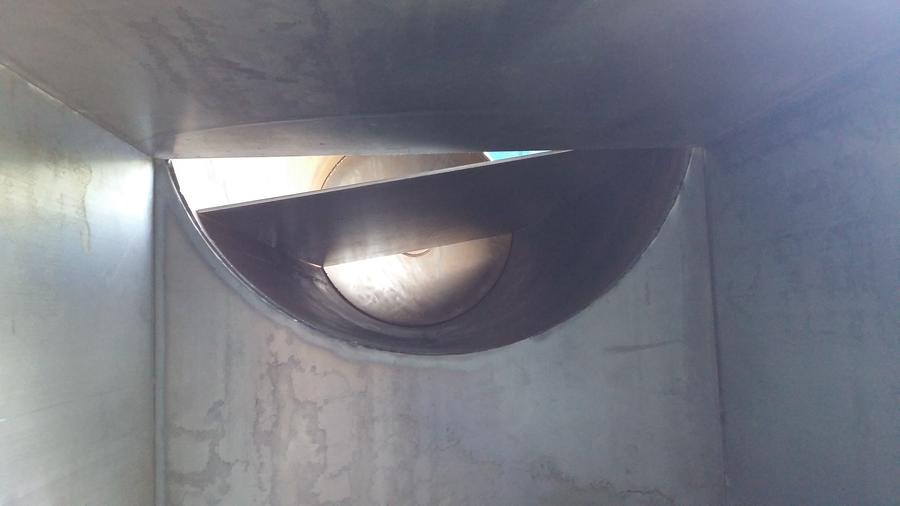
Thank you.... That makes life easier for both of us... If you go "OVERTHINKING" this smoker design.... what if I do this.... or that.... thinking you will improve on the smoker.... Build it this way first.... then build another smoker to compare them and how they operate... This design is not perfect by any stretch of the imagination but it works darn good..... Either one of the exhaust stack installations will work very well.... Notice how they are installed in the picture... The FB inlets are opposite the CC.... that works... Insert the FB past the weld seam on the tank... The weld seam "usually" has a backing plate on the inside... Life will be easier if you do that... the RF plate will be a rectangle and you will save on fit-up... I recommend skip welding in angle iron for the RF plate to sit on... the plate can rest on top of the FB or butt up to in.... Weld a small angle on the end of the RF plate to stop grease from dripping into the CC and install a drain on the RF plate that extends through the CC wall into a bucket... drill a hole in the CC wall for the drain to fit... it does not have to be air tight but close fit for the drain pipe will do.. drill the holes for the drain in the RF plate and CC wall, install the drain pipe and weld to the RF plate and install (thread on) a ball valve on the outside of the CC tank... it should be hand tight.. One thing that works is... break the RF plate so there is a "Vee" down the center... a drop of 3/8" - 1/2" is plenty for the grease to follow...
Build and weld up the FB before you cut the doors.... welding up the FB first, "may" save on the tank warping and screwing up the door fitment... weld up the FB using good welding practices...
31 x 31 x .7854 x 88 = 66,400 cu. in. (31 is the I.D.) (88 is the compensated length for the bulbous end) close enough....
66,400 x 0.004 = 266 sq. in. for FB/CC opening etc....
66,400 x 0.001 = 66 sq. in. FB air inlet openings...
66,400 x 0.022 = 1,460 cu. in. for the exhaust stack (above the CC)
1460 / 0.7854 x 7 x 7 = 38" length above the CC and use a 7" ID exhaust tube...
Circle calculator...... open it....
click on RADIUS - SEGMENT HEIGHT.....
R= 15.5" guess at the segment height until you come up with a number close to 266 sq. in. from the above numbers...
12" segment height gives a segment area of 270 sq. in.
Chord AB is the width of your RF plate at 30.2 inches....
Firebox air inlets.... upper inlet ~10 sq. inches... lower inlet ~ 50 sq. in. below the fire grate... ~6" under the fire grate for ash collection area....
The tutorial has pictures and written description of everything else for you to make a great RF smoker...
I think that covers it... Good luck.... May I recommend you only have ONE thread to cover all the aspects of this build and ALL related topics so folks can follow along and not have to skip back and forth....


 First BLT of the Year...Homemade bacon and Home Grown tomatoes.
