Tons of good info so far.
I'll throw in my
...and some pics.
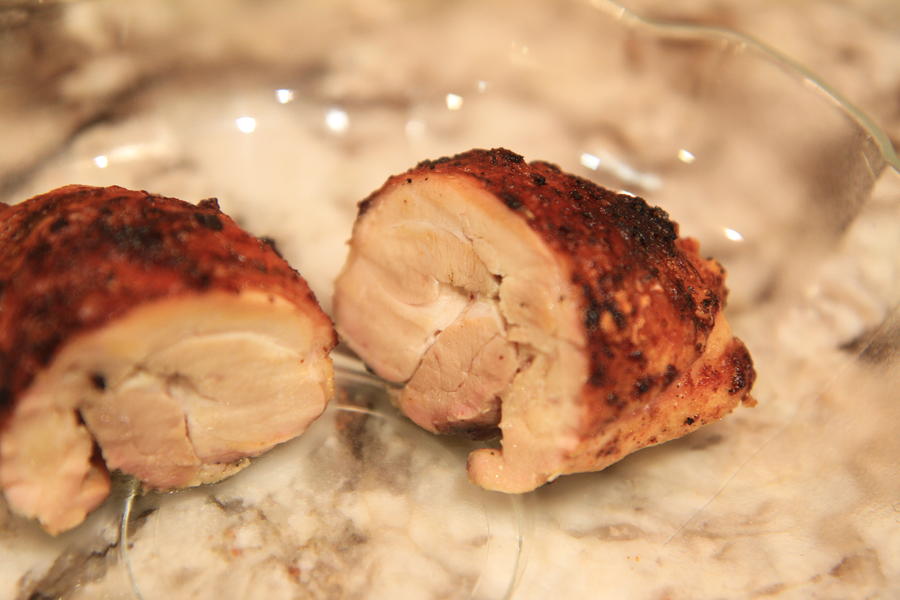
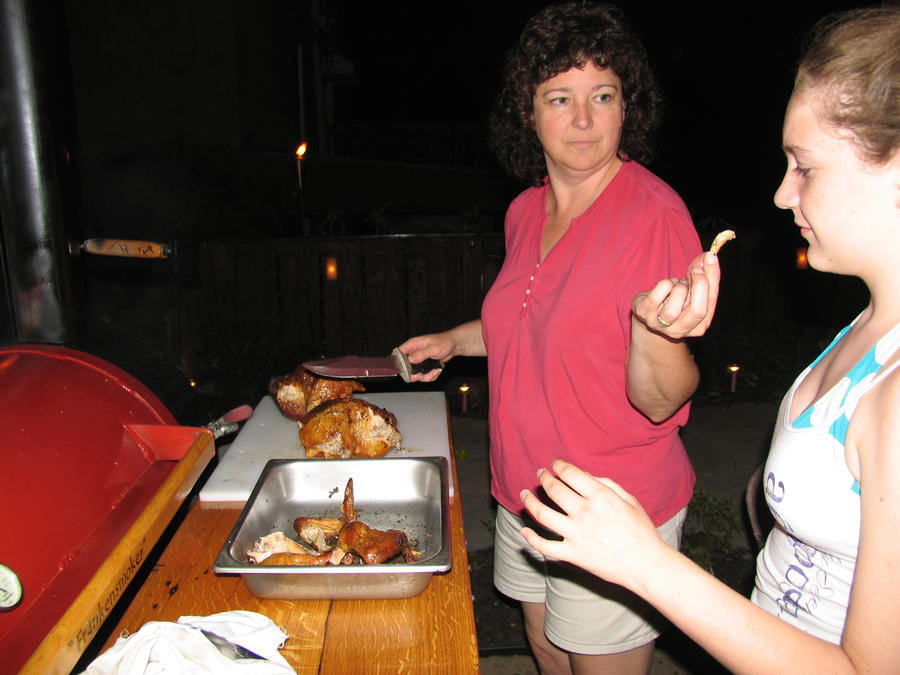
As far as a crispy skin, cooking at lower temps will render the skin and it wont be rubbery but it also will not be crisp like you would get from higher temps or direct grilling. However, if the skin is bite through, such as the thighs pictured below, you're gold.
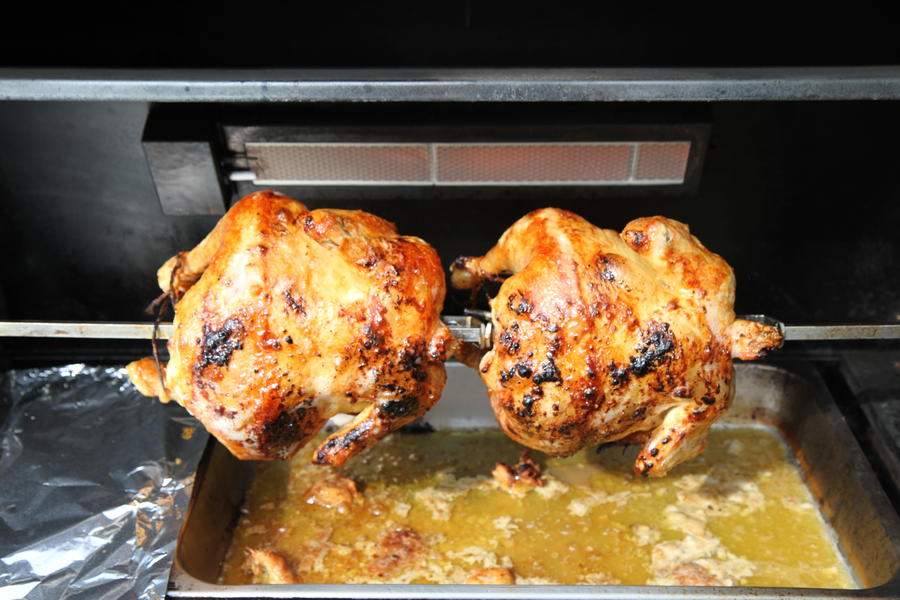
You could use a rotisserie for 20 minutes then smoke, I have never done it that way because once its on the grill I think its a waste of time throwing on the pit, because I can always add wood to the grill.
Just make sure to trim the heavy fat off, you can also prick the skin and pour boiling water slowly over the skin before placing in your smoker.
For thighs I remove the skin, debone, trim the heavy fat, wrap the skin back on the thigh tightly then do the boiling water trick, it works great.
Also for lower temp cooking, stay away from wet slathers and rubs, make sure to use dry rubs, however if you are using high heat, then the skin will benefit from such things as EVO or butter.
Another quick note, after you wash or brine the bird pat dry and place in the refrigerator for an hour uncovered. This prevents the wet skin from picking up the sooty particles that are more common in stickburners.
Here is a copy/paste from my website on larger birds, it's little dated and and I need to go over it a bit, but it has some good info.
[h3]Honey Glazed Pit Smoked Turkey with Apple Gravy[/h3]
USDA ON TURKEY
Note: when
smoking turkey try purchasing one that is no more than 12-14 pounds. Much larger than this and the meat may stay in the danger zone (40-140
°F) for too long.
A 20 pound turkey can take up to 10-14 hours and larger turkeys greatly increase food contamination risks. A 12-14 pound turkey will be good, however a 20 pound bird can be done, just be careful of the "Danger zone".
For a turkey over 14 pounds, bump the temp up to 300-325
°F the first few hours and for goodness sake, no peeking.
(
Stickburners note, make sure the bird is not blasted with the heat, you may want to shield the bird the first half hour and rotate 90
°often if using high heat in the pit)
- Brine Turkey, unless it already has been, such as "Moister Enhanced with up to 8% of solution" or "Self Basting" or "Kosher".
- Brining enhances flavor and texture and gives the cook a wider margin of error, ensuring a moist bird, in my opinion anyway.
- See attached "Brining basics" PDF at the bottom of this page.
- USDA States that BASTED or SELF BASTED: Bone-in poultry products that are injected or marinated with a solution containing butter or other edible fat, broth, stock or water plus spices, flavor enhancers and other approved substances must be labeled as basted or self basted. The maximum added weight of approximately 3% solution before processing is included in the net weight on the label. Label must include a statement identifying the total quantity and common or usual name of all ingredients in the solution, e.g., "Injected with approximately 3% of a solution of.
- Water to salt ratio is 1:16 or 1 cup of Kosher salt per gallon of non-chlorinated water.
- Sugar reduces the the taste of the salt, use the same ratio as the salt.
- Whole Birds brine for about an hour a pound.
- Breasts no more than 5-6 hours
Turkey Brine:
- 2 Gal Water
- 2 Cups Kosher Salt
- 2 Cups Sugar (1 Cup white + 1 Cup Brown)
- 4 TBS Black Pepper
- 1 TBS Dried Rosemary
- 1 TBS Thyme
- 1/4 Cup White Wine or dry vermouth. (not Cooking Wine)
Combine all ingredients to 1 gallon of water in a large pot and bring to a slow simmer for 10 minute stirring, remove from heat and cool in refrigerator. Reserve a few ounces for the beer can.
In a cooler add ice and the brine, submerge bird in brine, (weigh down if needed) add ice as needed, after brine period remove and rinse, pat dry.
Slather:
- 1/4 Cup Olive Oil
- 1 Tablespoon Worcestershire
- 1 Tablespoon Rosemary
- 1 Tablespoon Minced Onion
- 1 Teaspoon Onion Powder
- 1 Teaspoon Old Bay
- 1 Teaspoon basil
- 1 Teaspoon Thyme
- 1/2 Teaspoon Cracked Pepper
- 1/2 Teaspoon Celery Salt
- 1/2 Teaspoon Poultry Seasoning
- Remove the neck and giblets, (heart, gizzard, liver), from the inside, trash the liver and place the neck and giblets in the refrigerator, this will be used for gravy. Place the turkey in cooler add brine then add enough ice to last the length of time the bird will be in the brine and make sure bird is submerged and place in a cool location. Soak a 12 pound turkey in the brine overnight or 10-12 hours in the fridge, the goal here is about an hour a pound.
- Slather: Olive oil, butter, Garlic, Rosemary, Time, Cracked Pepper, etc... note the picture with all the spices. I warmed the slather about 25 second in microwave, mixed thoroughly and rest about half hour, then the slather is placed in the fridge to thicken up.
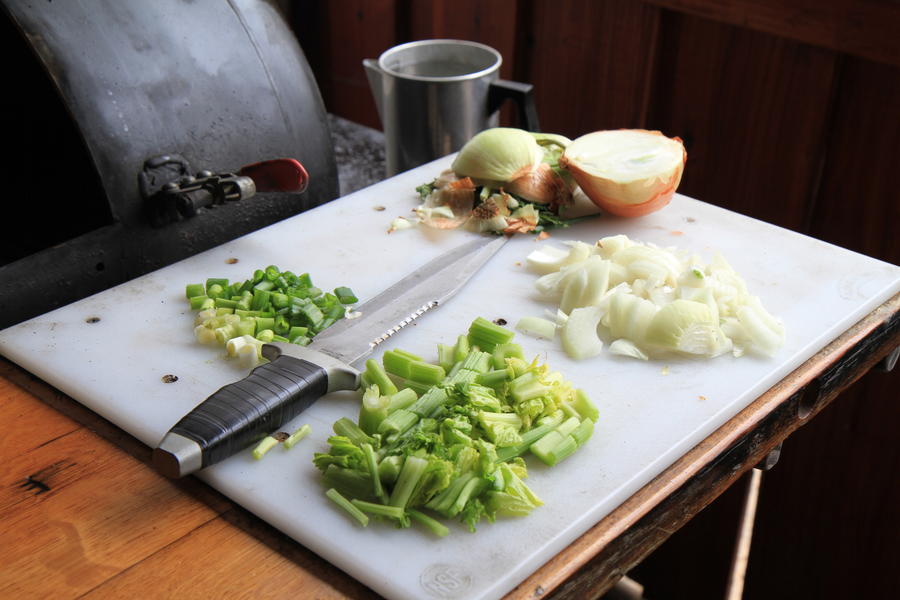
- Gravy: Fresh Sage, smoked garlic, green onions, white onion, applesauce and various spices as pictured below. Use fresh apples if you have them, the applesauce is a bit sweeter
Steps
- Fire up the Pit: and bring temp up to about 350°F+. I used white ash and cherry wood.
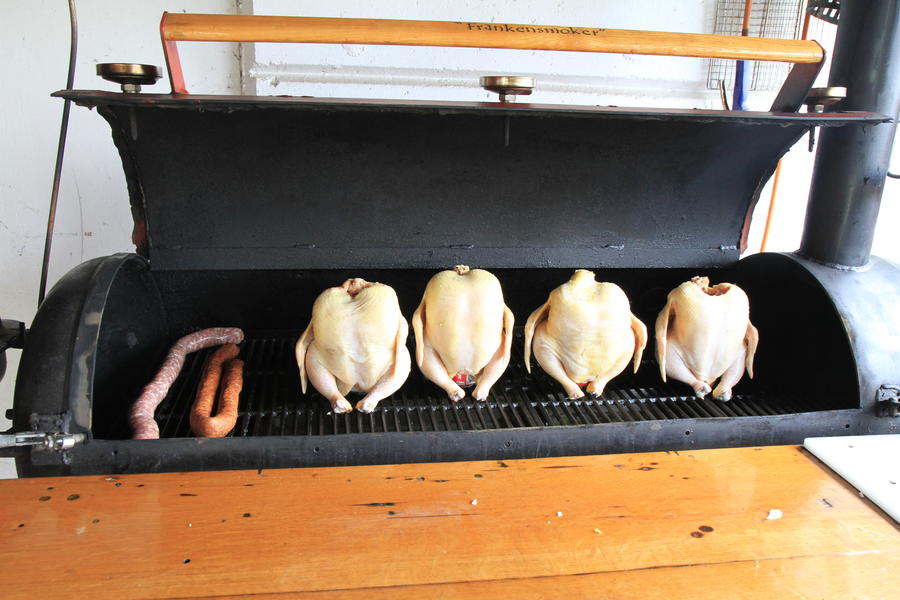
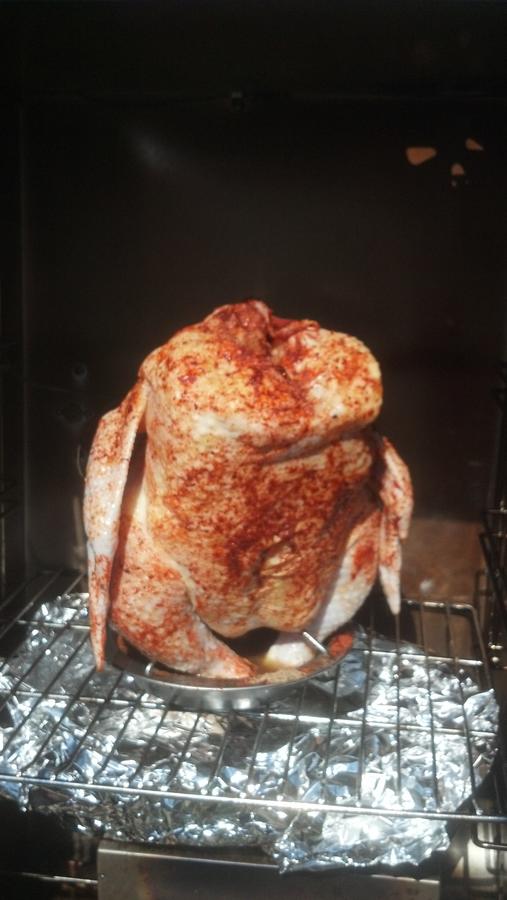
- Setup the beer can apparatus: and fill halfway with reserved brine. I Did not brine this bird due to the fact that it was an enhanced turkey, since it was enhanced , I just used a bit of Killians and spices as pictured.
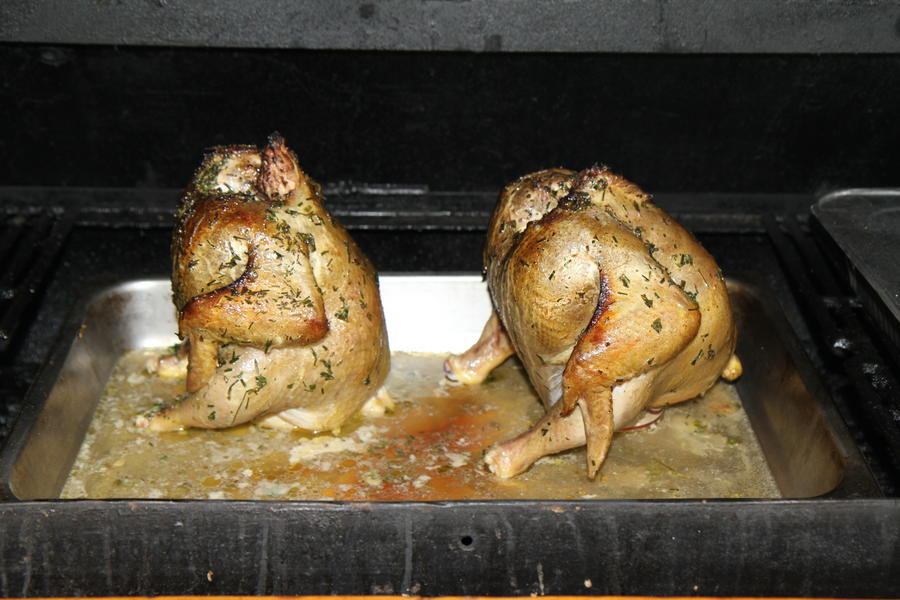
- Drip Pan: Place a grate then a disposable tin foil pan on the reverse flow plate with a quart of water to catch the drippings for gravy, add water as needed, place the giblets and neck bone in the pan. Add some celery onion slices and spices to the drip pan. This smoke I tried apple sauce for a sweet gravy and only added the neck bone at the wife's request. I did add 2 cups of water during the cook but it dd not need it.
- Reduce risk of contamination: Make sure everything is ready, reducing the possibility of contamination for example having the spices pre-measured in bowl and slather or rubs ready to go, because you will be handling the bird.
- Trimming: Remove bird from brine, this was an enhanced bird so I did not have the option for brining, rinse thoroughly in cold water then pat dry. Trim the neck flap. Remove any pop up timer devices.
- Rub/ Slather: At the least, make sure the breast is covered in a good slather or butter.
- Stuffing the turkey: I do not cook stuffing in a smoked bird, if not being smoked on a beer can style apparatus, stuff with apple and onion quarters.
- Placing the turkey: Once the Pit is preheated, to 350°F+, about an hour works for my Pit, place the turkey over top of the beer can apparatus, pin the wings close to the sides with toothpicks, place the turkey in the drip pan and insert meat probes. This cook I put the probe in the innermost thigh. Some will plug up the neck hole with an onion, this one was not but it may decrease the cooking time slightly, the jury is still out on this one. I also placed the bird in a pan to catch the drippings for the gravy.
- Cooking: Let the temp creep down slowly until a temperature range of 250°F - 275°F is achieved, this may take an hour or so to level off. Plan on 25 to 30 minutes per pound at this temperature. Watch the wings and breast and if they start to get too brown you can cover them with some foil.
- Drip pan: make sure to keep an eye on this, you do not want the drippings to burn up. Also try and back off on adding too much liquid in the tale end of the cook, you don't want a watered down gravy.
- Sanitize: Once everything is on the Pit, I will wipe everything down with Chlorox Cleanup.
- Mopping: If you want to mop your smoked turkey, wait until the last hour of the cooking time to start. This particular cook I brushed the bird with honey about 60 minutes before it was done.
- Danger Zone: Pay close attention to the cooking temps and time, if you are nearing the 4 hour mark and are not close to 140°F, I would suggest bumping your temps up to 325°F until you are out of the "Danger Zone".
- Checking the Internal Temperature: (I strongly suggest that anyone doing whole poultry, educate themselves on the proper handling and cooking procedures.) The breast and thighs must reach different internal temperatures for ideal doneness. When the breast reaches 150°F, cover it with foil to prevent it from being overcooked. I removed this turkey when the thick part of the thigh reached 160°F. The temperature will rise after removing it from the smoker. Keep an eye on your times and temps, if you get a reading that doesn't make sense with the time chart, err on the side of caution. Although I did not take a reading of the breast it was cooked perfectly and If I had taken the thigh up to 170°F, it may have been overcooked.
- Disclaimer for cooking temps, you knew that was coming. USDA states that the turkey should be cooked to a minimum of 165°F at the lowest temp reading. I would suggest an instant read thermometer, such as a Thermapen if you plan on smoking turkey. Check at the innermost part of the thigh and the thickest part of the breast and the lowest reading should be at 165°F, per USDA guidelines.
- Resting: Remove the turkey and cover loosely with aluminum foil for about 30 minutes. If I need up to an hour, the turkey will be wrapped in a thick towel in a non drafty area, any longer than an hour and its foiled, toweled and placed in a cooler with more towels.The resting is very important, a lot of the juices will redistribute into the meat ensuring its a moist bird. If you are pulling your turkey slightly before its final temp, make sure that you let it rest about a half hour wrapped in foil and lay a towel on top. During this rest your temps may increase due to carry over heat, so if you pulled it a little shy of 165°, don't sweat it.
- Gravy: As the bird is resting finish up the gravy, Pour liquids from beer can apparatus, (taste it first), and the drip pan through a strainer into a pot, bring gravy to a simmer and reduce by half, add spices to your preference, remove excess oil. Use arrow root or corn starch to thicken the gravy. If you have time you can refrigerate the gravy until the oils solidify on top then scrape the grease off the top.
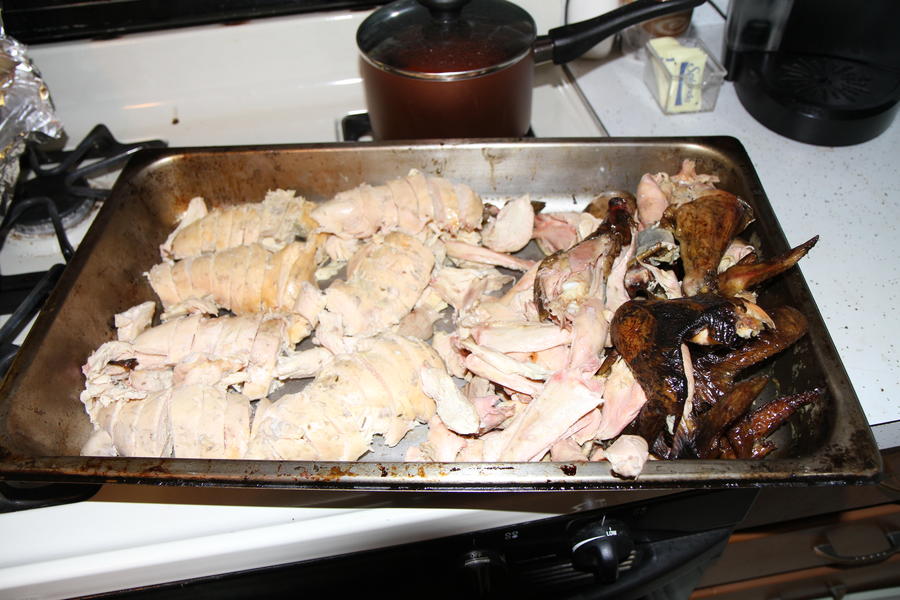
- Carving: When carving the turkey if it appears pink Don't panic, this is normal. The smoking process causes a chemical change in turkey that causes it to turn pink. Just make sure the lowest reading is at 165°F.
- Time charts, not an exact but in the ballpark,
This was a 12.4 lb bird and took almost 34 minutes per/lb at 230 - 240°F, I was at exactly 4 hours into the cook when I reached 140°F, next cook I will maintain 250- 260°F until it is out of the "danger zone", this was too close for comfort.
- At 235°F your turkey will take 30 to 35 minutes per pound.
- At 250°F your turkey will take 25 to 30 minutes per pound.
- At 275°F your turkey will take 20 to 25 minutes per pound.
- Thawing: Frozen turkey thawing timetable. Weight In refrigerator In cold water
In the Refrigerator (40°F or below)
Allow approximately 24 hours for every 4 to 5 pounds
- 4 to 12 pounds 1 to 3 days
- 12 to 16 pounds 3 to 4 days
- 16 to 20 pounds 4 to 5 days
- 20 to 24 pounds 5 to 6 days
I thawed this 12.4 pound bird in the refrigerator for 5 days and still had ice inside the turkey around the neck bone.
In Cold Water
Allow approximately 30 minutes per pound
- 4 to 12 pounds 2 to 6 hours
- 12 to 16 pounds 6 to 8 hours
- 16 to 20 pounds 8 to 10 hours
- 20 to 24 pounds 10 to 12 hours
Change the water every 30 minutes. Cook the turkey immediately after it is thawed.
Concerns/Notes:
- When carving the turkey if it appears pink Don't panic, this is normal. The smoking process causes a chemical change in turkey that causes it to turn pink. Just make sure the lowest reading throughout the turkey reads 165°F.
- This was a 12.4 lb bird and took almost 34 minutes per/lb at 230 - 240°F, I was at exactly 4 hours into the cook when I reached 140°F, next cook I will maintain 250- 275°F until it is out of the "danger zone", this was too close for comfort.
- Keep the turkey refrigerated or in iced brine until ready to cook, do not bring up to room temperature before smoking.
- Watch temps closely, the bird needs to be above 140°F in under 4 hours, bump up the temps until you are above the "Danger Zone".
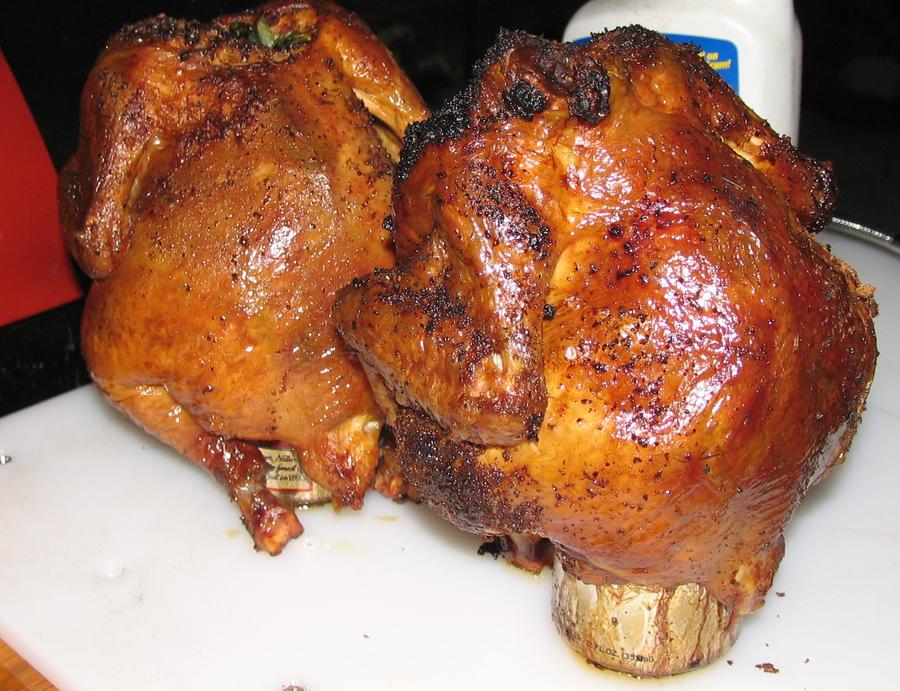
- The turkey turned out great, It had good flavor and was moist throughout, the dark meat was exceptional.
- Compared to an Oven Roasted turkey and my "Keg Roasted Turkey" the smoked turkey wins over the Oven Roasted but not the Keg Roasted turkey, but in all fairness the turkey was 11 months old and was an enhanced bird so I did not have the option of brining. I will follow this up with a fresh bird next time. However the skin was much better on the smoked turkey than the Keg Roasted Turkey,
- The gravy was good but needs work, I think next time I will saute or brown some of the ingredients before adding to the drip pan and use fresh diced apples in place of apple sauce. The sauce was much better the next day, after removing the grease.
- Many will say you can not get a crisp skin smoking with low heat, I had no problem getting a crispy skin and this bird was smoked sitting in liquids.
- Spices used for the slather and Gravy
- Fresh Sage, smoked garlic, green onions, white onion, applesauce and various spices.
- Bird ready to go, can half full with Killians and spices as pictured with a large sprig of fresh sage and smoked garlic.
- Cherry wood smoke. Note the removed grate, the pan is sitting directly on the reverse flow plate.
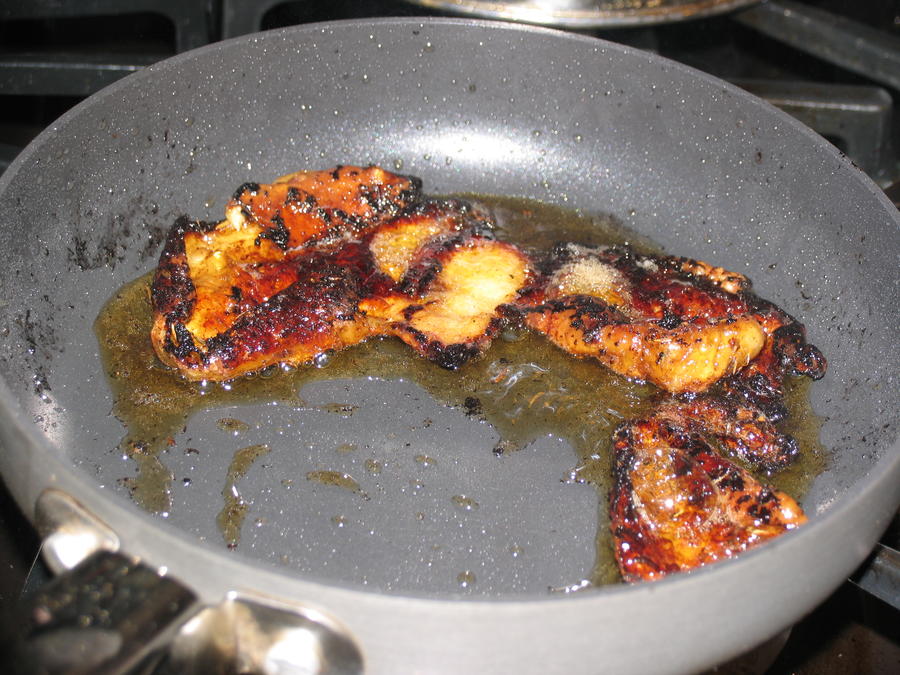
- Foiled Wings, starting to get dark
- Foiled breast when thigh reached 150°F
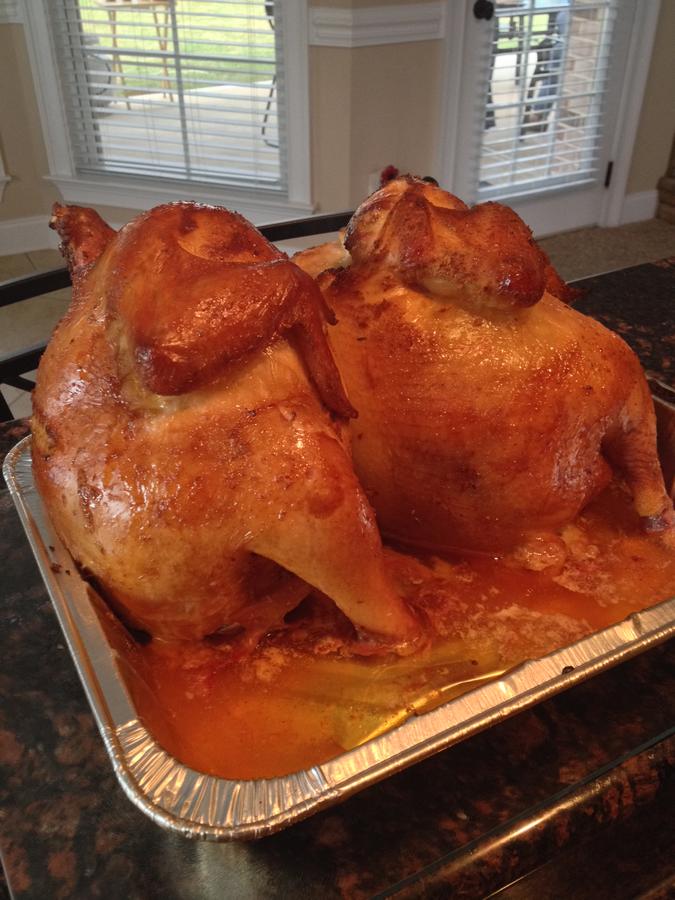
- Removed all foil at 155°F and brushed with honey
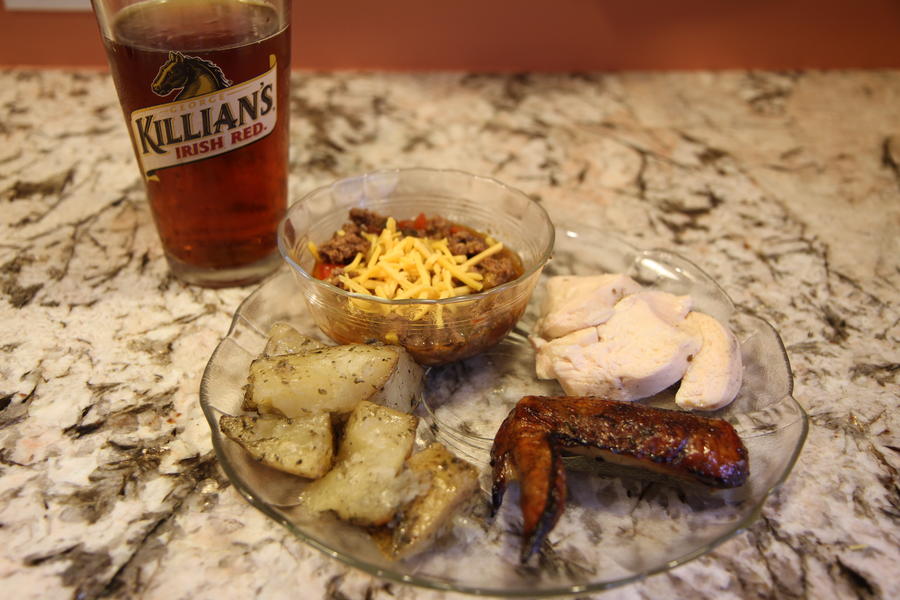
- Pulled when thigh reached 160°F
- Rested, wrapped in foil and towels for 30 minutes and ready to carve.