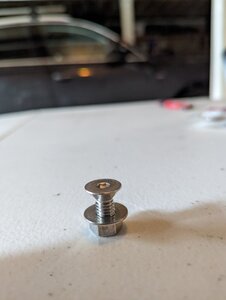
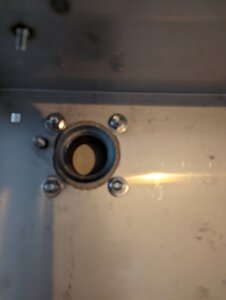
I'm going to do the leak test first out of the unit. This will test much of the joints up to the solenoid on one side and the valve on the other. Then I will put it in place and test the rest. I just thought it would be easier to check with it out of the unit. I should have bought a cap for the other end and then I could test the entire unit out of the smoker. Maybe I just do that with the money saved by the parts I get to return.
Smoke Vault gas smoker makeover
- Thread starter Nefarious
- Start date
-
Some of the links on this forum allow SMF, at no cost to you, to earn a small commission when you click through and make a purchase. Let me know if you have any questions about this.
You are using an out of date browser. It may not display this or other websites correctly.
You should upgrade or use an alternative browser.
You should upgrade or use an alternative browser.
SmokingMeatForums.com is reader supported and as an Amazon Associate, we may earn commissions from qualifying purchases.
Nice looking manifold.
RectorSeal #5 is my preference and probably the industry standard.
When using liquid pipe dope or tape ALWAYS keep it back at least 2 thread turns from the end of the male fitting. You do not want that residue in your system.
The optimal mounting is with the coil vertical and on top. Next is with the coil horizontal. This is for potential debris in the system so it doesn't get in the moving parts of the valve.I really don't understand how having the solenoid only in the vertical with the nut on top would make any difference. The solenoid is held closed by a very strong spring. They don't tell you the current needed to open the valve, it just seems that the manufacturer would make the spring strong enough that gravity would have zero effect on the operation of the solenoid. Or, why else would it have to be nut side up?
...
Yellow tape was thicker and when threaded the wrap around the tip of the male piece would get cut off and end up in the pipe. I kept having to fish it out so I sought some advice, and found that using a high quality thread dope was a better solution. I used RectorSeal and it all went together very easily. We will see how it stands up to time.
RectorSeal #5 is my preference and probably the industry standard.
When using liquid pipe dope or tape ALWAYS keep it back at least 2 thread turns from the end of the male fitting. You do not want that residue in your system.
Nice looking manifold.
RectorSeal #5 is my preference and probably the industry standard.
When using liquid pipe dope or tape ALWAYS keep it back at least 2 thread turns from the end of the male fitting. You do not want that residue in your system.
I used RectorSeal #5
The problem is I have very skinny fingers and there is no way I could control that. I put on the dope as best I could and used a clean rag to make sure the end was clean and that none was inside to fitting. The clean end insured no dope past the first thread, and only below the thread peek for the first groove.
The optimal mounting is with the coil vertical and on top. Next is with the coil horizontal.
My bench testing also confirmed this. At any position other than vertical, the operation was erratic.
I looks like you are getting close to a first fire!
That will have to wait until I get back from Whitefish. I also have the bolts to mount the mailbox. When I get back I should be ready to finish it up.My bench testing also confirmed this. At any position other than vertical, the operation was erratic.
I looks like you are getting close to a first fire!
I need to paint the connectors for the mailbox but it is too cold, I might just wait until it gets warmer. I'll see if I need to add the rtv now, maybe I'll just go with a thin gasket material. I'll know that when I do the smoke test and see how much makes it through and how much leaks.
Spent some of the morning trying to figure out the RTV solution for bonding the smoke tube between the smoker and the mailbox. It seems that LavaLock is the answer and they have 2 different products.
Black 450 LavaLock with 2K reviews 4.6 of 5
Red 600 LavaLock with 140 reviews 4.7 of 5
If you ask me today I say I will never smoke over 400 degrees and the Black 450 is the product that I should use, it is black. I have only been smoking for a few months and haven't experienced much. Is 450 enough or should I go to 600, which is red.
Does anyone ever smoke over 450 degrees?
Last edited:
So, you are passing the smoke through the pipes? If so, the black should be just fine. If you are over 450 degrees in this smoker, you have bigger problems!
Actually, i don't even know if it will get to 450°. Probably not. I just read some posts where people smoke low and slow and then turn it up to over 500, i suspect it's a different kind of smoker. I was just making sure since I have been at this for such a short time.
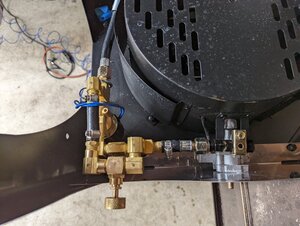
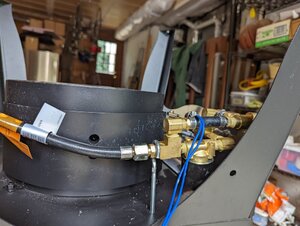
Got back to work on this this afternoon. Leak tested the manifold and jerry rigged the manifold to the smoker. Ran tests for hot and cold and attempted to see how low I could comfortably go with the new needle valve.


The manifold is held in place at the hose end by an eye bolt I had laying around. I had to bend it open a little, probably should be bigger and it is zinc and should be stainless. Before I am done I think I will replace it with a stainless u bolt.
The temperature swing, without the needle valve is 150*F at the lowest built in valve setting and 450*F at the hi setting. The lowest I can comfortably take the needle valve is 145*F.
Tomorrow I will deburr the inside of the smoker and put in the mailbox. No paint and no gasket, just bolted together. I need to see if I can get enough smoke or if I need to add the third connector. I really hope how it is now is sufficient.
Question: I don't want to paint the connectors now, it is too cold and the paint won't adhere well. Should I coat them in oil and just keep them oiled until I paint them, is there a better option, or should I just paint them now and repaint them in the spring?
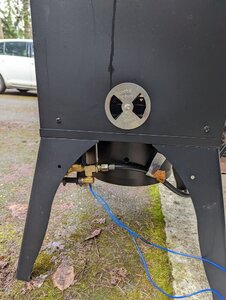
Ran a smoke test this morning and it turned out as expected, not enough smoke. There are several things I need to change.
First there are two intake vents at the bottom of each side that need closed so I have to find some 3x3 to 4x4 piece of stainless sheet metal to close them off.
Second, as Ringer
said when I started this there needs to be a few holes drilled in the bottom to draw air from to carry it into the smoker.
The smoker with the mailbox attached.


Some smoke entering the smoker.


The needle valve is somewhat better then the valve that comes on the unit, but not tremendous. That's where the solenoid comes into play.
First there are two intake vents at the bottom of each side that need closed so I have to find some 3x3 to 4x4 piece of stainless sheet metal to close them off.
Second, as
The smoker with the mailbox attached.
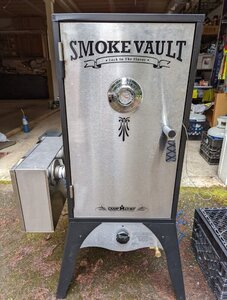
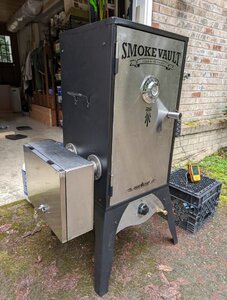
Some smoke entering the smoker.
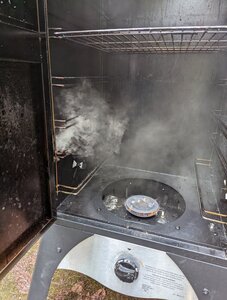
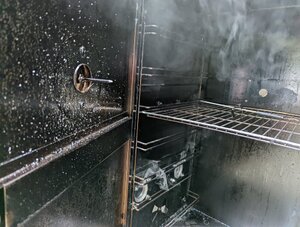
The needle valve is somewhat better then the valve that comes on the unit, but not tremendous. That's where the solenoid comes into play.
Awesome, it looks like you are getting draw. I have noticed that the warmer the smoker body gets, the better the draw is on mine. Good work!Ran a smoke test this morning and it turned out as expected, not enough smoke. There are several things I need to change.
First there are two intake vents at the bottom of each side that need closed so I have to find some 3x3 to 4x4 piece of stainless sheet metal to close them off.
Second, asRinger said when I started this there needs to be a few holes drilled in the bottom to draw air from to carry it into the smoker.
The smoker with the mailbox attached.
View attachment 525989 View attachment 525990
Some smoke entering the smoker.
View attachment 525991View attachment 525992
The needle valve is somewhat better then the valve that comes on the unit, but not tremendous. That's where the solenoid comes into play.
I only have 2 little 3/8 holes in the sides near the bottom. I think when I drill the holes like you suggested it will be better. Maybe you can see in the smoke pic's there are two input air vents that I need to close.Awesome, it looks like you are getting draw. I have noticed that the warmer the smoker body gets, the better the draw is on mine. Good work!
I am really hoping I don't have to put in the third tube between the mailbox and the smoker. That will be a major piece of work.
Found what to use to cover the intake vents:
Vent Cover
I was hoping to not have to take the mailbox off. If I have to it will make drilling the holes in the bottom of the mailbox easier.
Vent Cover
I was hoping to not have to take the mailbox off. If I have to it will make drilling the holes in the bottom of the mailbox easier.
I only have 2 little 3/8 holes in the sides near the bottom. I think when I drill the holes like you suggested it will be better. Maybe you can see in the smoke pic's there are two input air vents that I need to close.
I am really hoping I don't have to put in the third tube between the mailbox and the smoker. That will be a major piece of work.
I do have 6 in mine but I'm running an mes 30 and a smaller box mod so they won't be the same. The good thing is if you drill too many holes you can always cover over them with metal tape or whatever. The 2 tubes you have should be good. Maybe just open up more holes on the bottom of the box mod 1 at a time with the smoker going and see. If you start to get back draft then you drilled 1 too many unless the exhaust is catching wind. Looks to be well under your control.
I don't know how much I need, smoker is smaller so maybe less, maybe more. I will space 8 1/4" holes evenly down the middle, it puts them about 2" apart. That gives me 16/8, slightly less then yours. If I need more I will just drill out some to 3/8". Pictures will follow.
These will be the hardest 8 holes I have ever drilled. I have a 1/8 stainless drill bit, maybe I should get a smaller one for the pilot hole. It's what I used for the other holes, maybe the walls are thicker. Slow and pressure.
SmokingMeatForums.com is reader supported and as an Amazon Associate, we may earn commissions from qualifying purchases.
Similar threads
- Replies
- 5
- Views
- 1K
- Replies
- 9
- Views
- 940
- Replies
- 14
- Views
- 8K
- Replies
- 17
- Views
- 2K
Hot Threads
-
Local To Your Area Recipe Thread?!
- Started by Rafter H BBQ
- Replies: 24
- Blowing Smoke Around the Smoker.
-
California Roll
- Started by Gonna Smoke
- Replies: 22
- ABT's and all things Appetizers
-
Power Out for last 4 days...
- Started by sandyut
- Replies: 22
- Blowing Smoke Around the Smoker.
-
Piedmontese deal
- Started by Steve H
- Replies: 19
- Blowing Smoke Around the Smoker.


