I am going to attempt to list my OKJ Highland modifications, reasons, and observations.
There are many helpful threads throughout these forums dealing with the Oklahoma Joe smokers, perhaps we can compile some information here in a running thread to assist everyone who is using, modding, and wondering what to do in their particular situation.
Please add any of your experiences below. State whether yours is a Highland or Longhorn. Any newer Reverse Flow models should probably go in a different thread.
Here we go.
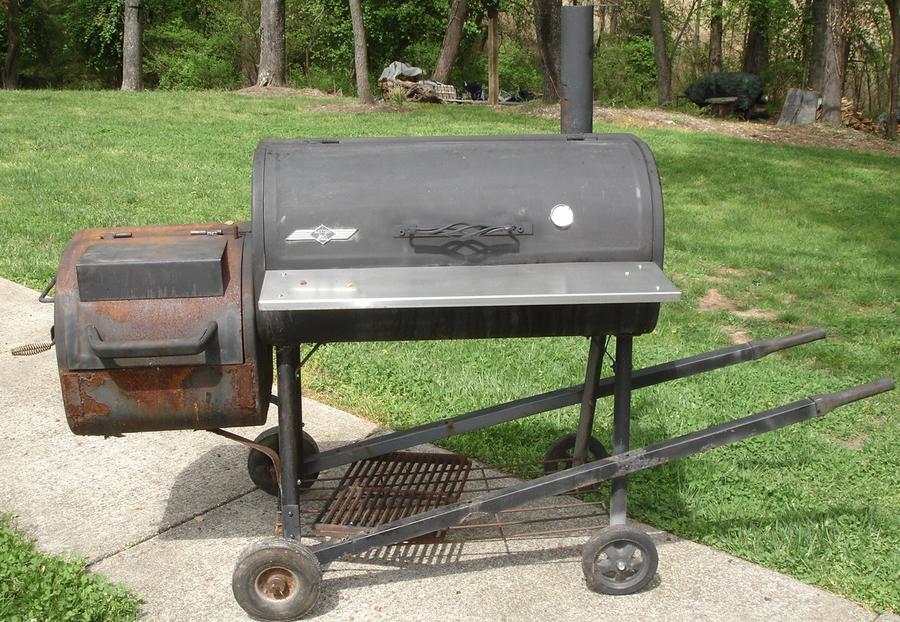
This is a newer Oklahoma Joe Highland purchased early 2017. Having owned a Chargriller many years ago, then another generic offset smoker, I had a list of mods for right out of the box. I added the lavalock nomex gasket to the FireBox and Cooking Chamber area after reading and seeing the leakage with y own eyes. Same goes for adding a seal around the FireBox Side Air Inlet/Clean out door when i discovered that controlling inlet air was sketchy.
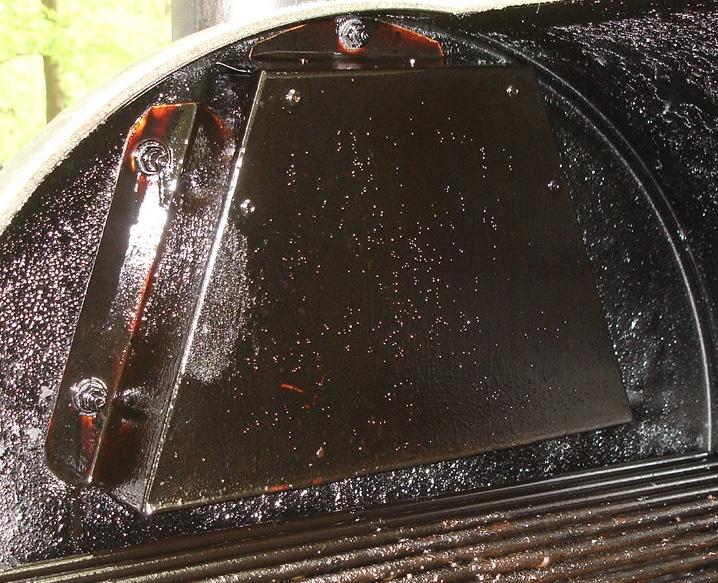
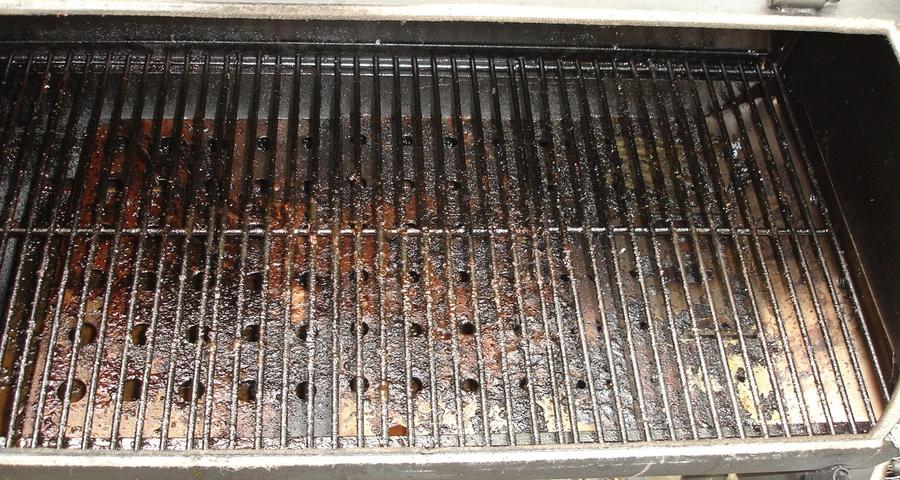
Extend Exhaust Stack Down to Grate Level: One the most important mods in my book was to extend the exhaust stack down to about 1" above grate level. Based on other smokers I have used, I knew this would keep the heat flowing across the grates better, rather than bottling up at the top of the cooking chamber. The normal way to do this is by using a piece of 3" round aluminum dryer vent, with a bend bringing it down to grate level. The downside to have a round pipe extended down is that you lose a little bit of prime real estate. To get around that issue, I used a piece of SS sheet metal, made a cardboard mock up to make sure i had the correct shape, and bent an exhaust baffle which bolts to the side of the cooking chamber, directing the gasses up to the factory stack opening. If you do this, make sure to do the math to ensure you are not restricting the flow. I calculated the are of the 3" stack circle, then made sure my exhaust baffle was equal or slightly larger so that it didn't choke the outgoing flow.
Effect: Gets the heat and smoke down closer to grate level where the food is sitting.
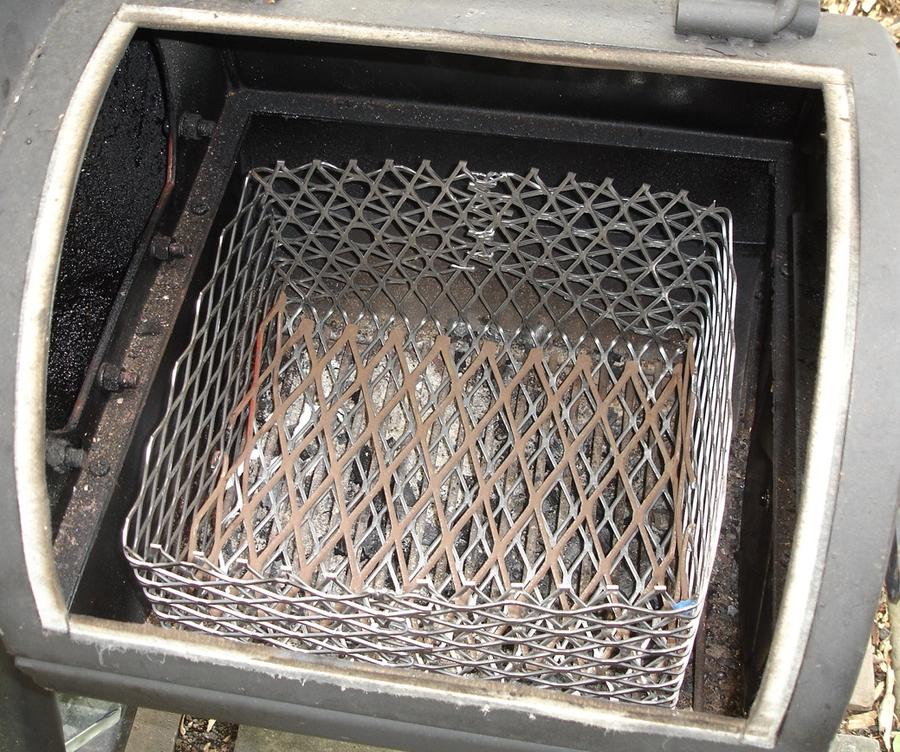
Charcoal Basket: This one goes without a lot of explanation. Allows for better fuel containment and fuel/heat management.
On the OKJ Highland, the largest base dimensions to have it still fit properly is 12" by 11", the sides on mine are 6" tall. Made from a sheet of 24" x 24" expanded metal from Home Depot. I had a leftover piece of heavier expanded metal, laid it in the bottom. The bottom of the charcoal basket is usually what burns out first.
Effect: Better fuel & fire management.
Additional Side Door: This one takes a little more fabricating experience. WHY this anyway?
On my previous smokers it was apparent that any time the larger main firebox door was opened (Like the pic above) massive amounts of heat escapes, which is not good for the actual smoking going on, and unpleasant for the BBQ chef who gets blasted with hot gasses when he opens it.
For years i had been thinking of a way I could add fuel, that would be less disruptive and easy. When smoking, I like to toss some wood splits or sticks in there, and needed a way to do this quickly without opening the big top FB door.
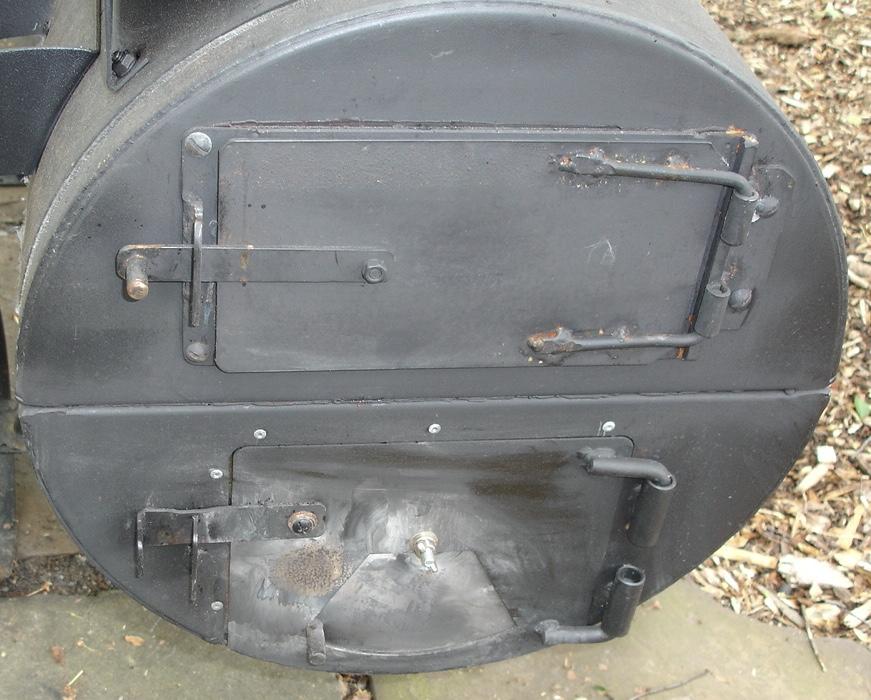
I built this side firebox door in the upper half of the firebox. It is above the height of the charcoal basket. Open, toss in a stick or two and close it. Very easy.
Effect: easy to add fuel to an existing fire without opening the top firebox door which disrupts the air flow and dumps a lot of heat from the FB into the air. I am pleased with this one, but I know it might be beyond the scope for some folks.
Bottom FB Door Seal:
Also, notice the rivets on the bottom factory door? That is where the internal flange is attached to seal up the bottom door.
A lot of air was getting into the firebox through that gap. Now I can actually open the damper more and get a better gauge on how much air I am letting in. before, the air leakage was bad enough that the actaul slide damper stayed almost closed when trying to maintain 225-240 range. Now the damper sits open about 1" to keep those temps.
Baffle and Convection Plate(s): This mod is to correct the Left to Right temperature imbalance. In stock form, these smokers, and others in the lower price range suffer from unbalanced heat across the grate area. near the Firebox (right side) can run 50 degrees hotter than the Left, depending on where you are in terms of fire/heat management.
Definitions:
The Baffle is the part that touches and/or attaches the firebox end of the cooking chamber, where the heat enters the cooking chamber. There are times when folks will only install a baffle, which can help the imbalance somewhat and help the hotspotting in the area near the firebox. In my last two smokers I only used a baffle plate, but still had to be cautious about food placement. I did most of my smoking at the end away from the firebox.
Tuning Plates? Convection Plate(s)? What does it mean? It's actually pretty simple, you use one of the other to help even out the heat across the cooking chamber. They sit about 3" below grate level.
Tuning Plates are numerous rectangular pieces of steel, that can be adjusted (slid) easily to crate smaller or larger gaps where the heat rises up to the grate. For a Do It Yourselfer, tuning plates can be an easier option, as they are simple pieces of steel that you cut to the proper length and drop in.
A Convection Plate is usually a larger piece of sheet metal, typically with holes drilled in it. The holes start small at the firebox end and gradually get larger toward the stack end of the cooking chamber. There are several suppliers who make Convection Plates, and some folks make their own. Hole size and placement being the important factor.
This Baffle/Convection Plate set-up is 3 pieces of heavy gauge SS sheet. The baffle is bolted to the firebox side of the cooking chamber using the two existing top bolts that hold the Firebox (FB) and cooking chamber (CC) together. My baffle has approximately a 1.5" vertical flange where it bolts up to the side. Then, roughly a 3.5" transition that is bent at around a 45 degree angle, followed by the horizontal section which runs under and parallel to the cooking grates, which begins the actual convection plate section (s).
My 45 degree angle transition starts at the top of opening between the FB and CC, I did not block any of that opening, but some folks do. I drilled a lot of holes. A Lot. If you look at the commercial models, you can see that you can get away with half the holes I drilled.
Effect: When finished, it was tested and I found that it was running a bit hotter at the stack end now!! I had reversed the heat imbalance. I added and enlarged a few holes at the FB end, and viola, it's spot on. I notice now that just a cut of meat has more effect on side to side temperature than anything else.
Side Effect: When you add extra steel inside, it's additional thermal mass. This is usually a good thing, but, you will experience slower warm up times because it take longer for more steel to come up to proper temperature. Even though this was sheet metal, it was on the thicker side, so it added about 6 lbs. of mass. More to heat up. But on the PLUS side, once it's up to temp, it helps hold that temp.
Stack Extension and Wind Cap: These were easy so i did them. Both are removable, slip on fittings.
A stack extension can help provide greater air draw through the unit, this is called "draft" and is a common topic in the fireplace/woodstove world. The idea being a taller chimney can create a great draft. NOTE: Too tall, or and improperly sized Stack Extension can have the opposite effect. My belief, after decades of using fireplaces, wood stoves, and BBQ smokers, is, as long as you don't go crazy with the the length of your extension, you'll be fine. if you need to extend a long length, like up above a shed roof, or carport, then just be mindful that you don't want to get to the point you restrict the flow. This would call for a larger diameter stack.
In terms of this smoker, think in the 12" range give or take. Maybe even 18"?? Each case is unique, and it depends on your situation.
Effect: increase draw on days when the smoker just doesn't seem to have the proper draft or air draw it needs.
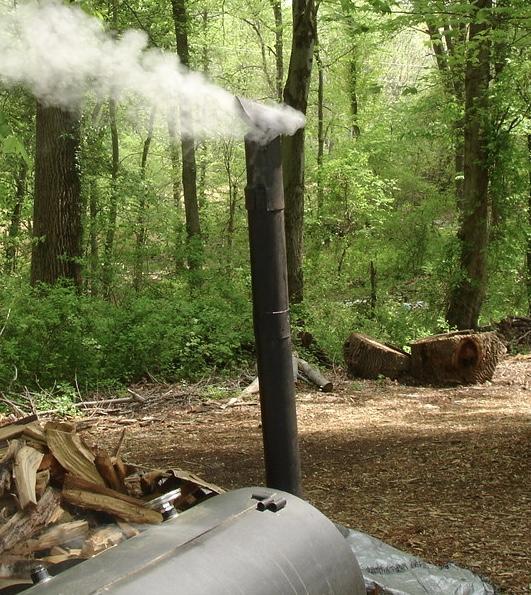
The Wind Cap is a simple design. Started with a circle of sheet metal, bent it into a round half circle, mounted at an angle on top of the stack with enough room between the stack and the cap to let plenty of gasses escape. My smoker FB faces west, because that is our prevailing wind pattern, West to East. In the picture below, the breeze is almost opposite, blowing East to West and it was a humid morning. I manually moved the wind cap around so that the lower end was toward the breeze. it acts like an airplane wing, sorta, blowing breeze over top of it, which creates low pressure below, it which helps "pull" air out of the stack.
Without a wind cap the breeze tends to sheer across the top of the horizontal stack, creating an a damming effect.
Effect: Helps create a draft when breezes are blowing from unwanted direction (s).
Observation: I don't think I needed the extension on this day, but it didn't hurt. i think the stack extension will be useful on humid mornings, low barometric pressure, when the air is still and muggy, especially to help with start up.
Please add your OKJ mods and experiences below or, if you have done a write up already, add a link to that thread so we can tie a lot of the OKJ info together?
There are many helpful threads throughout these forums dealing with the Oklahoma Joe smokers, perhaps we can compile some information here in a running thread to assist everyone who is using, modding, and wondering what to do in their particular situation.
Please add any of your experiences below. State whether yours is a Highland or Longhorn. Any newer Reverse Flow models should probably go in a different thread.
Here we go.
This is a newer Oklahoma Joe Highland purchased early 2017. Having owned a Chargriller many years ago, then another generic offset smoker, I had a list of mods for right out of the box. I added the lavalock nomex gasket to the FireBox and Cooking Chamber area after reading and seeing the leakage with y own eyes. Same goes for adding a seal around the FireBox Side Air Inlet/Clean out door when i discovered that controlling inlet air was sketchy.
Extend Exhaust Stack Down to Grate Level: One the most important mods in my book was to extend the exhaust stack down to about 1" above grate level. Based on other smokers I have used, I knew this would keep the heat flowing across the grates better, rather than bottling up at the top of the cooking chamber. The normal way to do this is by using a piece of 3" round aluminum dryer vent, with a bend bringing it down to grate level. The downside to have a round pipe extended down is that you lose a little bit of prime real estate. To get around that issue, I used a piece of SS sheet metal, made a cardboard mock up to make sure i had the correct shape, and bent an exhaust baffle which bolts to the side of the cooking chamber, directing the gasses up to the factory stack opening. If you do this, make sure to do the math to ensure you are not restricting the flow. I calculated the are of the 3" stack circle, then made sure my exhaust baffle was equal or slightly larger so that it didn't choke the outgoing flow.
Effect: Gets the heat and smoke down closer to grate level where the food is sitting.
Charcoal Basket: This one goes without a lot of explanation. Allows for better fuel containment and fuel/heat management.
On the OKJ Highland, the largest base dimensions to have it still fit properly is 12" by 11", the sides on mine are 6" tall. Made from a sheet of 24" x 24" expanded metal from Home Depot. I had a leftover piece of heavier expanded metal, laid it in the bottom. The bottom of the charcoal basket is usually what burns out first.
Effect: Better fuel & fire management.
Additional Side Door: This one takes a little more fabricating experience. WHY this anyway?
On my previous smokers it was apparent that any time the larger main firebox door was opened (Like the pic above) massive amounts of heat escapes, which is not good for the actual smoking going on, and unpleasant for the BBQ chef who gets blasted with hot gasses when he opens it.
For years i had been thinking of a way I could add fuel, that would be less disruptive and easy. When smoking, I like to toss some wood splits or sticks in there, and needed a way to do this quickly without opening the big top FB door.
I built this side firebox door in the upper half of the firebox. It is above the height of the charcoal basket. Open, toss in a stick or two and close it. Very easy.
Effect: easy to add fuel to an existing fire without opening the top firebox door which disrupts the air flow and dumps a lot of heat from the FB into the air. I am pleased with this one, but I know it might be beyond the scope for some folks.
Bottom FB Door Seal:
Also, notice the rivets on the bottom factory door? That is where the internal flange is attached to seal up the bottom door.
A lot of air was getting into the firebox through that gap. Now I can actually open the damper more and get a better gauge on how much air I am letting in. before, the air leakage was bad enough that the actaul slide damper stayed almost closed when trying to maintain 225-240 range. Now the damper sits open about 1" to keep those temps.
Baffle and Convection Plate(s): This mod is to correct the Left to Right temperature imbalance. In stock form, these smokers, and others in the lower price range suffer from unbalanced heat across the grate area. near the Firebox (right side) can run 50 degrees hotter than the Left, depending on where you are in terms of fire/heat management.
Definitions:
The Baffle is the part that touches and/or attaches the firebox end of the cooking chamber, where the heat enters the cooking chamber. There are times when folks will only install a baffle, which can help the imbalance somewhat and help the hotspotting in the area near the firebox. In my last two smokers I only used a baffle plate, but still had to be cautious about food placement. I did most of my smoking at the end away from the firebox.
Tuning Plates? Convection Plate(s)? What does it mean? It's actually pretty simple, you use one of the other to help even out the heat across the cooking chamber. They sit about 3" below grate level.
Tuning Plates are numerous rectangular pieces of steel, that can be adjusted (slid) easily to crate smaller or larger gaps where the heat rises up to the grate. For a Do It Yourselfer, tuning plates can be an easier option, as they are simple pieces of steel that you cut to the proper length and drop in.
A Convection Plate is usually a larger piece of sheet metal, typically with holes drilled in it. The holes start small at the firebox end and gradually get larger toward the stack end of the cooking chamber. There are several suppliers who make Convection Plates, and some folks make their own. Hole size and placement being the important factor.
This Baffle/Convection Plate set-up is 3 pieces of heavy gauge SS sheet. The baffle is bolted to the firebox side of the cooking chamber using the two existing top bolts that hold the Firebox (FB) and cooking chamber (CC) together. My baffle has approximately a 1.5" vertical flange where it bolts up to the side. Then, roughly a 3.5" transition that is bent at around a 45 degree angle, followed by the horizontal section which runs under and parallel to the cooking grates, which begins the actual convection plate section (s).
My 45 degree angle transition starts at the top of opening between the FB and CC, I did not block any of that opening, but some folks do. I drilled a lot of holes. A Lot. If you look at the commercial models, you can see that you can get away with half the holes I drilled.
Effect: When finished, it was tested and I found that it was running a bit hotter at the stack end now!! I had reversed the heat imbalance. I added and enlarged a few holes at the FB end, and viola, it's spot on. I notice now that just a cut of meat has more effect on side to side temperature than anything else.
Side Effect: When you add extra steel inside, it's additional thermal mass. This is usually a good thing, but, you will experience slower warm up times because it take longer for more steel to come up to proper temperature. Even though this was sheet metal, it was on the thicker side, so it added about 6 lbs. of mass. More to heat up. But on the PLUS side, once it's up to temp, it helps hold that temp.
Stack Extension and Wind Cap: These were easy so i did them. Both are removable, slip on fittings.
A stack extension can help provide greater air draw through the unit, this is called "draft" and is a common topic in the fireplace/woodstove world. The idea being a taller chimney can create a great draft. NOTE: Too tall, or and improperly sized Stack Extension can have the opposite effect. My belief, after decades of using fireplaces, wood stoves, and BBQ smokers, is, as long as you don't go crazy with the the length of your extension, you'll be fine. if you need to extend a long length, like up above a shed roof, or carport, then just be mindful that you don't want to get to the point you restrict the flow. This would call for a larger diameter stack.
In terms of this smoker, think in the 12" range give or take. Maybe even 18"?? Each case is unique, and it depends on your situation.
Effect: increase draw on days when the smoker just doesn't seem to have the proper draft or air draw it needs.
The Wind Cap is a simple design. Started with a circle of sheet metal, bent it into a round half circle, mounted at an angle on top of the stack with enough room between the stack and the cap to let plenty of gasses escape. My smoker FB faces west, because that is our prevailing wind pattern, West to East. In the picture below, the breeze is almost opposite, blowing East to West and it was a humid morning. I manually moved the wind cap around so that the lower end was toward the breeze. it acts like an airplane wing, sorta, blowing breeze over top of it, which creates low pressure below, it which helps "pull" air out of the stack.
Without a wind cap the breeze tends to sheer across the top of the horizontal stack, creating an a damming effect.
Effect: Helps create a draft when breezes are blowing from unwanted direction (s).
Observation: I don't think I needed the extension on this day, but it didn't hurt. i think the stack extension will be useful on humid mornings, low barometric pressure, when the air is still and muggy, especially to help with start up.
Please add your OKJ mods and experiences below or, if you have done a write up already, add a link to that thread so we can tie a lot of the OKJ info together?