Oh my that looks nasty.
Edit: think I would replace both items as in post #4, should take care of ya.
Edit: think I would replace both items as in post #4, should take care of ya.
Follow along with the video below to see how to install our site as a web app on your home screen.
Note: This feature may not be available in some browsers.
Oh my that looks nasty.
Edit: think I would replace both items as in post #4, should take care of ya.
When I finally got the cover off and saw this I just
shook my head. I have the limit switch on order.
Good morningYep what I thought was happening. Your switch burnt up on you.
You will want to use high temp connectors AND replace the switch. For now you can just clip those wire ends, wire nut them together and electric tape them to ensure it doesnt come loose and any metal is touching bare wire.
Now understand that these switches are super delicate and cheap. If you bend or wiggle the tabs of the connector in ANY way where they fasten to the plastic back of the switch then the switch will fail on you in no time and you will be replacing it again.
Reinstall in this manner to avoid damaging the replacement safety rollout limit switch (it seems counter intuitive but will save you in the future):
Again this seems like an odd way to go about this but those switches are seriously so delicate that any wiggle to those tabs will cause a switch to fail fast as hell.... I've replaced at least 5 of those things learning this the hard way hahaha.
- Take a new switch and put the connectors on both tabs, no wiring involved yet
- Take a small hammer and with hold the switch so that one connector (slid onto the tab) is resting on the ground or a piece of wood. Take the hammer and tap the top connector (slid on the other tab) and start gently tapping onto it until one or both of the connectors is all the way on the tabs. Rotate the switch to the other tab and continue tapping until both are on the way they should be.
- Now with both connectors all the way on the tabs, put the wires into the connectors and crimp
- Now fasten the switch to the MES and cover with your panel. I think I see they riveted your current switch in place so you may have to buy some screws and nuts to fasten the new one.... lame if they riveted the old one in place. Never seen it riveted before, in the past they always used screws and nuts.
The good news is that you now have a panel and spare parts to keep this major failure point going. Also if it ever fails here while a smoke is going on then simply unplug from the outlet. Get in there and wirenut the wires together and start up again and you can get through your smoke until you can replace the switch again... if you decide to replace the switch.
My guess is that if you can ever find a ceramic version of the switch it is less likely to melt down on you like this plastic version but who knows. Any plastic one I've ever used including $15 ones has melted down so someday I'll try a ceramic one when all my plastic ones burn up :)
Good job on the find and good luck with the fix! :)
Yep what I thought was happening. Your switch burnt up on you.
You will want to use high temp connectors AND replace the switch. For now you can just clip those wire ends, wire nut them together and electric tape them to ensure it doesnt come loose and any metal is touching bare wire.
Now understand that these switches are super delicate and cheap. If you bend or wiggle the tabs of the connector in ANY way where they fasten to the plastic back of the switch then the switch will fail on you in no time and you will be replacing it again.
Reinstall in this manner to avoid damaging the replacement safety rollout limit switch (it seems counter intuitive but will save you in the future):
Again this seems like an odd way to go about this but those switches are seriously so delicate that any wiggle to those tabs will cause a switch to fail fast as hell.... I've replaced at least 5 of those things learning this the hard way hahaha.
- Take a new switch and put the connectors on both tabs, no wiring involved yet
- Take a small hammer and with hold the switch so that one connector (slid onto the tab) is resting on the ground or a piece of wood. Take the hammer and tap the top connector (slid on the other tab) and start gently tapping onto it until one or both of the connectors is all the way on the tabs. Rotate the switch to the other tab and continue tapping until both are on the way they should be.
- Now with both connectors all the way on the tabs, put the wires into the connectors and crimp
- Now fasten the switch to the MES and cover with your panel. I think I see they riveted your current switch in place so you may have to buy some screws and nuts to fasten the new one.... lame if they riveted the old one in place. Never seen it riveted before, in the past they always used screws and nuts.
The good news is that you now have a panel and spare parts to keep this major failure point going. Also if it ever fails here while a smoke is going on then simply unplug from the outlet. Get in there and wirenut the wires together and start up again and you can get through your smoke until you can replace the switch again... if you decide to replace the switch.
My guess is that if you can ever find a ceramic version of the switch it is less likely to melt down on you like this plastic version but who knows. Any plastic one I've ever used including $15 ones has melted down so someday I'll try a ceramic one when all my plastic ones burn up :)
Good job on the find and good luck with the fix! :)
Good morning
Thanks for the help. I was wondering why when I opened the door I smelled a burnt smell. What usually causes these switches to burn up like that?
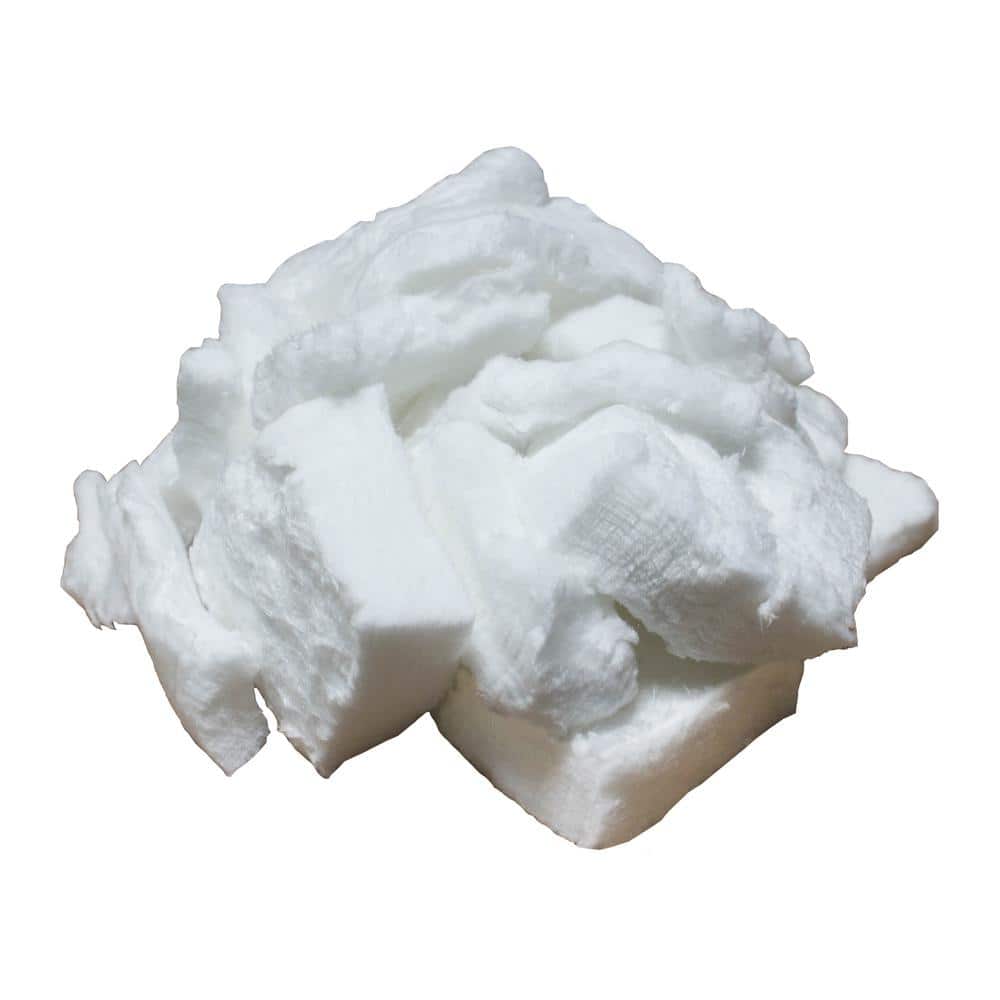
Any thoughts on what I could to replace that burnt
up foam that is stuck on the backside? When I opened the door it smells burnt inside and wondering how long before and if it will disappear
The fact that they are cheap parts made with cheap materials in China. Chinese components are inexpensive but man are they made NOT to last haha. If you can find one made somewhere else and where they are made they use better materials then you have a better chance of these things not melting down and burning up on you. It's just cheap parts man, nothing more you can do about em, hence buying a 5 pack lol.
Yeah you can get some high temp rated fiber glass and just shove it in there if you have a large gap and just pin it in place with some paper clips or something that won't melt. I've done that with a unit where I dug up all the wires to figure out how an MES is wired. I then put fiber glass insulation in place of the all the foam insulation I dug out and problem solved. No issues.
You might be able to get this locally at a Home Depot, rated at 2300F so should do the trick no problem. If you can find less and cheaper then go that route but you get the idea:
UniTherm International 1lb. 13 in. L x 13 in. W x 4 in. H Ceramic Bulk Fiber Box (6-8# Densities, 2300F) - R 2.27 BF-6-8-1 - The Home Depot
Wrap up a contemporary addition to your living space with the choice of UniTherm International Ceramic Bulk Fiber Box R.www.homedepot.com
Once you get it running just do a max temp empty run but burn chips or pellets if you are using an AMNPS. Do that for like 3 hours and I bet you are good to go.
Good morning
I got everything all cleaned up. New connectors at the wires Hooked up the new switch and set temp
for 275 degrees. Unit sat at 105 degrees for 15 mins and I never saw a rise in temp. Heating element has been replaced. Any suggestions?
I would check your new switch. I wouldn't doubt that it melted down already haha. Especially if it wasn't treated like the most fragile thing alive when you installed it haha.
if you can unhook the connectors from the switch lay against each other and wrap with electrical tape you can test without the switch in the mix and that would tell you if the switch is the problem still. I'm telling you those things are cheap.
if that's not the case then I would guess your controller has gone bad. If it goes to 115F though that means it got heat and the one major thing to misread the temp is the safety rollout limit switch if it is individually over heating. This is a common situation for the behavior you describe. Switch is burning up but the smoker is not. Indicates bad switch or connection at the switch.
Hello again
Did more troubleshooting and found a bad connection. Replaced and now temperature is rising
as set in controller.Now I have to ensure all connections are 100 percent good once I get the switch mounted.
I hope this helps :)
Hello again
Did more troubleshooting and found a bad connection. Replaced and now temperature is rising
as set in controller.Now I have to ensure all connections are 100 percent good once I get the switch mounted.
Good morningGlad you found the bad connection.
Yeah leave the panel off the back when you have the switch connected and you are testing
Looks like you are on your way!
Once you get this goin and you pair with an AMNPS tray with pellets. You will be UNSTOPPABLE!! I can't wait until you get the full experience.
It feels so good to go from mediocre and broken to super high performance that can smoke basically anything!
Good morning
So I did a test run today. I set the temp at 225.
The MES started to heat up. It reached the desired temp but it kept climbing . Ugh. I shut it down. Okay, is this a temp switch issue, or a controller issue?
HiThis could be general MES behavior. The MES swings temps high and then low and hopefully you get an average of 225F.
If you set to 225F I wouldnt be surprised if it peaks at 245F and then its a low point of 208F and then does this over and over the entire time you run it.
Did it get close to 300F before you turned it off?
Also note that the INITIAL heat up may have a higher peak then subsequent swings/peaks. This is because the heating element is on full power for so long to get up to set temp that it takes longer to cool down when the MES determines the set temp is hit. So it shuts off the heating element but the element is still glowing hot for a bit haha.
Let me know if this makes sense and what it's peak temp behavior was when you tested it.
Hi
I am going out right now and try it again.
Hi
I just fam a test again. I set it for 225.It reached temp, the heating light went off and it stayed around 235 for temp. So, my question is if I set the temp at 225, then I will be seeing 235 as my actual temp when it cooks for 3 hours
Hi
I am going out right now and try it again.
Hi
I just fam a test again. I set it for 225.It reached temp, the heating light went off and it stayed around 235 for temp. So, my question is if I set the temp at 225, then I will be seeing 235 as my actual temp when it cooks for 3 hours
Thank you so much. I will button everything back up and keep playing with the smoker. Like you mentioned I think I am on my way since I got that switch replaced. Thanks again !!No it will peak and valley around 225F. So it will go up to 235F and turn the element off and then likely drop to 215F before the element is turned off and it starts rising again.
Are you using an accurate wireless thermometer to verify the temperature inside the smoker? The MES reported temps are ALWAYS off. So all of us MES guy use a dual probe (or more) wireless thermometer to get the real readings inside and then we just adjust temp based on that thermometer.
Even if it were to stay at 235F you would be fine as 99% of the meat you smoke won't have any issues up to 250F.
Pork butts, ribs, beef chucks, and briskets don't care what temp you smoke em at so you would do well to max it out at 275F for those dishes and save hours of cooking.
Chicken skin comes out leathery unless you can get around 315F-325F+ temp smoking which is way higher than 225F.
My MES and many other guys could never get the MES to actually hit the max 275F temp so if yours does or gets hotter then u are lucky my friend.
Keep playing with it and figure out how hit behaves. This is always step #1 of learning your smoker so you are well on the path now my friend :D
One last question.. on my MES, I have to hit the time setup to make the temp start to work. Is there a way I can set temp, then go back and start my actual smoker time? Just curious.Thank you so much. I will button everything back up and keep playing with the smoker. Like you mentioned I think I am on my way since I got that switch replaced. Thanks again !!
One last question.. on my MES, I have to hit the time setup to make the temp start to work. Is there a way I can set temp, then go back and start my actual smoker time? Just curious.
Tall man,Actually I don't have an answer to that hahaha. Before I rewired and put on my PID controller I just maxed out the time setting so I didn't have to keep setting it and then every few smokes I would max it out again.
Maybe someone else can chime in and say if you can run the thing without having to enter a time setting. I never figured out how so I just maxed the time haha :D
Tall man,
The outside of the MES could use a paint job. What type paint would u recommend?


SmokingMeatForums.com is a community of barbecue and outdoor cooking enthusiasts dedicated to smoking meat.
© 2004-2026 SmokingMeatForums.com