Haven't been posting much on here, been busy with other projects and scouts. Figured I would post our latest project.
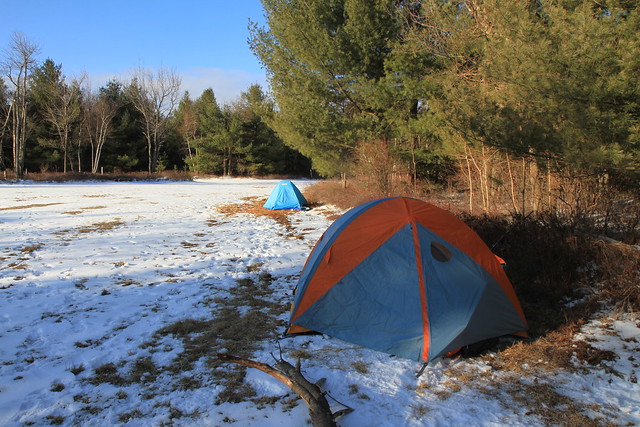
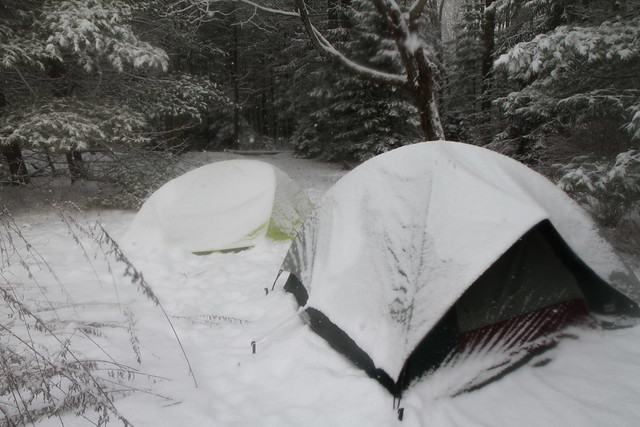
There is something to be said about winter camping, especially when Mother Nature turns the forest into a winter wonderland. To me, I envision winter camping like this, sitting inside cozy by a nice wood burning stove, sipping on some Irish Coffee, cooking some beef stew on top of the stove, enjoying the solitude of the outdoors that winter brings, the deafening quiet only to be broken by a few bad jokes and laughter, not to mention the non-existence of bugs, the days are short, the nights are long.
Mother Nature can be a formidable adversary but no worries because you can quickly retreat into your cozy abode.
A group of us have been discussing a winter tent setup to accommodate 4-6 guys for quite a while. I don't know if the other guys just agree with me to shut me up or if they're really on board? After our last trip, we were pretty eager to go to the next level... or at least I was, lol.
Winter camping has been awesome so far but we wanted to be able to hang out as a group, enjoying a fire, bullshitting, chowing down on some good eats and a tossing back a few adult beverages, regardless of the weather. Being able to stand up and walk a few feet is also nice!
The urge to do this was incredibly strong to the point of becoming obsessed and I couldn't shake this urge. I sometimes get something in my head and if I don't at least try it, I am haunted by it, Yeah, I know, it's a sickness!
I really wanted to try this and be able to fit our group under one roof without a second thought to the outside elements. My main concern is setup, I want to try to do this so 2 guys can setup and breakdown the tent if needed.
The beginning of this year, we picked up a 4 dog stove, we tested the 4 dog stove at Jims St. Patrick's Day Party in March, it worked well, however we don't know how good, as it was near 50°F that night. Our tent plans were sort of put on hold, probably because the warmer weather brought different plans
Anyhow, we have been searching for a tent for quite a while. Prices were way too high for a canvas tent like the Montana or a Davis tent, we toyed with the idea of a Cabelas Alaknak, but that was out of our price range also.
I have done a ton of research looking for something that was fairly large and fairly inexpensive, reading everything I could on what other folks were doing.
Well our time has finally come and we finally ordered one.
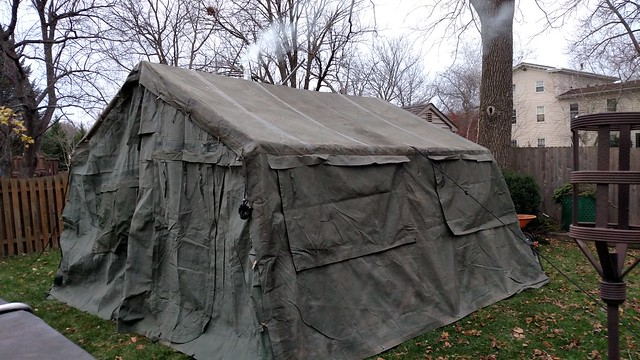
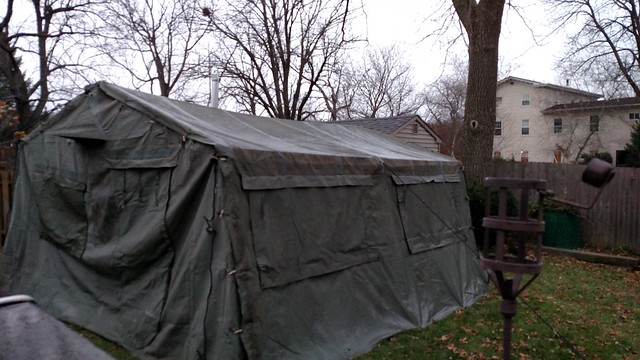
It is a 16' x 16' Frame Type Expandable Tent.(without the frame) from Mountain Gear surplus.
Mid Section NSN:8340-00-566-7416
End Section NSN:8340-00-566-7398
This purchase was definitely a gamble, they resell these tents modified to use with the wooden Military GP tent poles, apparently somewhere along the line, the aluminum frames get scrapped, although, I wouldn't get the aluminum frame anyway as it's way too heavy.
I was a bit nervous because I have three other guys trusting me on this purchase and I have no idea what it's going to look like!
Our initial thought was to see how the tent looked with the supplied poles before building a frame from EMT. The idea was simple, we would pitch the tent with the supplied poles make a decision based on how the tent looked, if we are unhappy with the supplied support system we would move on to plan B.
Plan B, was to start building underneath the tent using Jims canopy frame,(11' x 20'), remove the wooden poles and start building the final structure from EMT or Fencing top rail trying to utilize parts from Jims canopy without modifying them.
I was 99% sure Plan B was going to be our best bet and we knew that before purchasing the tent as it would be about another $250.00
Here's our story!Thursday 11/19/2015
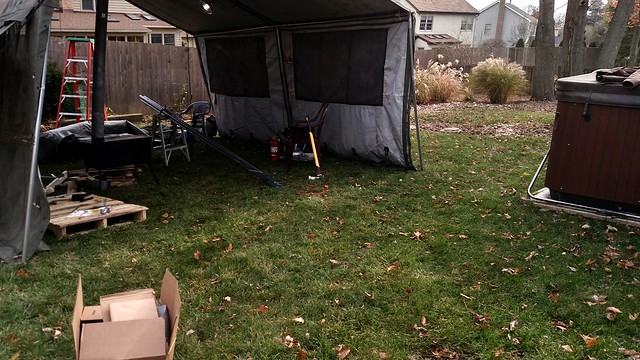
I dropped the tent off at Jims and we opened it up to give it a quick look, we were both busy with other stuff so we decided to work on it Sunday.
The tent came with


Our next step is to get more pipe and put in the ridge pipes.
Monday 11/23/2015
I ordered some "T" and "Miter" fittings for the bottom of the legs so we can have the legs spaced correctly and rest the frame on the sod cloth section of the tent, I'm hoping this adds to the stability of the tent.
I also ordered some fittings so we can cut and modify to relax the pipes and kick out the bottom of the legs a bit more.
I also contacted the salesperson that sold us the tent to let then know we were missing the Ridge "Peak" Guy lines.
Tuesday 11/24/2015
I picked up 5 more pieces of 1-3/8" Chain Link Top-rail at Home Depot in the morning to finish the ridge tonight.
The stove really heated up the tent tonight actually a little too much, I had to adjust the air intake to bring the temp down a bit and at times I would get smoke backing up, so this is something we will need to work on.
Jim keeps saying, "I'm gonna sleep out here tonight", I doubt he has yet lol!
Saturday it may rain so I might head over and check out the tent during the rain. I'm actually more concerned about this tent in heavy rains than snow or wind.
Maybe Saturday we can do a real word test and set up everything as we would if we were camping.
Wednesday 11/25/2015
Friday 11/27/2015
After we got the tarp setup we took some measurements. The angle looks good but our peak was near 12" too low, we decided to call it a day and work on it Saturday.
Saturday 11/28/2015

Jim went around and marked any holes he could find and we hit them with a bit of PVC Glue, we also glued the sewn areas too.
We still need a good driving/windy rain to see how waterproof this tent is and a below 20° day to test the stove.
That's it for today, we finished our beers and discussed our next move.
Were still undecided what to do with the duct holes in the tent.
Monday 11/30/2015
I heard back from "Mountain Gear Surplus", they are sending out two replacement guy lines but it turns out we were missing only one.
I also contacted "Cover Me Tarps" and their going to accept the unused fittings back and issue a refund.
I picked up some more Grommets at Home Depot.
Wednesday 12/2/2015
"The Mancamp Project"
I have always wanted to winter camp, aka, "Hot Tenting", you know... in one of those big side wall tents that you see at deer camps, these guys always look like they're having a blast, and enjoying the camaraderie. Just an FYI... this is not Glamping, I just wanted to clear that up and not emasculate the Mancamp Project!There is something to be said about winter camping, especially when Mother Nature turns the forest into a winter wonderland. To me, I envision winter camping like this, sitting inside cozy by a nice wood burning stove, sipping on some Irish Coffee, cooking some beef stew on top of the stove, enjoying the solitude of the outdoors that winter brings, the deafening quiet only to be broken by a few bad jokes and laughter, not to mention the non-existence of bugs, the days are short, the nights are long.
Mother Nature can be a formidable adversary but no worries because you can quickly retreat into your cozy abode.
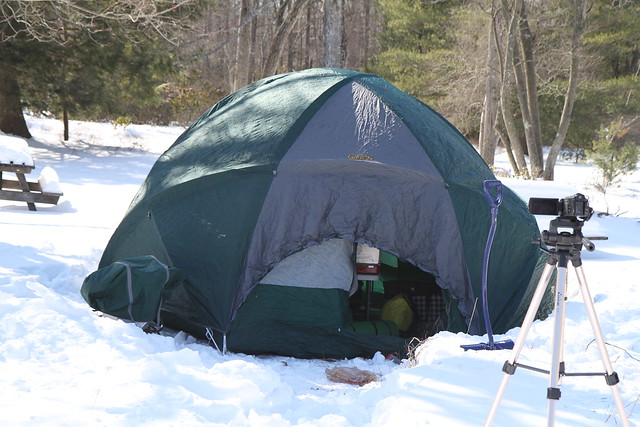
- I have tried winter Backpacking and really enjoyed it.
- My 2nd winter camping trip was a lot of fun but what I remember most is, being cold.
- Our most recent winter camp was a blast, there were three of us. It was pretty awesome being in a 70°F tent while it was 8°F outside, drinking ice cold beer, eating Porterhouse steaks while the wind kicked up and the snow was coming down sideways. This was the closest we have come to "Hot Tenting" so far. This is when I decided I wanted MORE!
A group of us have been discussing a winter tent setup to accommodate 4-6 guys for quite a while. I don't know if the other guys just agree with me to shut me up or if they're really on board? After our last trip, we were pretty eager to go to the next level... or at least I was, lol.
Winter camping has been awesome so far but we wanted to be able to hang out as a group, enjoying a fire, bullshitting, chowing down on some good eats and a tossing back a few adult beverages, regardless of the weather. Being able to stand up and walk a few feet is also nice!
The urge to do this was incredibly strong to the point of becoming obsessed and I couldn't shake this urge. I sometimes get something in my head and if I don't at least try it, I am haunted by it, Yeah, I know, it's a sickness!
I really wanted to try this and be able to fit our group under one roof without a second thought to the outside elements. My main concern is setup, I want to try to do this so 2 guys can setup and breakdown the tent if needed.
The beginning of this year, we picked up a 4 dog stove, we tested the 4 dog stove at Jims St. Patrick's Day Party in March, it worked well, however we don't know how good, as it was near 50°F that night. Our tent plans were sort of put on hold, probably because the warmer weather brought different plans
Anyhow, we have been searching for a tent for quite a while. Prices were way too high for a canvas tent like the Montana or a Davis tent, we toyed with the idea of a Cabelas Alaknak, but that was out of our price range also.
I have done a ton of research looking for something that was fairly large and fairly inexpensive, reading everything I could on what other folks were doing.
Well our time has finally come and we finally ordered one.
It is a 16' x 16' Frame Type Expandable Tent.(without the frame) from Mountain Gear surplus.
Mid Section NSN:8340-00-566-7416
End Section NSN:8340-00-566-7398
This purchase was definitely a gamble, they resell these tents modified to use with the wooden Military GP tent poles, apparently somewhere along the line, the aluminum frames get scrapped, although, I wouldn't get the aluminum frame anyway as it's way too heavy.
I was a bit nervous because I have three other guys trusting me on this purchase and I have no idea what it's going to look like!
Our initial thought was to see how the tent looked with the supplied poles before building a frame from EMT. The idea was simple, we would pitch the tent with the supplied poles make a decision based on how the tent looked, if we are unhappy with the supplied support system we would move on to plan B.
Plan B, was to start building underneath the tent using Jims canopy frame,(11' x 20'), remove the wooden poles and start building the final structure from EMT or Fencing top rail trying to utilize parts from Jims canopy without modifying them.
I was 99% sure Plan B was going to be our best bet and we knew that before purchasing the tent as it would be about another $250.00
Here's our story!
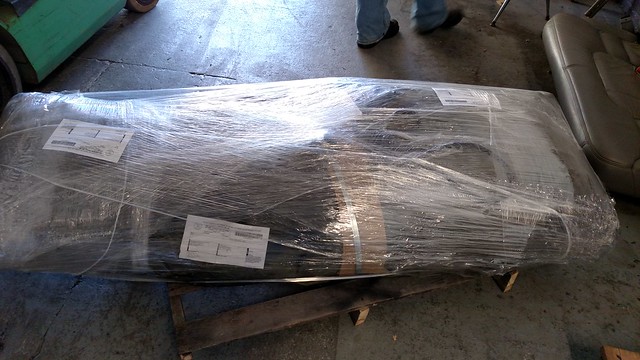
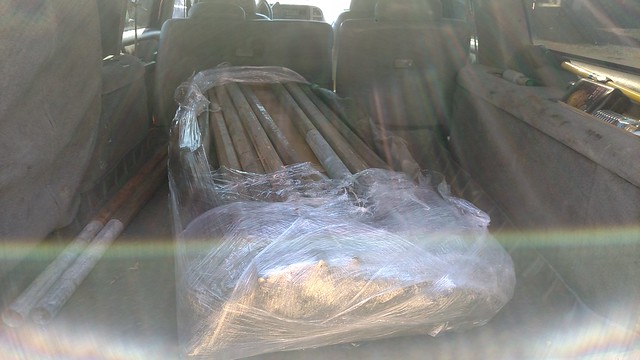
- Wooohoo, the tent arrived at work.
- Brian helped me forklift it into the back of the truck.
I dropped the tent off at Jims and we opened it up to give it a quick look, we were both busy with other stuff so we decided to work on it Sunday.
The tent came with
- cover
- 6 windows, two are in real bad shape
- 3 centers, Wooden poles
- 6 eaves, Wooden poles
- mid-section
- 2 sides
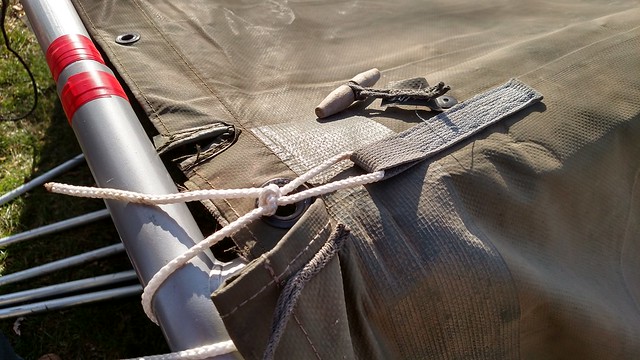
- 1 eaves line with slip tensioner on each side of the side pieces
- 2 center eaves line with slip tensioner on each side of the middle piece.
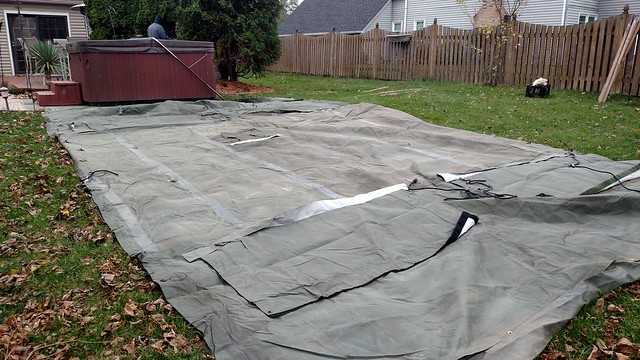
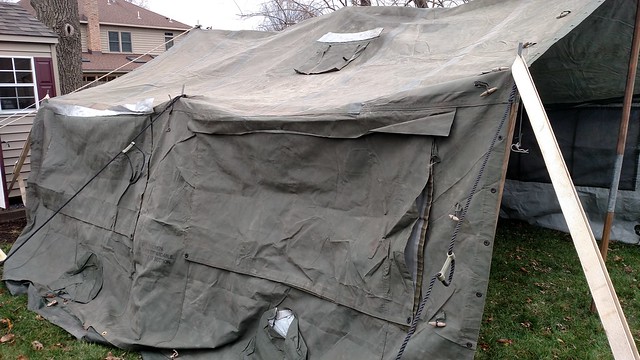
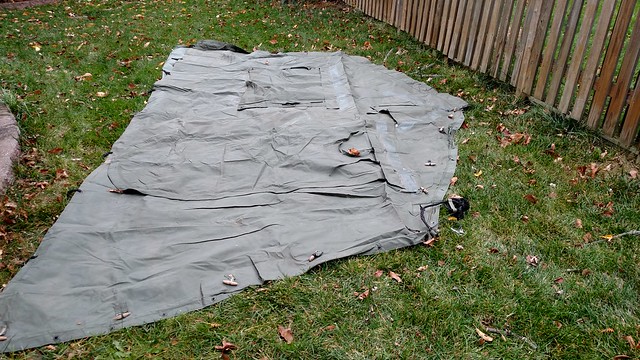
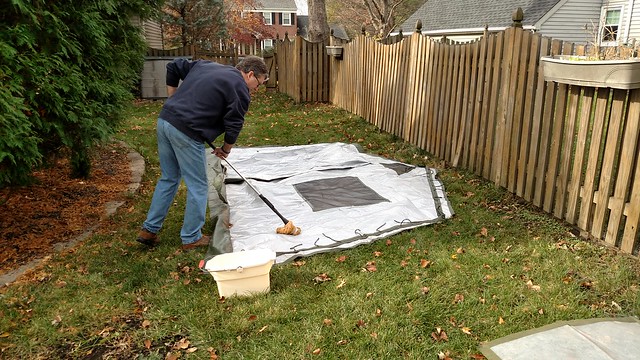
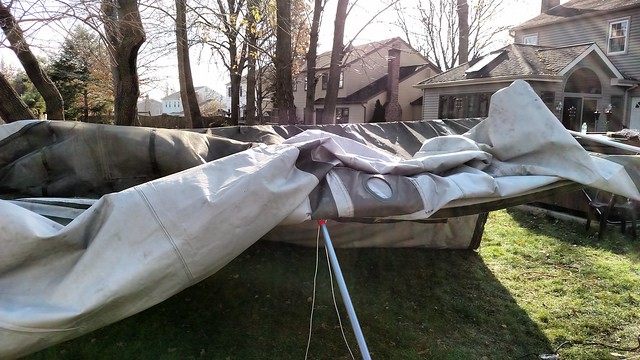
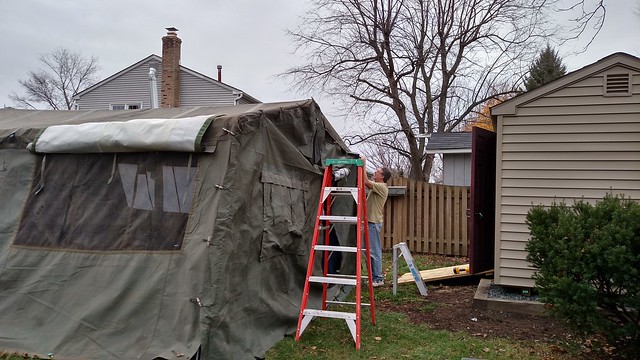
- We started by laying out the middle section, inspecting it and coming up with a game plan, looks OK, a few patches, but OK. The mid section is heavy but manageable for two guys.
- Then we staked everything out using the supplied wooden poles and whatever straps and ropes we had on hand.
- After we got some sort of shape to the tent we looked at our options, would we stick with the current setup? Or build a frame from pipe? Looking at how the tent laid and the diminished space it was a no-brainer so we decided on Plan B no kiddn'
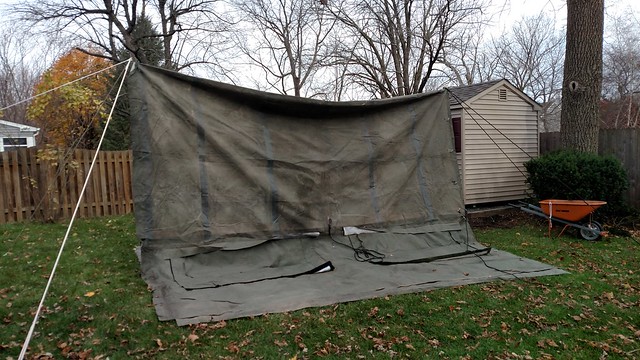
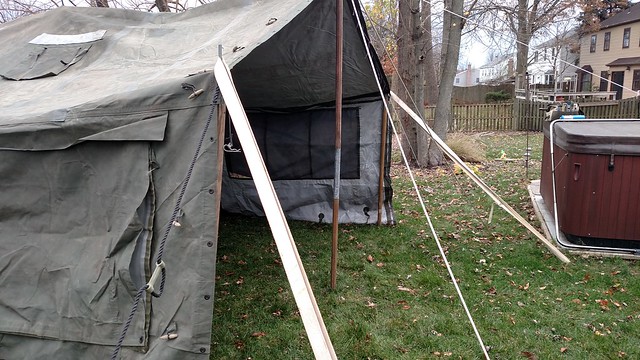
- We started building a frame underneath using Jims canopy parts.
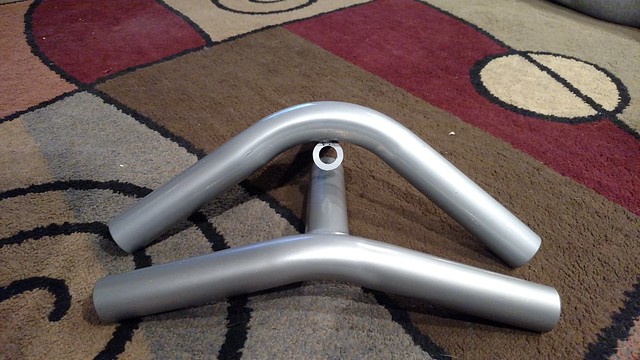
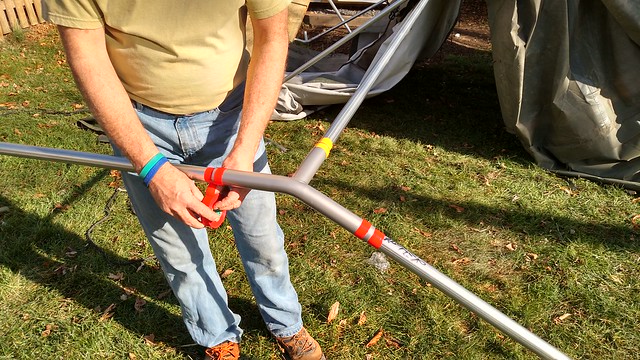
- After we got an idea on what to do, we headed over to Home Depot to check out the pipe, we brought a fitting to Home Depot with us to check the pipe. First we tried the electrical section we checked out the EMT pipe... the EMT would not work...SHIT, the EMT marked 1-1/4" was the same exact diameter as the fitting. Then we went to the fencing section and checked the pipe there... FITS, awesome. We picked up 8 pieces of a 10' x 1-3/8" x 17 gauge Chain Link Toprail.
- Back at the tent, we measured, talked, remeasured, talked and measured again before making the cuts. As we built the frame from the Chain Link Toprail we would relax the guy line tension on the wooden posts install a couple pieces of the pipe and remove some of the wooden posts. It was tedious but almost foolproof.
- We laid out the side piece and took some measurements from the side and from the mid-section piece, discussed a game plan, took some more measurements, talked some more, before we made any cuts.
- We then cut a few pieces for the rafters and legs, after we cut a section we put it in place using Jims canopy pieces for the ridge and joints and our newly cut pieces as the rafters and legs.
- After we were happy with the first section, we made the second section.
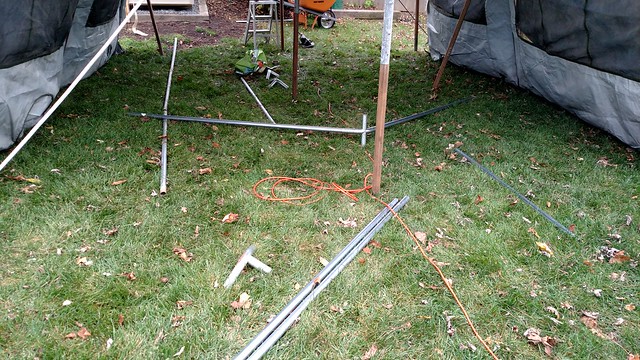
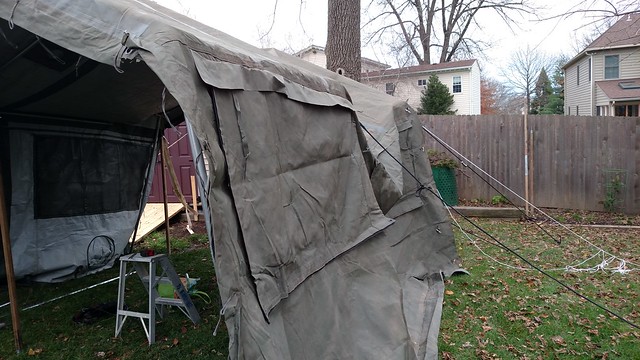
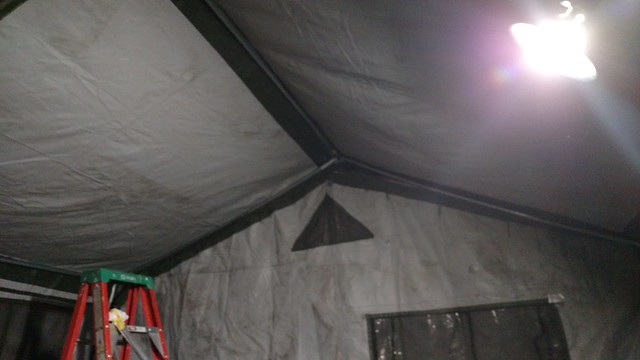
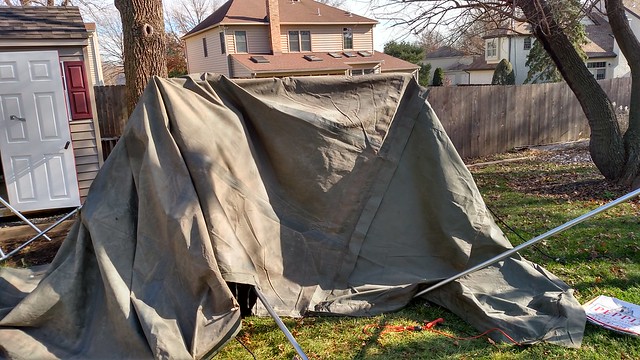
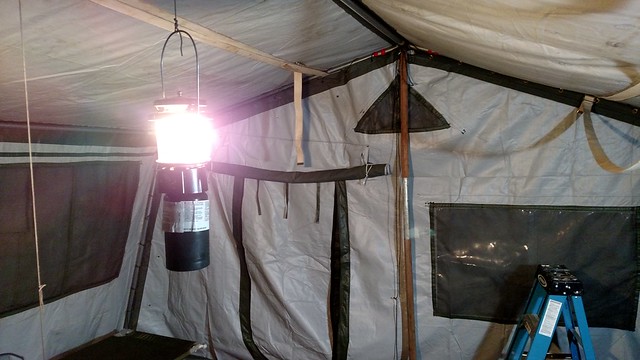
- The tent opened up dramatically after we had removed all the wooden poles and inserted the pipe. You can see from the picture below how the rafter poles do not line up yet (the poles should be in the green area of the tent), this is because we used Jims ridge poles temporarily (fund$ were low).
- After we got some type of shape, we installed an end piece. The end piece is proving to be a challenge and were going to have to make some modifications to the end piece to fit snugly.
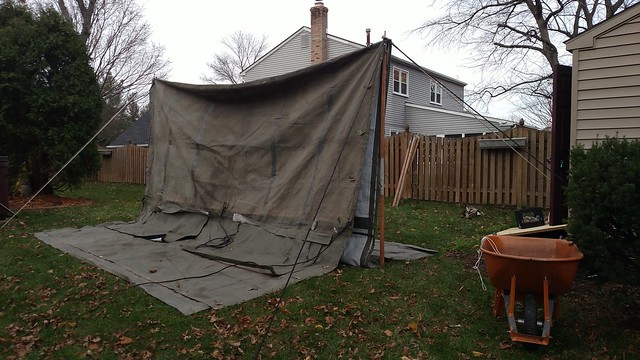
- You can see by the pic below that the bottom sides of the tent needs to kick out quite a bit but the angle of the fittings is not correct for this tent and is restricting the angle, so we either live with it, or purchase fittings that will need to be cut, angled correctly and re welded.
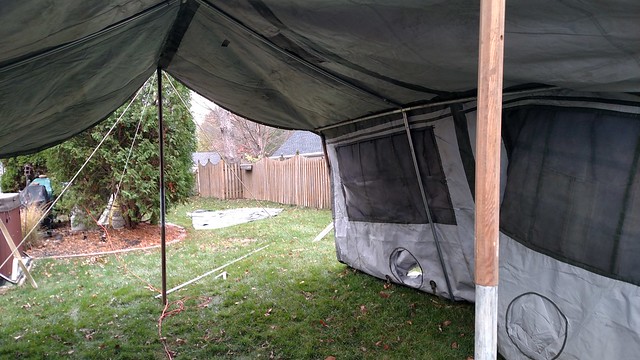
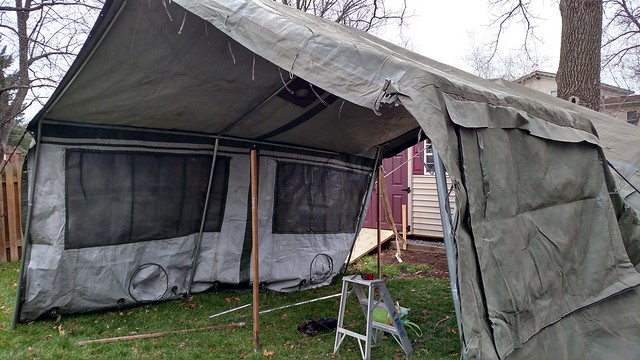
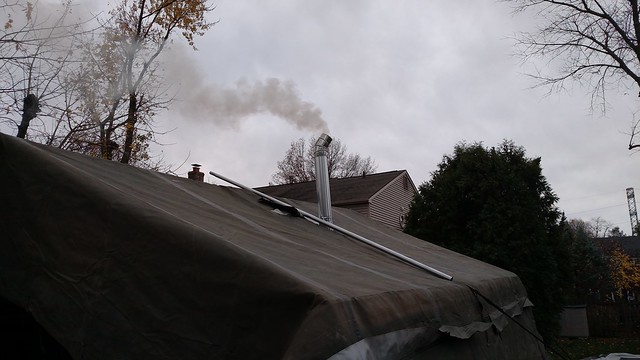
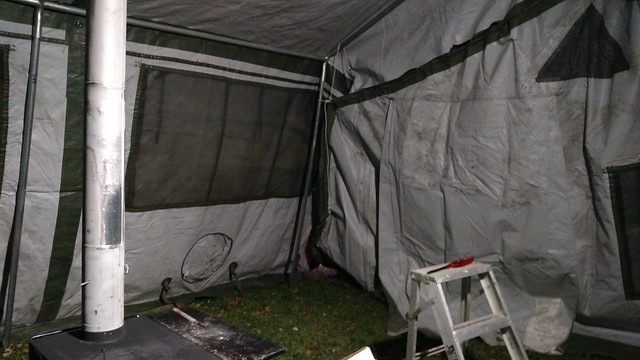
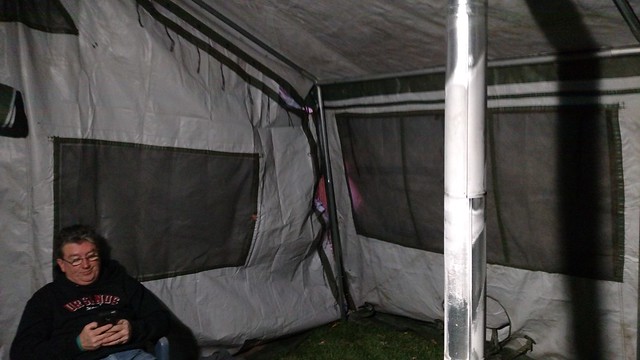
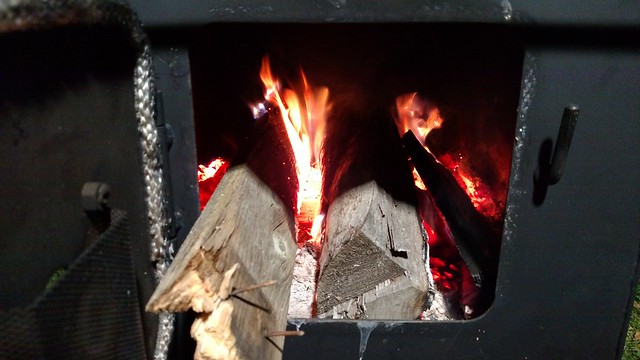
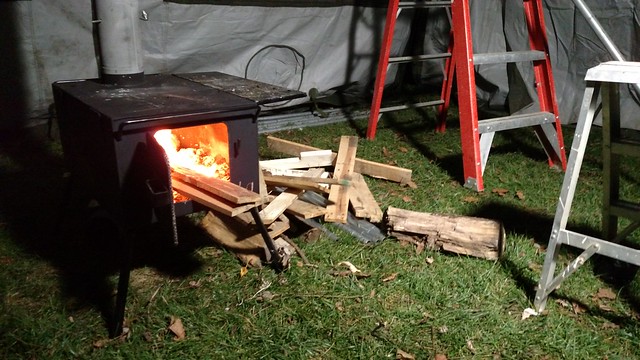
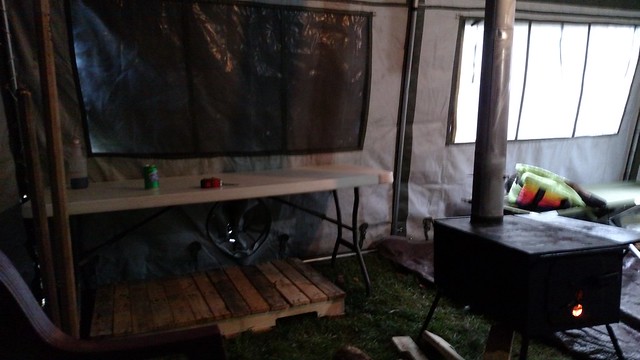
- After we got the first side installed, we installed the stove and chimney and Jim started a fire.
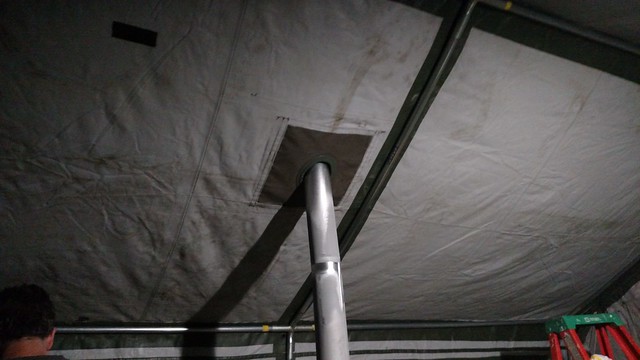
- One mod I need to make is to place a rope and grommet on the stove jack cover so I can pull it back from the other side and secure it away from the stove pipe so it doesn't burn, note the pole holding down the Stove Jack cover. I'm guessing the stack is 10'
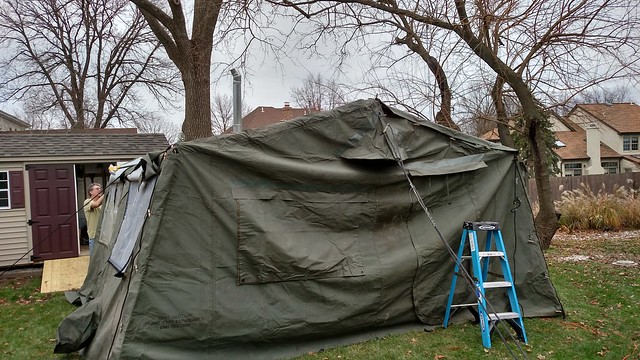
- After we had the fire going, we added the other end and started stitching that up. Hell Yeah! It's starting to look like something!
- We need to cover up the grommet holes that were put in by Mountain Gear Surplus as part of their mod to allow setup using the wooden GP tent poles. Note the poles do not line up with the green area.
- Since the pipes we used were from Jims canopy and too short, we could only do so much today. So we grabbed a couple of chairs had a few beers, took some more measurements and discussed our next step.
- The fire was kicking and kept the tent fairly warm, it was 45° outside. I wasn't too impressed with the heat output at this point but we still have a lot to do!
Our next step is to get more pipe and put in the ridge pipes.
Monday 11/23/2015
I ordered some "T" and "Miter" fittings for the bottom of the legs so we can have the legs spaced correctly and rest the frame on the sod cloth section of the tent, I'm hoping this adds to the stability of the tent.
I also ordered some fittings so we can cut and modify to relax the pipes and kick out the bottom of the legs a bit more.
I also contacted the salesperson that sold us the tent to let then know we were missing the Ridge "Peak" Guy lines.
Tuesday 11/24/2015
I picked up 5 more pieces of 1-3/8" Chain Link Top-rail at Home Depot in the morning to finish the ridge tonight.
- Back at the tent, I drug in two pallets to burn in the stove for warmth, it was pretty damp and about 40-44°, when I got there Jim already had a fire going, so I busted up a pallet for the fire so we wouldn't have to use all Jims good wood.
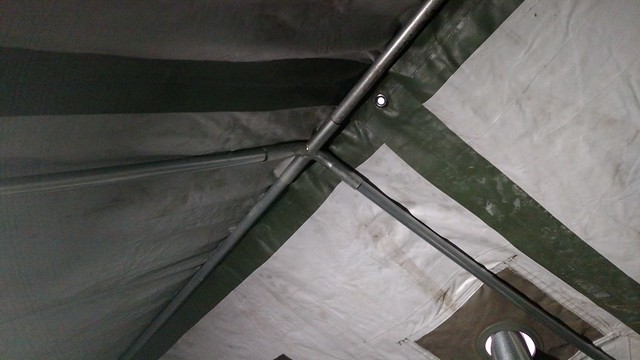
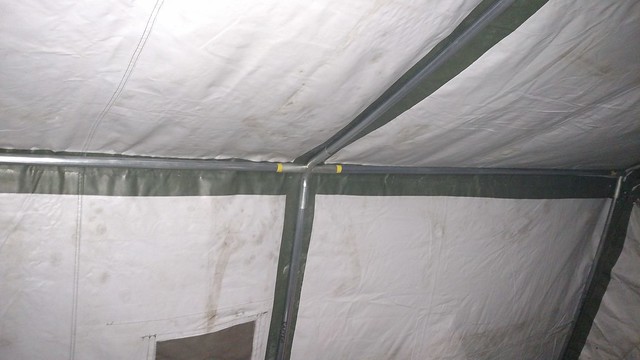
- After I drove a pallet nail up under my thumbnail and got the bleeding to stop, we measured and cut our 6 Ridge Poles. I decided at the last minute to add 2 inches to each pole so the total width would be exactly 16'.
- After cutting the ridge pipes we started replacing the temporary canopy ridge pipes with the new ridge pipes, this was a freaking chore, one reason was due to the stress put on the fittings due to an improper angle. We also had the weight of the tent and the stove going like crazy and were trying to shift poles under the tent and shift the tent over the poles, one things for sure, after all the abuse the stoves stack got, I am confident it will stay put in high winds.
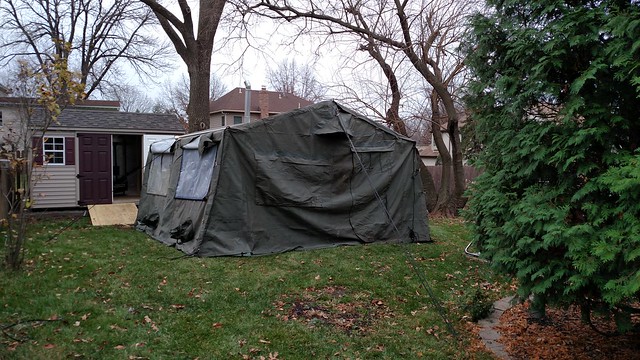
- We got all the Ridge Pipes installed and its looking pretty dam good!
- We started marking different pipe sections with colored electrical tape for an easier setup and as an afterthought Jim said to mark the pipe once inside the fitting and wrap the tape there, this will give us a visual of the pipe being inserted correctly. When I take out the pipes. I'll mark them with marker and color code them with the electrical tape.
- We have 4 more sections of Pipe to make that will be the same length of the ridge pipe, this will be for the bottom of the legs that will space the legs proportionately and will rest on top of the sod cloth adding stability... hopefully.
- I am much happier how the tent fits now. It opened up even more. My concerns at this point are:
- The angle of the current fittings, it puts too much stress and bends on the pipe, hopefully our new fitting will work much better after modifying the angle.
- The angle of the current fittings, doesn't allow for the base to open up to the appropriate width, the tent bottom needs to kick out about another 12"
- My other concern is how to secure the sides to the middle section and pipe at the same time. Since the mid section only overhangs each side of the frame by two inches, it needs to be secured to the poles and sides so weight from freezing rain or snow wont push the mid section below the pipe.
The stove really heated up the tent tonight actually a little too much, I had to adjust the air intake to bring the temp down a bit and at times I would get smoke backing up, so this is something we will need to work on.
Jim keeps saying, "I'm gonna sleep out here tonight", I doubt he has yet lol!
Saturday it may rain so I might head over and check out the tent during the rain. I'm actually more concerned about this tent in heavy rains than snow or wind.
Maybe Saturday we can do a real word test and set up everything as we would if we were camping.
Wednesday 11/25/2015
- The Fittings from Cover Me Tarps came in and I can tell by looking at them that the corners for the legs (TOP FITTING) were not going to work. The angle of the ridge pieces looked good and the "Miter" and "T" fittings for the legs will definitely work.
Friday 11/27/2015
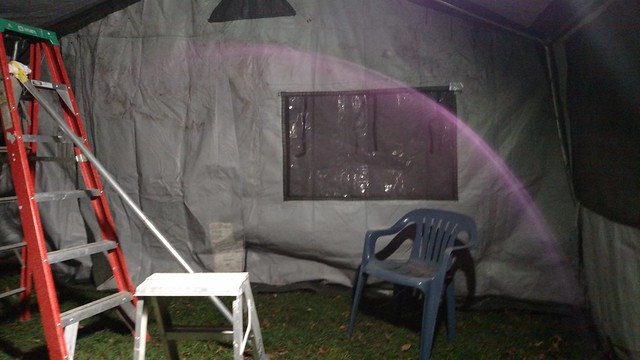
- Jim picked up 4 more pieces of Top rail to finish the base of the legs, before we started on the legs, we decided to give the interior of the sidewalls a good scrubbing, we figured we would take advantage of the unseasonably warm weather. It was too hot to play with the stove.
- After the sidewalls were scrubbed and hung to dry, we cut the pieces for the leg supports.
- We then tried putting in the new ridge fittings without taking down the tent, but there was just too much stress on the poles so we decided to take the tent apart and start from scratch. This was a good opportunity to see how 2 guys could setup the tent. The rafter pipes were actually bent due to the stress we put on them so I had to straighten them out using the tree in the yard for leverage.
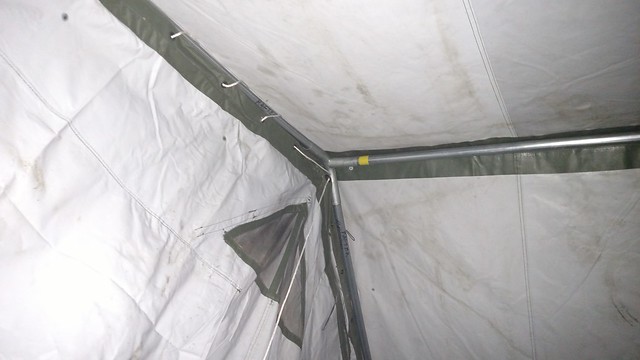
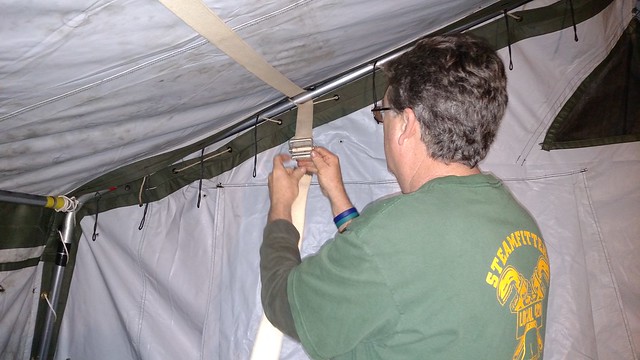
- As we rebuilt the structure we took a little extra time color coding the pipe and fittings, we positioned the tape so it shows full insertion (you like that dontcha!) in the fitting for a visual reference when setting up.
- We decided to run a ridge-line rope to keep the fittings secure during setup, we also decided on a strap along the rafters also, this should keep all the fittings snug during setup.
- We built the frame completely except for the three legs and base on one end. We then pulled the tent over the frame, after the tent was on the frame we lifted the frame on the one end and inserted the legs and base. It wasn't too bad, this can be done with two guys and a little perseverance.
After we got the tarp setup we took some measurements. The angle looks good but our peak was near 12" too low, we decided to call it a day and work on it Saturday.
Saturday 11/28/2015
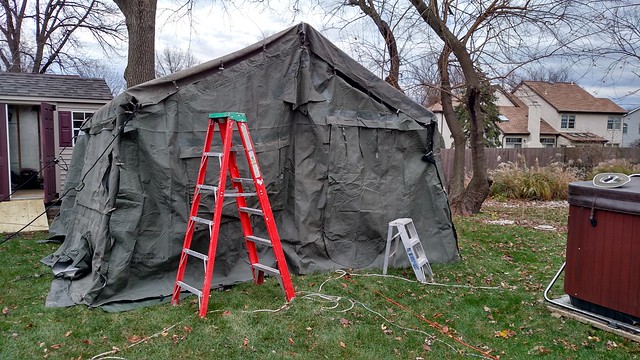
- I arrived at Jims just as Adam arrived, we took a quick look at what we were up against and decided to adjust the tent to fit the specs it should be, we ended up putting two of the wooden poles as supports on each end of the ridge and we are pretty close to the true size, we may be off an inch or two.
- We measured the eaves height, ridge height, width from rafters and width of the entire tent and were pretty dam close to actual specs, The wooden supports will need to be used for setup in addition to the Fence Rail Frame. We busted one of the wooden poles supporting the center of the tent but we wont need the center support.
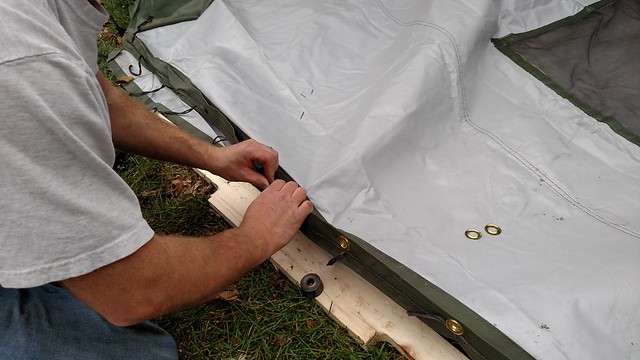
- After we got our dimensions correct, we started on the sides. We decided to grommet the sides of the midsection and the sidewalls.
- We ran out of Grommets so Adam and I headed over to Home Depot to pick up some more grommets. When we got the grommets installed we secured the sides. (We still have one section of grommets to install)
- When we actually setup the tent for camping, the sidewalls and mid section will need to be laced together from the inside using the grommets. This will be a little time consuming but can be done at our leisure, after the tent is erected and a fire is started in the stove.
- GO ADAM, GO ADAM, GO ADAM!!!
Jim went around and marked any holes he could find and we hit them with a bit of PVC Glue, we also glued the sewn areas too.
- Back to the wooden support poles... below are two pictures of before and after the poles were added, I wasn't liking the way the side sections were hanging after the new ridge fittings were put in, plus when the "Peak" tie downs are pulled down, the peak dips even further creating the sag. Although I liked the height of Jims Ridge fittings, they put too much stress on the legs and rafters when we tried to get the proper dimensions of the tent
- The little bit of sag in the second picture will be taken up when the guy lines are in place, we will be using (6) 24" rebar for the guy line stakes and (28) 11" tent spikes for the perimeter of the tent. I'm still unsure if were gonna use 4 guy lines or use 6 guy lines. Using the new Ridge fittings brings the tent much closer to true specs.
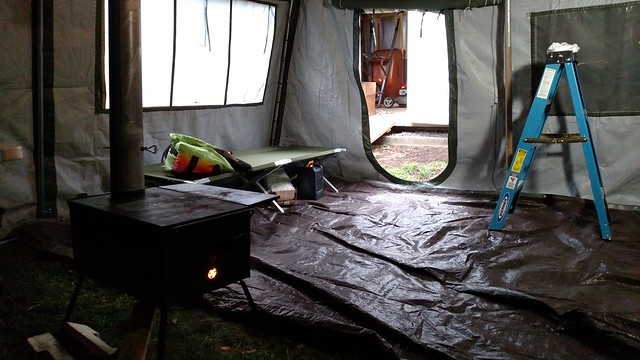
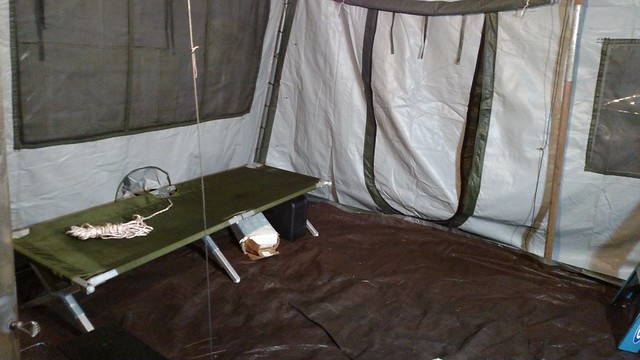
- We started a fire, had a few beers, threw around some more ideas. Then we pulled the sod-cloth in under the leg footings, tossed in a tarp for a floor, brought in a cot and table and took some measurements to get some idea of a layout when camping.
We still need a good driving/windy rain to see how waterproof this tent is and a below 20° day to test the stove.
That's it for today, we finished our beers and discussed our next move.
Were still undecided what to do with the duct holes in the tent.
Monday 11/30/2015
I heard back from "Mountain Gear Surplus", they are sending out two replacement guy lines but it turns out we were missing only one.
I also contacted "Cover Me Tarps" and their going to accept the unused fittings back and issue a refund.
I picked up some more Grommets at Home Depot.
Wednesday 12/2/2015
- I stopped over Jims to pick up the fittings to send back, we checked for leaks. There were some leaks but not too bad, we will need to figure out a way to seal the gap between the stove jack and stove pipe.
- We also worked on our roof straps and need to come up with an easy way to install these straps.
- I ordered some buckles and slam rivets from Mcmaster Carr to try and come up with an easy way to secure the straps, There's a lot going on this week, Camping at Grice with the scouts this weekend and the following Friday is MANDAY, so I'll try to get over there and work on the straps Monday or Tuesday.


