JarJar Mini (Jumbo ) Build w/Pics

  • Some of the links on this forum allow SMF, at no cost to you, to earn a small commission when you click through and make a purchase. Let me know if you have any questions about this.
SMF is reader-supported. When you buy through links on our site, we may earn an affiliate commission.
So here we go with the rest of the build.........

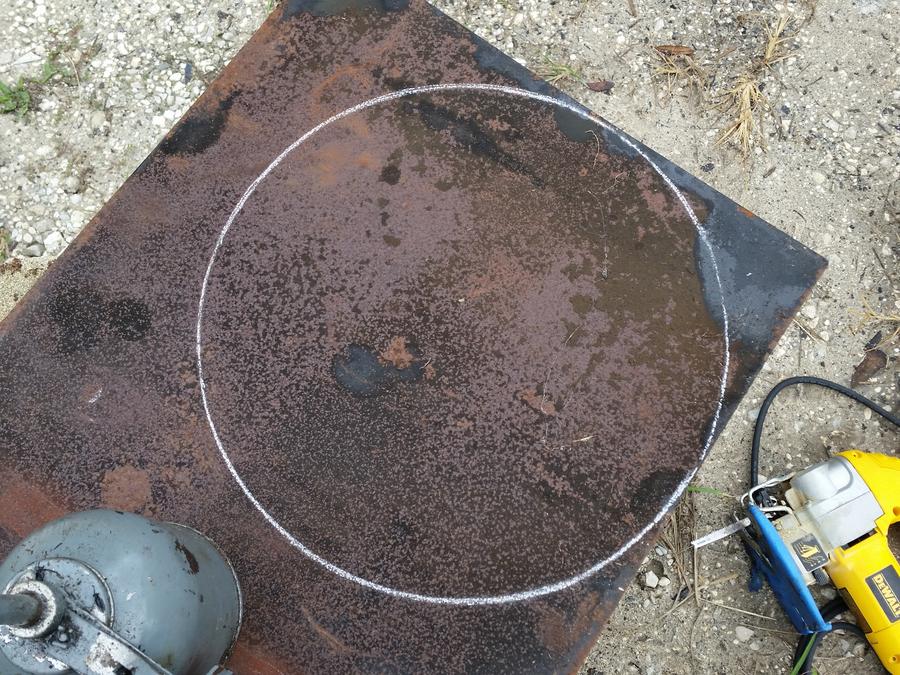
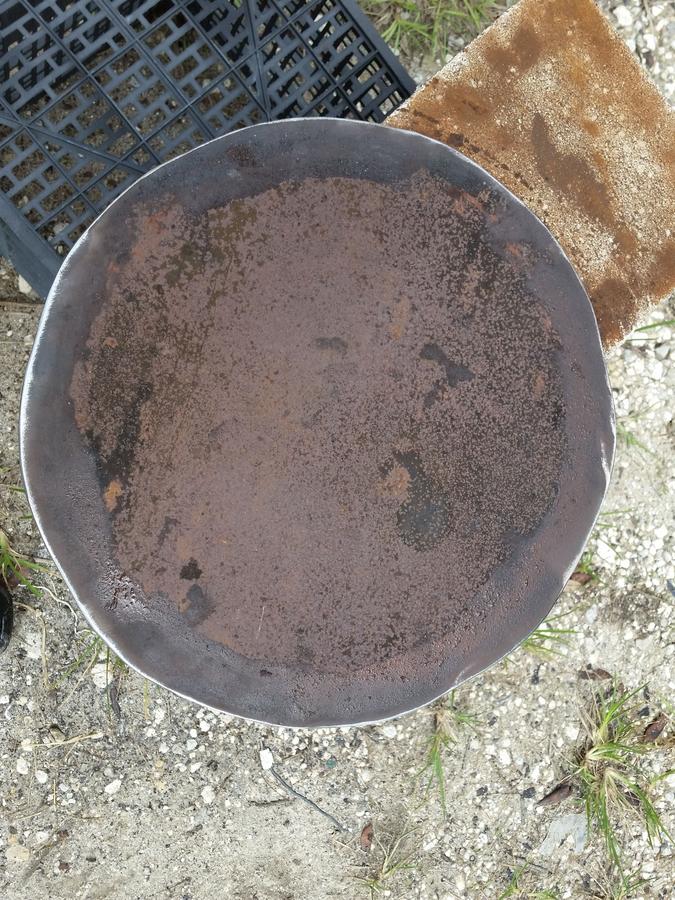
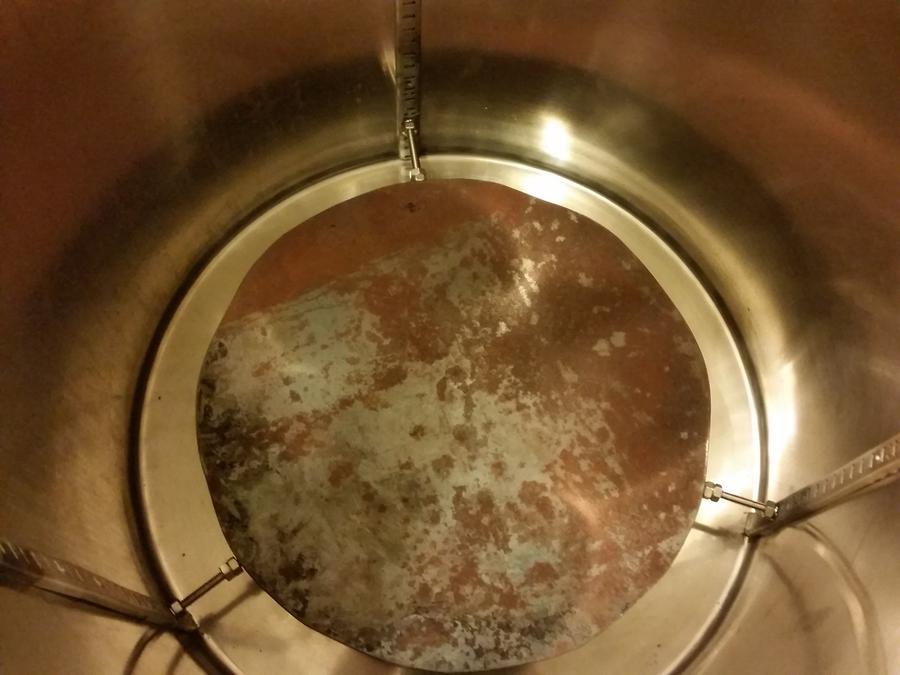
I cut out the deflector plate out of some plate I had for another project.
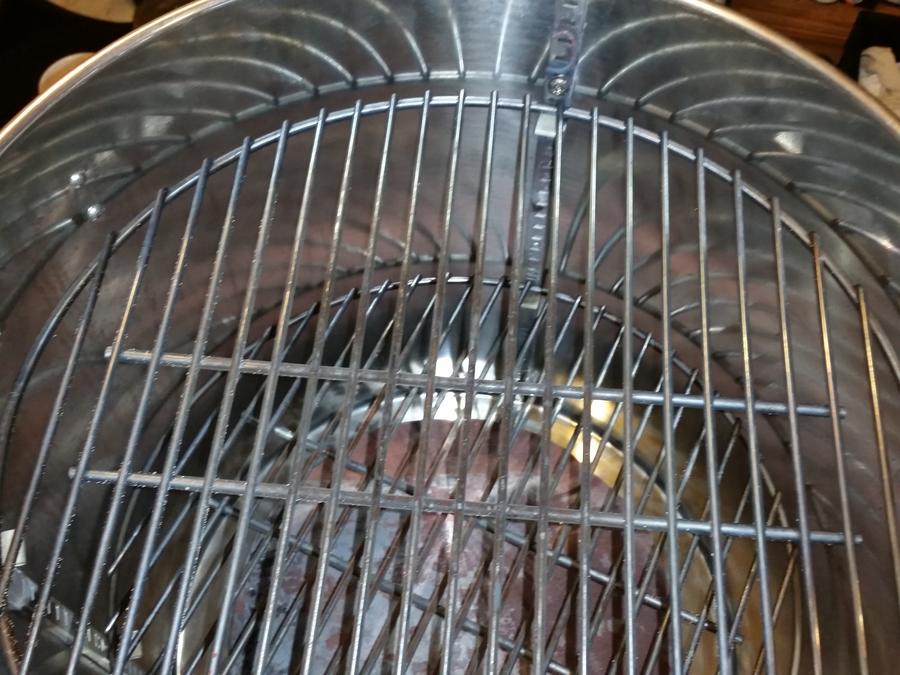
I used the stock charcoal grate for the circle. Cut it out with the jigsaw and a bit of oil. Wish I could have been a little more accurate with my circle.


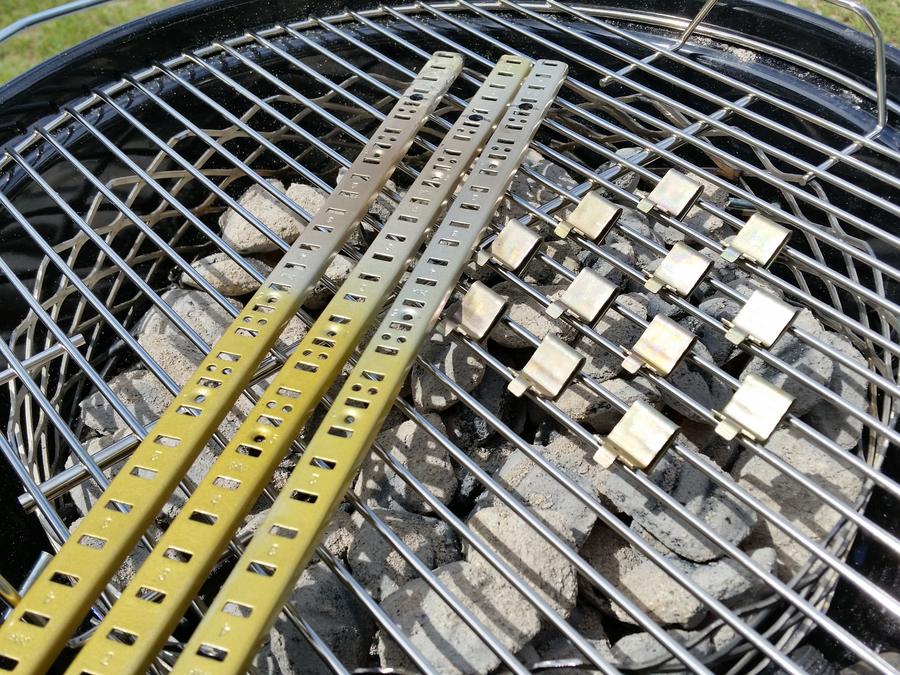
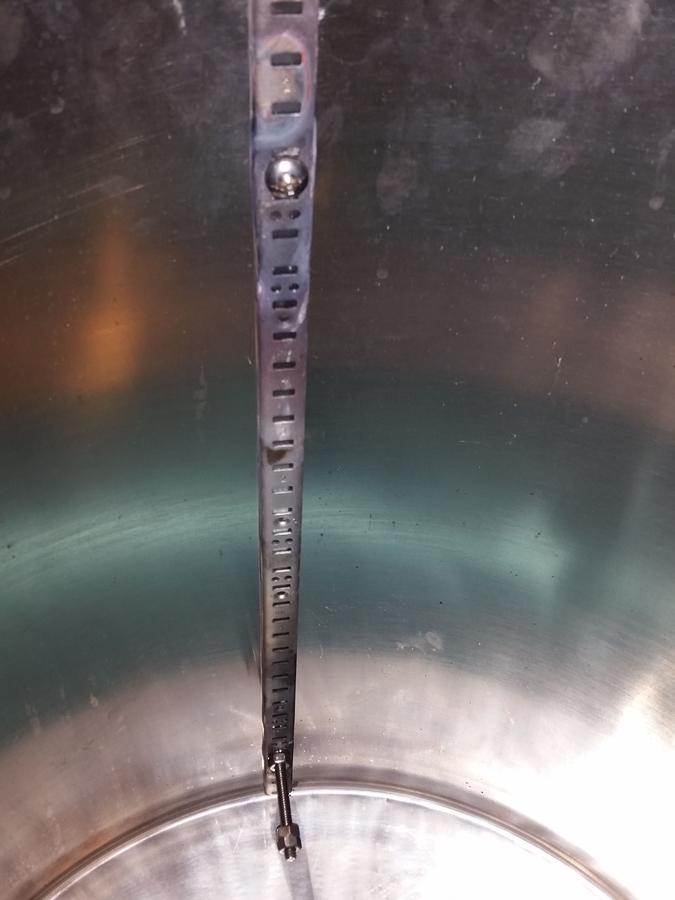
I burned off the coating for the brackets and clips. I tried to just put them on the grate, but eventually had to put them directly into the charcoal.


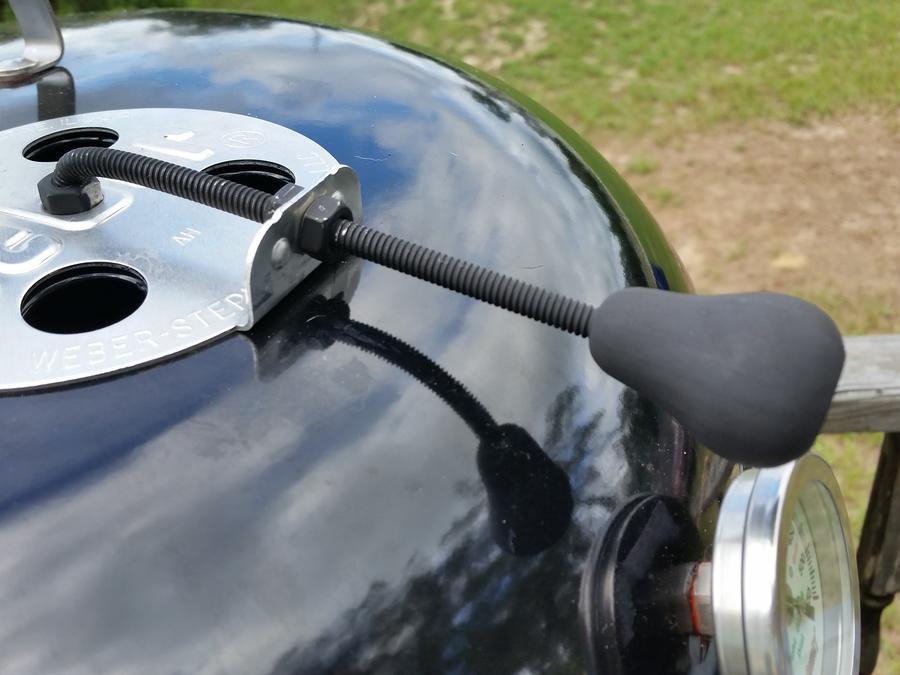
This is a better picture of the handle I made for the stock air vents. I was able to get a pear shaped wood thing from a hobby store. Drilled a 1/4" hole and screwed it on the all thread. Painted with high heat black paint.


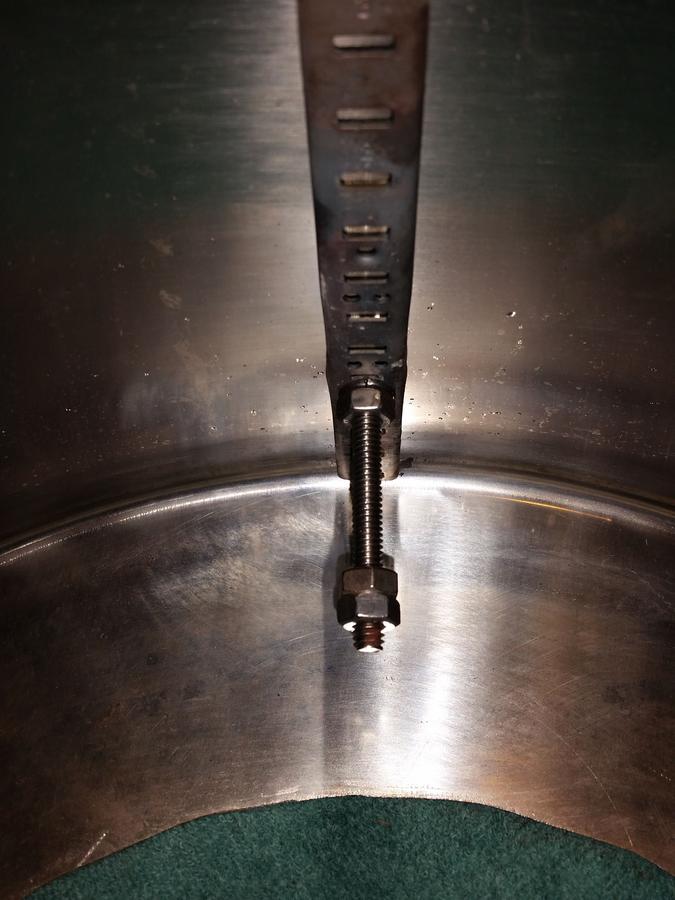
I bolted the brackets in. I had to cut the 3/4" bolts down so I could use the acorn nuts. I used the 2 1/2" bolts to hold the deflector plate, should be 3". I used 2 nuts to help center and hold the plate in place.


Placed the clips into place and installed the plate and racks.


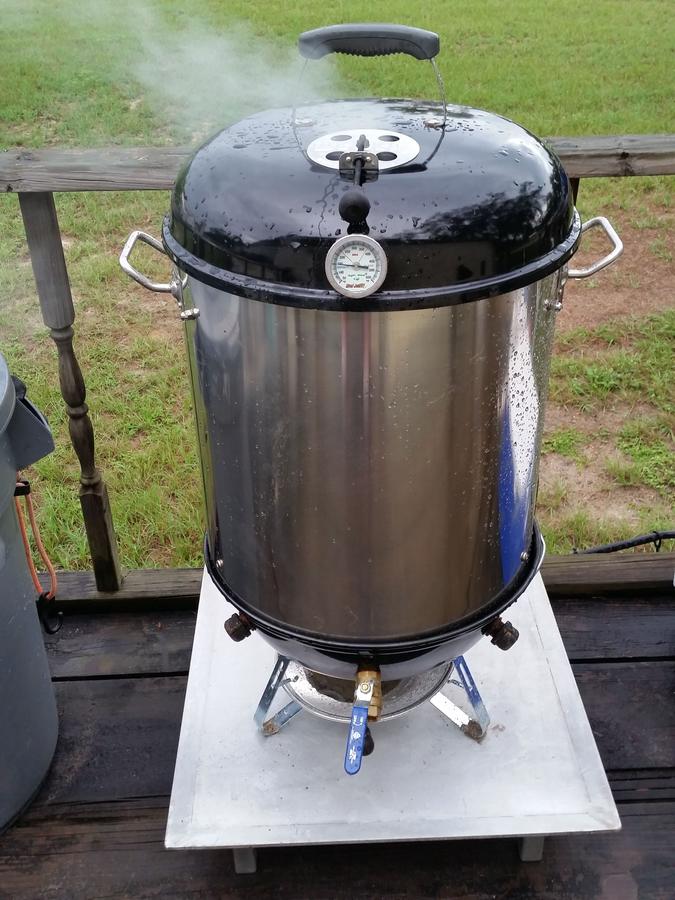
So her it sits in it's new home. I was able to aquire a couple aluminum risers to place it and the DO when needed.


Thank you for taking the time to look. If I can help answer any questions please feel free to ask.

I will update the first post later with costs. I will say the way I did mine is not the cheapest way, but I am very happy with the results.
 
Looks FANTASTIC Jeramy!      It'll sear great for you too... I like opening up that bottom vent and giving parts some fire for a finish once in a while. Keith
 
Looks FANTASTIC Jeramy!      It'll sear great for you too... I like opening up that bottom vent and giving parts some fire for a finish once in a while. Keith

Thank you for taking the time to help with finding the pot and talking me through a couple of the questions I had. It made a huge diffrence on filling in the gaps and allowing the process to be easy.

I am still looking for the 30 gallon drum to make the pizza oven. As I was working on the pot I truly understood why you said you would not cut the SS pot. It looks too awesome to cut it.....
 
I guess i really did go good on price, just under $200 but that was thanks to clearance at Target....JJ and grates. 

It is a versatile little cooker for sure, and it holds heat really good along with sears like a champ. 
 
Yea I knew since I could not find the same deal here, mabye because we have a longer grilling season here, I was going to be a bit higher than your build. I looked last year and this year at several places, but was no luck. I even asked if they were planning on any sales soon at most big box places. They just smiled and said why when they will sell out at this price. Fortunately I had gift cards and received a little unexpected cash from a project.

I am excited to run it this Thursday with butts. I am thinking I can fit 4 easily. We shall see. ...
 
So I was having to use the bottom vent more than I wanted too. I am looking at making new legs that will possible block the 2 outer vents and make them not usable. So I wanted to try something I really should have done from the start. I changed the ball vave to a 1", for now. The cost of the larger ones are abit intimidating. .......

I was building 2 minis today and had an idea for the ball valves and keeping them close to the side with no gap. The pipe fitting I used is slightly tapered to be larger in the middle where the thread pattern changes. So I screwed a conduit lock nut down as far as it could go. Then cut the opposite side off. I ran the remaining thread end through the hole in the bottom and screwed the ball valve onto the thread end as tight as it will go. If you have a gap and the valve will not tighten enough, add another conduit lock nut to the back side. It works very well.

I will get a picture of the inside tomorrow, the one I have was blurry.

For me it gives a very clean finish to it.


Open


Closed


Now to test it.....
 
@jarjarchef Sorry to resurrect the thread but i was curious about the shelf supports and clips you used. I was going to use them in a mini build (smokey joe version) but im not sure I would have the clearance between the grate and the side of the pot. I am overseas right now so i dont have the pot sitting in front of me; its on its way but will take a while. I want to try and order everything at the same so I dont have to wait again. Are you able to offer any help? Thanks in advance!
 
@jarjarchef
Sorry to resurrect the thread but i was curious about the shelf supports and clips you used. I was going to use them in a mini build (smokey joe version) but im not sure I would have the clearance between the grate and the side of the pot. I am overseas right now so i dont have the pot sitting in front of me; its on its way but will take a while. I want to try and order everything at the same so I dont have to wait again. Are you able to offer any help? Thanks in advance!

No worries on revival of the thread. I like my cooker and love to share info on it.

I do not think they will work. Even with getting the slightly smaller charcoal grate for the 18" weber to use as the cook grate for the mini, it is still very tight. Someone did another build like mine, but made a diffrent type of adjustable shelf that shoukd work for you, not as flexable, but it does have multiple levels for cooking. He even made a grip system to place the shelves. Below is the link to it. Hope this helps, let me know if I can help in any way.


http://www.smokingmeatforums.com/t/206636/they-call-it-a-jimmy#post_1398902
 
Beautiful build.  I'm starting mine right now.  Just debating on 80qt or if there has been a 60qt option anybody has run across.  How did the 1" work for you vs the 3/4" ball valve?  I'm debating one or two ball valves for mine.  

Thanks for the how to on here.  

TC
 
 
Beautiful build.  I'm starting mine right now.  Just debating on 80qt or if there has been a 60qt option anybody has run across.  How did the 1" work for you vs the 3/4" ball valve?  I'm debating one or two ball valves for mine.  

Thanks for the how to on here.  

TC
Thank you.

I am not sure if there is a 60qt available or not, but it just needs to be the same diameter.

If I was to do the ball valve thing over. I would only do 1 hole, not the 3 holes I did. I never took the outer 2 off, they were a pain to do so, so I used the bottom vent for more air when needed. I would actually use a 2" or larger ball valve. You will have to do some on the site figuring out, but it can be done.

After 3 years of really not keeping it out of the weather, I am going to have to put some work into rebuilding the adjustable brackets. They are not SS, so after the heat and rain they have rusted out at the bottom few inches. The top are still fine, plenty of grease sealing there.

I am contemplating on if I am going to do a major rebuild or just the brackets. I really would like to replace the legs to something more sturdy and put the 2" ball valve in.

One of the things that I really enjoy about the smoker is the size vs. portability. I can put the grill back together with the grates and wood chunks lock the top, then drop the deflector plate down to seal the bottom hole of the pot and place a large bag of charcoal and other tools inside, put the lid on and go. I have done 4 butts at once and no issues. With only using 2 shelves I have done 4 racks of St. Luis cut ribs. I can put 3 shelves comfortably if I wanted too....

I built my dad a mini and he melted the aluminum pot. If I had to chose the Jumbo Mini or the Classic Mini, I would do the Jumbo anytime. Just so much more versatility and not much more fuel usage, or not enough to get me worried.

Hope this helps. Let me know if you have any other questions.

Jeramy
 
SmokingMeatForums.com is reader supported and as an Amazon Associate, we may earn commissions from qualifying purchases.

Hot Threads

Clicky