Has Anyone Fooled the MES Temp Sensor Before?

  • Some of the links on this forum allow SMF, at no cost to you, to earn a small commission when you click through and make a purchase. Let me know if you have any questions about this.
SMF is reader-supported. When you buy through links on our site, we may earn an affiliate commission.
 
I've fooled the stock sensor... but in the opposite way you need.  Same info applies though.  You just need the proper resistor in parallel. ohms law.

http://www.smokingmeatforums.com/t/238214/350-in-a-mes30-yep-heres-my-mod

-J
Next time you take it to 350°, put your ear near the side wall (Top left is cool), and listen.

I had an MES accidentally get to 350°, and I could hear what sounded like the insulation between the walls crackling.

I would not intentionally take one over 325° MAX. JMO

Bear
 
 
That is great input Sigmo!

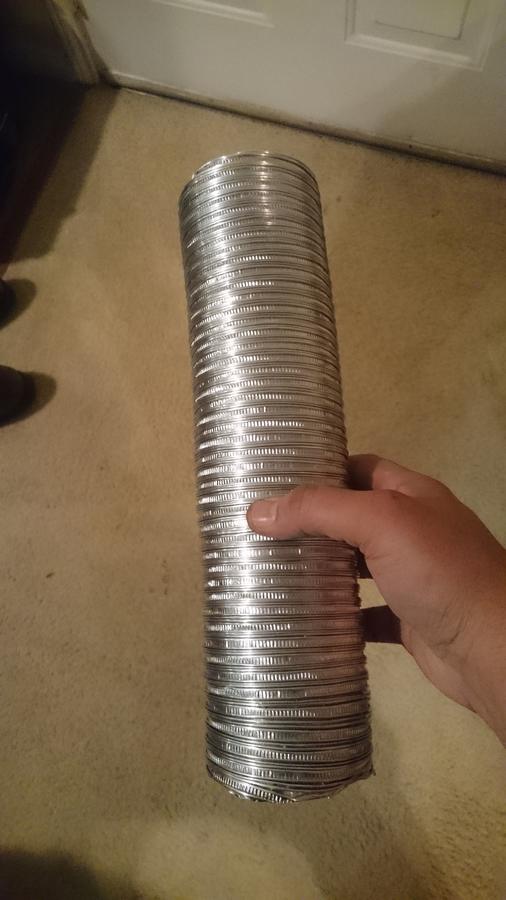
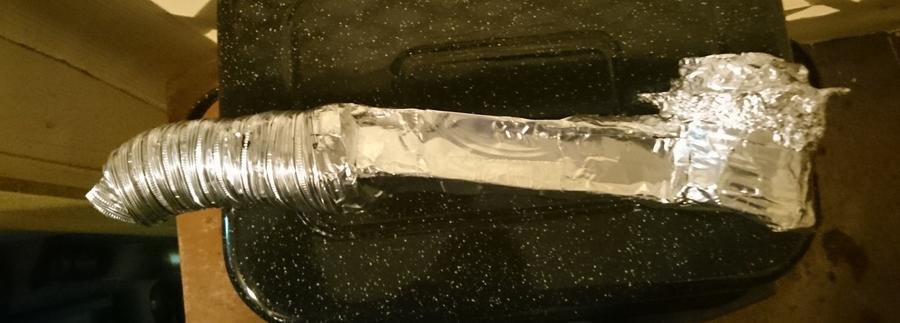
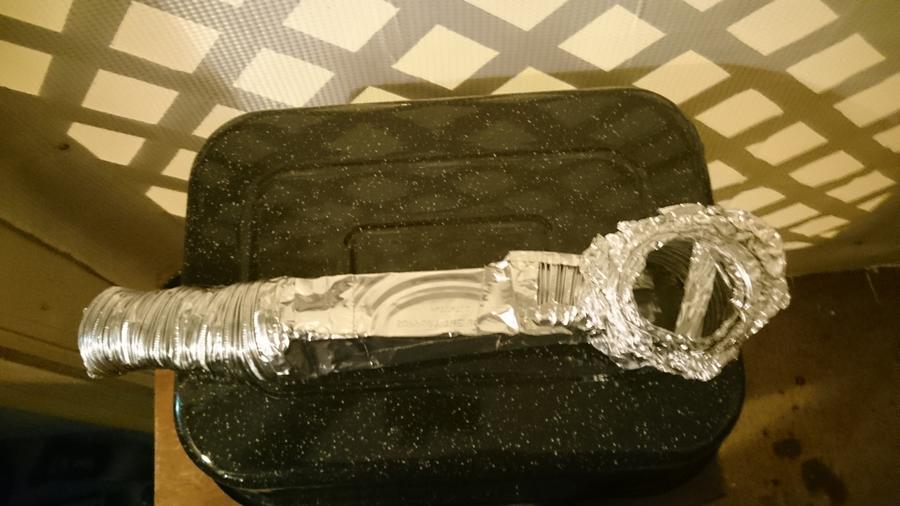
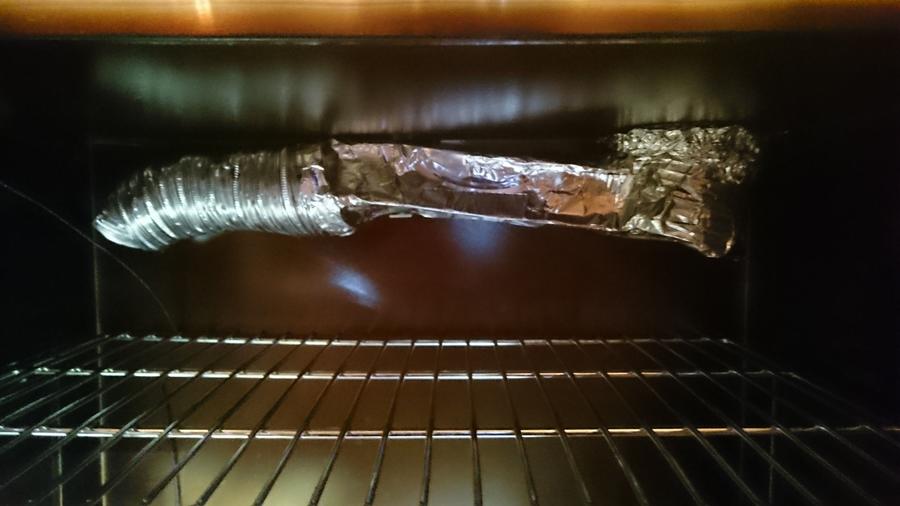
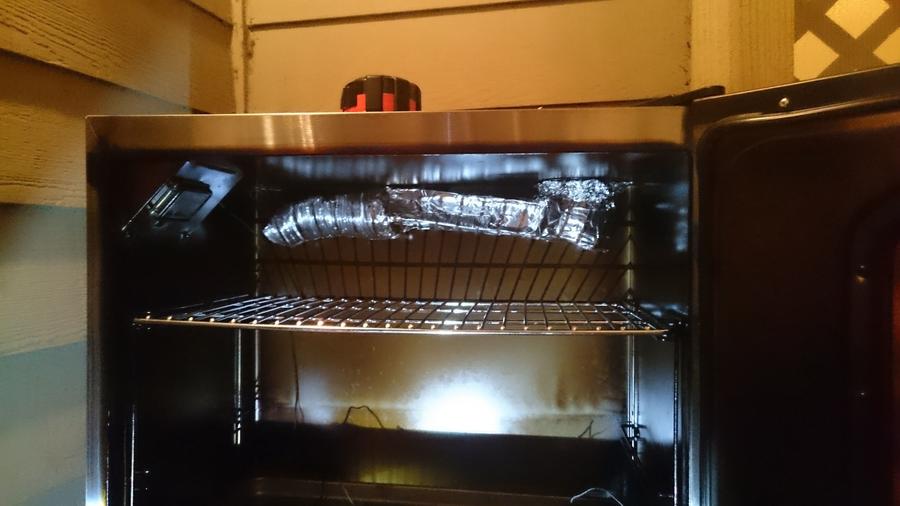
I just received confirmation from Masterbuilt that my new controller unit is on the way so I will have that to toy with myself.  I also bought a flexible ducting hose to try and "duct" the exhaust from the opposite side of where the vent/damper is currently located.  This would have the air flow across the smoker rather than straight up from element to vent/damper.

Lots of experiments on the list lol.
I think the experimenting is half of the fun for me!  I suspect the same is true for a lot of us.

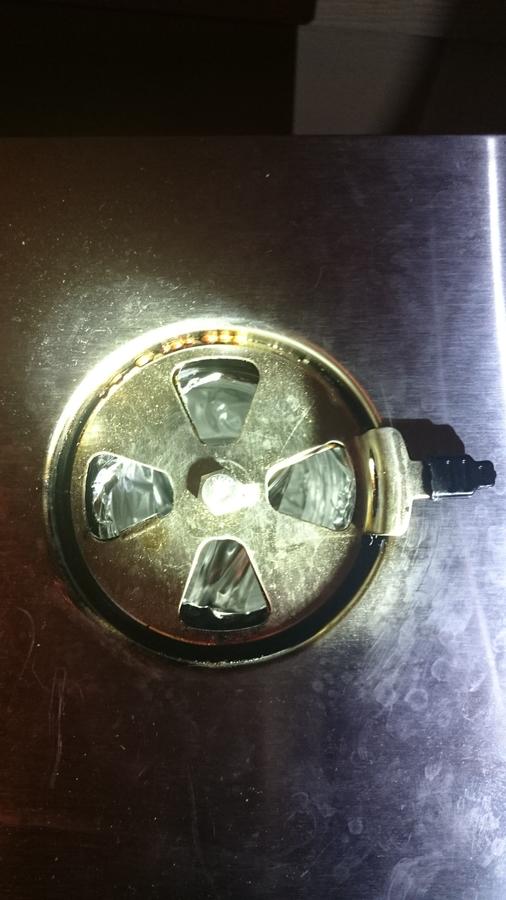
The duct to collect the exhaust air over at the opposite corner from where the factory vent is located would be good for me, too.  The vent is directly above the heater in mine, too.

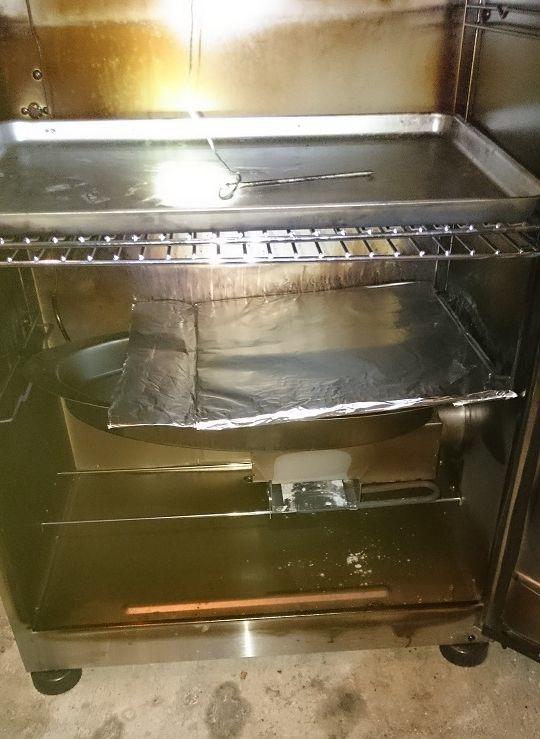
I've put some of those cheesy disposable aluminum-pan bits in various places to help direct the airflow.  If I'm not using the top rack, I usually put a sheet of that thin aluminum on the top rack such that it blocks off all but the leftmost four inches or so.  Thus, the air has to go over to the left before it can get to the vent.  But of course, that monopolizes that top rack.

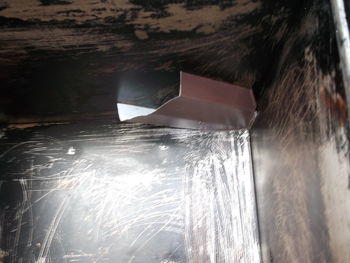
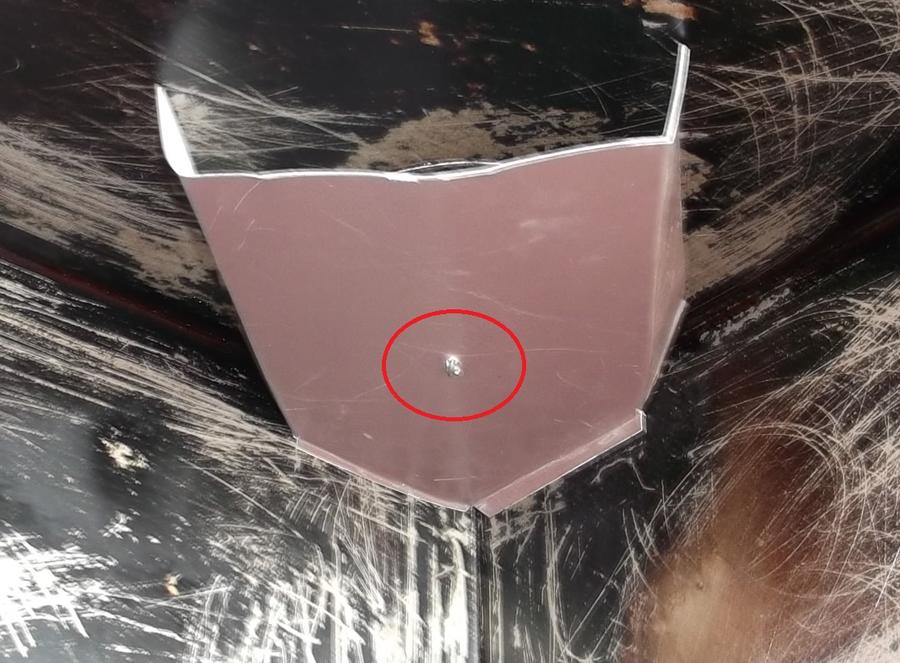
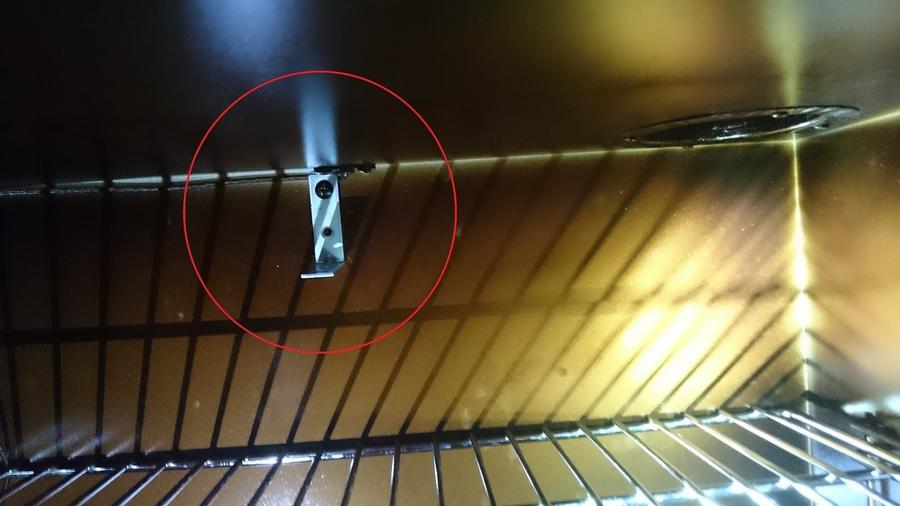
I don't remember who it is on here, but they posted a photo showing how they mounted a piece to do that same thing, but they mounted it to the "ceiling" of the smoker, creating that same sort of plenum, but without wasting so much of the smoker's space.  I may have to do that or use your hose idea.
Thanks Bear. You confirmed what I suspected. Now to figure out a way to get the heat to distribute. I fan inside the unit stirring the air up would probably be best, but I couldn't imagine it lasting very long. LOL
My wife bakes fancy cakes for weddings and the like.  And years ago, I installed a small stirring fan in our home oven to even the temperatures out in that unit.  But here's the secret:

I used a fan that I took out of an old gas chromatograph's column oven.  The way they work is simply to have a very long shaft between the motor and the little squirrel cage.  The motor mounts outside of the oven, and that long shaft pokes through a hole that goes all the way from the outside of the oven, through the insulation, and into the interior.  So the motor and bearings do not experience the heat of the oven.

And the little convection oven fan I got works the same way.  It has a very long shaft, and it even has a second small set of fan blades back near the motor.  I've seen these referred to as a "heat slinger" in the description of some "draft inducers" which have the same kind of task.  The idea is to act as a heat sink to cool the shaft before it goes into the front bearing.

One downside of this design is that you need to come up with some sort of enclosure to surround the motor which, of course, is mounted to the outside of the smoker.

The idea of putting a fan entirely inside of the smoker is not good if you're using high temperatures because most would not be designed to handle such temperatures and might give off some nasty fumes when they are heated, not to mention the fact that they'd likely not last very long.

I admit, though, that I have used a little computer fan to stir the smoke up when cold smoking, but even at that, I suspect the smoke might eventually gum up the bearings.  But since the little fans are so cheap, I was willing to risk it for cold smoking.
 
I've fooled the stock sensor... but in the opposite way you need.  Same info applies though.  You just need the proper resistor in parallel. ohms law.

http://www.smokingmeatforums.com/t/238214/350-in-a-mes30-yep-heres-my-mod

-J
Pardon this long story, but:

I was looking for a way to find very cheap meat probes to use with a fancy industrial controller, and after looking around, found that I could buy entire temperature meters with meat probes on EBAY, from China, for about $8 each.  So even if I throw the meter away, I've got a meat probe for $8.

Being too impatient to wait for the cheap meter/probe units to arrive, I took the probe from one of my existing electronic oven thermometers, and characterized the probe at a variety of temperatures.  It turns out that they used a thermistor type probe, and that's no surprise since they're inexpensive.

The problem is that these thermistors are very non-linear.  So you need to implement a conversion to linearize the thermistor.  The one I tested was a negative temperature coefficient, and probably what they'd call a 400K Ohm thermistor.  The fancy PLC I plan to use has special input modules for resistances, and the "brains" actually implement some standard thermistor linearizations that you can tweak. But these input modules are not cheap, and the only ones I could find used, were for 40K thermistors.  I'm still waiting to get a few of the $8 units, but I fear they'll be the same.

I also found a few articles about how to implement the math to linearize such probes or how to approximate a linearization with a very simple two-resistor circuit.  Just do a web search for "thermistor linearization", and you'll get a lot of interesting hits.

I wonder if Masterbuilt uses the two-resistor approximate linearization circuit.  And if so, I wonder if we couldn't actually do a pretty good job of tweaking one in, over a rather wide range, by changing the values of those two resistors (assuming that's what they use, and further assuming they're accessible on the PCB of their controller).

I could also very well imagine them directly reading the resistance, and then implementing the linearization in the firmware of the microcontroller.  If that's the case, the best you can probably do is exactly what you folks are doing.  Either put a resistor in series or one in parallel depending on which direction you want to "push" the readings.  But the problem, as you folks have already noted, is that you can only achieve perfect adjustment at one temperature.

But then again, that might well be good enough!

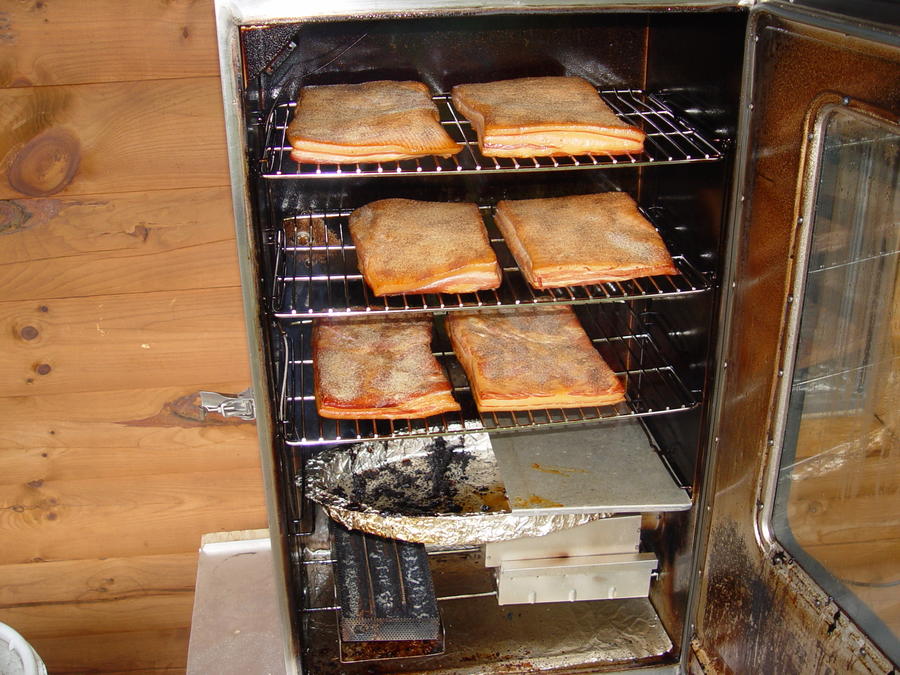
As Bear mentioned, you probably don't want to set things up to heat these units up beyond their original design limits.  And as I've talked about before, you want to make sure that you're really comparing temperatures right at the smoker's sensor before adjusting things.  The temperatures can vary so widely from one place to another in the smoker that you must take that into account before assuming that the smoker's sensor/controller is really off.

I would hope that the snap-disk would prevent things from overheating too badly in any case.  And if I found that the snap disk was tripping prematurely, I'd likely replace it rather than jumper around it, defeating that safety system.  As Bear pointed out, I don't know what sort of insulation they use, but if it's the foam stuff, it probably can't handle temperatures too far above what the factory controller is supposed to give us.

If I was making my own smoker from scratch, I'd use some mineral insulation of some sort so that I could run it up to "oven" temperatures if I wanted to.  But I'm not sure what these MESs use.
 
Last edited:
Heat Deflector for Gen #1 MES Units:

This is an old picture of my Heat deflector in my old MES 30 Gen #1.

The Aluminum plate resting just above the Water Pan is actually sitting on a metal prop on the left end.

I can raise that left side to Direct more heat from the right side to the left & middle, or I can lower the left side to get less heat directed over to the left. The left & right heat balance can be had easily with this. (I don't need this in my Gen #2.5 MES 40

This Works Awesome!!!

Note:  Putting something on the ceiling (Like a Plenum) to direct the heat where you want it will allow the heat to rise on the right side all the way up through the smoker, and then jump over when it gets to the top.

Deflecting the heat at the bottom, like my Deflector does, causes the heat to go where I want it, before it rises through the food on the racks.

Bear

 
Well I attempted to make a little duct out of some materials I had.  This is version 1 and it is a bit rough but I think it will be a good first attempt and if it works I'll stick with it.

Added a 2 inch elbow bracket using the screw that was already in the smoker.  It holds the chord to the meat probe to the back top of the smoker.  I just unscrewed the screw and then added back with the elbow bracket.


Used a foil pan and some 3inch foil semi flexible expandable ducting and some high temp Flue tape to make this contraption.

I cut as slit about 3 inches from one end of the duct and then forced an overlap to snugly fit into the exhaust vent hole in the MES.  Once it fit I Flue taped it.  The normal 3 inch diameter is slightly oversized for the MES exhaust hole so the duct must be tapered down a little bit.  The image below does not show the tapering, just the 3 inch duct.


Here is what it looked like installed.  The round duct at the left end was just me re-purposing materials from the 3 inch duct where I had been playing around with the design. The bracket basically holds everything up as the coil fits very snugly into the MES vent hole.


To do over I would start by installing the elbow bracket in place and then measure the amount of space I had available on the bracket for the homemade duct to sit.  The bracket idea didnt come to me until I built the contraption and couldn't get it to stick in place using wire.  

Putting the bracket in place first and then doing measurements would allow for a homemade duct to be created that would be more of a flush/perfect fit.  

I would then do a better measurement job on the 3" duct that goes into the MES exhaust vent slot.  As you can see mine is a little too long and my homemade duct was fastened too low.

After everything was measured and fit properly I would flue tape the crap out of the contraption and install it.

Doing over again this approach would create a device that takes up the least amount of space in the the smoker and keeps everything fitting as flush as possible.

Oh, I did use plain foil around the 3 inch duct pipe that goes into the MES exhuast hole.  The foil was mashed to the device while in place to fill any gaps in fitting the 3inch duct to the MES exhaust hole.

I plan to attempt a standing rib roast or pork ribs Sunday morning so I will know how it handles with smoke.

I can probably do a temp check with probes before then.

Oh, another thing I will be figuring out is how well everything seals and works with Maverick prob wires going through the door rather than the vent.  I didn't think about this at all with this project so I will try and come up with a better approach or I will simply just dedicate the probes to the smoker and fix them in place through the vent/new ducting and use foil to seal up the gaps that are made.  I have a strong feeling I'll be going this dedicated probe route.

Please feel free to give your thoughts and feedback.  I appreciate all of the input and ideas you guys come up with or help generate :)
 
Last edited:
Nice Job!!

However, I guess you didn't agree with me that it's more important to kick the heat over to the center of the smoker at the bottom, before it rises through the meat being smoked?

Also if you really think pushing it from right to left at the top is important, instead of at the bottom, why not just install a Top vent on the left, like Masterbuilt finally did with their Gen #2.5.

You could even put another identical vent in the top left, and then have two adjustable top vents. This wouldn't take any room from your smoker, and you could run your Maverick cables down either Vent.

Bear
Hi Bear.  

I don't disagree with your approach to kick the heat over at the bottom.  I have been using the following mod (ceramic tile) and can easily add the water pan like you do when I smoke.  I haven't been adding the water pan because the tile is fairly big but it wont hurt for me to try it.

(Ignore the drip pan and grates being in that position/configuration, this is just for storing and I will pull and arrange properly when I smoke)


My thought process was to get the duct in place so I could kind of mimic what you have described with the MES 2.5.

I like the idea of making another vent like you mention.  I'm going to wait to permanently modify the MES until after my warranty is up.  After the warranty is up anything I can do is fair game :)

With everything I have going right now I can go duct only, duct + ceramic tile, or duct + ceramic tile + water pan to hit all combinations.  I'm hoping some combination works.

The new controller should be here in 4 days so the weekend following that I will be able to try it out and see if it works better.  Man lots of stuff going on! :)
 
 
Hi Bear.  

I don't disagree with your approach to kick the heat over at the bottom.  I have been using the following mod (ceramic tile) and can easily add the water pan like you do when I smoke.  I haven't been adding the water pan because the tile is fairly big but it wont hurt for me to try it.

(Ignore the drip pan and grates being in that position/configuration, this is just for storing and I will pull and arrange properly when I smoke)

My thought process was to get the duct in place so I could kind of mimic what you have described with the MES 2.5.

I like the idea of making another vent like you mention.  I'm going to wait to permanently modify the MES until after my warranty is up.  After the warranty is up anything I can do is fair game :)

With everything I have going right now I can go duct only, duct + ceramic tile, or duct + ceramic tile + water pan to hit all combinations.  I'm hoping some combination works.

The new controller should be here in 4 days so the weekend following that I will be able to try it out and see if it works better.  Man lots of stuff going on! :)
A long time ago, I tried the big piece of ceramic tile on the right of my MES 30, and I had big puffs of smoke coming out the top vent.

That MES 30 didn't have a Window, but I figured out that the heat from under the ceramic tile was trapped & was knocking the tile up & down with built up pressure.

I could have tilted it to avoid all the heat build up under it, but instead I elected to go with aluminum, because it's easier to cut & adjust, and works just as good.

If your ceramic tile is laying flat and tight against the back & right wall, the same could happen to you.

I don't see a good reason for the tile in there laying flat---Do you?

Like I said, the only thing I ever needed in my MES 40 Gen #1 was the adjustable heat deflector, and that worked perfectly. Easy too, as all you need is a piece of metal, and a folded up piece of foil for an adjustable prop on the left.

I could put a Temp probe on the right & on the left, and adjust the tilt of the plate to get both sides reading the same temp.

Bear
 
Bear this is what I can do with what I have at the moment.  I need to find a prop to angle the deflector.  As for now I have a little flap at the end I can bend up and down but not sure it will make any difference with the deflector already angled down.

I should be able to make it work close to what you have :)

(Edit: added image)

 
Last edited:
 
Bear this is what I can do with what I have at the moment.  I need to find a prop to angle the deflector.  As for now I have a little flap at the end I can bend up and down but not sure it will make any difference with the deflector already angled down.

I should be able to make it work close to what you have :)
At first I had a piece of aluminum bent into a "V" (upside-down), but I found a piece of scrap foil pan bent to the right size works great, and is easy to shape.

The right side of the deflector just rests on the top of the wire rack that holds the water pan, and the prop under the left end is in the water pan.

Bear
 
I just started researching why my MES has started running cooler than the thermostat is set for and found this thread.  I noticed this for the first time a couple of weeks ago while doing my first cold smoke with the external Masterbuilt smoke generator.  I was running a small load (1 pound) of salmon with the chamber set to 150, and noticed the meat probe on the side wall was reading 125 (the probe in the salmon was my remote reading ThermPro).  I turned up the thermostat to 175, the same 25 degrees as the difference between top and side.  A little while later the probe on the side said 150. 

I'm doing a few pounds of beef short ribs right now (with an umbrella to keep the rain off) and just noticed the temp difference again.  When I ran into Bear's post (#16, above):
 Generally speaking the biggest problem with the Gen #1 was the fact that the heating element is on the right side, and so is the top vent.
So the heat would come from the right half of the smoker & run straight up the right side & out the top vent on the right.

That would make the right side hotter than the left.  I solved this years ago, by putting a piece of metal (Heat deflector) on the right side, just above the water pan in it's normal position. This would push the heat from the right to as far to the left as I wanted, by a simple adjustment to that heat deflector. I did this for 4 years, until I got my New Gen #2.5 MES.

The water pan had little to do with this---It was the fact that both the heating element & the top vent were on the right.

I told Masterbuilt about this problem years ago & they moved their top vent to the left side---Problem Solved !!!

Bear
I didn't even know I had a Gen 1, but this just seems like it has to be the root cause.  Mine is the 30" digital without a window and the controller on the back.  The heater and the vent are both on the right.

So if the problem is the heat rising straight to the vent, doesn't that say to close the vent?  Or at least don't run it wide open?  Can't recall how many times I've read on here to run it wide open. 

Is there a guide somewhere on how to tell the generations apart?  What to look for?  I have this 30" digital and a 30" analog, the one with a simple controller stuck in the side.  The analog model has some advantages, like a bigger chip tray which smoked for much more time than the digital.  It had to be checked a bit more closely because the thermostat is in that controller sticking out the side.  Over the course of the day, the temperature would drift. 

The analog smoker has the heater all across the bottom and the vent on the right, but it's just a small hole in the back, about half an inch diameter.  It sounds like it would have more even heat distribution, but since the only temperature readout is an analog thermometer stuck in the front, and the thermometer's not connected to that controller, we'd never notice this problem.
 
 
I just started researching why my MES has started running cooler than the thermostat is set for and found this thread.  I noticed this for the first time a couple of weeks ago while doing my first cold smoke with the external Masterbuilt smoke generator.  I was running a small load (1 pound) of salmon with the chamber set to 150, and noticed the meat probe on the side wall was reading 125 (the probe in the salmon was my remote reading ThermPro).  I turned up the thermostat to 175, the same 25 degrees as the difference between top and side.  A little while later the probe on the side said 150. 

I'm doing a few pounds of beef short ribs right now (with an umbrella to keep the rain off) and just noticed the temp difference again.  When I ran into Bear's post (#16, above):

I didn't even know I had a Gen 1, but this just seems like it has to be the root cause.  Mine is the 30" digital without a window and the controller on the back.  The heater and the vent are both on the right.

So if the problem is the heat rising straight to the vent, doesn't that say to close the vent?  Or at least don't run it wide open?  Can't recall how many times I've read on here to run it wide open. 

Is there a guide somewhere on how to tell the generations apart?  What to look for?  I have this 30" digital and a 30" analog, the one with a simple controller stuck in the side.  The analog model has some advantages, like a bigger chip tray which smoked for much more time than the digital.  It had to be checked a bit more closely because the thermostat is in that controller sticking out the side.  Over the course of the day, the temperature would drift. 

The analog smoker has the heater all across the bottom and the vent on the right, but it's just a small hole in the back, about half an inch diameter.  It sounds like it would have more even heat distribution, but since the only temperature readout is an analog thermometer stuck in the front, and the thermometer's not connected to that controller, we'd never notice this problem.
Closing the top vent is not a cure for the heat balance problem.

My heat deflector solves it in the Gen #1, and it sounds like you have the Gen #1.

Here (Below) is more on the MES units. One tells how to tell the various Generations apart:

Masterbuilt Smokers (Bear's Thoughts & Findings)

MES Generation Number Recognition Pictures & Pics (Digital Units)

Bear
 
Interesting.  My smoker looks like the Gen 1 30" except for one thing: the controller is rounded rather than square.  I got it at Cabela's last Christmas, if I recall correctly.  Also, the water pan is oval and the one in the picture looks round. 

Do you have a picture of your baffle handy?
 
 
Interesting.  My smoker looks like the Gen 1 30" except for one thing: the controller is rounded rather than square.  I got it at Cabela's last Christmas, if I recall correctly.  Also, the water pan is oval and the one in the picture looks round. 

Do you have a picture of your baffle handy?
The rounded controllers came out about 2010-2011.

The squared ones were earlier.

They're both Gen #1 MES.

Actually they are all oval water pans, but the MES 40 water pan is naturally bigger.

My Heat Deflector is seen in Post #24 above.

All it is a sheet of aluminum that lays there, but there is a prop on the left to raise & lower to adjust how much heat gets sent from right to left.

Bear
 
Well I have successfully reached 278 degrees with all of the modifications!  I smoked a ribeye roast yesterday and temps hit the proper high's I've never successfully hit before.

Now I don't know if it is a combination of everything added (Bear's deflector type setup + the vent duct) or any one thing in particular.  Also I need to make sure my results are repeatable.

I will play around with the configuration over my next few smokes and report back more details.  Also running the probes through the door caused no issue.  I will keep an eye on the door seal though to make sure it doesn't get worn down or permanently deformed.

I will post my ribeye roast in another thread with Qview once I get time this week.  It turned out well and I think I can improve it even more :)
 
Last edited:
Good to hear!  Very cool results.

This past Friday, I was smoking about 7 lbs. or beef short ribs, with the chamber set to 235.  My "meat probe" on the left wall was reading 190.  I kept increasing the thermostat until the chamber got to 225, and it was close to 265.  Definitely have to do something.

I was thinking of trying just a wrap of aluminum foil over the lowest rack, on the right side of the smoker, like Bear's.  It's really just a thinner aluminum baffle.
I moved the exhaust to the center of the MES 30 with an aluminum "tunnel"...   It helped my smokers uniform temps... 

The trouble, as I see it, with trying to get even temps is....   The air flow...  It's not homogenized...   there are currents...    The currents change with meat in the smoker...  where the meat is placed...   how many hunks of meat are in the smoker.... 

I figure, it ain't never gonna be perfect and live with it.....

If  you really want to get confused...   check the exhaust temp while checking the others... 


Last edited:
 
Good to hear!  Very cool results.

This past Friday, I was smoking about 7 lbs. or beef short ribs, with the chamber set to 235.  My "meat probe" on the left wall was reading 190.  I kept increasing the thermostat until the chamber got to 225, and it was close to 265.  Definitely have to do something.

I was thinking of trying just a wrap of aluminum foil over the lowest rack, on the right side of the smoker, like Bear's.  It's really just a thinner aluminum baffle.
A bunch of aluminum foil would work for a test, but make sure you have the left end of that foil at least a little higher than the right, so the heat doesn't get trapped under the "Foil" deflector. raising & lowering the left side of that deflector will adjust the heat from right to left.

And Like I said, the only way to push the heat from right to left before it rises through the smoker is to do it at the bottom with a deflector. Anything you do up top will not change the movement of the heat at the bottom, or while it's rising through the meat.

Bear
 
Bear, did you have that piece of aluminum sheet lying around or did you buy it someplace?  Is it some sort of Home Depot part?  I don't have any sheets that size, and the only sheet I have is 1/8" thick anyway.  I wouldn't use 1/8 sheet in the smoker, it's too useful for other projects.  
 
SmokingMeatForums.com is reader supported and as an Amazon Associate, we may earn commissions from qualifying purchases.

Latest posts

Hot Threads

Clicky