Navigation
Install the app
How to install the app on iOS
Follow along with the video below to see how to install our site as a web app on your home screen.
Note: This feature may not be available in some browsers.
More options
Style variation
-
Some of the links on this forum allow SMF, at no cost to you, to earn a small commission when you click through and make a purchase. Let me know if you have any questions about this.
You are using an out of date browser. It may not display this or other websites correctly.
You should upgrade or use an alternative browser.
You should upgrade or use an alternative browser.
First down flow build Has been started
- Thread starter scott s
- Start date
SmokingMeatForums.com is reader supported and as an Amazon Associate, we may earn commissions from qualifying purchases.
Thanks to Bruno and Gary for the input on secondary air I think I will probably use both locations and see which one works better. Heck its just time and materials no real cost and the one I don't use just stays shut.
Hopefully will be posting progress soon
Thanks again
Hopefully will be posting progress soon
Thanks again
Hey inkjunkie
I forgot to mention it may be obvious to most but trying to measure a round tank is impossible with a metal tape measure and drove me nuts until my wife handed me a cloth tape measure from her sewing box and said I don't want it back after you ruin it just buy me a new one. I do love that girl.
Also I use silver sharpies for hot rolled (black) steel.
Most of you probably already know these things but if someone doesn't I may have helped out.
Anyone have advice for mill scale?
Is it necessary to get it all off or just the loose stuff?
Thanks in advance for any reply's
Is it necessary to get it all off or just the loose stuff?
Thanks in advance for any reply's
inkjunkie
Master of the Pit
- Nov 25, 2014
- 2,020
- 50
I was struggling measuring something round a while back...she did the same thing...let me borrow her fabric tape measure from her sewing gear. Thanks for the tip on the Sharpie, I use a black one and well....you know the results lol.Hey inkjunkie
I forgot to mention it may be obvious to most but trying to measure a round tank is impossible with a metal tape measure and drove me nuts until my wife handed me a cloth tape measure from her sewing box and said I don't want it back after you ruin it just buy me a new one. I do love that girl.
Also I use silver sharpies for hot rolled (black) steel.
Most of you probably already know these things but if someone doesn't I may have helped out.
bruno994
Master of the Pit
Looking good. Can't wait to see some smoke.
Howdy all who may be watching this build.
Trying my best to get some updates done. I will get some pictures on here and edit- comment as .the computer allows.
Second purchase of new parts
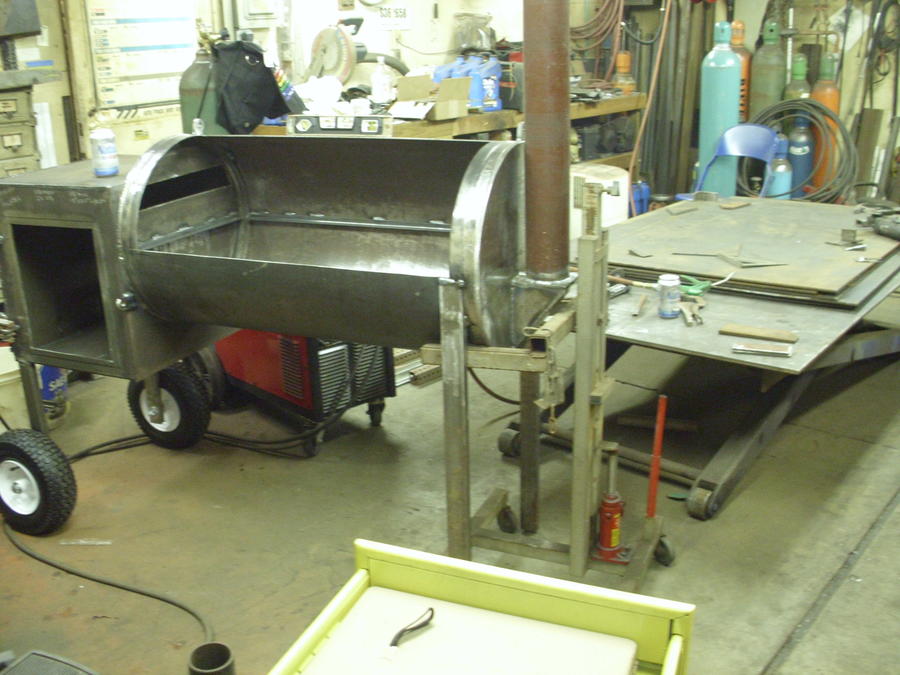
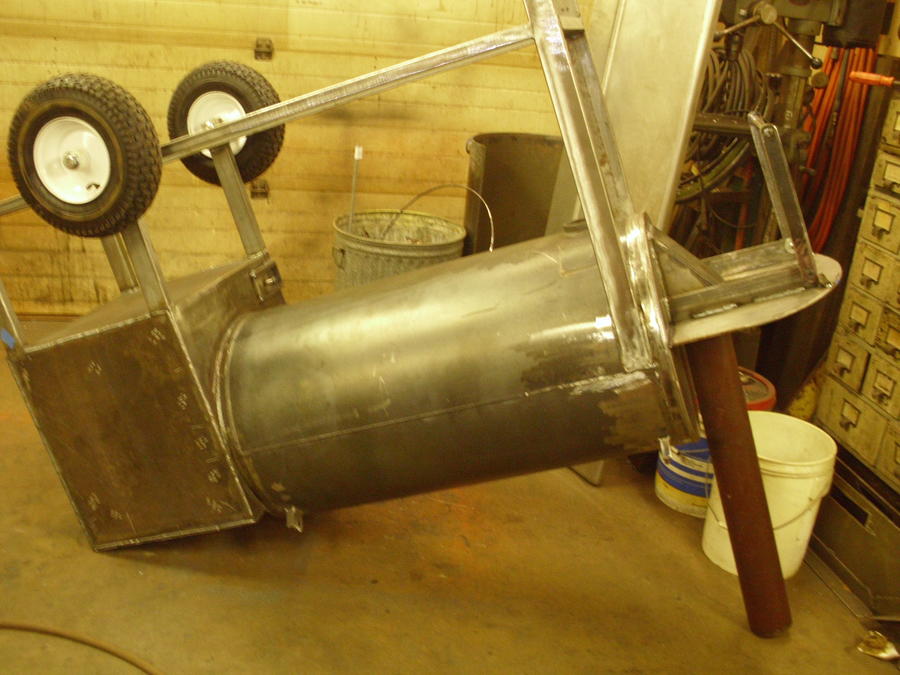
 13" x 5" wheels from harbor freight $12.00 each.
I have tons of wheels but none are wide enough to run something this heavy through soft grass in the yard or just stupid big for this thing so I had to buy these.
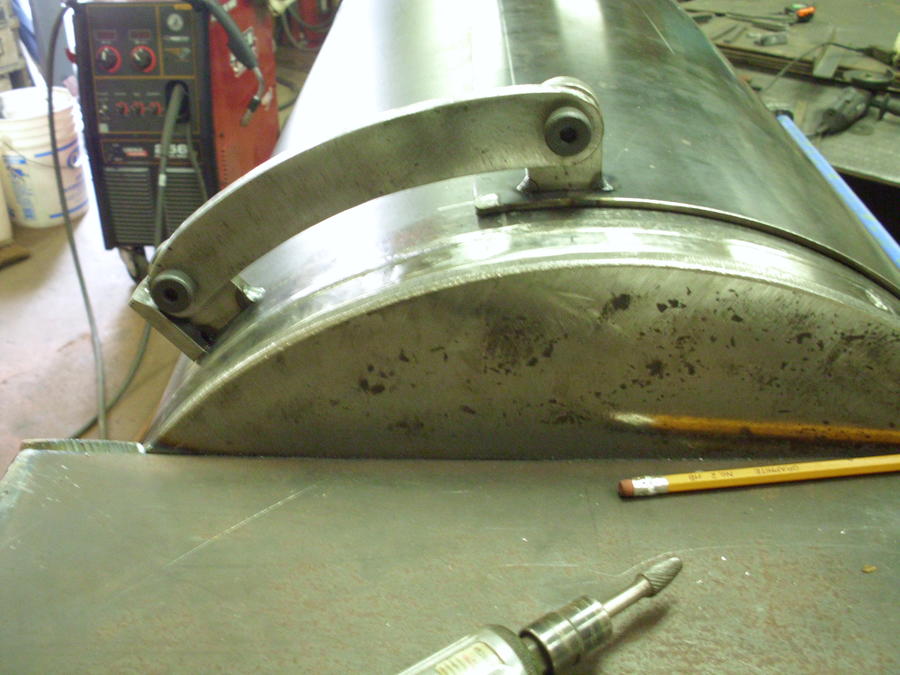
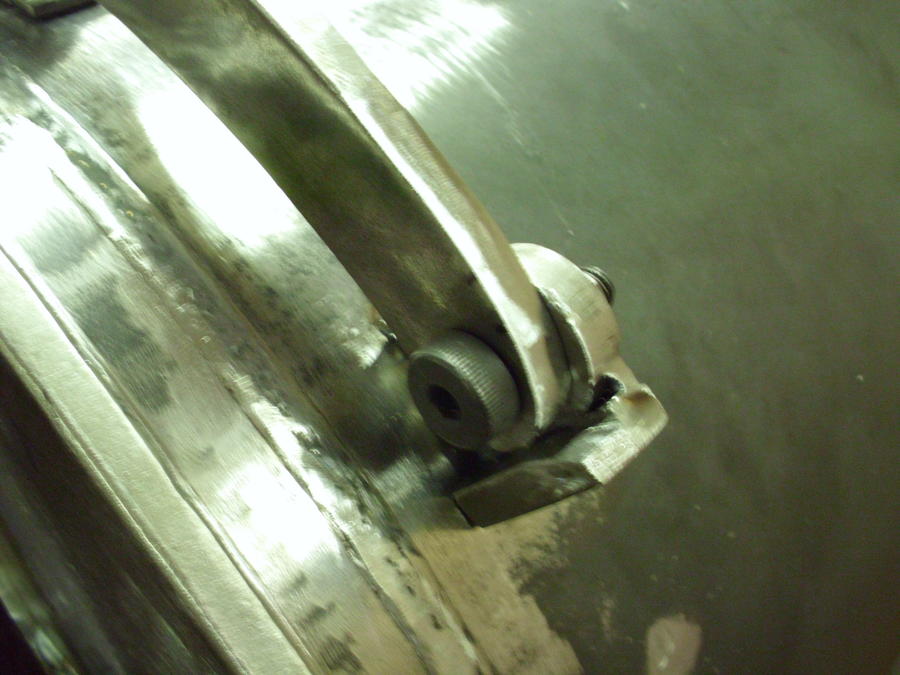
Legs going on the other end wish I had taken better pics of the rounded cut to fit them to the CC .
It was tricky but went well. I used the cut wheel at an angle like I was cutting the bottom of a bowl.
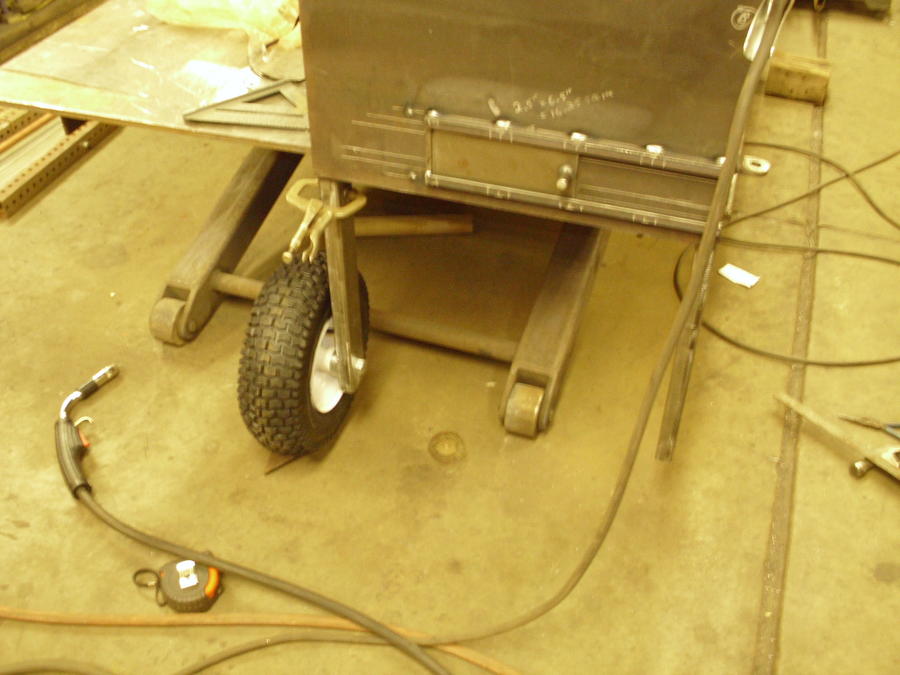
Motor went out on the lift table right after we took it off.
( lift table consists of an auto lift leftover from my days as an auto body tech that I have been trying to sell for five years but refused to sell cheap now it may be a stationary 18" high table If it would have quit at the 36" safety lock it would have been more useful. I hope a motor isn't too much )
Lucky the project is on wheels now.
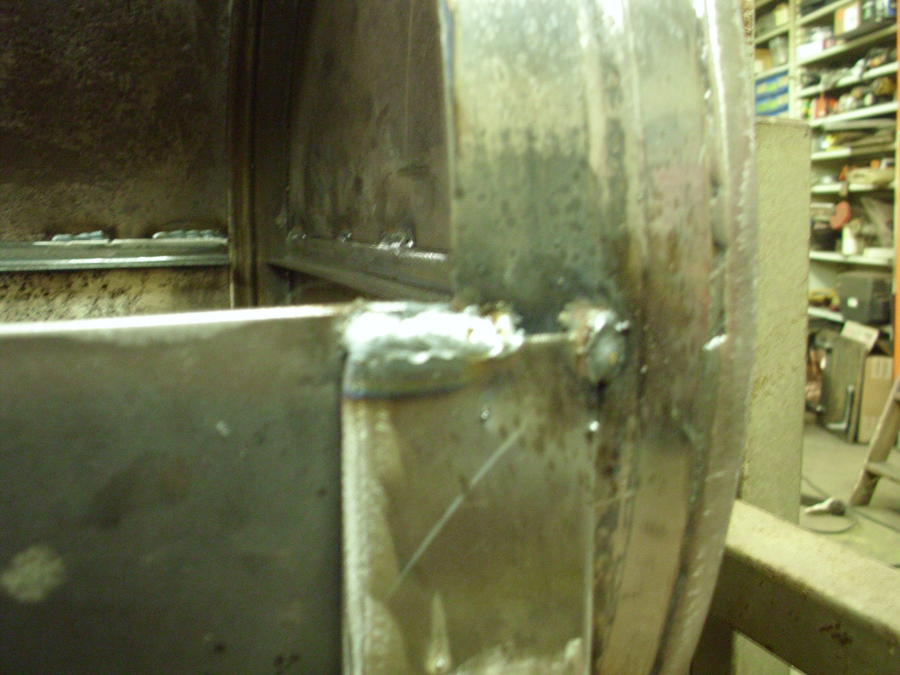
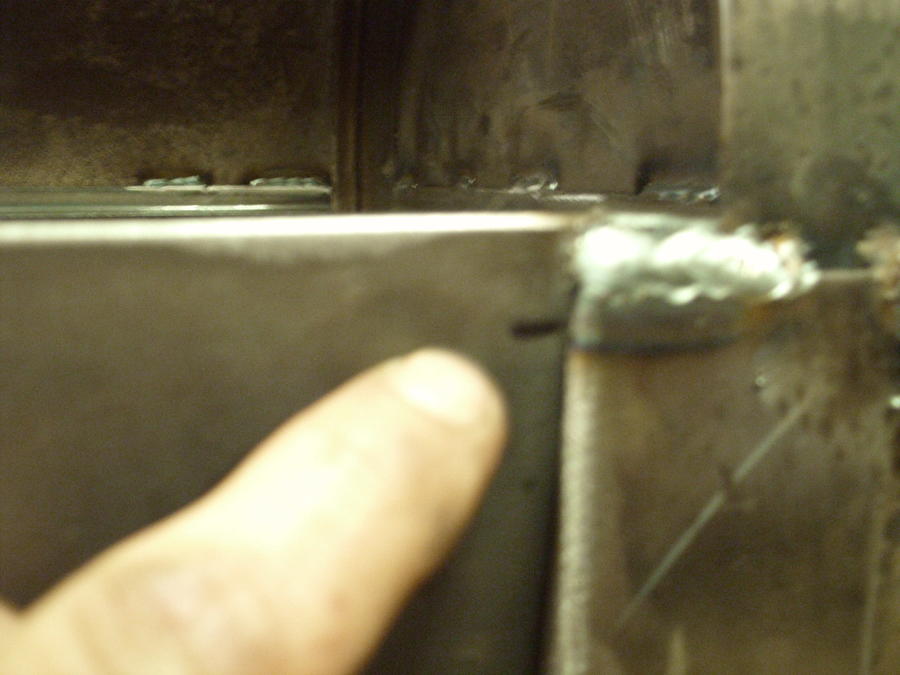
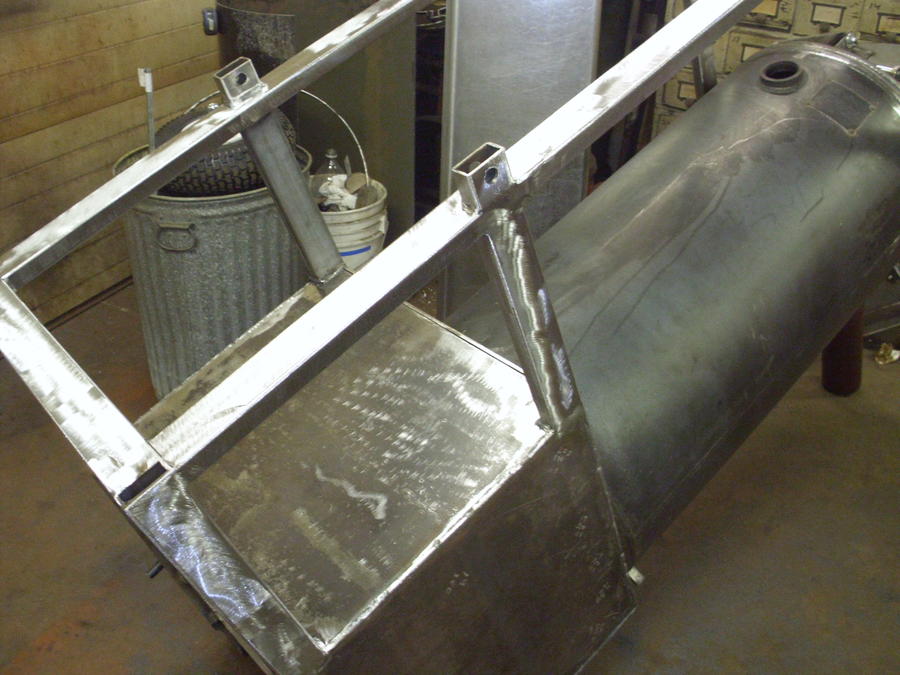
Ok tell me what"s wrong with this.
The faded black line I'm pointing to is the outline of my CC lid. And I put more than a tack on the leg. This is going to be fun and no choice but to fix it.
Here it is I remarked the line
Ok I have to cut to this line for the CC door to clear.
Then get the piece off without ruining the CC
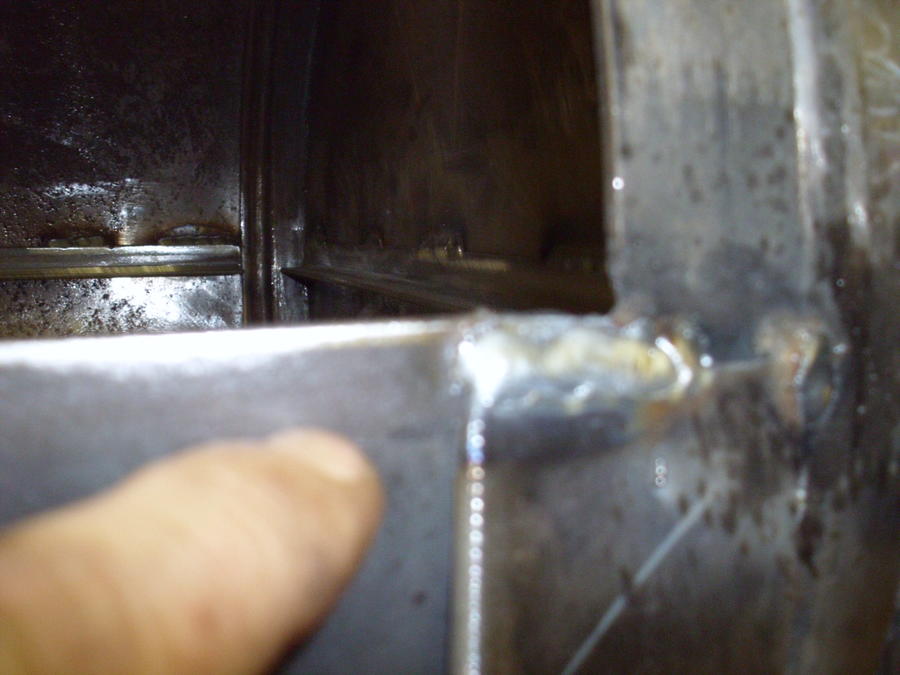
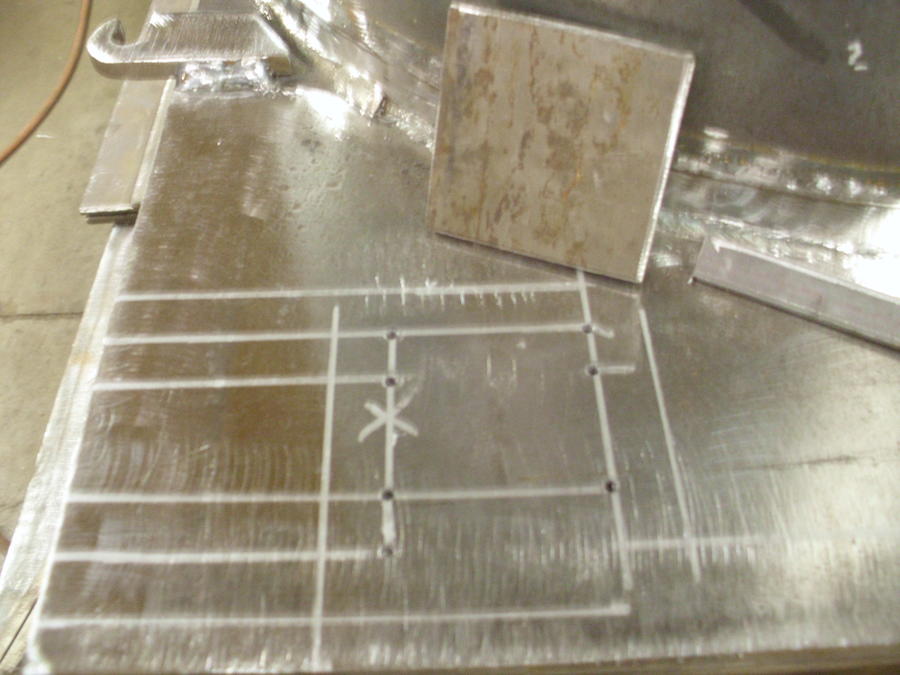
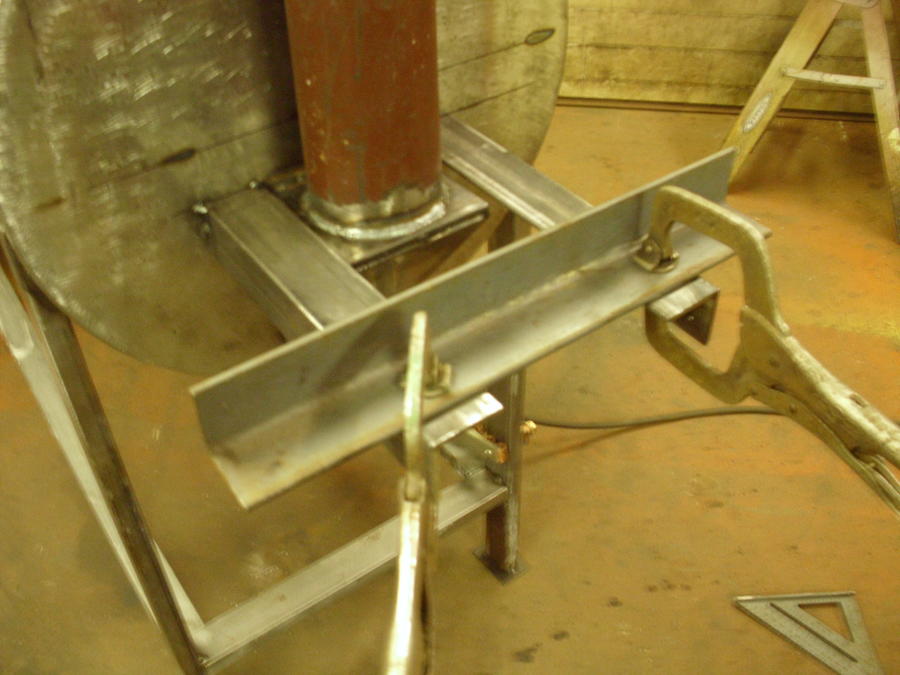
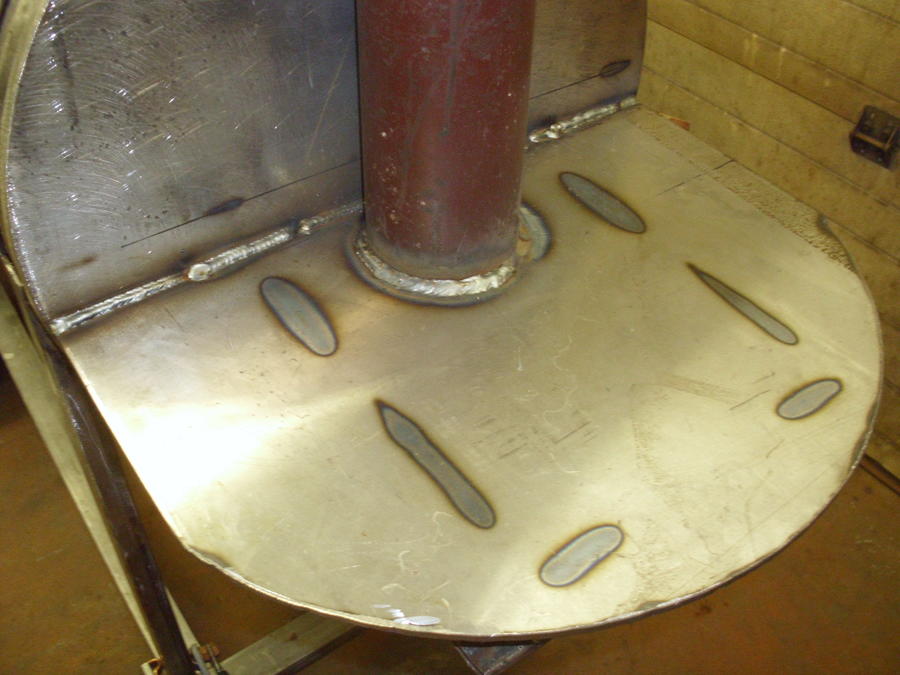
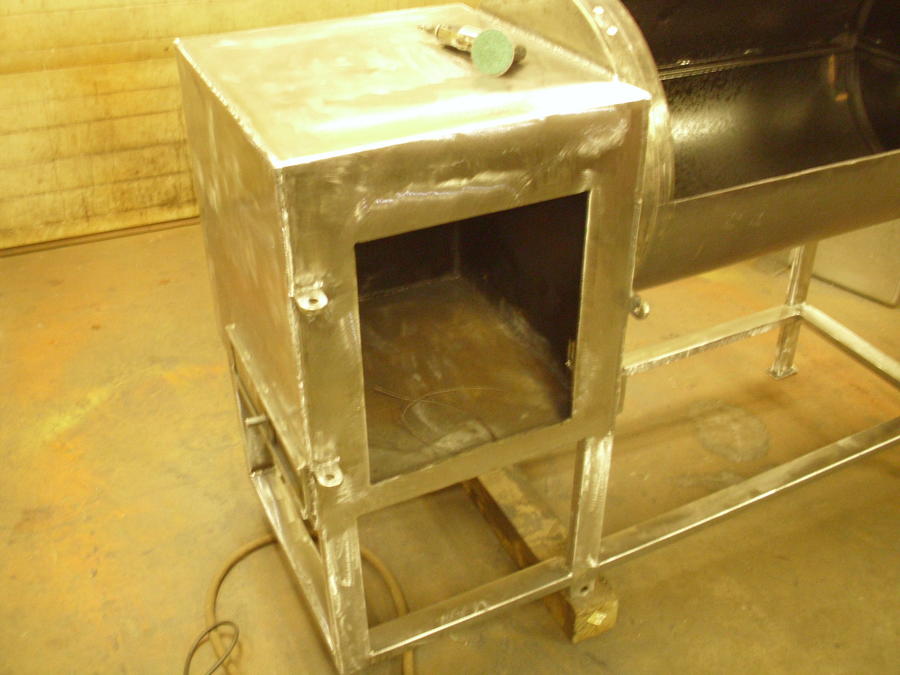
Started the first of the secondary air inlets. I changed my mind a few times during layout but the marks make sense to me.
As always drilled the corners before the plasma to keep it clean.
Thanks for watching and as I might have mentioned comments are encouraged.
I have really thick skin you can tell me what you think.
Still need advice on whether or not the mill scale has to come off.
and whether or not pure argon is good enough to do stainless mig instead of tri mix.
Trying my best to get some updates done. I will get some pictures on here and edit- comment as .the computer allows.
Second purchase of new parts
I have tons of wheels but none are wide enough to run something this heavy through soft grass in the yard or just stupid big for this thing so I had to buy these.
Legs going on the other end wish I had taken better pics of the rounded cut to fit them to the CC .
It was tricky but went well. I used the cut wheel at an angle like I was cutting the bottom of a bowl.

Motor went out on the lift table right after we took it off.
( lift table consists of an auto lift leftover from my days as an auto body tech that I have been trying to sell for five years but refused to sell cheap now it may be a stationary 18" high table If it would have quit at the 36" safety lock it would have been more useful. I hope a motor isn't too much )
Lucky the project is on wheels now.
Ok tell me what"s wrong with this.
The faded black line I'm pointing to is the outline of my CC lid. And I put more than a tack on the leg. This is going to be fun and no choice but to fix it.
Here it is I remarked the line
Ok I have to cut to this line for the CC door to clear.
Then get the piece off without ruining the CC

Started the first of the secondary air inlets. I changed my mind a few times during layout but the marks make sense to me.
As always drilled the corners before the plasma to keep it clean.
Thanks for watching and as I might have mentioned comments are encouraged.
I have really thick skin you can tell me what you think.
Still need advice on whether or not the mill scale has to come off.
and whether or not pure argon is good enough to do stainless mig instead of tri mix.
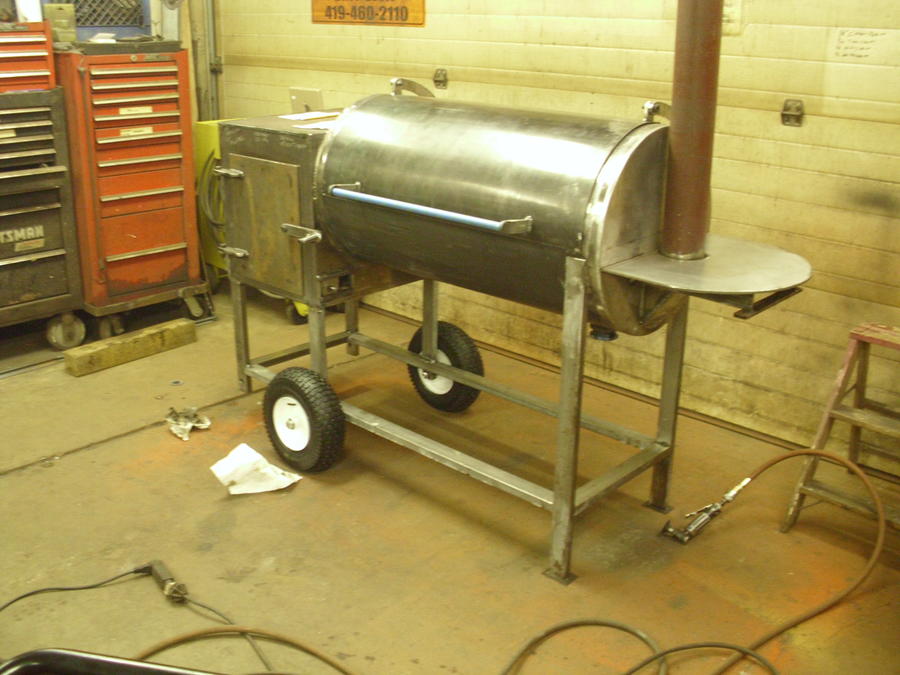
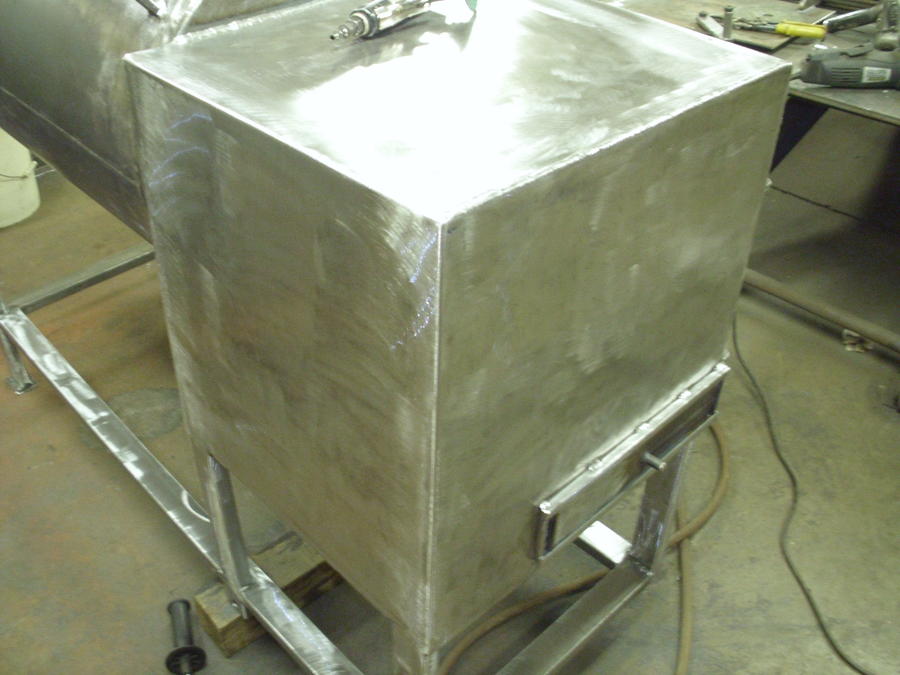
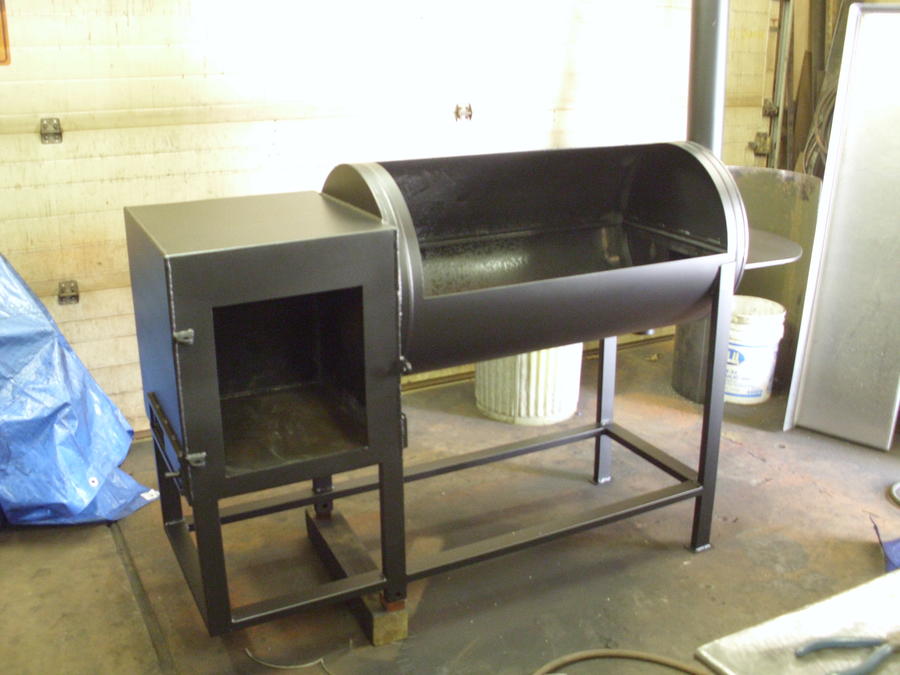
Got a lot more done in the last couple days.
Got the CC door mounted.
Cut the leg off where I screwed up.
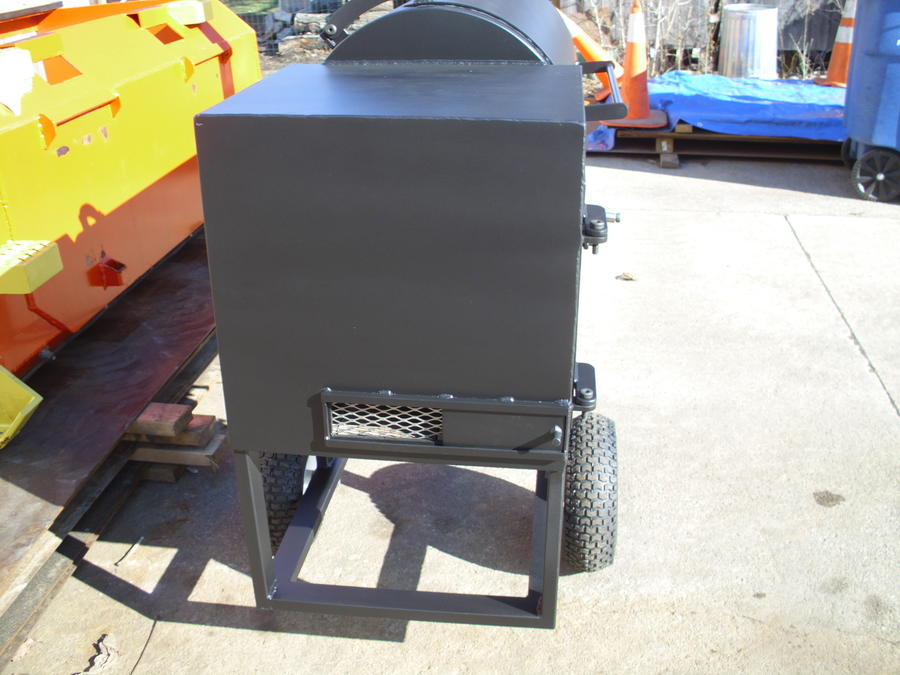
First of two secondary air intakes is finished
OK I cant take it I have to fire it up So out it goes at about 8:00 pm.
Just threw in a chimney of coals and then a couple sticks of oak didn't have a lot of time to play but I did check the temps at grate level with my maverick thermometers with about 5-8 degree difference from one end to the other. The chimney end was the hotter end and that surprised me.
This thing is crazy heavy to move so I got another problem to deal with.
Yea I need a drip rail what a mess
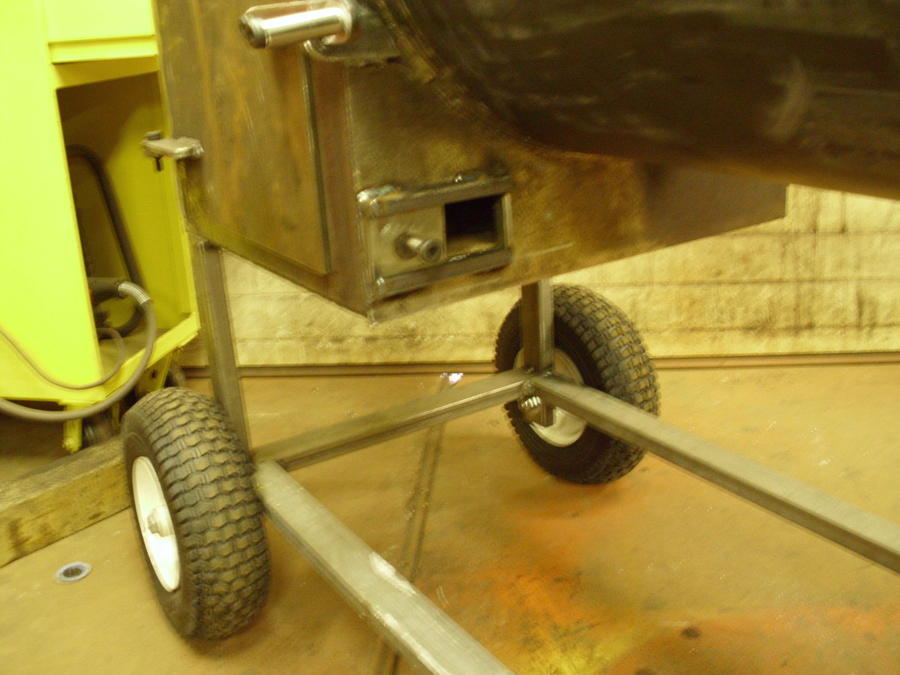
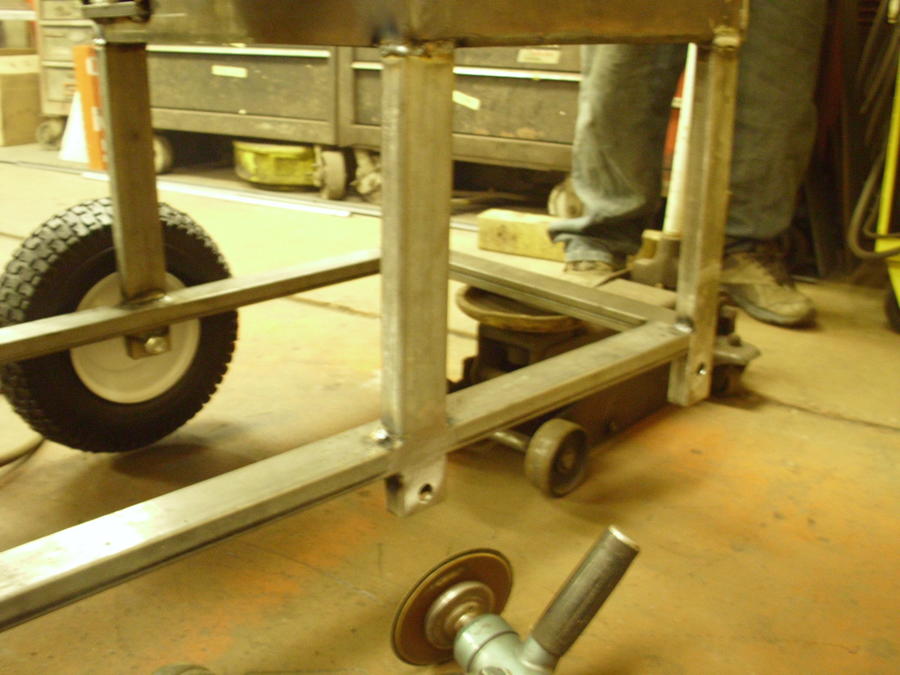
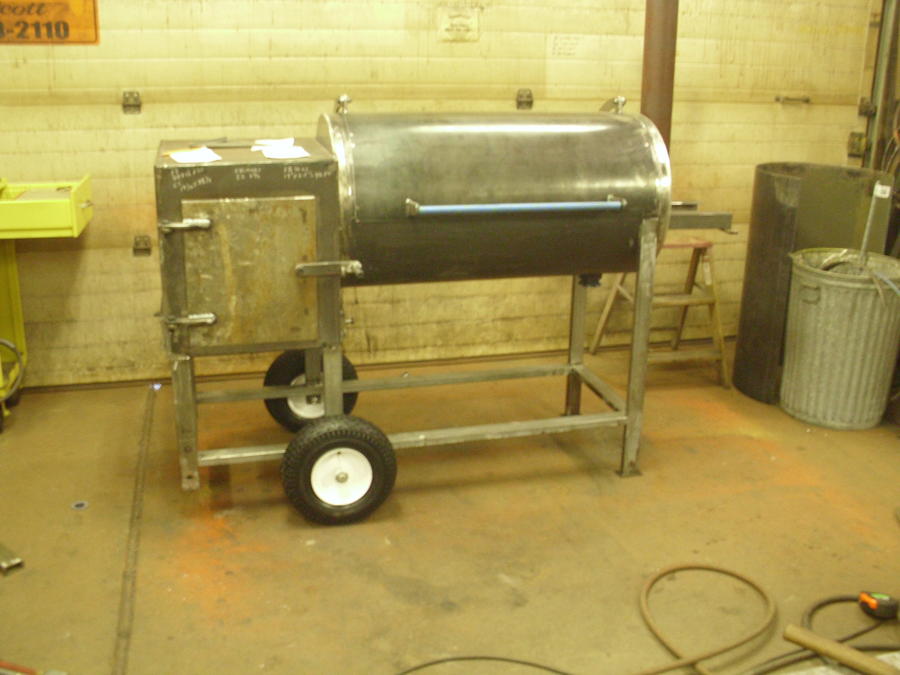
Solved the weight problem "I hope" by moving the wheels.
.
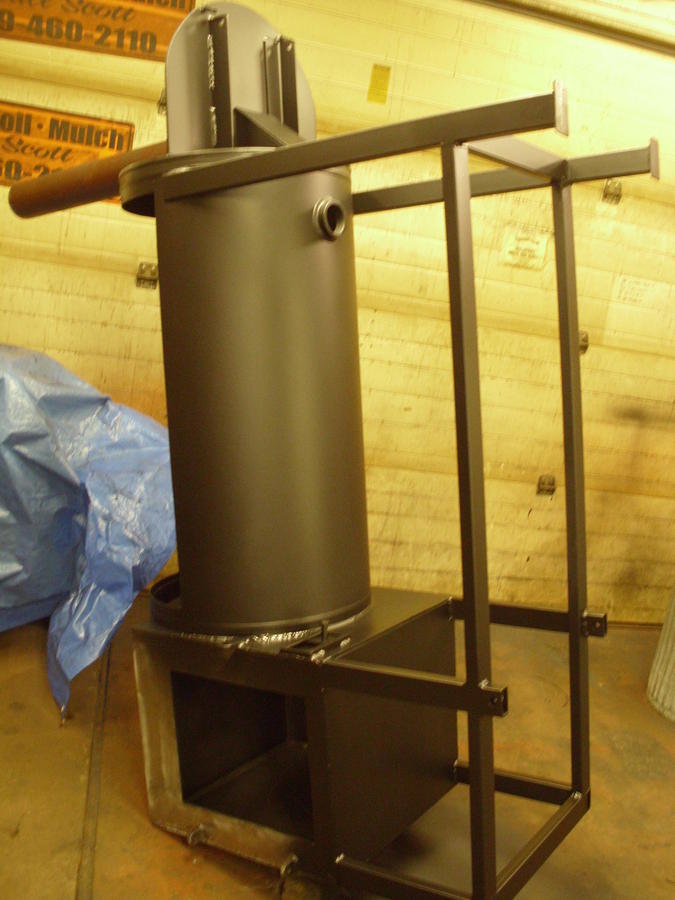
Moved the wheels and it's still pretty heavy so I started on a handle on the chimney end.
This is just ugly so I got another plan.
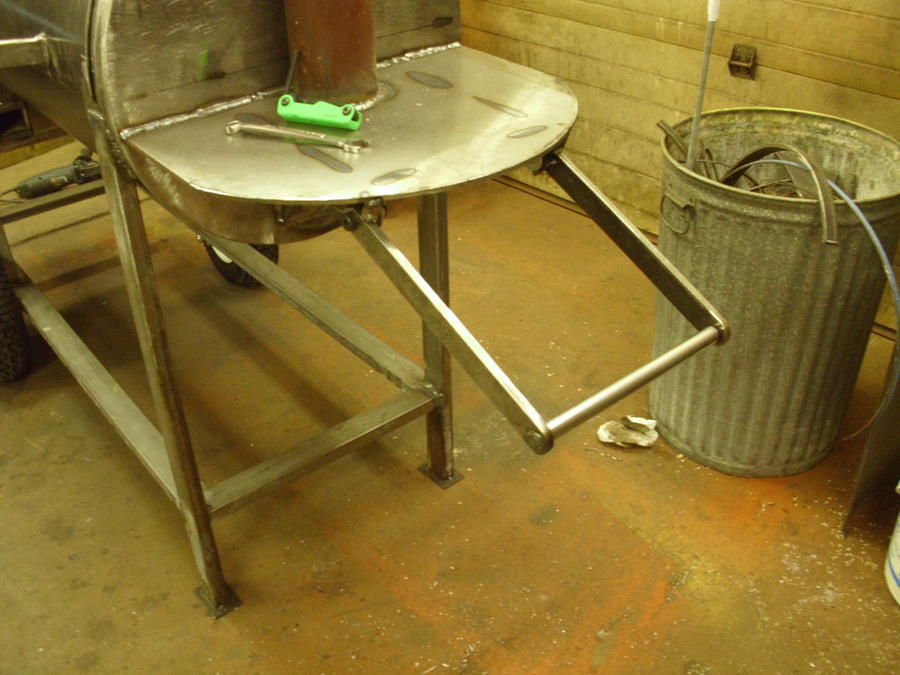
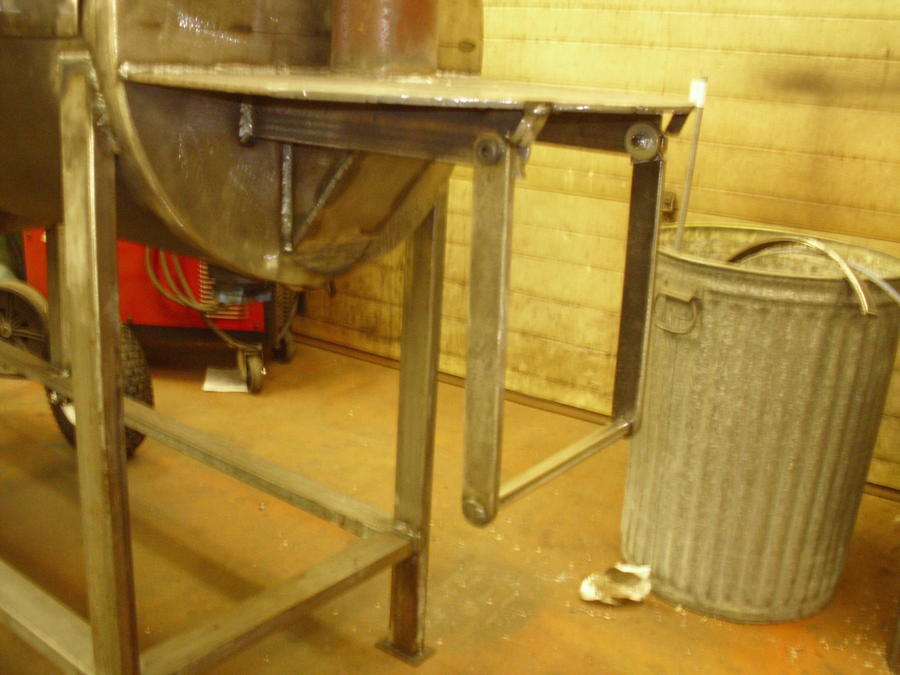
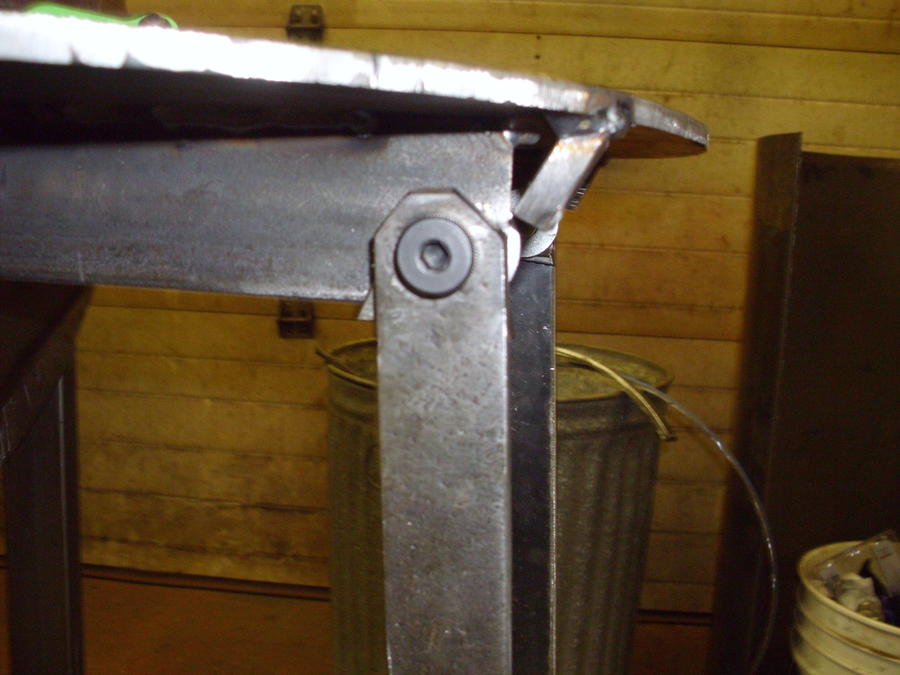
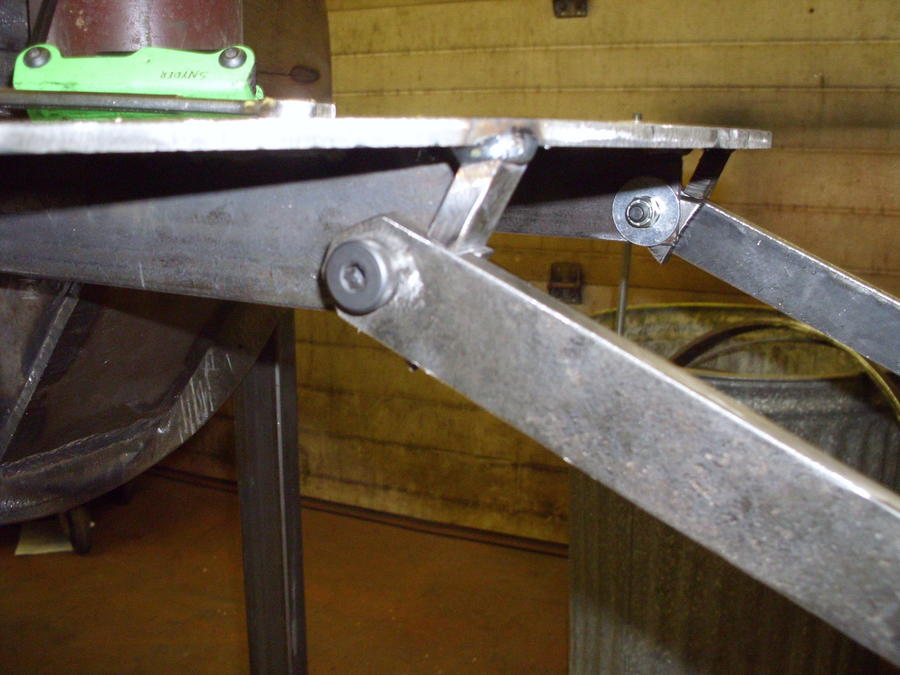
Hide the handle with a shelf that I wanted anyway.
Better
Got the CC door mounted.
Cut the leg off where I screwed up.

First of two secondary air intakes is finished
OK I cant take it I have to fire it up So out it goes at about 8:00 pm.
Just threw in a chimney of coals and then a couple sticks of oak didn't have a lot of time to play but I did check the temps at grate level with my maverick thermometers with about 5-8 degree difference from one end to the other. The chimney end was the hotter end and that surprised me.
This thing is crazy heavy to move so I got another problem to deal with.
Yea I need a drip rail what a mess
Solved the weight problem "I hope" by moving the wheels.
.
Moved the wheels and it's still pretty heavy so I started on a handle on the chimney end.
This is just ugly so I got another plan.
Hide the handle with a shelf that I wanted anyway.
Better

ewanjackson
Smoke Blower
Looks great. I'm definitely not jealous that you have these metalworking skills
unclebubbas bbq
Smoking Fanatic
WOW, very impressed with your build, can't wait to see how she cooks. Never seen this set up before
Got a lot more done.
After moving the wheels I needed to remove the extensions where they were mounted.
Next the wife said it was still too heavy to move. My only option was to extend the handle for better leverage and it's already over six feet so I made a handle that swings down when not in use.
Temporarily mounted handle.
Put some stops on to keep the handle lower for the vertically challenged
Full up position hitting stops.
Still not sure about the mill scale so its all coming off to be on the safe side.
Legs spreaders and bottom of FB clean.
Man this takes time and patience.
To bad I can't get quality high temp clear that will last.
All but the chimney ready for paint.
Posting more as soon as I can.
Scott
After moving the wheels I needed to remove the extensions where they were mounted.

Next the wife said it was still too heavy to move. My only option was to extend the handle for better leverage and it's already over six feet so I made a handle that swings down when not in use.
Temporarily mounted handle.
Put some stops on to keep the handle lower for the vertically challenged
Full up position hitting stops.
Still not sure about the mill scale so its all coming off to be on the safe side.
Legs spreaders and bottom of FB clean.
Man this takes time and patience.
To bad I can't get quality high temp clear that will last.


All but the chimney ready for paint.

Posting more as soon as I can.
Scott
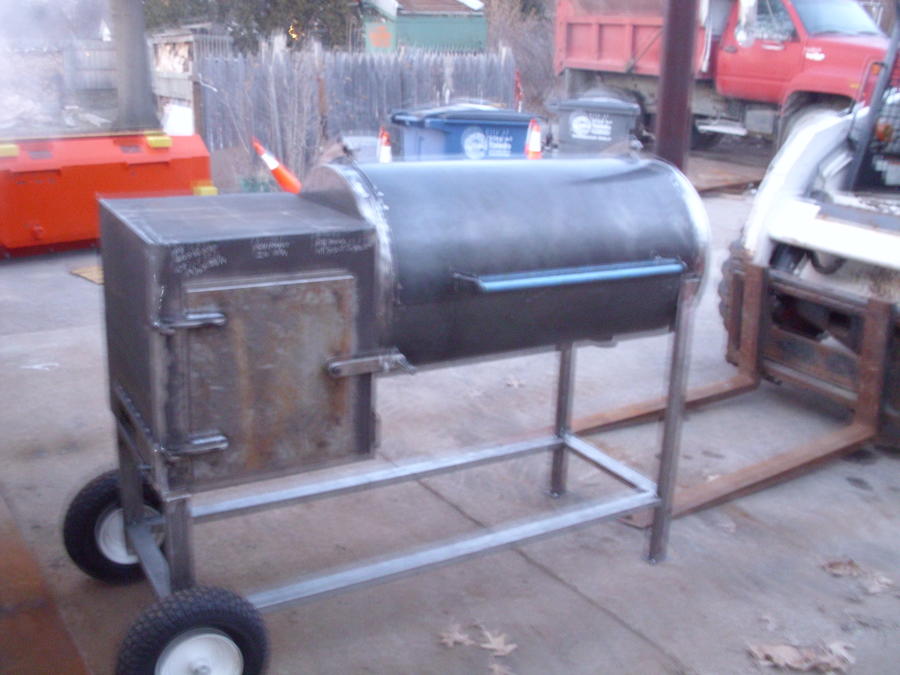
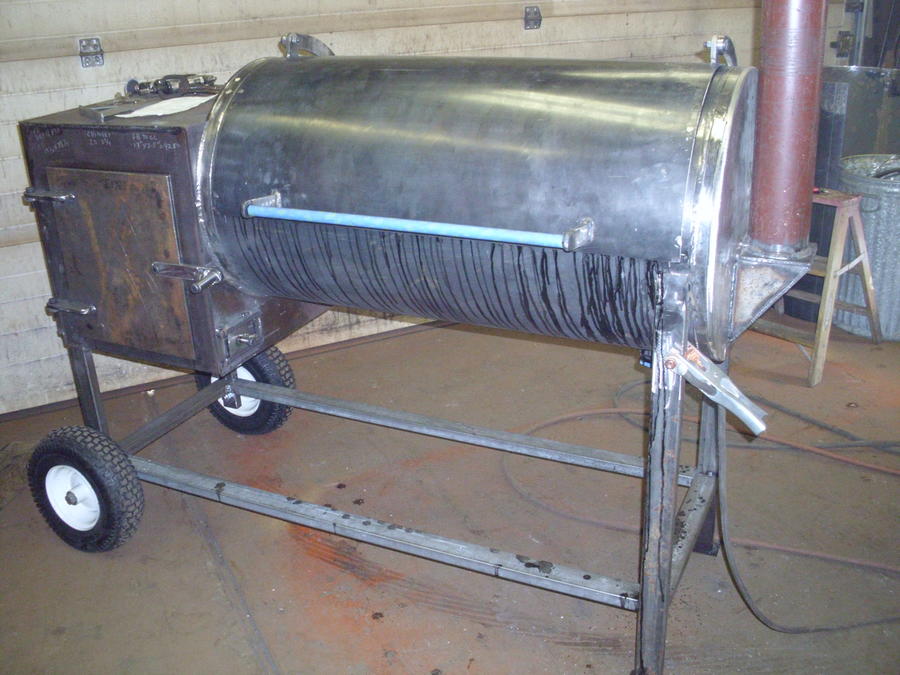
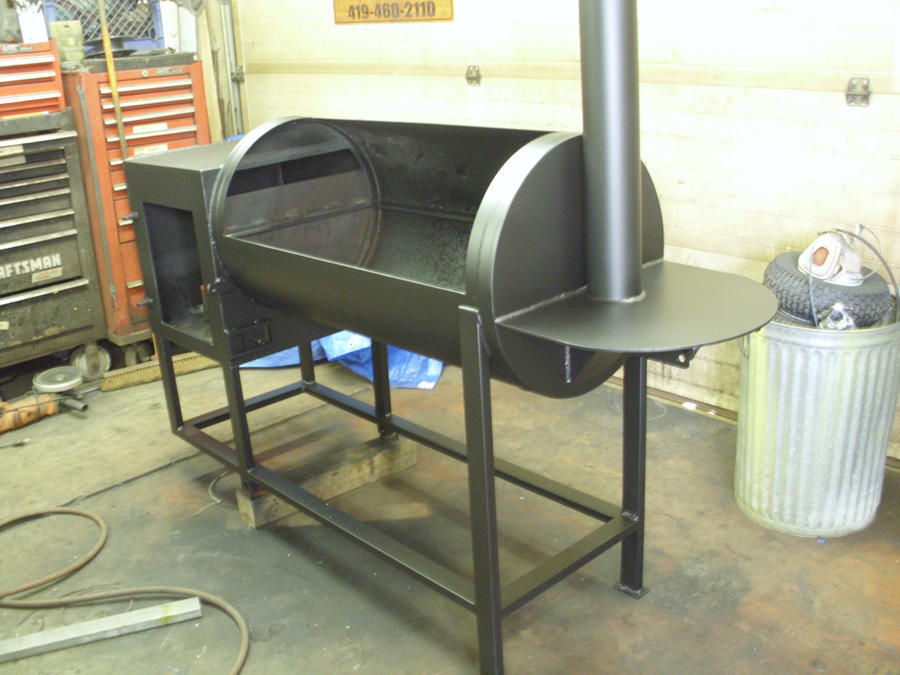
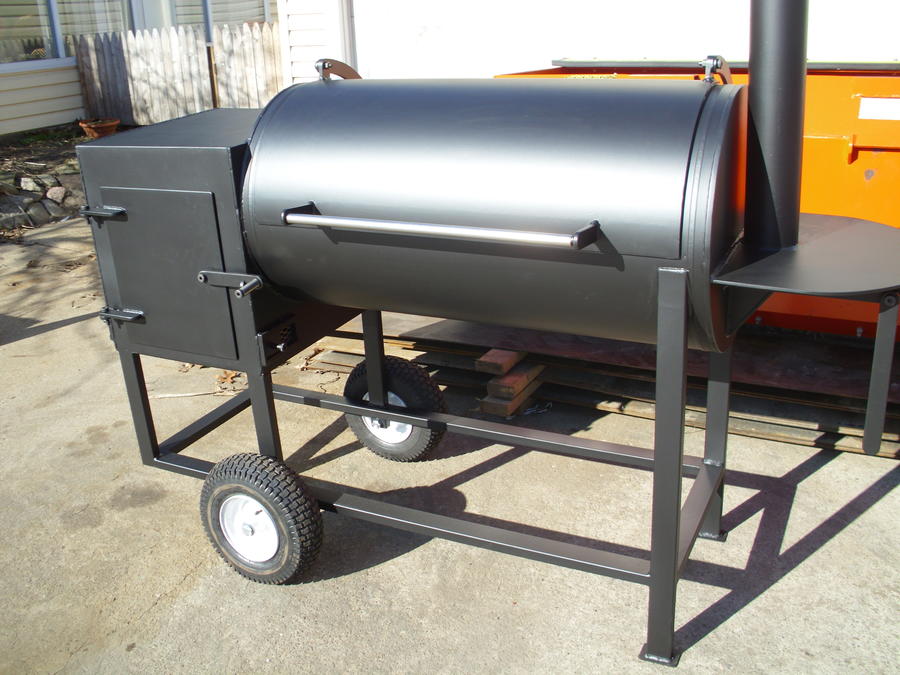
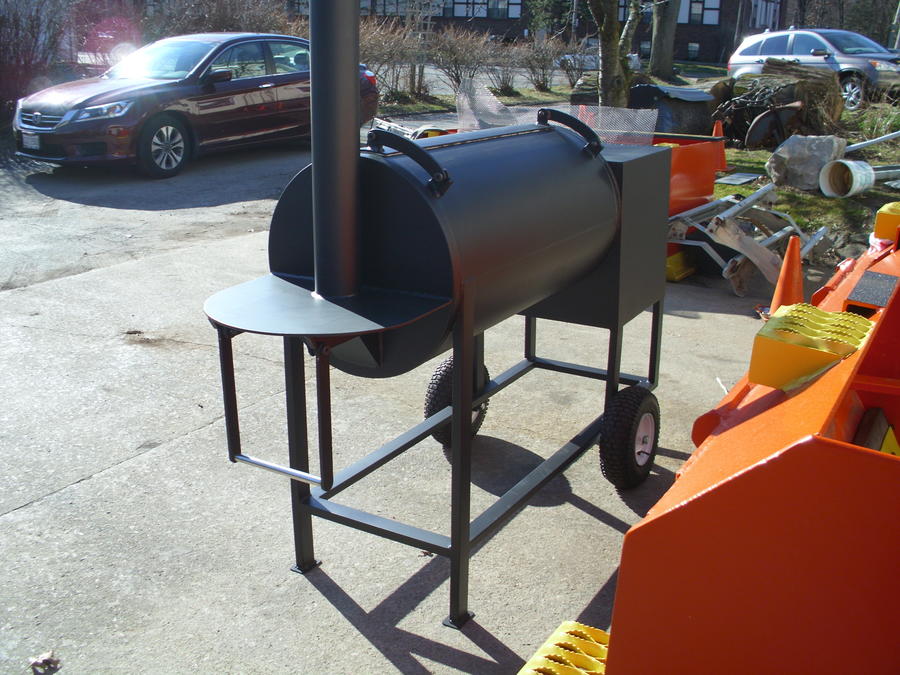
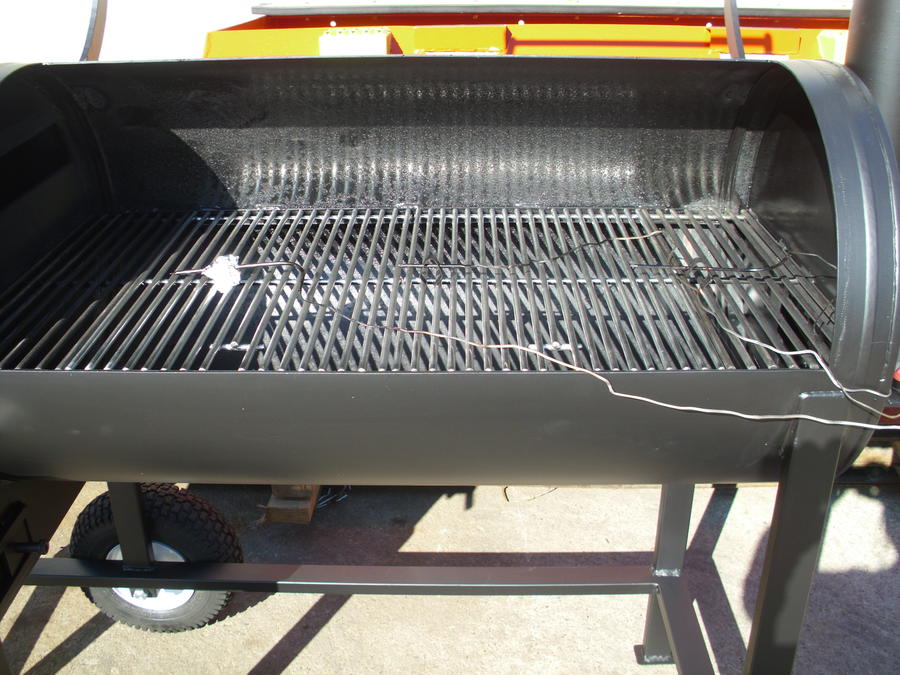
Got it painted and a few of the finishing touches still needs a lot more but I can use it till I have time to finish.
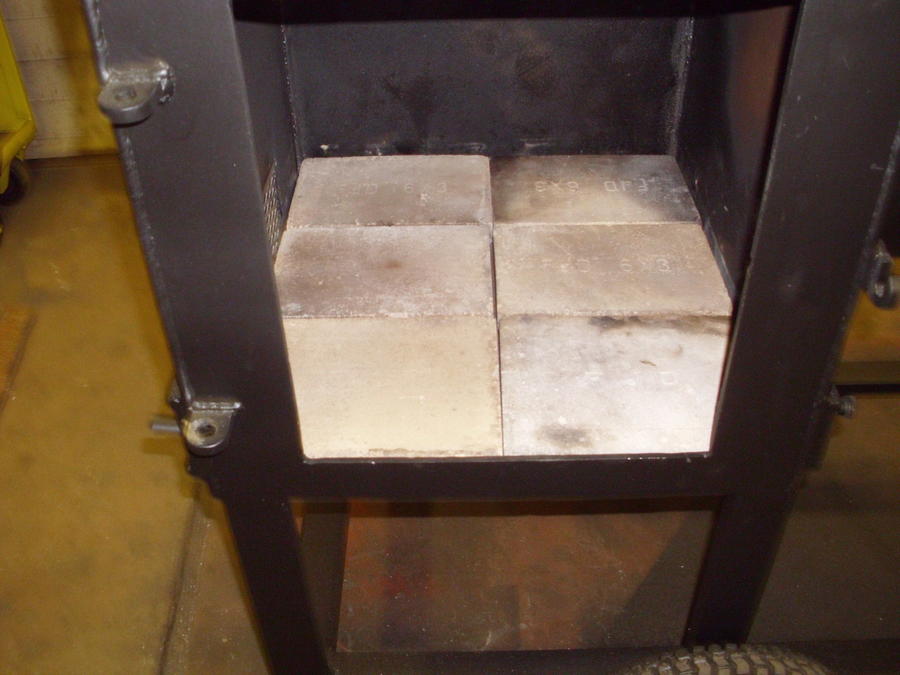
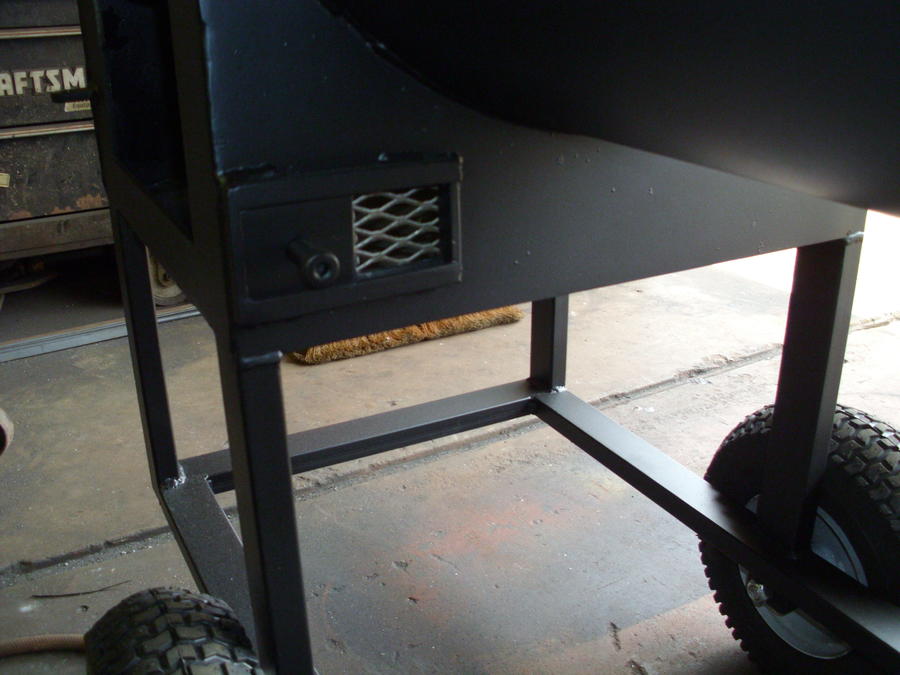
Fire brick in the FB floor only
Expanded over secondary intake at floor level
.
Expanded at main intake.
A few shots of the "almost" finished smoker
Best excuse to not help in the kitchen for Easter dinner is to be outside cooking ribs and pork loin.
Yea I know she's doing a ham.
Started with a chimney full of Kingsford.
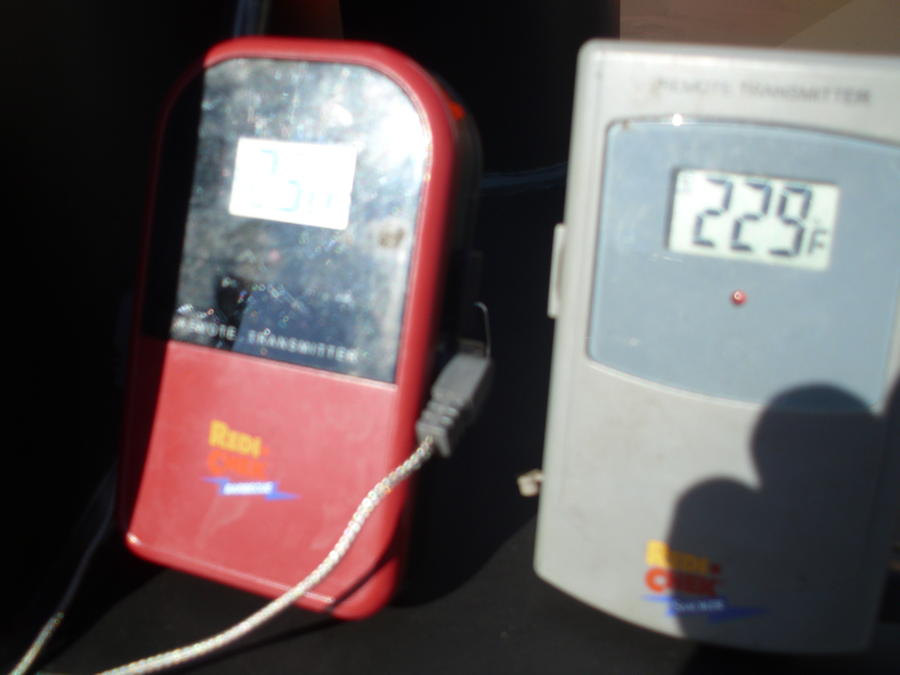
Probes in place to check temps in four different places.
Sorry. I took about five shots and one or the other had bad glare.
The temp stayed steady between 225 and 230 real well without any adjustments but the wind is blowing and the outside temp is around thirty five.
Somewhere along the line I saw someone use Pillsbury grand's to test for even temps.
Ok these got to go.
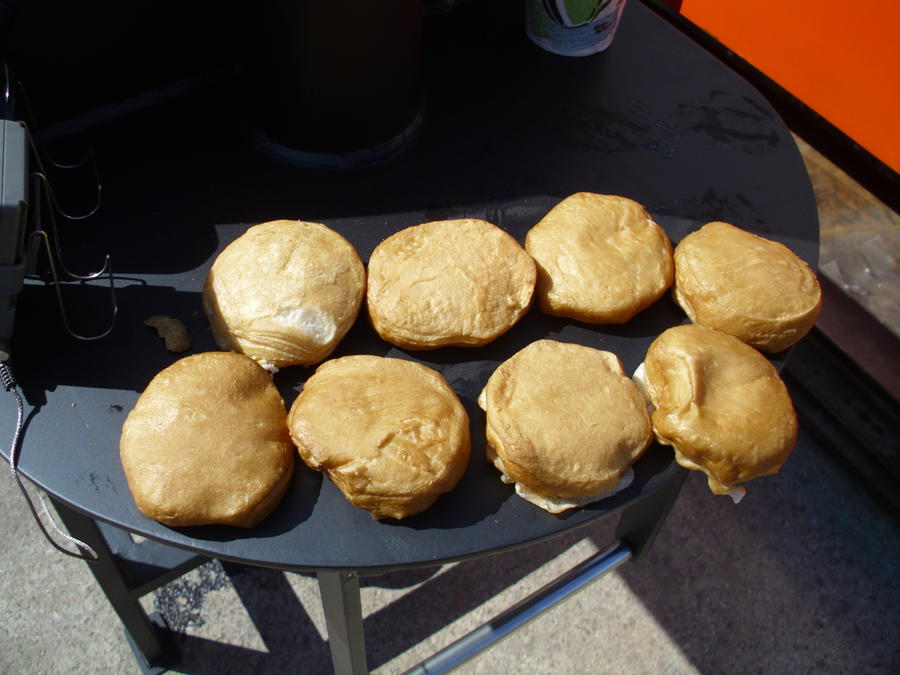
I have to get the ribs started. They look even although not done.
Top layer was good but doughy inside
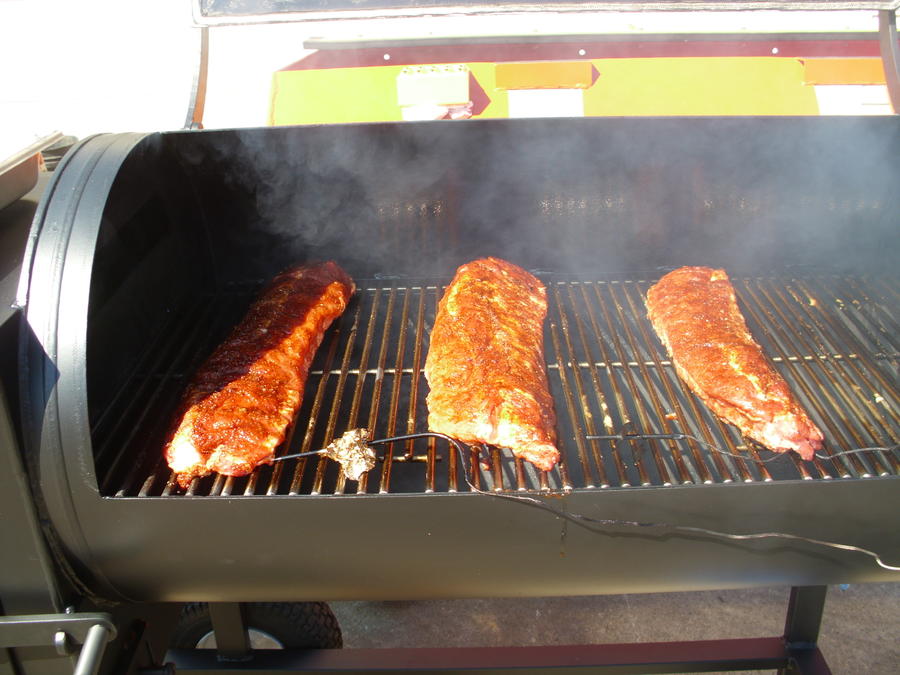
Ribs on!
I wanted St Louis but Costco only had three packs of baby backs to choose from. I should have gone on Friday
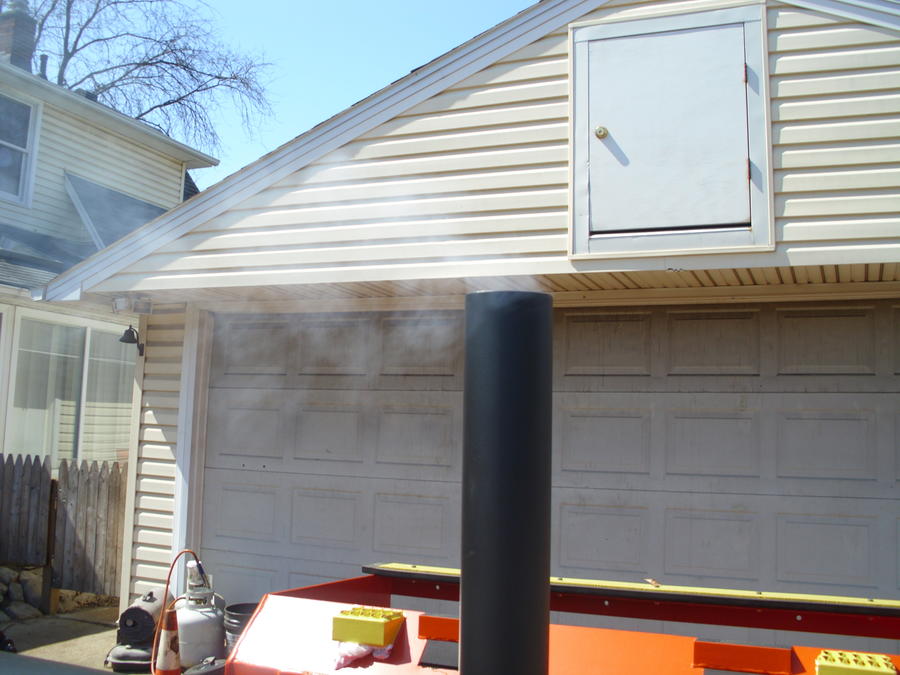
Nice thin smoke
.
Got a little brutal removing the fat from the loin I was in a hurry
.
Almost killed me to not open the CC door for two whole hours but the ribs need wrapped and its time to put the loins on.
Outdoor temp got up to about forty but the wind kicked up to thirty MPH gusts and that took a toll on the temps jumping ten degrees back and forth.
Ribs at two hours before wrap
Ribs wrapped with apple juice and vinegar.
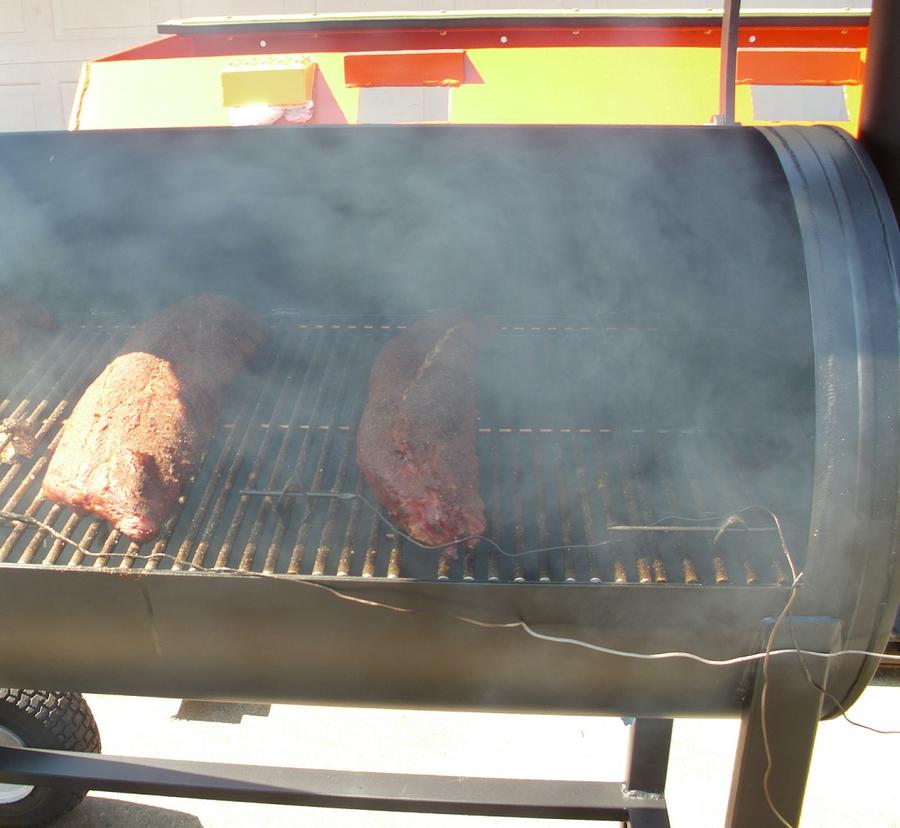
loins on also.
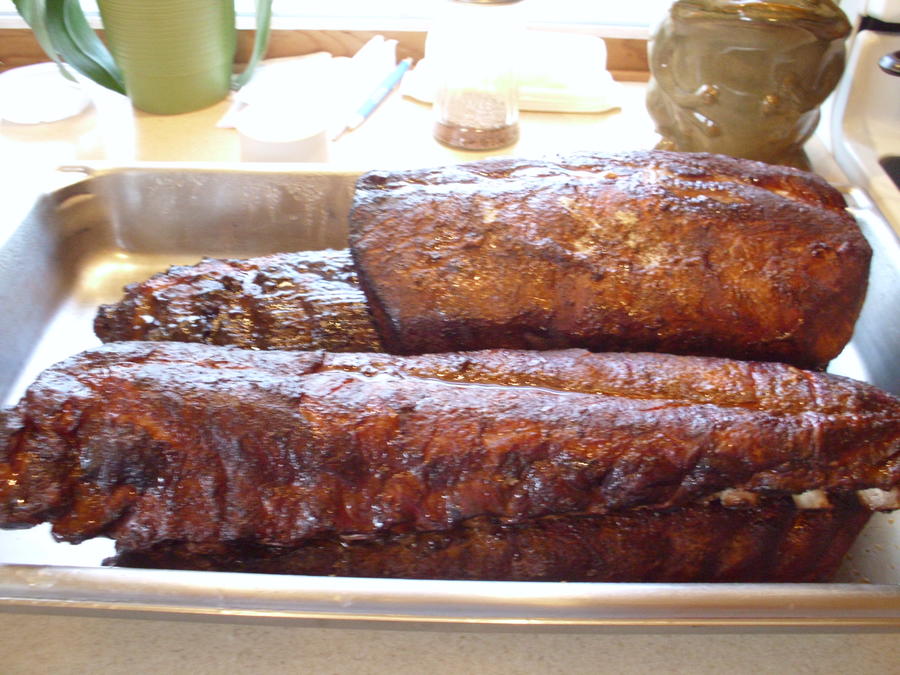
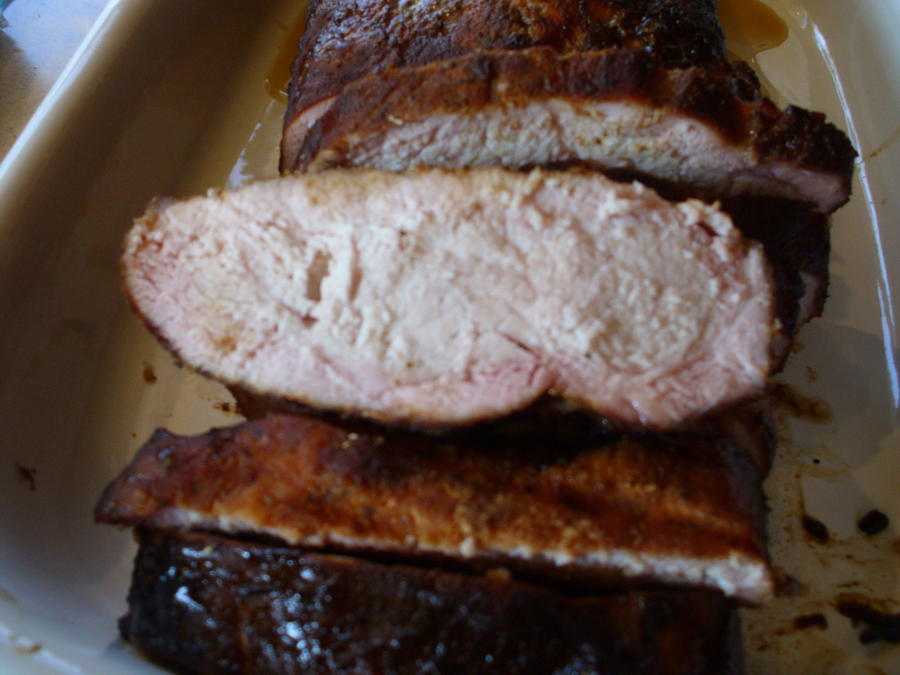
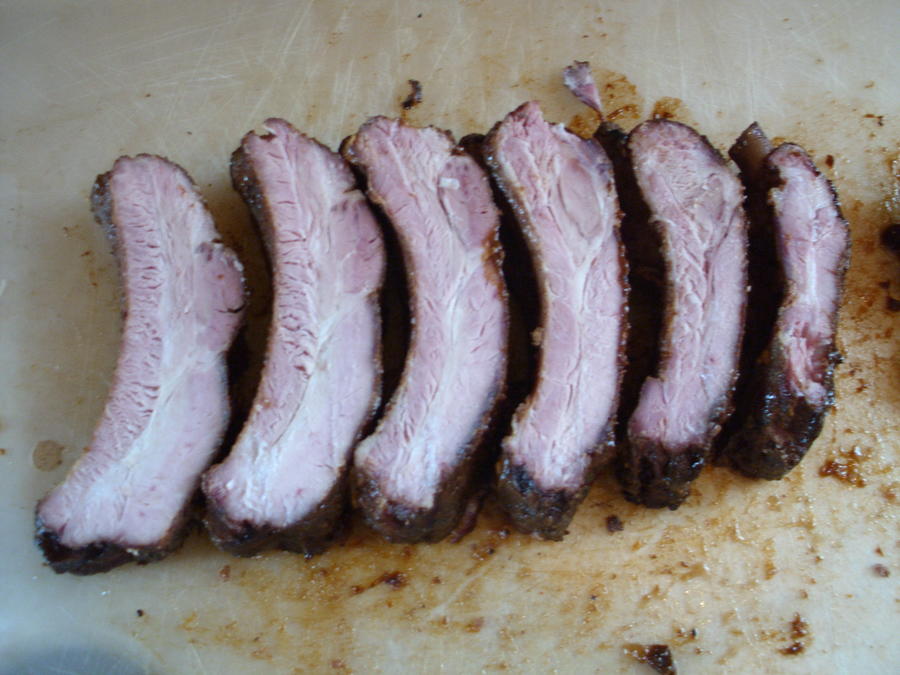
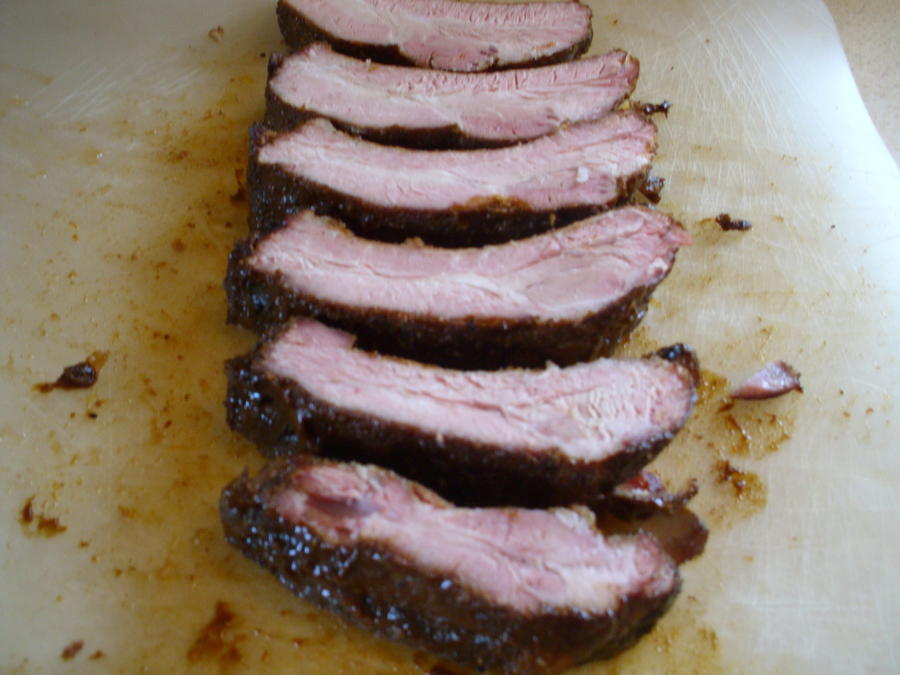
Ready for slicing.
The smoke ring is better than the pic shows I should have turned the flash off.
Mommas ham was good too
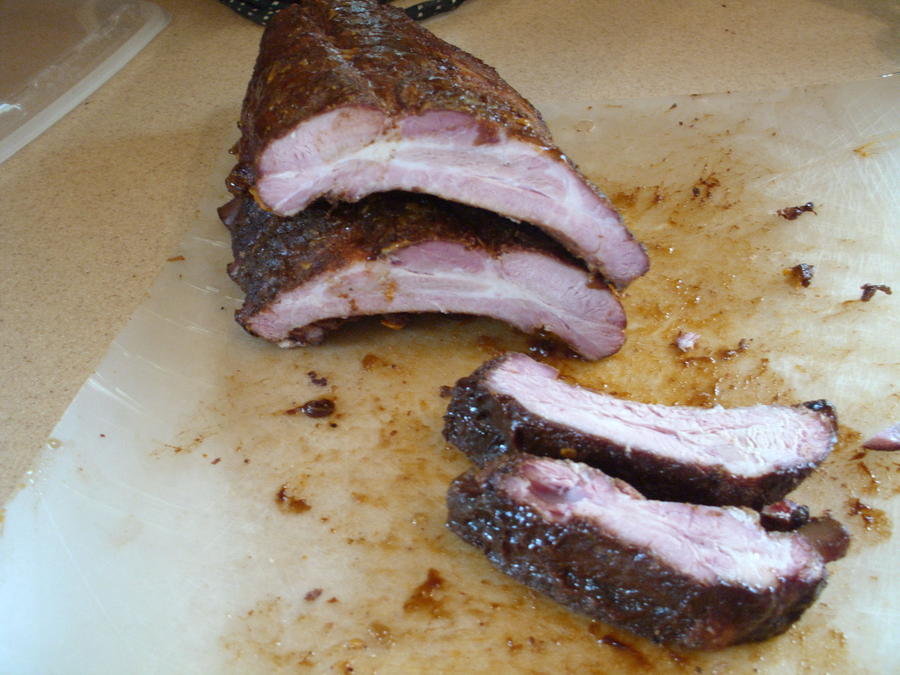
Slicing up leftovers for the freezer.
Pieces in the back with the dark meat took the smoke a lot better.
The ribs don't really have a smoke ring they're just pink all the way through.
Thanks for watching the show I have a lot more to do to this, but for now I need to get to other projects before the weather breaks.
All in all it works real well and much better than my old one. I neglected a lot of details and hope to get them posted as soon as I can.
Wish I had taken better pics but nothing I can do about that now.
Cant wait to try it out with warmer temps outside and less wind but I think this would be usable in the winter if I wanted. It did real well.
Happy smoking
Scott
Fire brick in the FB floor only
Expanded over secondary intake at floor level
.
Expanded at main intake.
A few shots of the "almost" finished smoker

Best excuse to not help in the kitchen for Easter dinner is to be outside cooking ribs and pork loin.
Yea I know she's doing a ham.
Started with a chimney full of Kingsford.

Probes in place to check temps in four different places.
Sorry. I took about five shots and one or the other had bad glare.
The temp stayed steady between 225 and 230 real well without any adjustments but the wind is blowing and the outside temp is around thirty five.
Somewhere along the line I saw someone use Pillsbury grand's to test for even temps.
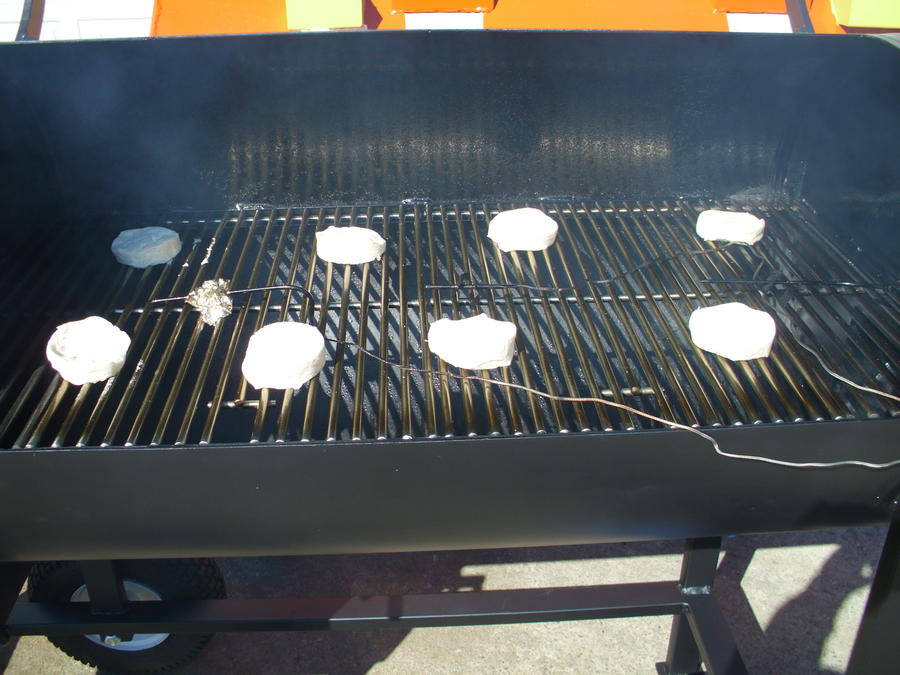
Ok these got to go.
I have to get the ribs started. They look even although not done.

Top layer was good but doughy inside
Ribs on!
I wanted St Louis but Costco only had three packs of baby backs to choose from. I should have gone on Friday
Nice thin smoke
.
Got a little brutal removing the fat from the loin I was in a hurry
.

Almost killed me to not open the CC door for two whole hours but the ribs need wrapped and its time to put the loins on.
Outdoor temp got up to about forty but the wind kicked up to thirty MPH gusts and that took a toll on the temps jumping ten degrees back and forth.
Ribs at two hours before wrap

Ribs wrapped with apple juice and vinegar.
loins on also.

Ready for slicing.


The smoke ring is better than the pic shows I should have turned the flash off.
Mommas ham was good too

Slicing up leftovers for the freezer.
Pieces in the back with the dark meat took the smoke a lot better.


The ribs don't really have a smoke ring they're just pink all the way through.
Thanks for watching the show I have a lot more to do to this, but for now I need to get to other projects before the weather breaks.
All in all it works real well and much better than my old one. I neglected a lot of details and hope to get them posted as soon as I can.
Wish I had taken better pics but nothing I can do about that now.
Cant wait to try it out with warmer temps outside and less wind but I think this would be usable in the winter if I wanted. It did real well.
Happy smoking
Scott
Last edited:

ewanjackson
Smoke Blower
Brilliant job. This looks amazing
frijole smoke
Smoke Blower
Nice!! On both the build and the cook.
unclebubbas bbq
Smoking Fanatic
Great job! A lot of work but I'm sure you forgot all about when you bit into that first rib
the1pearson
Fire Starter
Superb detail and it all paid off, looks like a great build with the evidence to prove it!

SmokingMeatForums.com is reader supported and as an Amazon Associate, we may earn commissions from qualifying purchases.
Similar threads
- Replies
- 14
- Views
- 591
- Replies
- 8
- Views
- 466
- Replies
- 3
- Views
- 492
SmokingMeatForums.com is reader supported and as an Amazon Associate, we may earn commissions from qualifying purchases.

SmokingMeatForums.com is a community of barbecue and outdoor cooking enthusiasts dedicated to smoking meat.
© 2004-2026 SmokingMeatForums.com