Brick smoker - Compete how to

  • Some of the links on this forum allow SMF, at no cost to you, to earn a small commission when you click through and make a purchase. Let me know if you have any questions about this.
SMF is reader-supported. When you buy through links on our site, we may earn an affiliate commission.

wes w

Master of the Pit
Original poster
OTBS Member
Jul 31, 2012
1,175
82
NW North Carolina
I know I'm new here but there's not a lot of info on the web about building  brick smokers.  I see every kind of build topic except brick.  I am very close to completing  my smoker.  I have about 2 more weeks of cure time before I can safely fire it up without cracking it.  I'd love to see brick have its own topic.  I'd be more then glad to share any info that I have concerning brick smoker builds.  Just thought it would be easier to locate if it had its own topic.  I plan to post a summary of the build with pictures after the first smoking run.

  Hope everyone has a awesome week-end!
 
Last edited:
  • Like
Reactions: Deeez
Wes, morning..... we do have a section for building "Smokehouses".....   That might work...  
th_dunno-1%5B1%5D.gif
  ...  Dave

http://www.smokingmeatforums.com/f/200/smoke-houses
 
Wes, I have also often wondered how to go about building this type of smoker. Can't wait to see the build! Make sure you tell us dimensions and details so we can learn what some of the do's and don'ts. Good luck on your maiden voyage!
 
Be glad to.  I'm pretty excited about firing it up.  It pretty much done, just giving the masonry time to cure.   Brother is building the shelves for it.   He's being a bit slow about it, but its free so can't complain.  

Once ready to use, I'm going to do a dry run just to get a feel for holding heat.  I also built a fireplace beside it for my fuel source. 

After my first run I plan to post the entire build step by step.  Hopefully it will be helpful to someone.   Only thing I could find online were a few pictures.  Not alot to go one out there. 
 
 
Wes, there is very little info out there because you good ol' boys don't want us Yankee's learning how to master north Carolina BBQ! Feel free to give rub and sauce recipe along with your instruction manual for all us wannabes! ;-)
 
  • Like
Reactions: noble captain
Wes, I appreciate your response, its never considered rambling if its about BBQ. I smoke on a Weber 22.5" kettle. I have had great success, most it due to this site and Jeff's rub and sauce recipes! I have seen sticky fingers sauce in the store. I wasn't sure about it since I've been making my own for the last few years. Ill have to check it out. I'm not a huge fan of high fructose corn syrup if its not necessary so I hope it doesn't contain it. I like to taste all the ingredients in my sauce.
 
I've never messed with sauces much.  The sticky fingers we like best is the Memphis Original.    I need to try a batch of Jeff's.   I'm always open to new ideas if you care to share your sauce.   I've been trying new things lately.  I grilled some fish on a cedar plank a couple weeks ago.  It was awesome.  The flavor from the cedar was incredible.  Smoked a turkey a couple years ago.  It was good but I think I left it in the brine to long.  It had a really strong flavor.   Did a beer can chicken a while back.  Not the best.  I want to do a prime rib in the near future.  It makes me nervous because they cost so much.  I mostly stick to  pork.  Finally got the bugs worked out of my ribs, thanks to Jeff's newsletter and site.  
 
 
Jeff's sauce has a little heat to it but for sweet you can omit some of the heat and add a few Tblsp. Of honey and it works out real nice if you like the sweet stuff
 
Thought I'd go ahead and start the smoker build.  I'm guessing by the time I get it written I will have my first run complete. 

  I do know a little about masonry.  I have layed a few block in my day, but I've never layed brick.  The brick I used came from our house.  It was built around 1907.  We remodeled it in 2000.  We took the chimney down before it fell. 

  I opted to build a fireplace to fuel the smoker.  I  offset two runs of firebrick  in the fireplace to use as a grill.  

  The ground I had to work with wasn't the best.  Its soft and sandy.  The foundation is 1 foot bigger then the project.  I opted to pour 13 in. of concrete with a double run of 5/8 re bar.   10 in. and a single run would have been enough, but with the softer ground, I needed all the support I can get.  Once poured, I was ready to lay block.  First I layed the size I wanted it to be.  Then filled it all in with block.  All the block were layed with portland cement.  The same product concrete is made from.    I left a channel open toward the back for ash clean out access.  I opted to cap it with 4 in. cap block instead of pouring a 4 in. slab.  I opted to build the fireplace first. Once done, I was ready to start my smoker.

  I wasn't sure how big I wanted to build it so I started with how big I wanted the doors.  My brother has a metal fab shop so  I called for help.   Once the doors were built I was ready to start.  

  First I layed the base with 4 in. cap block.   Then layed firebrick on top of that.  Outside of that I layed 8 in. block.  You have to create a air space between heat and outside to keep it from sweating and compensate for thermal expansion. 


Ready for rebar and concrete


Cris-cross each run of block to make it stronger


Offset brick in fireplace for grill


Smoker base with clean out.


Finally getting started.  Vents on both sides of the firebox for air intake.  I used vented ash dumps for this. Door is off the firebox frame to make it easier to work with.  Brick against clean out door till it sets.  There is about 2 in. between firebrick and block.   The fire box is started off the top of base.  That way everything is protected by firebrick.
 
Wes, evening.....  The hole in the ground for the footing....  I do not believe it is real.... you photo shopped it.....  You had to.... Nobody and I mean nobody would dig a hole that perfect, square, vertical sides, no tear outs in the sod, no dirt mixed in with the grass.....  

You are deliberately trying to fool us or.......   I don't know what to say here....  That hole in the ground is the most beautiful hole in the ground I have ever seen...  I mean it.... It looks like one of those chalk drawings on city streets you see in e-mails.....    OK, I'm done for now....  I'll think of something later...  maybe.... not..... I'm done..... Dave

PS:  By the way.... nice hole in the ground....     
 
Haha, No its real Dave.  As I said the ground is soft.  I dug the  whole footing with a square pointed shovel if that tells you anything.  Dug it out into my small trailer that I pull with my mower.

    By the time I got it dug My wife was starting to look at me funny so I got it filled in as soon as possible, before she put me in it.. :-)

 The footing was 15x5.  
 
  • Like
Reactions: NayNay
If there is anything you want to know as we go along with this please ask.  I try to remember details but, well, I'm getting older.  I don't always remember.

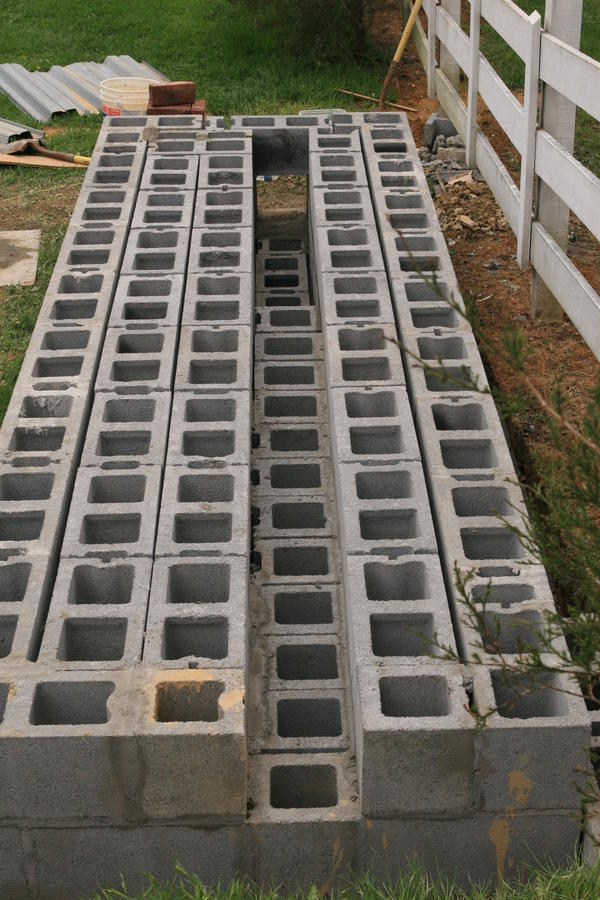
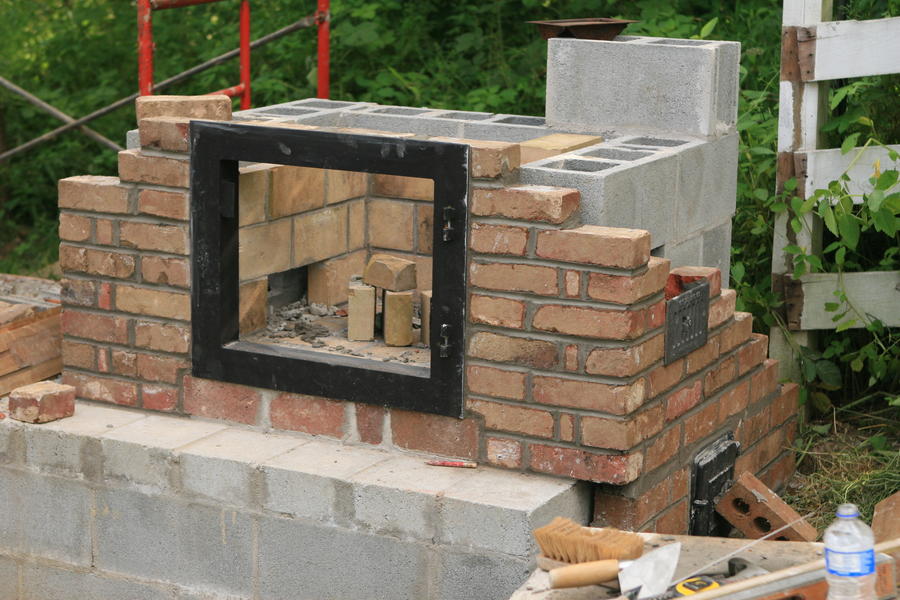
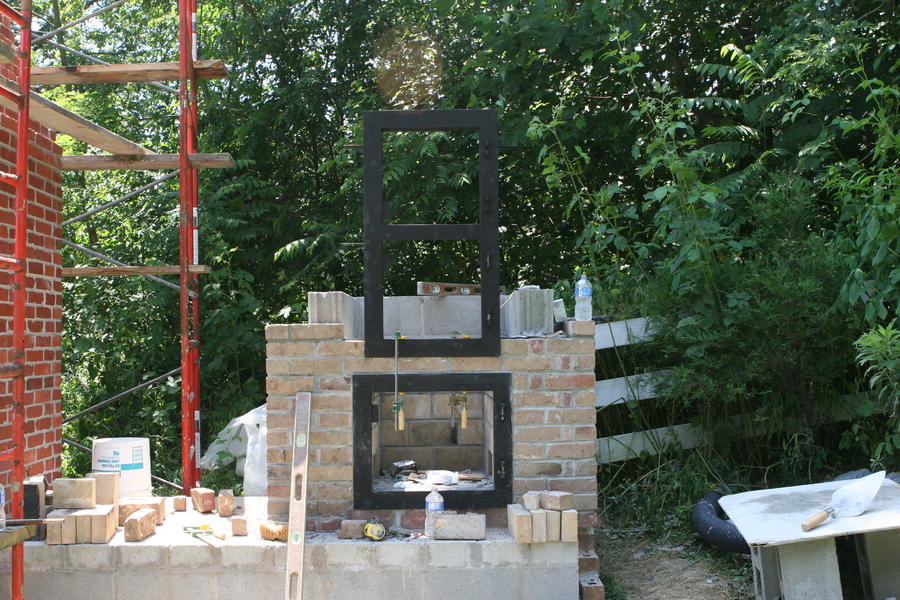
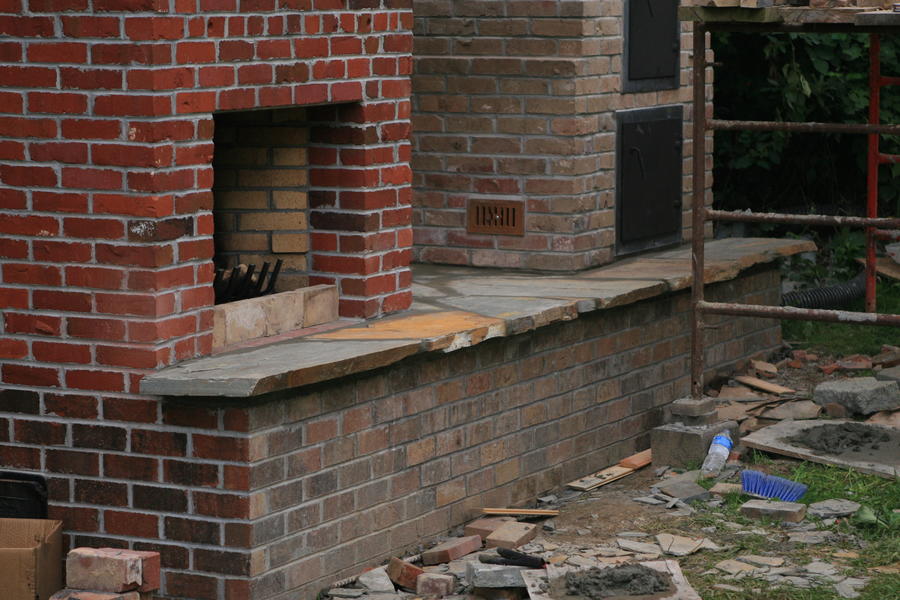
  Ok, the firebox door is 21x21.  It was built out of  3in. angle iron.  Being that big, I can use it as a lentil to lay brick across the top of door.  When setting the door it must be level.  If  it was built square, it will be plum.    Something to keep in mind is the door should be built on brick work.  The brick I was using was odd sized being they were hand made.  I layed them on 3inches.  At 7 runs I was even with the top of the door frame.  No cutting a half run to get over the door.  My brother welded metal flanges to the side of the frame on my brick work  to make it more solid in the masonry.   I'm still not sure if I have enough air flow coming into the firebox.  This is something I will know when I fire it up the first time.  Brother said if it was a problem to bring him the door back and he would cut a vent into the door for more air.  Once I reached the top of the door frame with the brick I stepped  the chamber down to 16 inches wide.   The chamber is 22 inches deep all the way up.

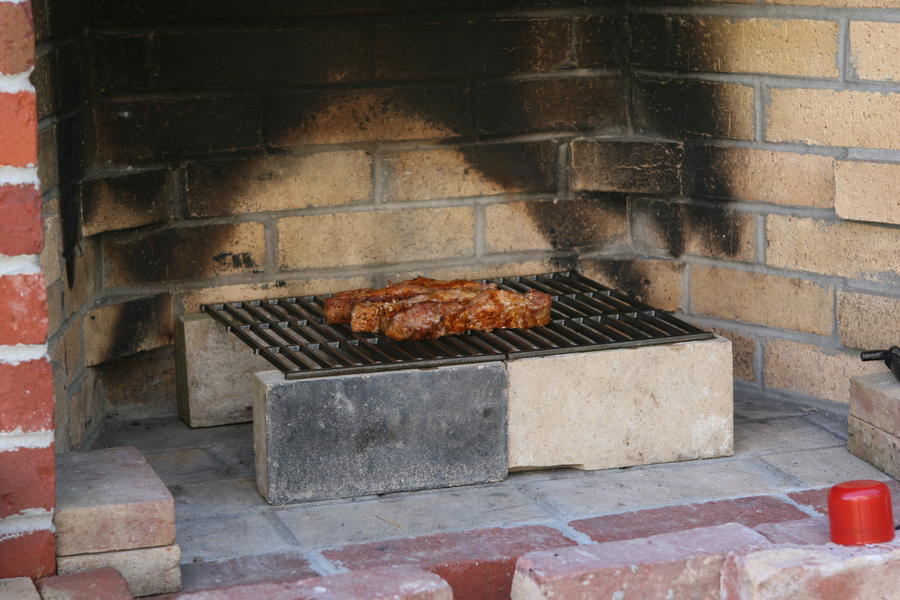
  Now/ I'm ready to start the cook chamber.  My first shelf is at the top of the firebox door.  Its a bit low for cooking, but its a great place to put my water pan.  The pan he (brother) is building is 16x12x3.  I ask him to build it from 1/8in. steel.  Being on the heat I thought it need to be pretty heavy steal to keep it from burning out quickly.  Size here is just a guess.  I may have to baffle it more depending on how even the heat is from bottom  to top.

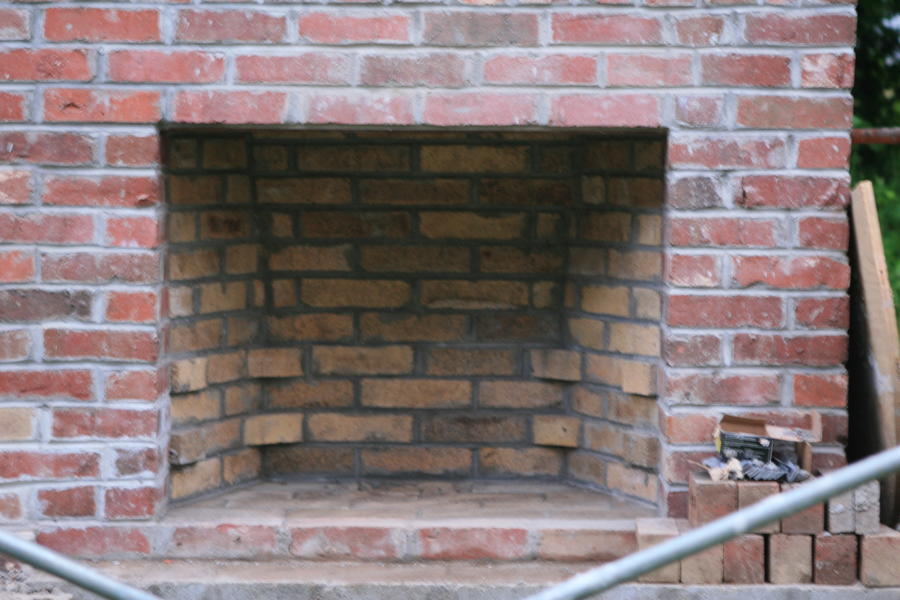
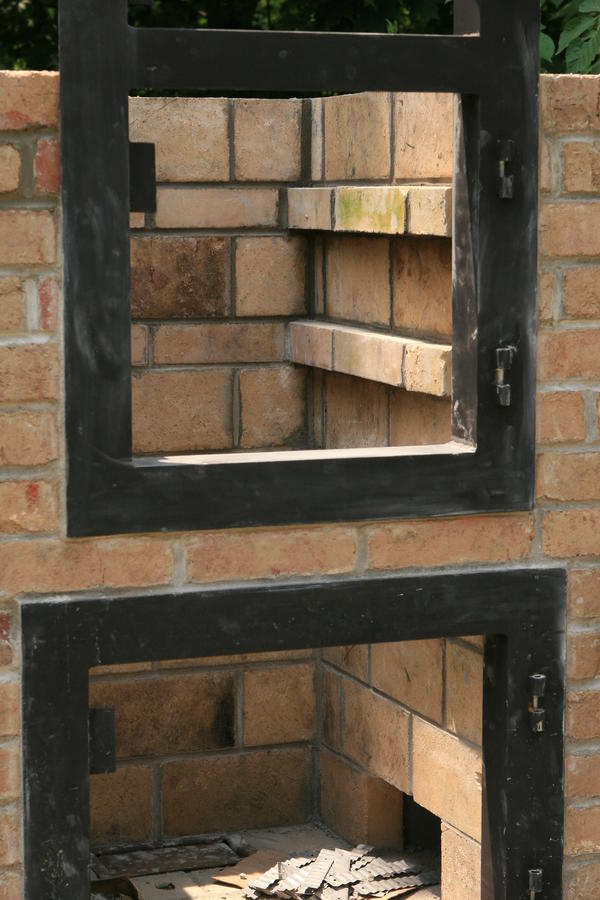
  To this point the firebrick have been layed on there side.  For the shelves I simply layed the firebrick flat and let them hang over 1 1/2in.  The spacing between shelves were, brick on side, brick layed flat.  This is very time consuming.  Its very important to keep everything level and square.  When laying firebrick the thinner the mud joint the better.  This isn't as important in a smoker as it would be in a fireplace.  Some people would say to use fire clay.  You can but, its expensive and not available in this area.   If you use type s mortar mix, mixed 2 parts sand 1 part type s it will be very strong.  It will last for many many years even in a fireplace.

  I had to take the whole build up at the same time.  I couldn't lay just the firebrick all the way up because it had to tie into the front.  I couldn't set the doors without the outside brick, so it all had to be done as it went up. 

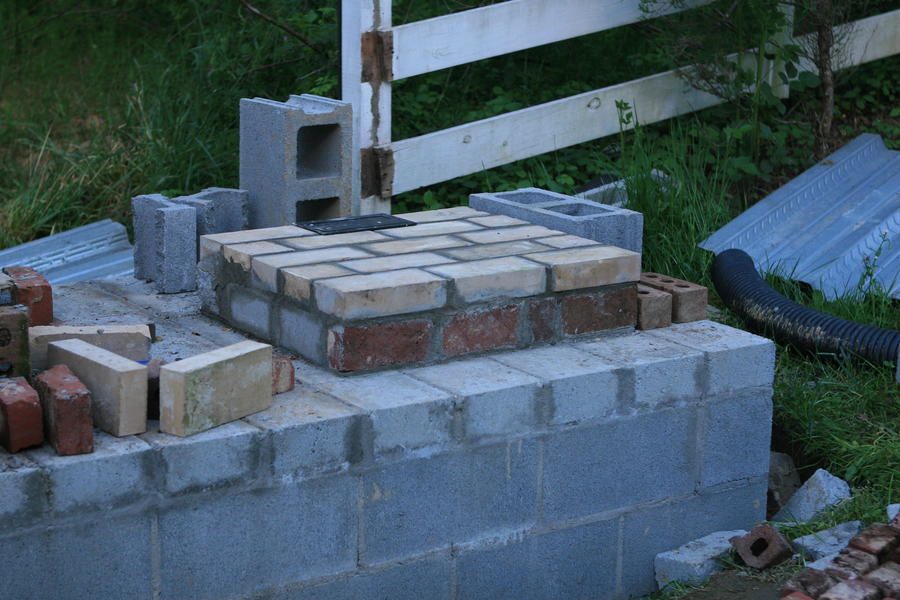
  Now, once I got to the top of the firebox I stepped my block back to 6in. block.  You wouldn't have to, but it cuts a few dollars off the cost of block work.  I still have about 2 in. of air space between the firebrick and the block.  To keep mud from falling in the void I stuffed it with fiberglass insulation.  OK, a little common sense here.  Yeah, take the paper off of it.   It helps insulate the cooker and keeps the air space open.  

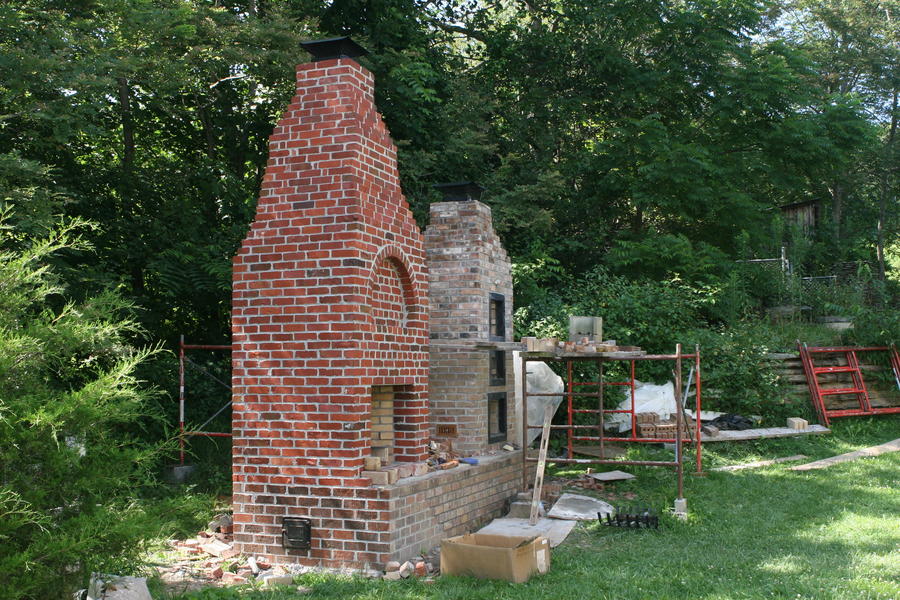
  Your shelf work can go as high as you want it to.  I could have probably gotten by with a single cooker door and a couple less shelves.   But, it looks good and I got room to spare when cooking.   After all, if I'm going to fire it up I can smoke 10 butts as easily as I can cook 1.   I keep tempting my friends with bits a pieces of what I smoke.  I'm hoping I can call them when I'm going to fire it up and get some orders.  One can hope anyway....

Next comes the damper system.


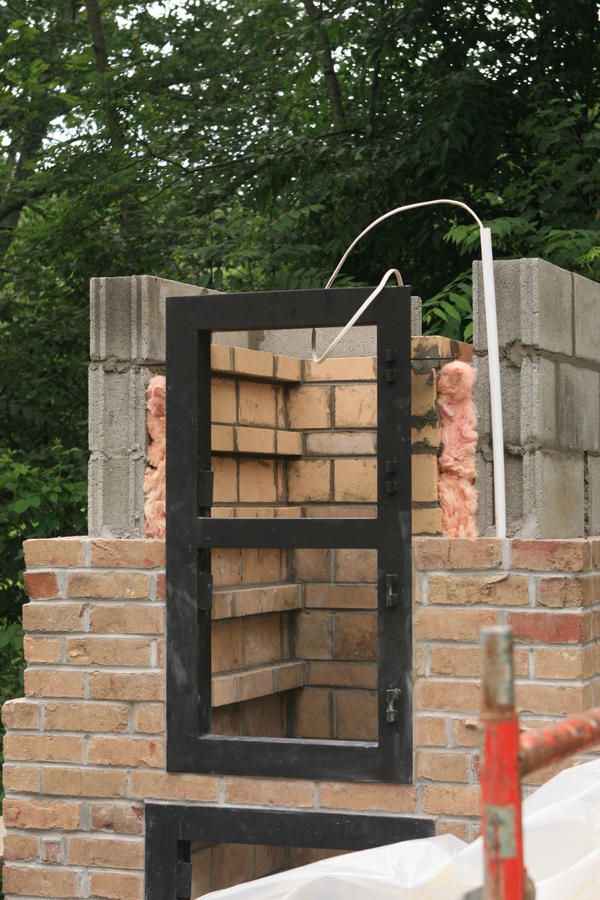
Setting the cooker doors.  Once again this door must be set level.


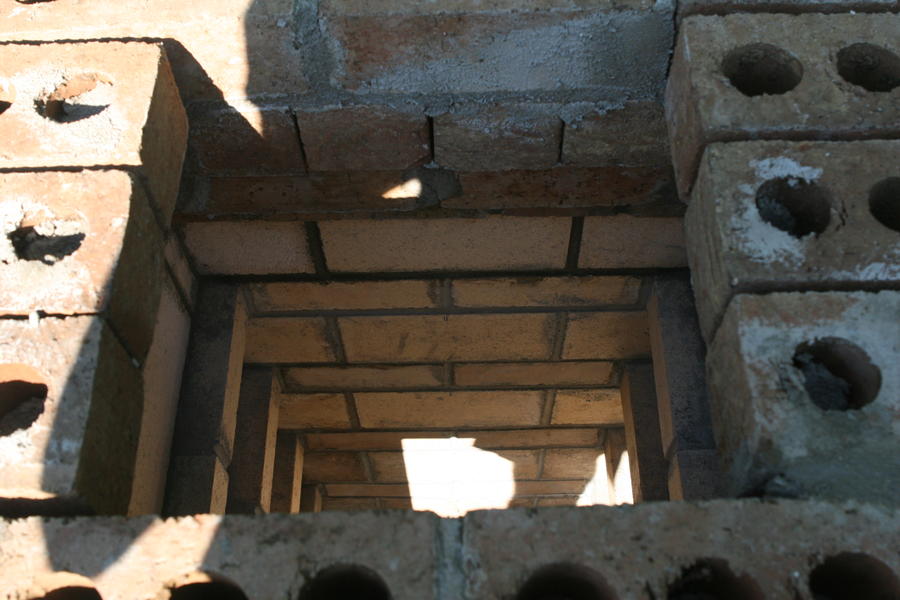
The first shelf is not seen.  Its between the two doors.


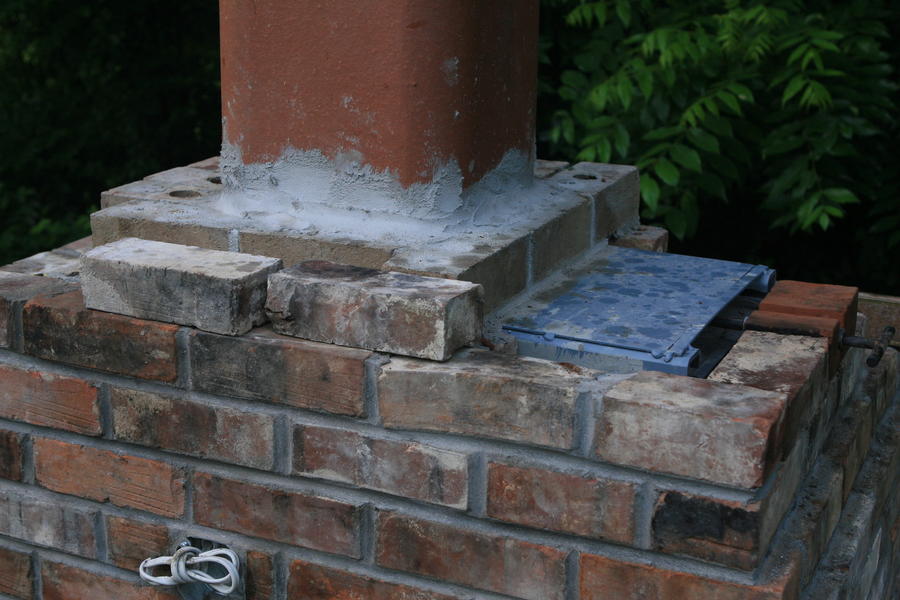
The white pipe is power to a light.  I wanted to have some kind of power source at my build so I ran a line for a receptacle and light.  A note here.  If you run power through masonry it must be in some kind of conduit.  If you don't over years the mortar will eat away at the wires.

  Here you can see how its all going together.  Shelves, block  and face brick.  Notice at the point that I stepped in from 8in block the 6's  I also stepped in the face brick.  It adds a nice look to the build. 

  Insulation  is tight but not packed.


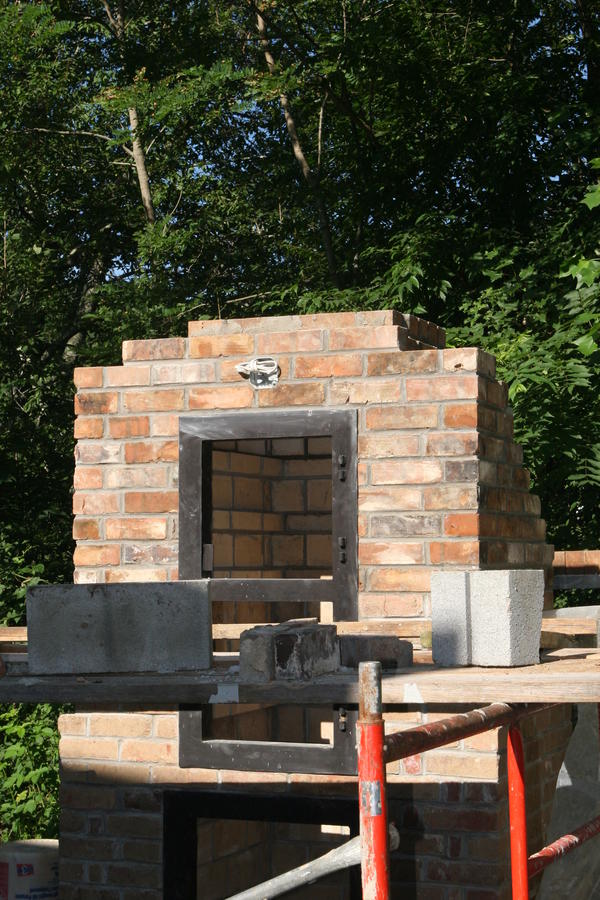
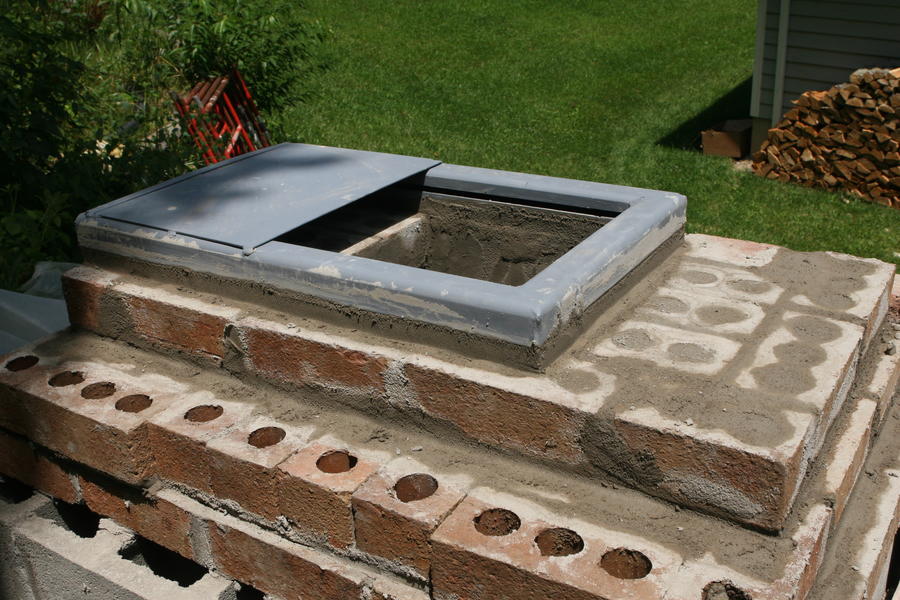
Once over the top door I'm ready to start stepping it into the damper system.

Couple notes here.  As a rule of thumb you should never corbel (step) brick more then an inch at a time without support under it.   Once set masonry will support itself.

Hope everyone has a great evening!
 
Last edited:
Ok, once over the top of the door I could start thinking about stepping it down to the damper.  The flue size I was using was a 13x13 OD.  My brother made me a simple slide damper.  He built it from 2x2 tube steel.  He cut a gap all the way around the inside with a plasma cutter.   The slide was a simple flat sheet of 1/8th inch metal with a handle as long as it took to get to the outside of the masonry.  

  The inside of the smoker must slope in as well.  The inside  was built up as a solid unit because I stepped my brick in 2in. a run.  I did this to keep it from being so high.  I didn't want to set more then one flue.

  The damper that my brother built was to big.  They sell flue liners sized before they kiln dry them.  Once dried they are way smaller.  It was an over site on my part.  So, I had to bring my brick work over the top of the damper to make the hole smaller.  No big deal, just took time to get it done.  Once the mortar set,  I was ready to set the flue.

  From there its just a matter of finishing the brick work.  Always leave a space of 1/2 to 3/4 of an inch between brickwork and flue.  This is for thermal expansion.   If you use a flue cap as I did you need to stop somewhere around 1in to 2in from the top to allow for your cap to sit over the liner.

  Allow to cure for 30-45 days before building any kind of fire.


View from top down.  Ready for damper


This is the damper.  The slide has been removed.


Inside is stuccoed  for smooth flow. 


This is where I had to build up over the damper to make the hole smaller for the flue.  Other wise I would have just set the flue on the damper.


Smoker complete.  All I lack is giving it a good scrubbing.  Putting thermometers in doors, and repainting all the metel


Same evening I finished the smoker I rigged up a make shift grill in the fireplace and grilled some Country Style Ribs.  They were awesome as usual.  Can't wait to get the racks


Flagstone base complete.  My project is complete except for and good cleaning and sealing the masonry.  If I could only get the clean-up crew motivated.....

This is my project.  I'll probably fire it up for the first time in a couple weeks.   I hope to pick up all the racks labor day week-end at my brothers in Burlington.  

  Its nothing fancy,  Its doesn't take alot of tech to lay brick.  If you want Carolina BBQ you gotta  burn some coals.

  I hope someone gets something from this.   If there are details I missed or  something you want to know, just post it here.  Once I make a run with the smoker I'll post my results.  

Wes
 
Last edited:
Read some of your post.  Thanks Hillbilly!   I'm pushing 50 and don't have alot of projects left in me.  I wanted this one done.   Being in the Mtns of NC I like your nickname.  We are a little behind the times here but thats the way we like it.   We still leave the doors open at night and don't lock our cars.  
 
  • Like
Reactions: travisty
SmokingMeatForums.com is reader supported and as an Amazon Associate, we may earn commissions from qualifying purchases.
Clicky