500 gallon (i guess reverse)

  • Some of the links on this forum allow SMF, at no cost to you, to earn a small commission when you click through and make a purchase. Let me know if you have any questions about this.
SMF is reader-supported. When you buy through links on our site, we may earn an affiliate commission.

tmaven

Newbie
Original poster
Apr 17, 2017
22
13
Hello everyone!

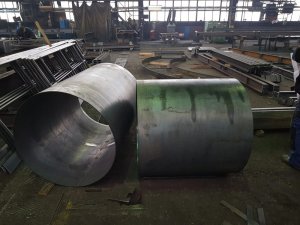
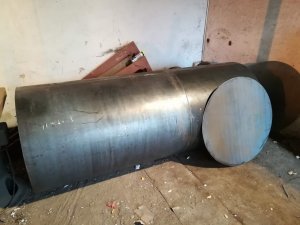
I would like to build 500 gallon smoker (Ordered 0.26x100x42-inch tube).

I want to have stable temperatures across the smoker. Not sure if I can handle same temperatures across 100-inch normal offset smoker. (But I saw video of Moberg Smokers and that was pretty accurrate!). Normal/Reverse? Would like to do one type of meat (pulled pork with ribs or alone briskets).

But I have few questions regarding the build.

I used calculator: Link to BBQ Pit Calculator

Firebox:
35x35x35 (102%)

Chimney:
Round 8x42


But I have few questions:
Green question mark: As per calculator, this should be 343 in^2. That is pretty clear, but.. How should I cut it? Leave some space from top (as heat shield). Or it should be in same level as top of firebox.

Orange question mark: I guess this should be exactly same as firebox > cooking chamber hole (343 in^2). Right?

Brown question mark: I will have cylinder shape, so there is no "tank round shape" to help the airflow. Do you you any bent plate to have "fake tank round" shape?

Red question mark: Hole for chimney will be round 8-inch as rest of chimney. Right? Do you count chimney lenght from hole or from top of smoker?

Thanks a lot!

 
Last edited:
Ups my bad, did mistake in conversion. Its 6mm thick, so 0.26inch. (live in Europe - metric system)
 
Last edited:
Ok,I thought all the original dimensions were metric and took the wall to mean centimeters-close an inch thick,as 2.6 mm would be too thin.Follow Dave's calculator and it should answer your questions.
 

Did that calculation before, but for example FBtoCB is different (calc 343.00, your 460).
So I guess that calculator is not that good.

(250 x 100 cm)

250 cm = 98.43 in
100 cm = 39.37 in
98 cm = 38.58 in

V = 1963495 cm^3 = 518 gallons


Gallons X 231 = volume in cubic inches.... Sometimes the tag, in gallons, reflects a 20% air space for expansion....
119658 in^3

Volume of the Cook Chamber.... Use the Inside Diameter of the tank...
Diameter X Diameter X 0.7854 X Length = Volume in cubic inches
38.58 x 38.58 x 0.7854 * 98.43 = 115064.89 in^3


Volume in cubic inches X 0.004 = FB/CC opening in square inches
460.25956

Volume in cubic inches X 0.004 = Area under the RF plate in square inches
460.25956

Volume in cubic inches X 0.004 = Area required at the end of the RF plate in square inches
460.25956

Volume in cubic inches X 0.33 = minimum volume of the Fire Box
37971.4137

Volume in cubic inches X 0.001 = FB air inlets in square inches...
115.1
^ half for upper and half for bottom?


Volume in cubic inches X 0.022 = Exhaust Stack Volume in cubic inches, above the CC.... (ESV)
(The increase in volume ~30% shows a dramatic improvement in equalized temperatures across the cooking surface... edit 6/19/15 )
ESV = 2531.43 in^3

ESV in cubic inches_____________________________ ... = Stack Length in inches (36" +/-)
0.7854 X Stack Diameter X Stack Diameter

0.7854 x 8 x 8 = 50.27 (50.36")
0.7854 x 9 x 9 = 63.61 (39.8")
0.7854 x 10 x 10 = 78.54 (32.23")
 
Green question: given you are indicating a flush mount, either position will work. If you end up notching the cc to accept the fb, this question will need to be readdressed.
Brown question: without modeling and testing, installing any curve may actually decrease the airflow performance. Go with the right angles and learn how to cook with any nuances they offer.
Red question: I alway use the top of the plenum. However, in this case, you will probably be ok from the top of the cooker. I have found sizing the largest diameter stack possible combined with an adjustable baffel/rain cover provides a shorter stack with the ability to "tune" the exhaust in less than ideal conditions, an approach that has proven to work extremely well for my builds, it seems to wrinkle the shorts of some.
Good luck
 
For the exhaust... anytime you have an "obstruction" of sorts, you reduce the effective air flow due to the vena contracta... In a gravity flow situation like a smoker, that can really reduce the air flow... A plenum to attach the exhaust stack to, would be an alternative that is a good choice....
Smoker Exh and Intakes.jpg

The vena contracta significantly reduces the available area for air flow ...

Vena Contracta 1.png ... Vena Contracta 2.jpg
 
Dave,
What are your thoughts on plenum design? Some guys swear by short and wide (franklin), others are tall and relatively narrow. My attempts at using the short and wide worked great...so long as I only used the bottom rack. When I added product on the top rack(s), things would go south pretty quickly and I ended up reworking every atone of them. I find a plenum about 3/4 as wide as the cc that runs from about 1" above the bottom rack and about 3/4 of the way up the cc does a much better job leveling temps within the cc. Granted, each build has its own unique quirks, but by dialing plenum placement, I am finally getting to the point they are fewer and more predictable.
 
2 pieces; will be weld together :cool:
 

Attachments

  • IMG-20181108-WA0000.jpg
    IMG-20181108-WA0000.jpg
    133.9 KB · Views: 65
20181108_171754.jpg
FB_IMG_1541967925906.jpg


Two completely different plenum designs I have used on different cookers. Both seemed to work equally effective. Just make sure the opening to the plenum is slightly higher than the highest cooking grate. This will allow the heat/smoke to flow over top of your meat.
 
I found in one cooker I built, the plenum was too low and the top grate temp was drastically higher than the lower grate. Basically it was drawing exhaust from the upper middle section of the chamber. The hottest heat was rising and staying in the cooker. But yes plenum placement is crucial to an efficient cooker. You would be amazed at how much an inch high or an inch low will make. My suggestion is err on the high side. You can always get more heat via the firebox. But there's only one way to remove it!!
 
progress
 

Attachments

  • IMG_20181116_095125.jpg
    IMG_20181116_095125.jpg
    87.8 KB · Views: 55
So first "blue print" ..

FB to CC is 400 in^2 (2 580 cm^2)

CC - plate opening is little more.

Have question regarding space between first cooking grade and that opening. Should I leave space there? (12 cm currently 4.72 in) (that red line on picture 2)

Plate will have little tilt (from 40 cm to 38 cm; V shape). So it will leave 10 cm (3.93inch) between cooking grade and plate.


Any recommendation?
IMG_20181119_2000481.jpg
IMG_20181119_200048.jpg
 
Yes, you absolutely will want that extra space to catch grease that may drip off the end of the cooking grates. If it is flush with the end of your cooking grate, you will always have a mess in the bottom of your CC. I can't really tell from your drawing if you are planning to have a lip between the bottom of the CC and the opening to the firebox. If not, I would recommend realigning the joint so that there is at least 1" of lip at the bottom to prevent grease from flowing back into the FB.
Plan on installing a clean-out valve some place on the bottom of the CC to flush out ash, debris and grease that will inevitably accumulate there.
 
Ye, at the end of V shape plate will be drip tube with valve outside. I smaller offset smoker, see that fat rolling out.. so from this big boy..

Still wondering, that red part. Do I need to have space between opening and grate? Or I can place grate next to opening (that will have me 12 cm of space for cooking).
 
Yes, you need to keep that space. Without it you will have excessive grease dripping off the end of your grate down into the bottom of the cc. The extra 12cm is simply not worth the problems it will cause. If you need more grate area, install a second (removable) grate above the first one.
 
A couple thoughts, from the school of past builds (and rebuilds).
First, consider expanding the plenum down to a point about 2.5cm above the bottom grate.
I have discovered the best drafting occurs when the plenum is built about 5-10cm wider and deeper than the exhaust pipe diameter.
Second, unless I am working with a very large diameter cc, I have gone away from trying to squeeze a third rack on the top as they seem to spend more of their life setting on a shelf than in the smoker being used.
Don't forget to get the grease and cc drains designed into your drawings. Figure on no less than a 5cm (2") pipe and ball valve for both drains.
 
SmokingMeatForums.com is reader supported and as an Amazon Associate, we may earn commissions from qualifying purchases.

Latest posts

Clicky