alrighty Guys, this is my first build, I’m a 15 year fabricator/welder. I have been smoking for a couple of years. my first smoker was a charbroil cheap one from Walmart which the FB rusted out after the first smoke. I kept on using that grill till it eventually rusted out in the CC. So I started looking for heavy duty smokers then I stumbled Upon the reverse flow style and they were 600 or so bucks. I remembered my wife’s grandpa had some 20 inch pipe the city was using for columns just lying around. So I thought “why not build one?”
I spent days researching on this site and using davomak calculations plus looking at google images. Special thanks to Davomak for helping me with my opening size and segment height!! CC 31” FB 15” The stack is 4 1/4 x 16 5/8 long
I tacked a 1x1 angle under the RF at an angle to act as a grease run off
and a back plate for the grease. I welded a pipe at the end of the angle with ball valve to drain grease. You can see later I’m pics.
I used angles for straight edges for my door ( torched out, everything was with a torch )and also for my legs which I didn’t cope to fit the radius. ( just hurrying bc it was late). I tried to use pipe but the owner of my company i work for wouldnt sell me any pipe, so I found a bunch of short 2x2x3/8 angle on a pallet he sold to me for $5. (Super heavy but stout). I paid $20 for the diamond plate I used for my end caps. And 20”pipe was giving to me!
added a temp handle and cut the trim out of 1/8 plate steel I grabbed from the scrap bin. I used a cut off wheel and ripped the trim. Also added some chain links I had left over from a job as The hinges. I had problems with that door and had to do a lot of tweaking bc I welded the trim too fast and it warped or bc I didn’t put temp braces on the door before I cut it out! Which I did on my FB door. This door was my learning curve!! The flt bar was there to help trying to adjust shims


this time, I torched the door out then cleaned up the edges on both peices.it did warp a little. I fit the door back in flush starting from bottom. It was all flush till about 3/4 from top. I then took a dog and wedge and forced the top part flush, then heavy tacks. I took a rose bud and heated the door up all over. To help the door relax as it cools to the curve! Then I tacked those temp braces in for extra measures. The next day I cut the tacks and cleaned it up, with braces still on!! Instead of welding the trim on the door on my table (like I did with CC door). I fit and tacked the trim to door while it was lightly tacked to the FB. Which worked out a lot better and quicker!!!
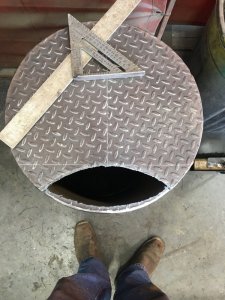
my clean out door!! And intake! Which I built on my table out of dimond plate and then tacked to the whole plate to pipe
my grate slides out then hangs on some little angle I tacked on
i had it sandblasted for $80 and then i painted it with the high heat paint from sherwin Williams 2 coats. no primer required. And after seasoning it in yesterday and the first meat smoke, the temps are within 10 degrees from sided to side and the paint is holding up!!