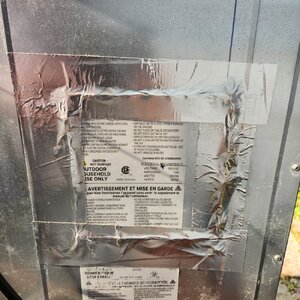
I see a lot of Masterbuilt 40" Electric Smoker threads, but I'm not certain that any of them match my criteria. I will try to describe my issue as briefly as possible. I thought I had a MB20074719, but it turns out I have a newer model, the MB20075519.
1. Owned my smoker for about 2 years and it worked like a champ
2. After critters tore apart my smoker cover, it may have gotten rained upon until I got a replacement cover
3. Suddenly, my smoker was tripping the breaker everytime the heating element turned on
4. Masterbuilt was not as helpful as some people claim, they gave me a claim number, said they would respond in 5 days but I never heard back
5. After some forum/youtube research, it sounded like the element, so I purchased a new $11 element from Masterbuilt, replaced it (had the new crimp connectors instead of the old ring ones -- so I cut, capped and heat-shrinked) and it seemed back to normal in Sept'22
6. First grill of May'23 and the day started off fine, smoker heated to 225. However, after opening the door to put more food inside, it no longer heated and, while it remained on, the temperature slowly dropped as if the element was no longer active
Now, tried the following things:
1. Fearing it was the element again, checked the element for holes, etc, and found it still looked brand new. Check the wiring, still looked as new as when I fixed it. Started tripping the breaker again, so I plugged it into my garage circuit to avoid running in and out of the house. Ran a few tests and, most of the time, it did not heat, although one time it did heat to 265, then stopped even when I did not open the door. The fact that it heated once or twice means the element and the contacts are fine, no?
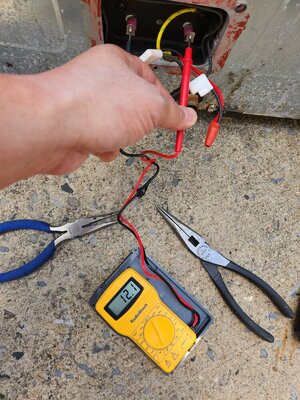
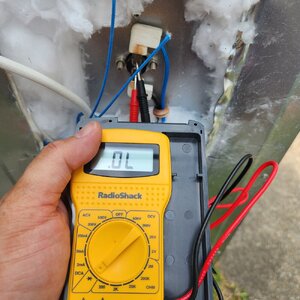
2. Found one or two mentions of the resistence in the element contacts, so measured it and it was 12 ohms for the 1,200W element, as indicated
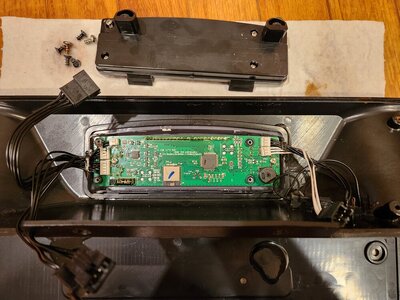
3. Found some youtube video where some lady fixed her Masterbuilt clicking but not heating but cleaning the top circuit board, so I undid the housing and that had no effect
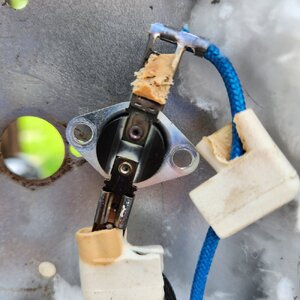
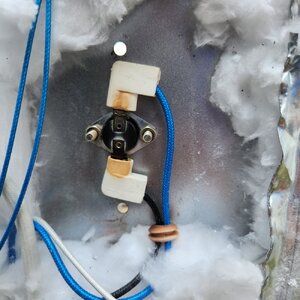
4. Found a few others mentioned cleaning the temperature thermometer and limit with vinegar/water, so did that and no effect
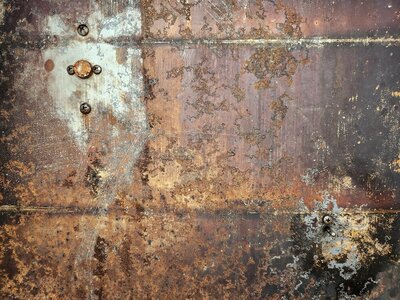
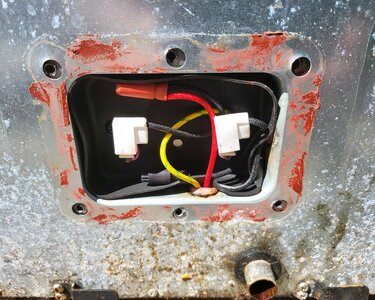
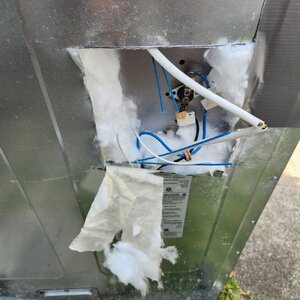
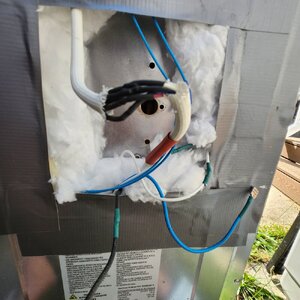
5. Found your forum about checking if the bottom controller was fried, but it looks fine, unlike the burnt look of the MB20074719 in another post here
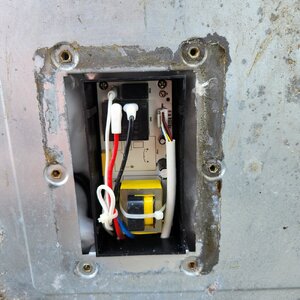
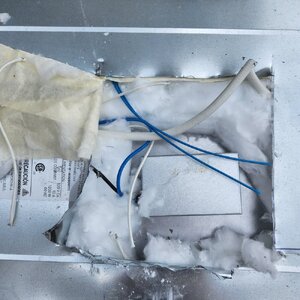
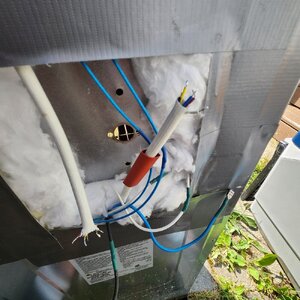
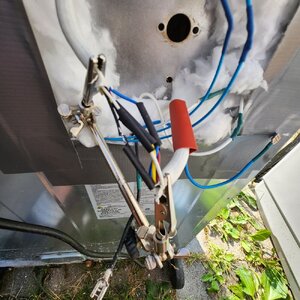
I posted the photos showing the control panel, bottom controller, element wires, cleaned limiter, and element measurements to illustrate how nothing looks faulty offhand.
Thinking about trying a few things, but wanted some advice from the folks here:
1. Replacing the KDS301 and/or probe? Seems like the temperature probe would be fine since it was reading the temperature when the smoker was heating and when it was not. However, since there is no panel, would have to cut the back sheet metal and would like to know that this could be a possible fix before I vandalize my "mostly pristine" smoker
2. Wanted to try the Simple Rewiring that @tallbm posted about to see if that, at least, heats the element when you bypass the bottom controller. However, with 2 whites + red, black, blue wires, I could not figure out how to determine which was the #1#2 and $#3-#4 connections
3. Lastly, would consider installing a PID controller, but wanted to verify that the controller was bad (even though not burnt) and assumed the simple Rewriting Bypass would confirm that? Also, trying not to spend more money on the parts than I did on the smoker.
Thanks in advance for your patience and any advice provided.
1. Owned my smoker for about 2 years and it worked like a champ
2. After critters tore apart my smoker cover, it may have gotten rained upon until I got a replacement cover
3. Suddenly, my smoker was tripping the breaker everytime the heating element turned on
4. Masterbuilt was not as helpful as some people claim, they gave me a claim number, said they would respond in 5 days but I never heard back
5. After some forum/youtube research, it sounded like the element, so I purchased a new $11 element from Masterbuilt, replaced it (had the new crimp connectors instead of the old ring ones -- so I cut, capped and heat-shrinked) and it seemed back to normal in Sept'22
6. First grill of May'23 and the day started off fine, smoker heated to 225. However, after opening the door to put more food inside, it no longer heated and, while it remained on, the temperature slowly dropped as if the element was no longer active
Now, tried the following things:
1. Fearing it was the element again, checked the element for holes, etc, and found it still looked brand new. Check the wiring, still looked as new as when I fixed it. Started tripping the breaker again, so I plugged it into my garage circuit to avoid running in and out of the house. Ran a few tests and, most of the time, it did not heat, although one time it did heat to 265, then stopped even when I did not open the door. The fact that it heated once or twice means the element and the contacts are fine, no?
2. Found one or two mentions of the resistence in the element contacts, so measured it and it was 12 ohms for the 1,200W element, as indicated
3. Found some youtube video where some lady fixed her Masterbuilt clicking but not heating but cleaning the top circuit board, so I undid the housing and that had no effect
4. Found a few others mentioned cleaning the temperature thermometer and limit with vinegar/water, so did that and no effect
5. Found your forum about checking if the bottom controller was fried, but it looks fine, unlike the burnt look of the MB20074719 in another post here
I posted the photos showing the control panel, bottom controller, element wires, cleaned limiter, and element measurements to illustrate how nothing looks faulty offhand.
Thinking about trying a few things, but wanted some advice from the folks here:
1. Replacing the KDS301 and/or probe? Seems like the temperature probe would be fine since it was reading the temperature when the smoker was heating and when it was not. However, since there is no panel, would have to cut the back sheet metal and would like to know that this could be a possible fix before I vandalize my "mostly pristine" smoker
2. Wanted to try the Simple Rewiring that @tallbm posted about to see if that, at least, heats the element when you bypass the bottom controller. However, with 2 whites + red, black, blue wires, I could not figure out how to determine which was the #1#2 and $#3-#4 connections
3. Lastly, would consider installing a PID controller, but wanted to verify that the controller was bad (even though not burnt) and assumed the simple Rewriting Bypass would confirm that? Also, trying not to spend more money on the parts than I did on the smoker.
Thanks in advance for your patience and any advice provided.