Fire Pit - Deconstruction- reconstruction

  • Some of the links on this forum allow SMF, at no cost to you, to earn a small commission when you click through and make a purchase. Let me know if you have any questions about this.
SMF is reader-supported. When you buy through links on our site, we may earn an affiliate commission.

sqwib

Smoking Guru
Original poster
OTBS Member
Sep 25, 2007
5,962
1,034
Philadelphia


Fire Pit Deconstruction - Reconstruction

September 15th, 2019


For at least the last 10 years I have had some type of fire pit in the back yard (well at least that's how far my pictures go back), the first 5 years the fire pit was a seasonal fire pit, every year I would remove the bricks, stack them on the back hill, put away the fire ring, rake up the area real good looking for nails, then install an 18" pool.

2014 was the last summer I put up the pool and concentrated more on gardening throughout the summer.

  • 2012


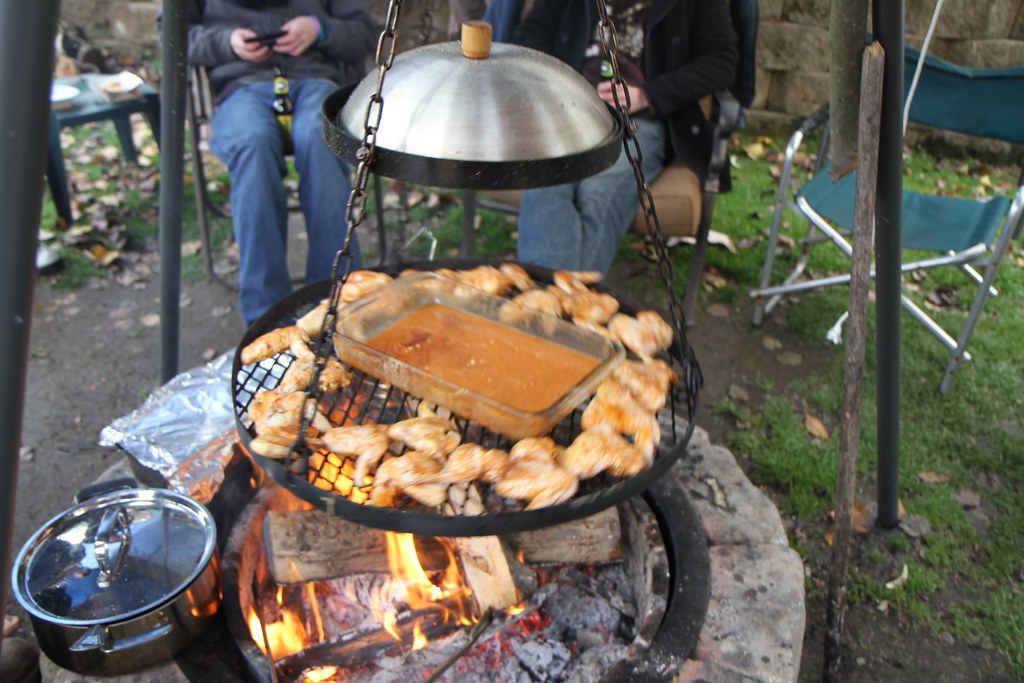
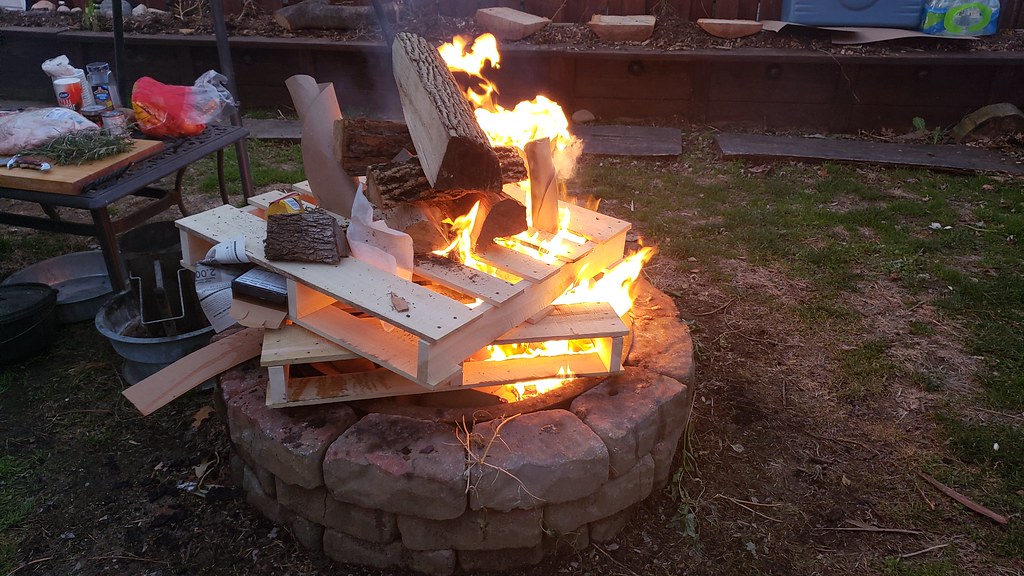
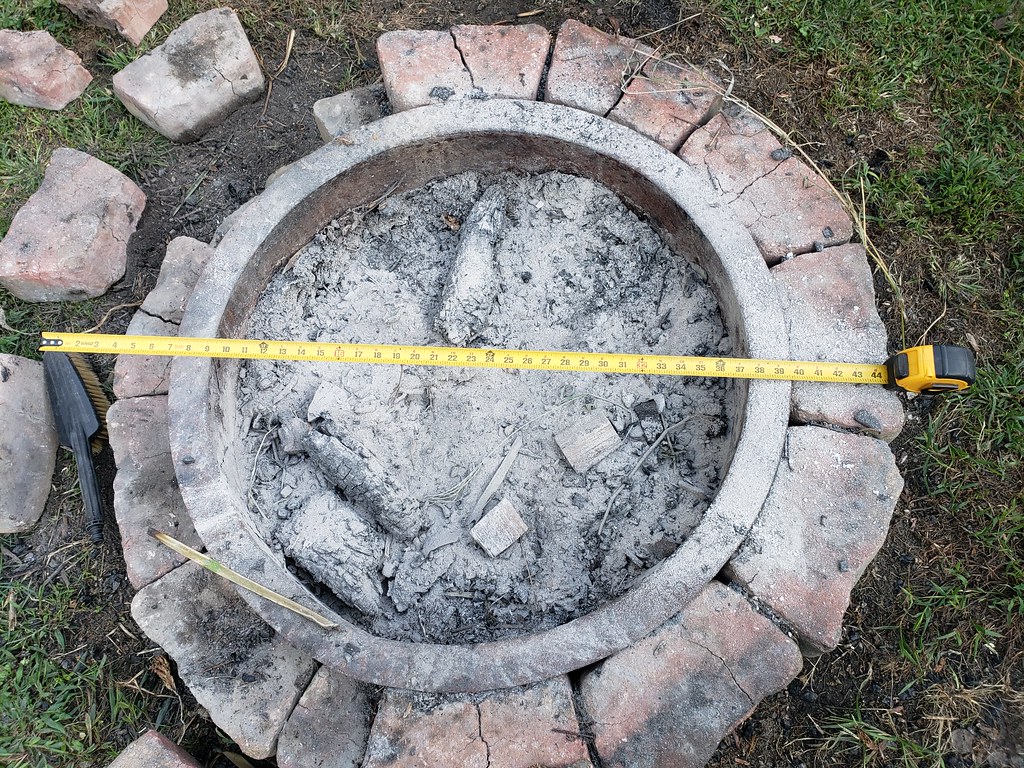
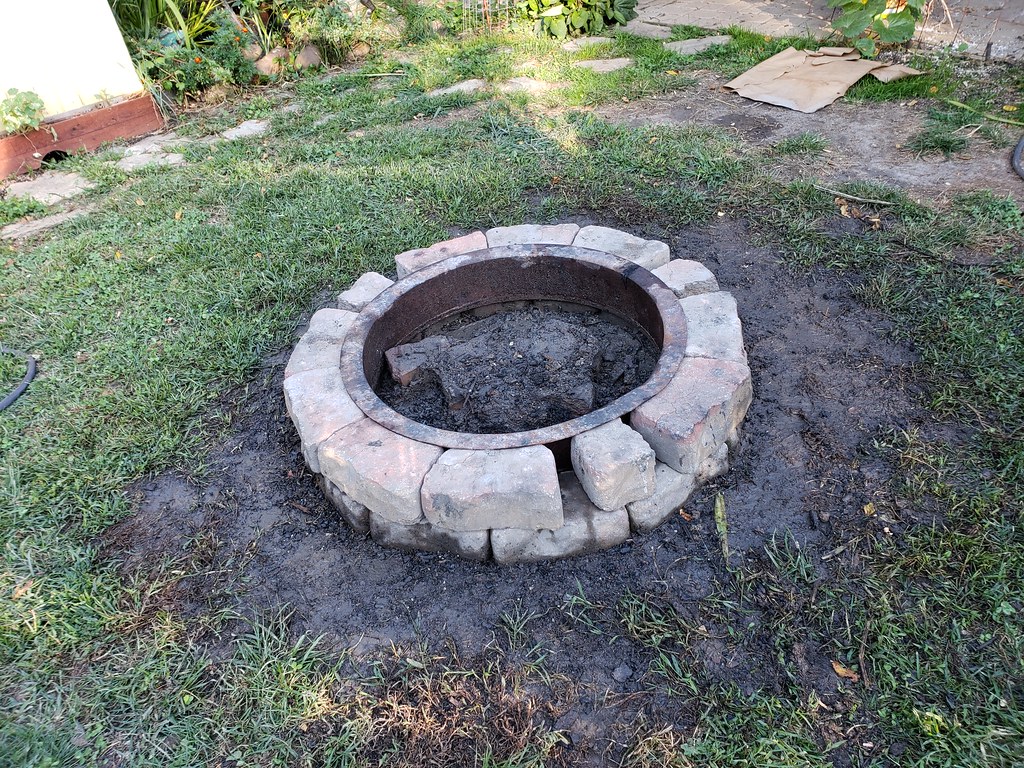
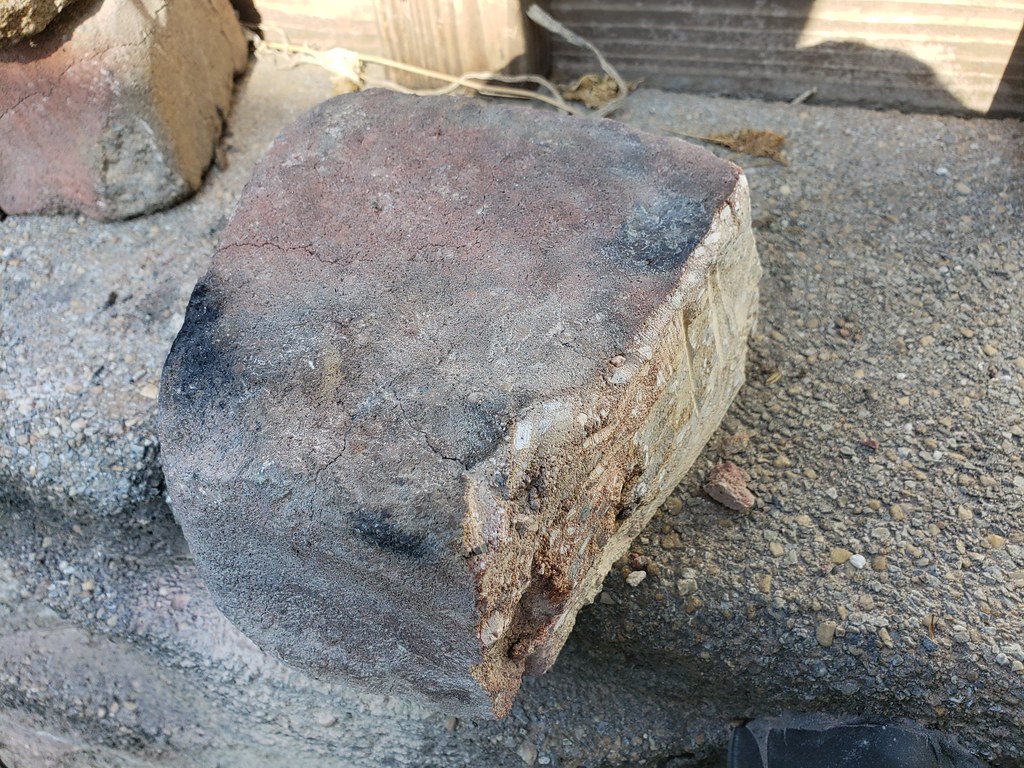
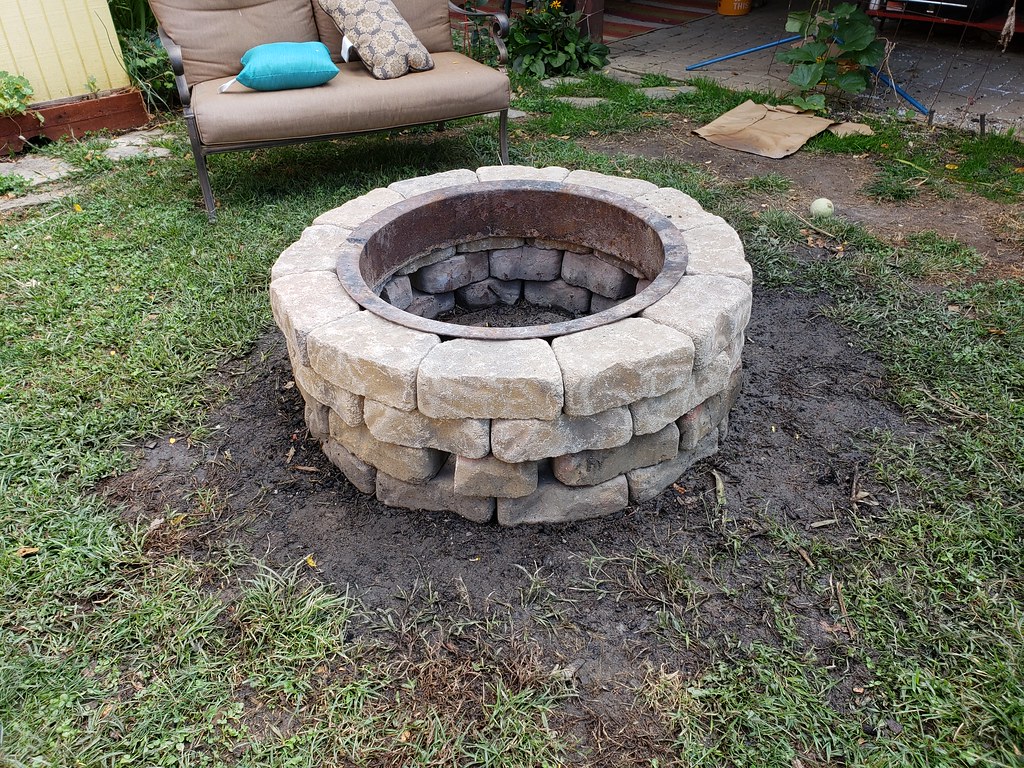
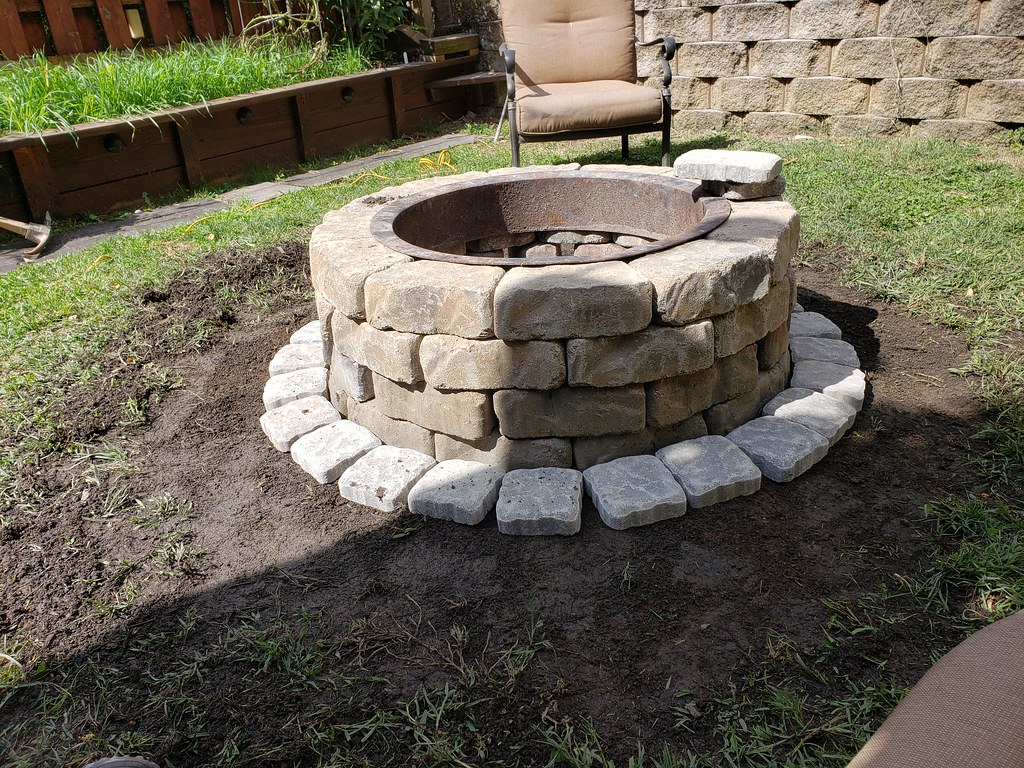
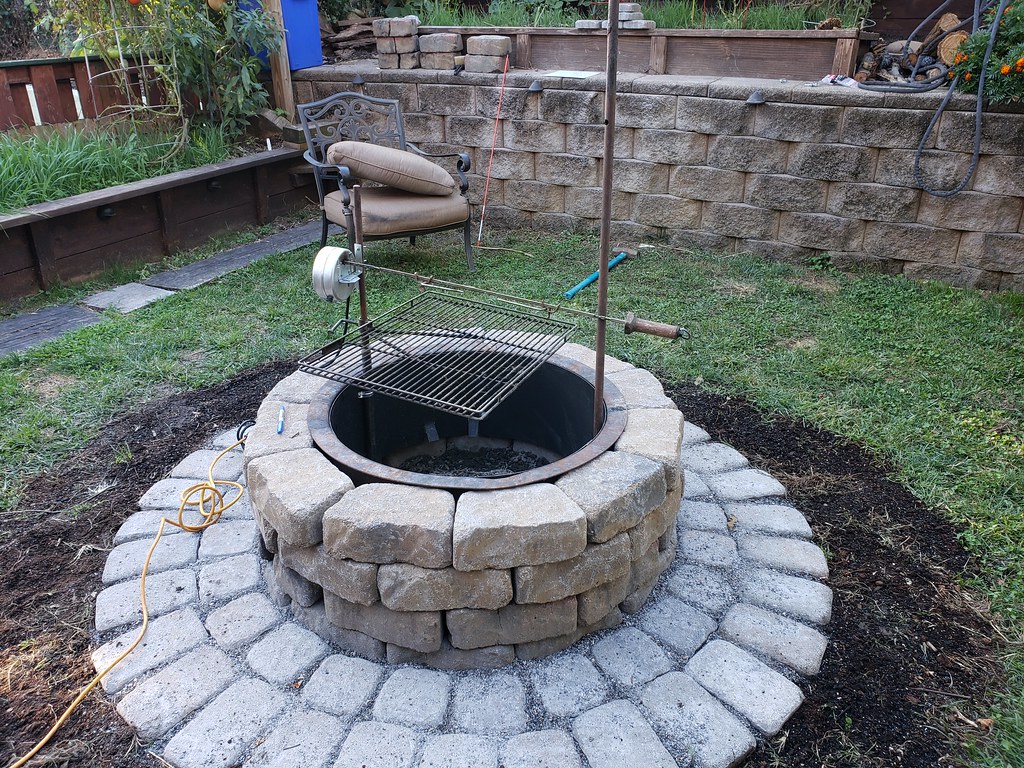
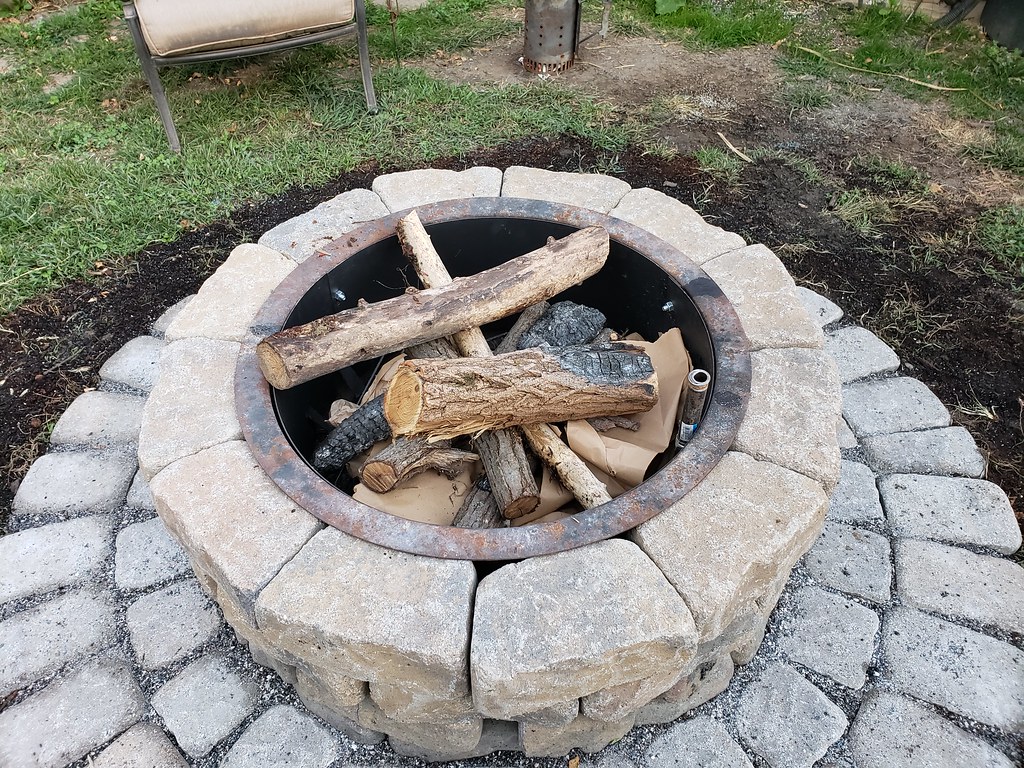
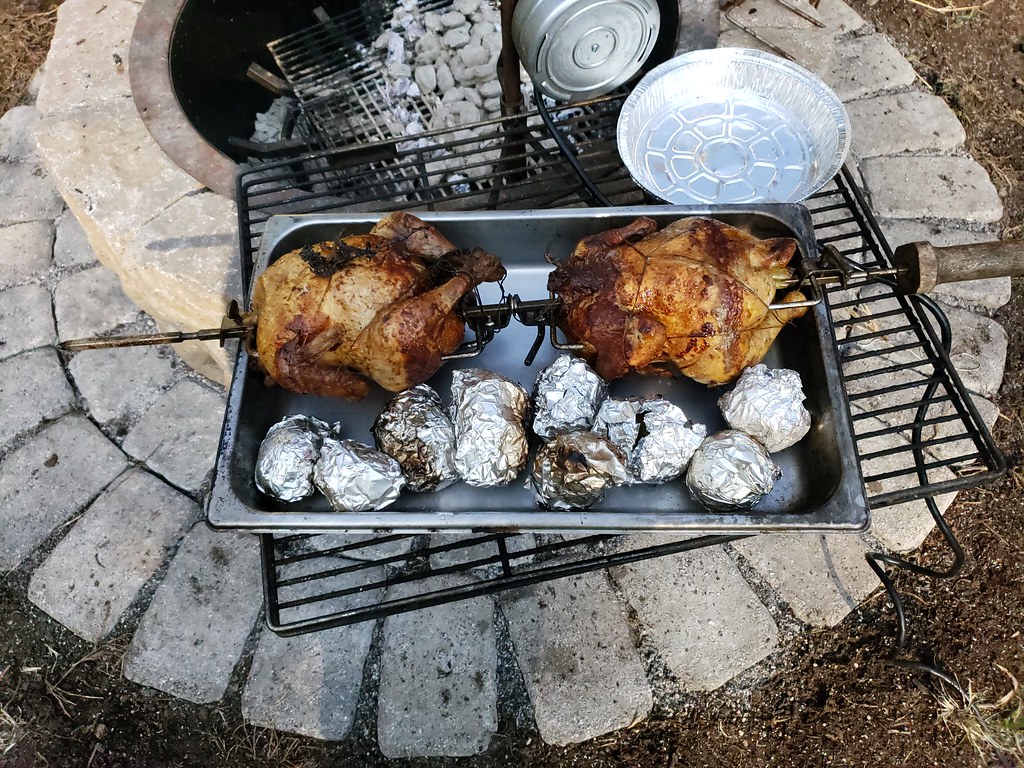
The fire pit has seen some serious fires and abuse, from making Bio-char with pallets to making Lump Charcoal in steel drums.

I started out with a 24" fire ring, I think it was 10 block's around, totaling 30 blocks. After a few years the blocks all cracked and I just used the steel fire ring.

In 2014, IIRC, a friend was getting rid of their Fire Pit, this was a 30" ring with 36 blocks, they delivered... awesome!
The same year we built a Schwenker for the pit.

A few of the problems I faced with the fire pits with landscape blocks was the concrete blocks cracking due to the extreme heat (my fault), there have been times where red coals completely filled the pit and logs were just tossed on top. I have burnt pallets in here as well, it's actually a tradition to toss on pallets at the end of our Manday parties in December.
I have tried a double ring for insulation which I think helped insulate the blocks a bit, see 2nd pic from 2017 and first pic from 2018.

Another problem was the blocks turned red from the heat, I'm not too worried about cosmetics, I guess that is the natural color of the blocks.

I have tried to come up with ways to insulate the landscape blocks but the blocks were no match for the pallets.

I do a lot of outdoor cooking and use the fire pit on occasion for cooking. We like to cook over the Fire pit with the Schwenker, I also have a swing grate we use.

This year I decided to Deconstruct and Reconstruct a new fire pit with a few new rules, no pallets and nothing gets burnt unless it fits inside the pit. The pit will be designed with cooking being the priority.

  • 2010


  • 2012


  • 2013


  • 2015


  • 2017


  • 2018
Bio-char


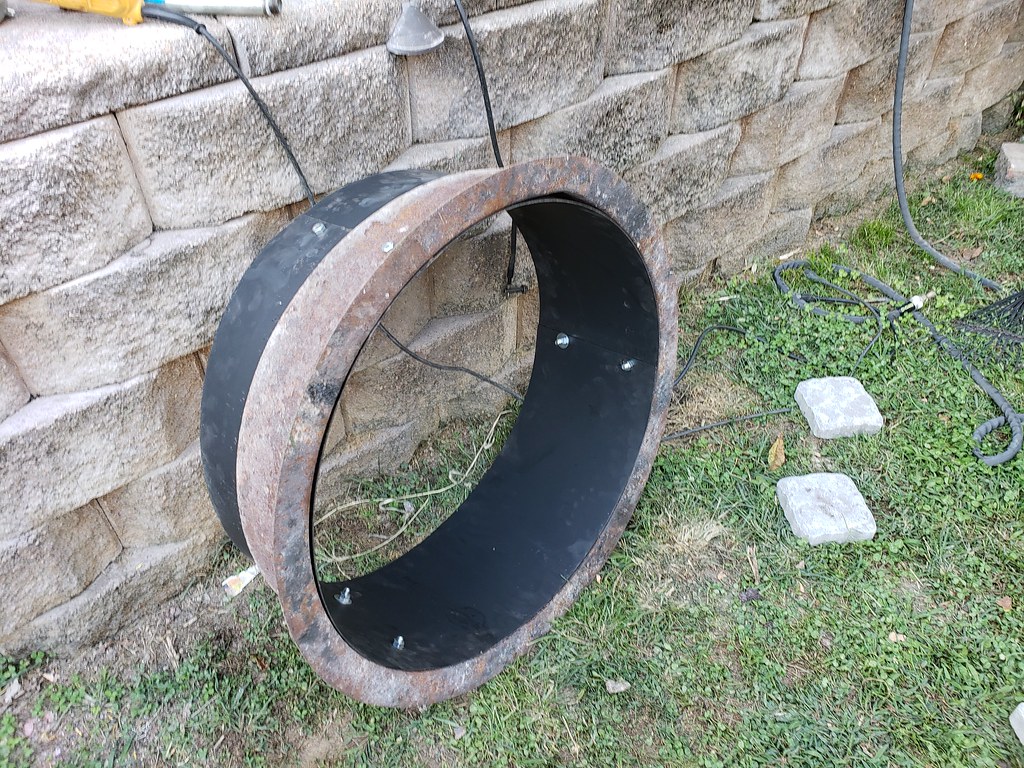
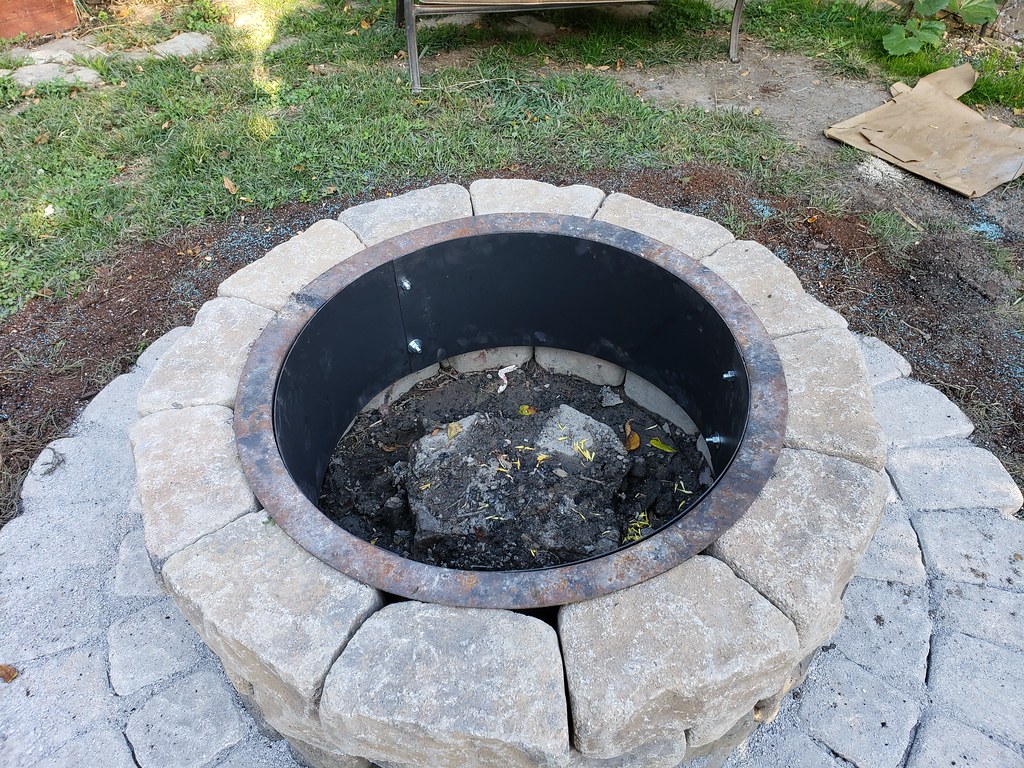
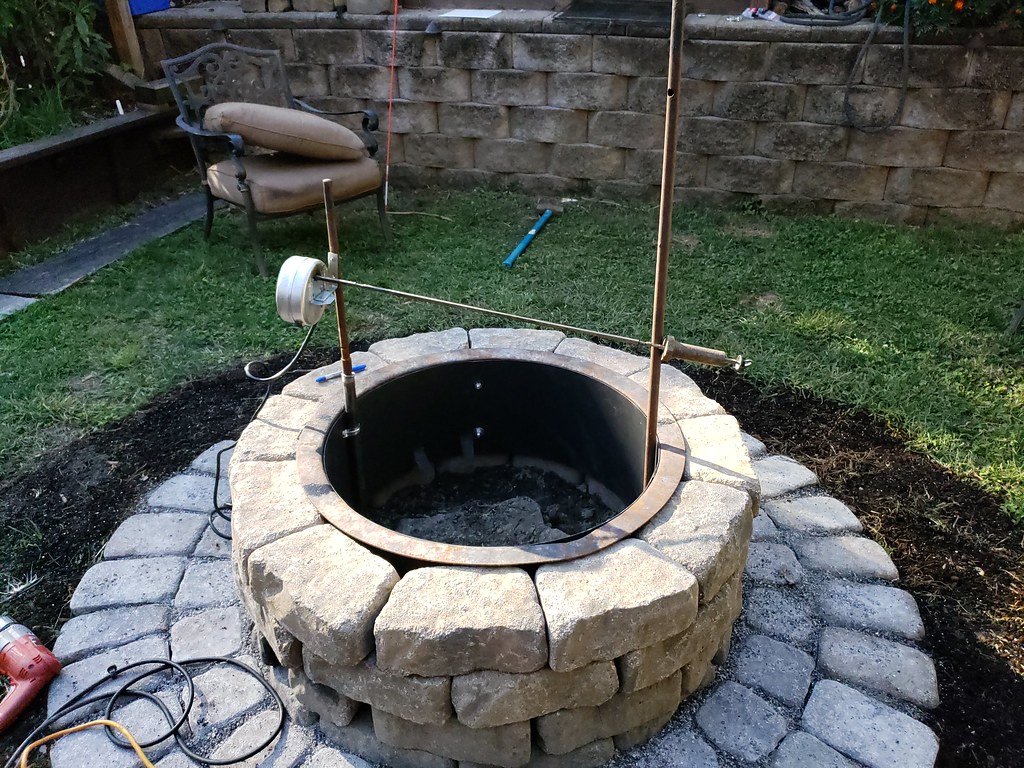
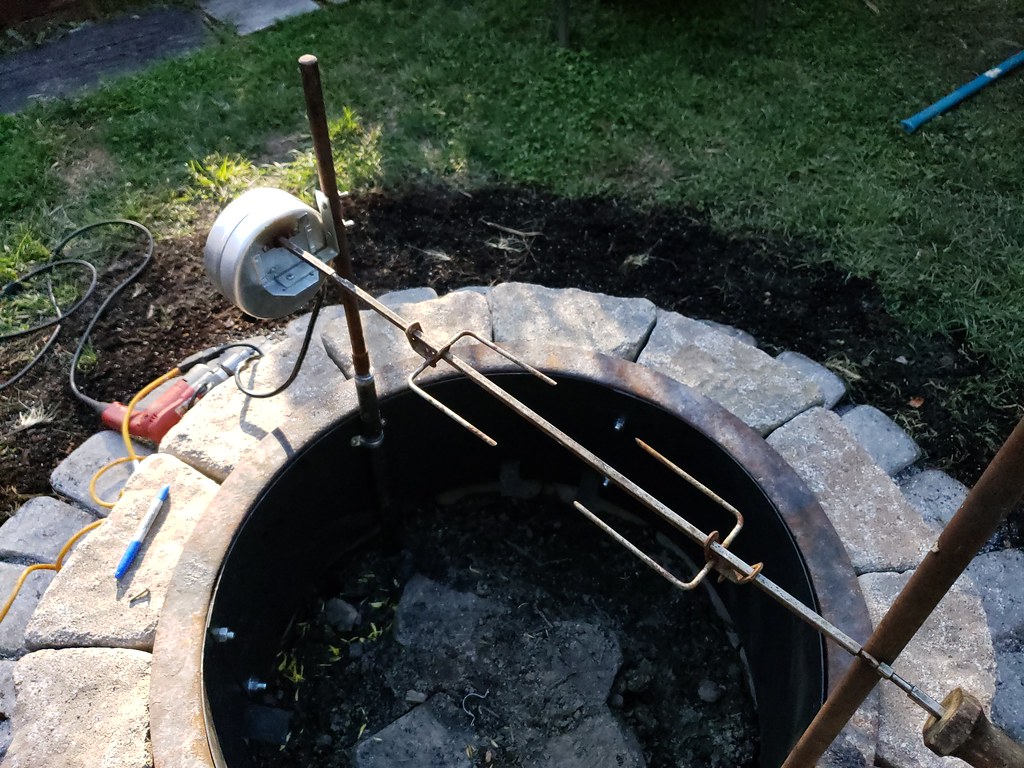
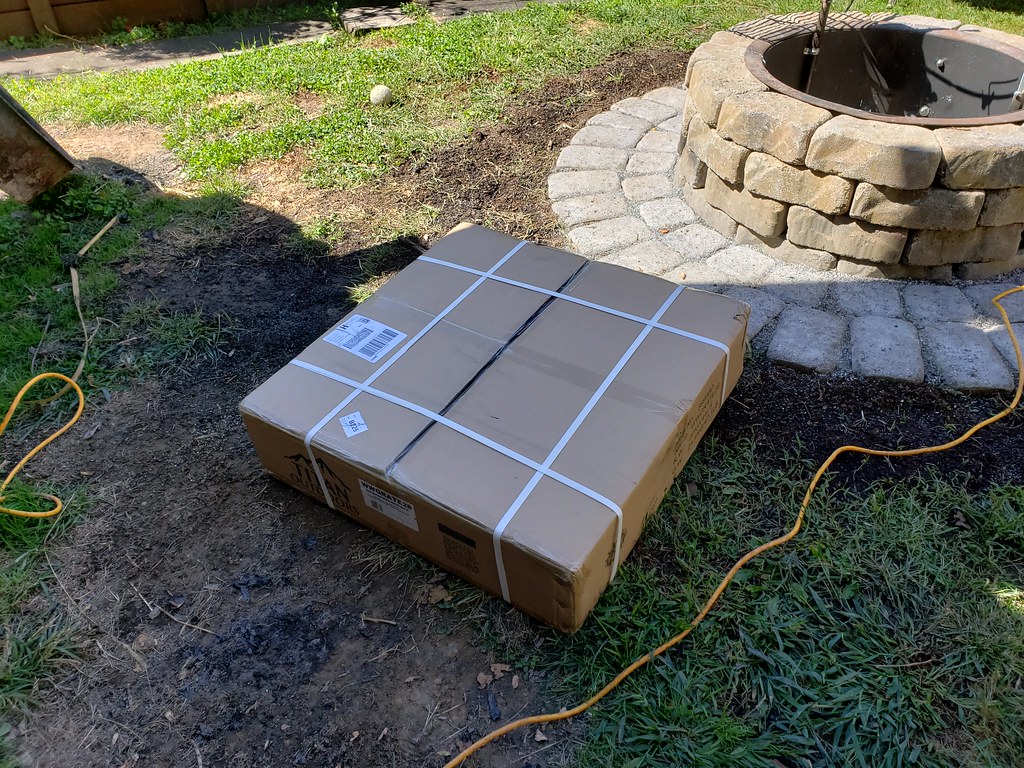
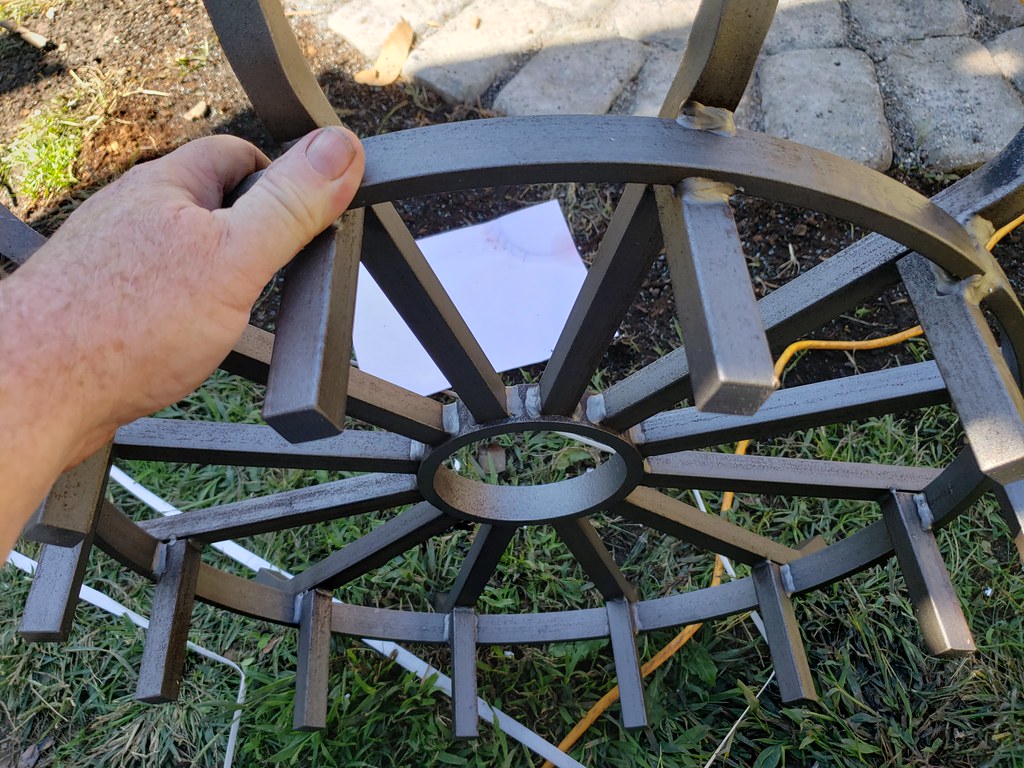
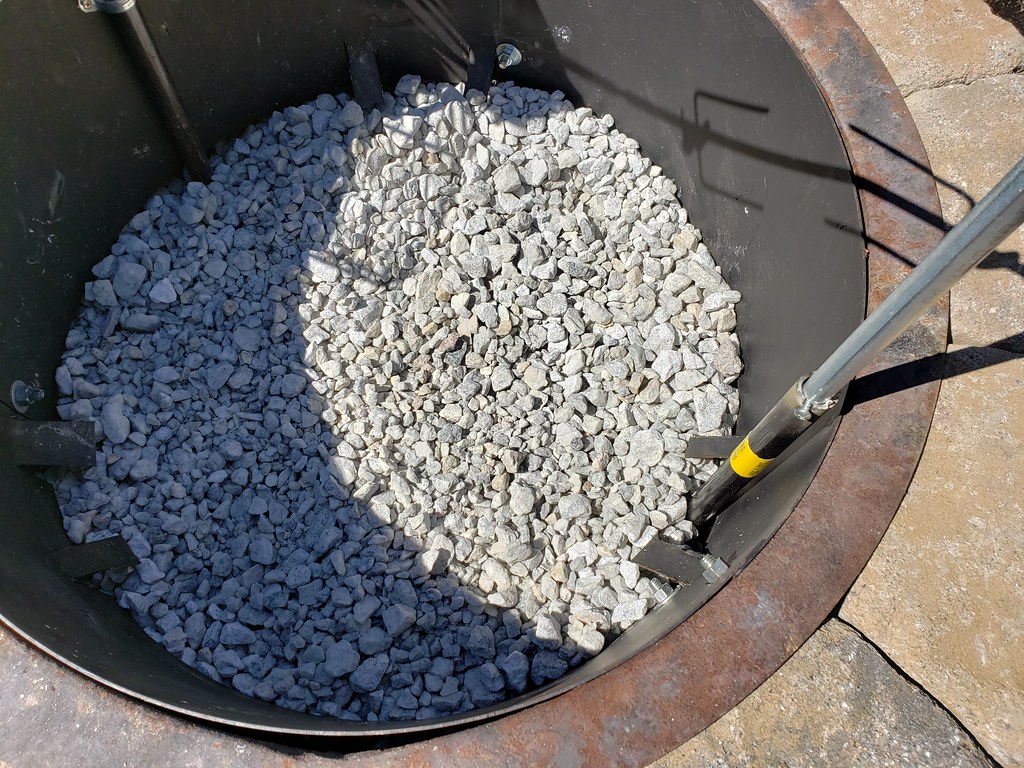
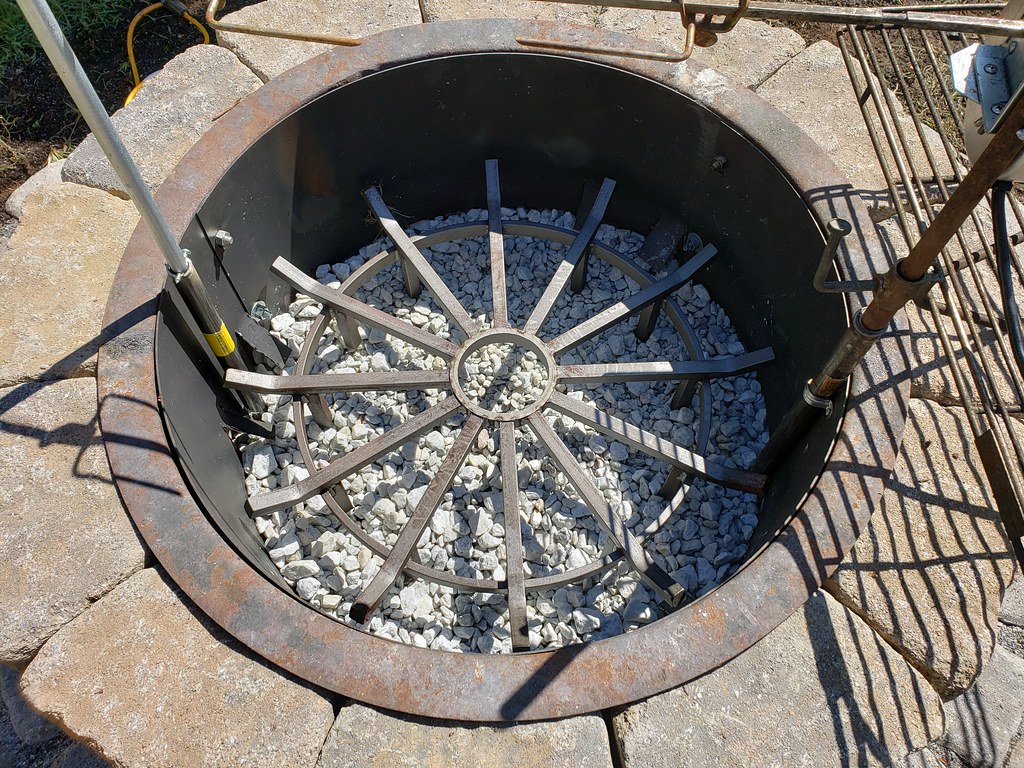
So this is what I plan on doing for the 2019 fire pit, but first a disclaimer here, this is NOT a tutorial, there are a million ways to skin a cat, this is the way I decided to do my Fire pit based on the last 10 years of using a fire pit..

Priorities for this redo are, air circulation, insulation (somewhat) and focus on it being primarily a cooking pit.
I done some research on how to vent the fire better, and was on the fence with using an underground 4" vent, sort of like a Dakota Fire. I decided against that due to a million other possible negative factors, so I went with vents on the side of the Blocks.
I increased the height another block because of the vents.

I also ordered another fire pit insert with no lip, this is 12" deep and I will be mounting it to the existing fire ring that has a lip. This insert will be secured directly under the lip of the existing fire ring ring giving me 12" deep steel insert that will cover three layers of the blocks.
The insert will be drilled with 2" holes for ventilation.

A fire grate will sit in the center of the air vents or level with the bottom of the vent, I am still undecided on this.

A 36" piece of black pipe will be pounded into the ground and secured to the installed fire pit insert with stainless steel screws, this will be for the swivel cooking grate.


  • First up was deconstruction and to see if any blocks were salvageable. The bottom 12 blocks were fine and about 10 of the second tier were fine, I picked up 24 more blocks and three of the broken ones will be used for the vents, so I needed 9 good blocks. I would wager that the fire pit is not level and to be honest, I really don't care!


  • Next up was to pick up some blocks at Lowes.


  • Then I started tweaking the original layer of blocks. I used the fire ring as a guide to tighten up the bottom blocks, these blocks are about one inch in the soil.


  • Started the next row with the fire ring in place and put in a few temporary broken blocks where the vents swill be.

  • After I was happy with the vent spacing, I cut three blocks for the vents so that there will be a 1.5" - 2" gap on each side of the block, I tried grinding it with the diamond blade to make it look like nicer. I cut these on an angle to match up with the wider blocks.


  • All the vents are in place and after closer inspection of the blocks, I may need to replace at least 4 more, but for now, they will be fine.


  • 3rd tier installed, I used the fire ring to tighten up the blocks. A little tip here, when inserting and removing the fire ring, step inside the ring, lift the ring, then step inside the fire pit and put in place, it is much easier and prevents the possibility of crushed fingers.


  • Rechecking the vents.


  • The 4th tier is installed, I put three blocks in place 4:00 o'clock - 8:00 o'clock, and 12:00 o'clock then dropped in the ring and added the blocks pushing up against the ring.


  • Looks pretty good!


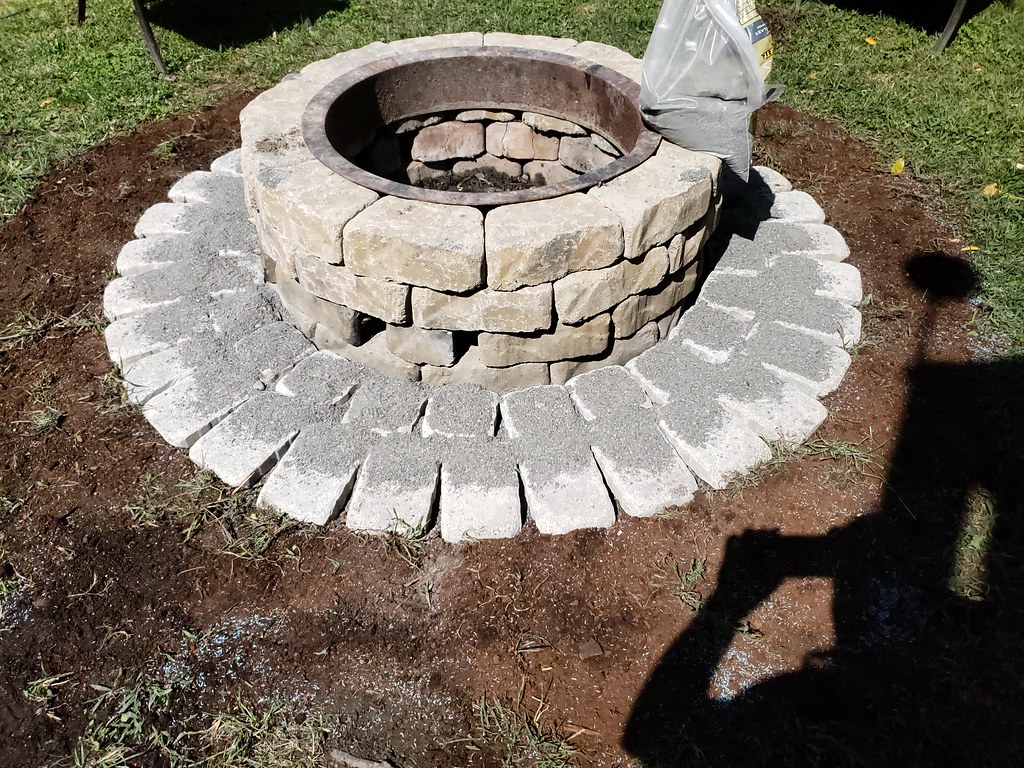
I was a bit unsure about the next part but decided to give it a shot anyhow. The grass dies around the pit from debris and such and gets weedy so I wanted to come up with a neater look.
  • Picked up some pavers and paver base at Lowes.


  • I'm getting really tired of carrying rock, stone, pavers, retaining wall blocks, wood, sand, dirt, mulch, firewood...


  • I scraped the ground removing the grass. Now before I go any further, the way I am doing this is not the professional way, my ground is so hard that I can get away with this.

  • I was a bit unsure on how to do this and eventually said, "screw it", and started tossing pavers down. I tried sloping the pavers slightly from the pit to the yard, I want the end of these pavers to be flush with the soil, or close, so it's not a tripping issue.


  • I originally was going to get 24 blocks of each but when stacking these at Lowes, and for some odd reason thought, "heck, I'll just grab 32 of each", I am glad I did. I had just enough of the larger pavers, one actually needed to be cut. I was a bit worried at first about the gap because of the square/rectangular pavers forming a circle, so I opted for paver base to fill in the gaps as opposed to sand. I believe I use 25 of the smaller ones.

  • Cut paver shown in this photo. I then went around and tamped the pavers.


  • Here is how I secured the blocks without edging, I mixed a bag of potting soil, peat moss and 10-10-10. I seeded the area around the pavers, laid down the potting mix, topped with more seed, as the seed grows I'll add some compost building up a little bit more.


  • Then went around, raked it up against the pavers, then tamped the soil up against the pavers.


  • Next up was to add the paver base.


  • I swept the paver base in and tamped the blocks once again, I saved some of the base for tweaking after a few weeks of settling.


  • Watered the potting mix real good.

  • I went back over with another layer of grass seed and watered everything in again. Growing grass is an issue in my yard because I have 2 dogs and a small yard, so I don't expect much from planting grass seed. Hopefully by the end of October I'll have a little grass here.


  • The insert came in. I'm referring to this as the "Insert" to avoid confusion The existing ring, I'm referring to as the "Fire Ring".


  • the insert was in three pieces and had some heavy hardware, it actually came with an extra bag of hardware. The insert seems to be pretty heavy duty.


  • Screwed together the bottom part of the insert. The game plan was to drop my existing "Fire Ring" on top of the insert using the lip of the "Fire Ring" as a stop, however the insert was about 3/4" shy and I had to put the insert on the inside of the existing fire ring.


  • OMG, Drilling this was a nightmare and by far the hardest part of this redo. After everything was drilled and I secured the inner ring "insert", it was off by half an inch, 2 of the holes were off! I couldn't believe it. Drilling another hole was not gonna happen so I elongated the holes in the insert with an angle grinder.


  • Dry fit to make sure the hardware didn't hit any blocks, at this point I got a marker, taped it to a fiberglass snow marker and did my best to mark the vent cut outs.


  • My original game plan was to drill two 1.5" holes in each open area (6 vent holes 12 holes to drill), I said, "no way", and decided to just use the angle grinder and slice tabs into the insert, it's not pretty but it works. I also like the idea that when hot coals fall they will most likely be deflected by the tabs and hopefully not come out of the fire pit.

  • Insert/fire ring is placed back in the pit and lined up with the vent holes.


  • Watered the area and will start on the swing grate install tomorrow.


Part 2
  • Next up was installing the swinging cooking grate, this has to be removable so the Schwenker can be used over the fire pit. A 36" piece of 3/4" black pipe is pounded into the ground then secured with a pipe strap using stainless steel bolts. The swinging cooking grate pole will slide right into this pipe and so is removable.


  • Next up was the rotisserie, I really had to think outside the box on this one. I am using an old Charmglow rotisserie I got from my dad, I'm assuming its near 40 years old? First up I dissembled the rotisserie and oiled it real well, then I had to make some type of mount. Then I done a dry fit and ran the motor for several hours to test.


  • I put on the swinging cooking grate to check for clearance. I still need to cut 2.5" off of the black pipe.


  • Although the Rotisserie is not done, the kids really wanted a fire and since the pit was still waiting for the grate install, I decided to toss in some blocks and old grates from a grill.


  • Patiently waiting for dinner.

  • So far the vents seem to be providing plenty of air to keep the smoke at a minimum... why didn't I do this before!


The kids partaking is some adult beverages.


OK, The next day its back to business with the fire pit. Started back on the rotisserie and a little surprise came in
  • What do we have here?


  • Wow, this thing is a beast.


  • Tossed in three bags of Chipped marble, put in another 36" x 3/4" black pipe and notched, used 1/2" emt for the other side of the rotisserie and popped in a screw to lock the EMT into the black pipe. Just a note, after beating in the black pipe the top was smashed but this was OK because I planned on trimming the pipe with an angle grinder to about 2" above the fire pit


  • Making some final tweaks and adjusting the height of the rotisserie.


  • I added some grill grates to keep the smaller coals from falling down when cooking.


  • Added a couple accessory hooks.


  • Time to do a test run.


  • I call this a total success, the chicken was done in 3.5 hours and I was figuring closer to 4 hours. The meat dripped a little but not much, however I didn't think that it was too big of a deal because the chix were rubbed in oil then seasoned.

The whole family agreed that the chicken was one of the best Rotisserie Chickens they had. I was really surprised because I never get such positive feedback when doing whole birds!
 
Looks great, I would dig the gravel back out and pour 2-4" of high temp mortar for the base, it will help clean ashes out a lot easier. I love cooking over a open fire, it don't get much better imo.
 
That's about a cool as it gets. A lot of work but a great pay off. You've done some cool things with this pit. I've seen some things I'd like to incorporate into our pit (that is due for a rebuild!)
 
SmokingMeatForums.com is reader supported and as an Amazon Associate, we may earn commissions from qualifying purchases.
Clicky