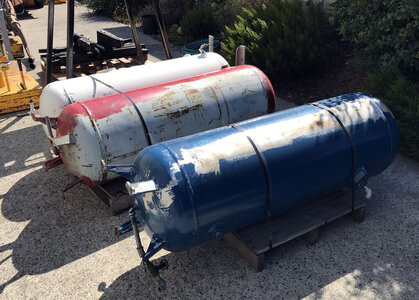
A friend recently offered me the choice of 3 air tanks.

These are heavy, 3/8" wall everywhere (shell and end caps). They're all 80 gallon tanks.
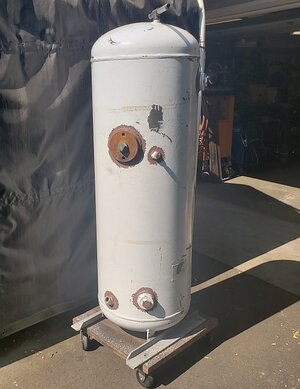
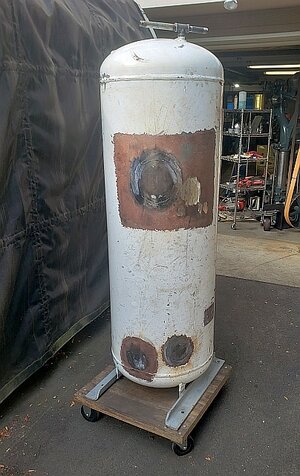
I don't like a smoker body to have lots of extraneous fittings welded to it. Air tanks have lots of fittings, though - inspection ports, air inlet and discharge, plus probably at least one other. This one had a huge (6") port welded in because these tanks were last set up to dump a lot of air quickly. For sure that one had to go! Anyway, to take out welded in ports you have to cut them out, fabricate a patch, fit the patch in place, weld it in and sand the welds smooth. Here is my tank before I "shaved" the ports:

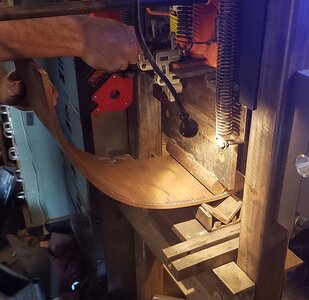
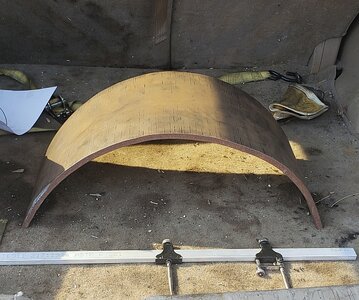
Of course, a patch for a curved tank wall has to be cut from stock that is itself bent to the same curve. I prevailed on a friend who has a small shop-built press brake to bend a piece of 3/8" steel plate 9" wide and about 22" long. This is my buddy's press brake setup:

Not shown is the drawing where I reproduced the arc of the tank wall, so he could check the part against the drawing to see where it needed a little more bend or even less bend. This type of bending is called "bump bending" and it's fiddly but as you can see it works fine for a one-off.

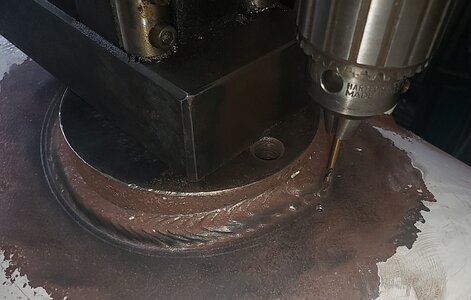
I didn't try to pierce the 3/8" tank wall with a torch. Recipe for disaster. Instead, I cheated and drilled a 1/8" hole on my cut line for a place to start my cut. What you see in the picture is a magnetic drill press sitting on the big fitting I mentioned before. Just below the drill bit is the tiny hole. It's hard to see, sorry!

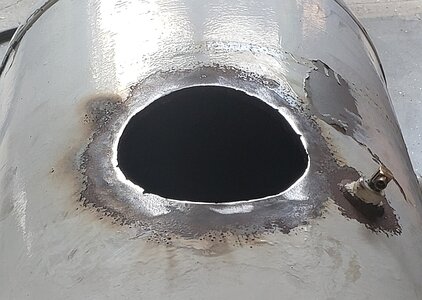
I used a circle cutting attachment on an oxyacetylene cutting torch to cut out the fitting.

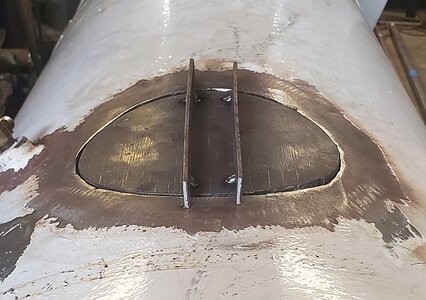
I cut the patch from the stock my friend bent up, and fit it in place:

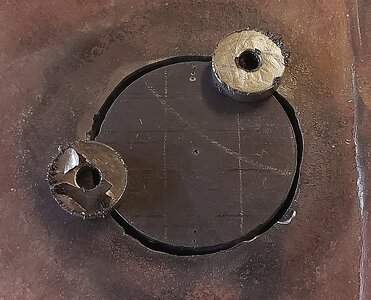
Here's a smaller patch fit up with magnets, ready to tack in place and then weld:

Here is the tank with all the fittings removed:

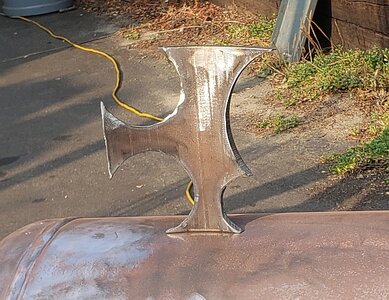
It was a lot of circle cutting! Here's what was left at the end. Looks like an art piece ..

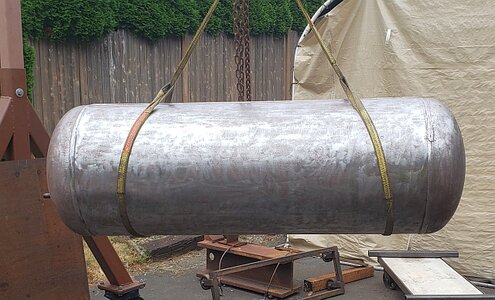
After patching all the ports, I used a needle gun and angle grinder with various tooling to remove the paint. Here is my tank all prepped and ready to turn it into a smoker!

Don't expect the rest of the build story to emerge in a day or two. I have a couple of other projects I'm going to have to get back to before I can make any more progress.
seattlepitboss
These are heavy, 3/8" wall everywhere (shell and end caps). They're all 80 gallon tanks.
I don't like a smoker body to have lots of extraneous fittings welded to it. Air tanks have lots of fittings, though - inspection ports, air inlet and discharge, plus probably at least one other. This one had a huge (6") port welded in because these tanks were last set up to dump a lot of air quickly. For sure that one had to go! Anyway, to take out welded in ports you have to cut them out, fabricate a patch, fit the patch in place, weld it in and sand the welds smooth. Here is my tank before I "shaved" the ports:
Of course, a patch for a curved tank wall has to be cut from stock that is itself bent to the same curve. I prevailed on a friend who has a small shop-built press brake to bend a piece of 3/8" steel plate 9" wide and about 22" long. This is my buddy's press brake setup:
Not shown is the drawing where I reproduced the arc of the tank wall, so he could check the part against the drawing to see where it needed a little more bend or even less bend. This type of bending is called "bump bending" and it's fiddly but as you can see it works fine for a one-off.
I didn't try to pierce the 3/8" tank wall with a torch. Recipe for disaster. Instead, I cheated and drilled a 1/8" hole on my cut line for a place to start my cut. What you see in the picture is a magnetic drill press sitting on the big fitting I mentioned before. Just below the drill bit is the tiny hole. It's hard to see, sorry!
I used a circle cutting attachment on an oxyacetylene cutting torch to cut out the fitting.
I cut the patch from the stock my friend bent up, and fit it in place:
Here's a smaller patch fit up with magnets, ready to tack in place and then weld:
Here is the tank with all the fittings removed:
It was a lot of circle cutting! Here's what was left at the end. Looks like an art piece ..
After patching all the ports, I used a needle gun and angle grinder with various tooling to remove the paint. Here is my tank all prepped and ready to turn it into a smoker!
Don't expect the rest of the build story to emerge in a day or two. I have a couple of other projects I'm going to have to get back to before I can make any more progress.
seattlepitboss


